The Pioneer Woman Tasty Kitchen
Profile photo of savorysweetlife

Spicy Cheese Breadsticks

Posted by in Baking, Step-by-Step Recipes

Tasty Kitchen Blog: Spicy Cheese Breadsticks. Guest post by Alice Currah of Savory Sweet Life, recipe submitted by TK member Heather of Heather Christo Cooks.

 
Who can resist buttery, flaky breadsticks made of puff pastry? Not me! And you thought puff pastry was only for tarts and pies.

If you can use a rolling pin, mix a few spices together, sprinkle some cheese, and twist strips of dough together, you will love this recipe for Spicy Cheese Breadsticks by Tasty Kitchen member Heather Christo.


Tasty Kitchen Blog: Spicy Cheese Breadsticks. Guest post by Alice Currah of Savory Sweet Life, recipe submitted by TK member Heather of Heather Christo Cooks.

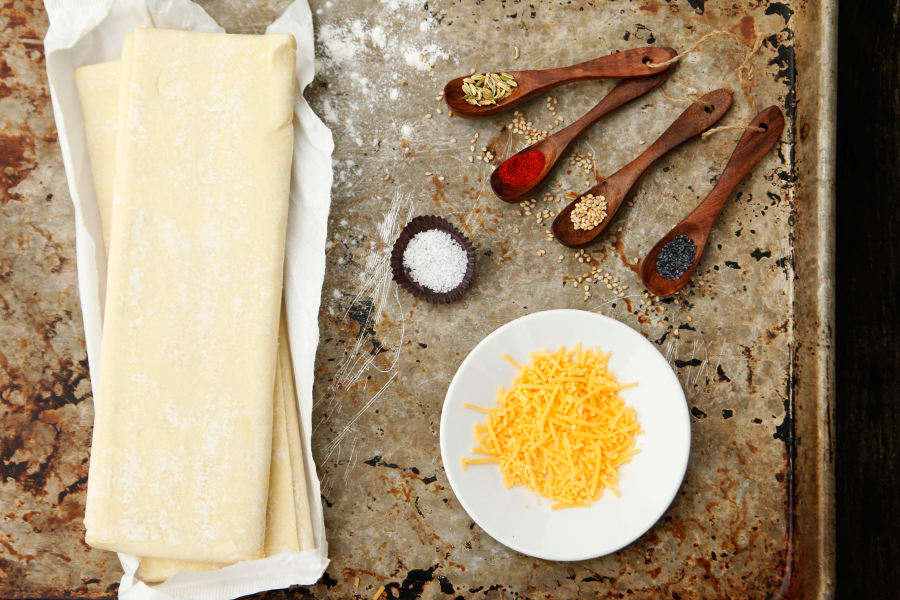
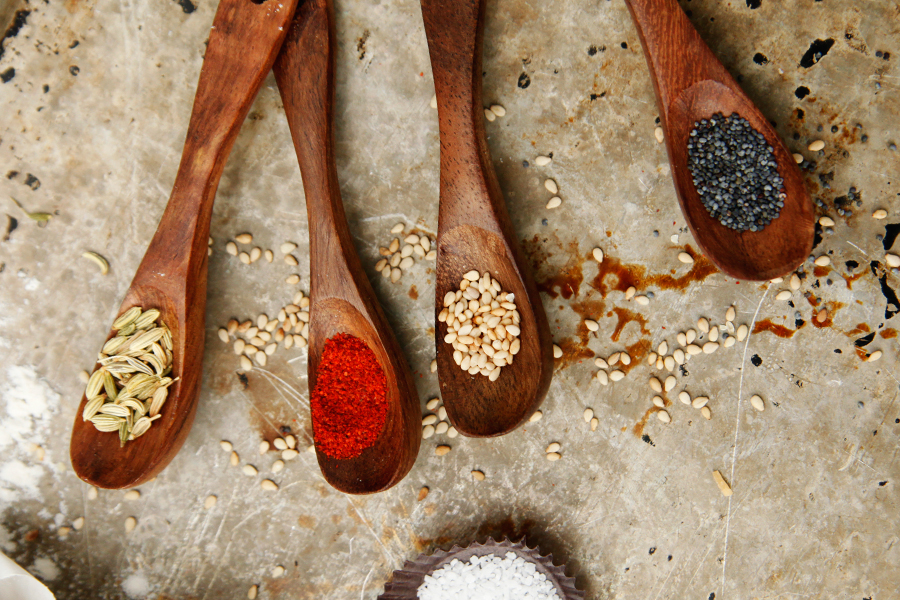
I have a feeling most of you have some if not all of these ingredients in your kitchen: puff pastry, flour, shredded cheddar cheese, fennel, cayenne pepper, poppy seeds, and kosher salt.


Tasty Kitchen Blog: Spicy Cheese Breadsticks. Guest post by Alice Currah of Savory Sweet Life, recipe submitted by TK member Heather of Heather Christo Cooks.

Heather’s blend of spices is what makes these breadsticks yummy!


Tasty Kitchen Blog: Spicy Cheese Breadsticks. Guest post by Alice Currah of Savory Sweet Life, recipe submitted by TK member Heather of Heather Christo Cooks.

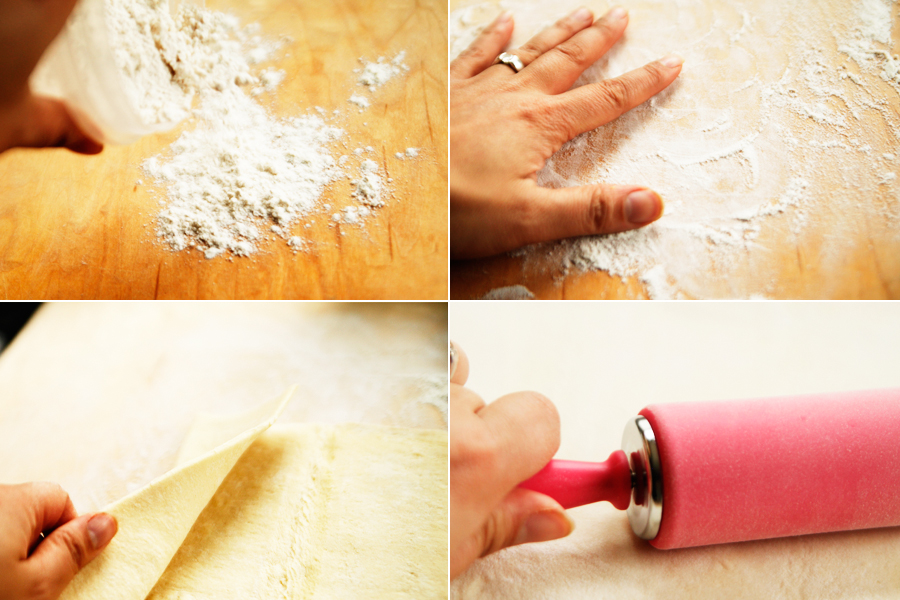
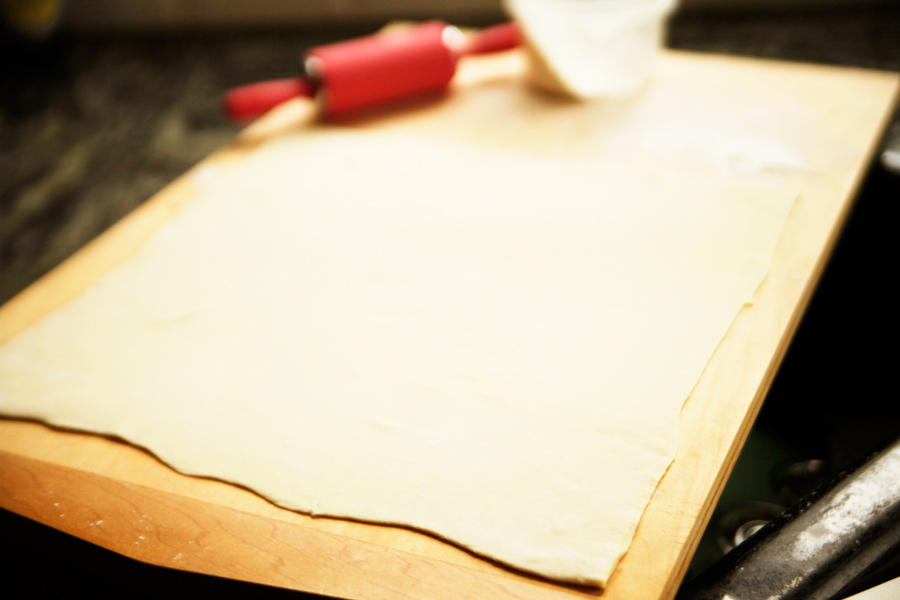
First you will need to generously flour a clean surface for rolling dough. Unfold the puff pastry and roll it as thin as you can. Make sure to retain the square shape as closely as possible. Periodically check to make sure the dough is not sticking to the surface by adding more flour when necessary.


Tasty Kitchen Blog: Spicy Cheese Breadsticks. Guest post by Alice Currah of Savory Sweet Life, recipe submitted by TK member Heather of Heather Christo Cooks.

Look at this beautiful sheet of buttery goodness!


Tasty Kitchen Blog: Spicy Cheese Breadsticks. Guest post by Alice Currah of Savory Sweet Life, recipe submitted by TK member Heather of Heather Christo Cooks.

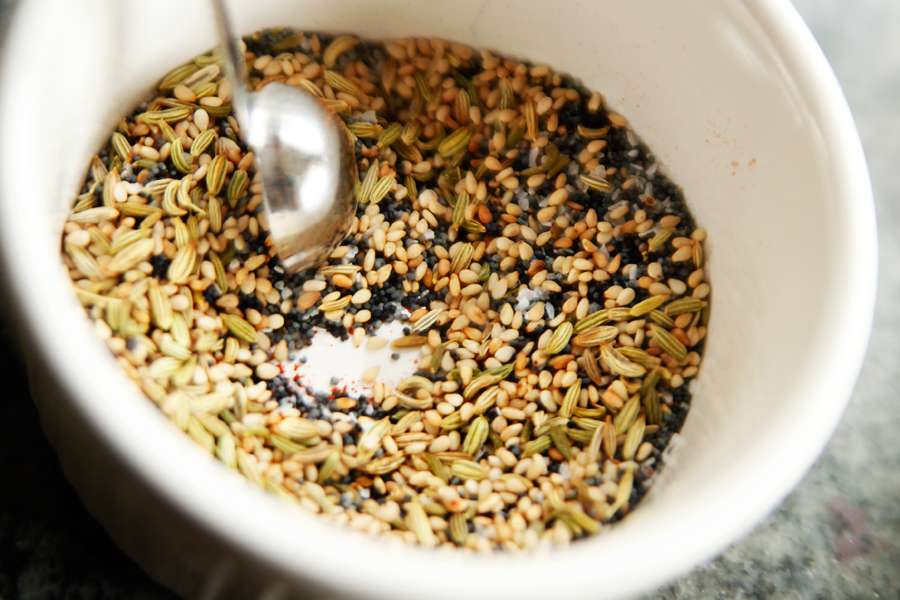
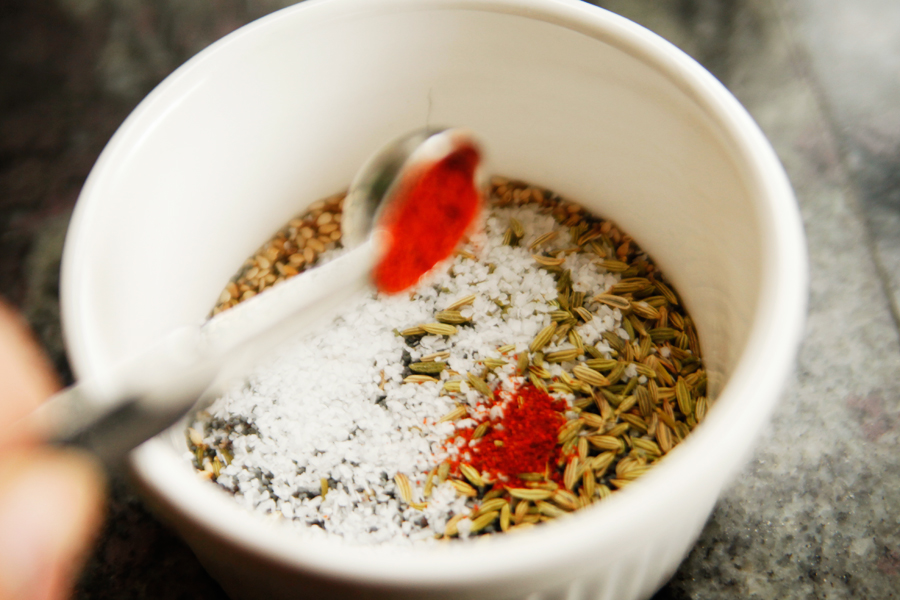
Add all your spices to a small bowl.


Tasty Kitchen Blog: Spicy Cheese Breadsticks. Guest post by Alice Currah of Savory Sweet Life, recipe submitted by TK member Heather of Heather Christo Cooks.

Give the spices a quick stir. This will make it easier for you to sprinkle and spread on the puff pastry.


Tasty Kitchen Blog: Spicy Cheese Breadsticks. Guest post by Alice Currah of Savory Sweet Life, recipe submitted by TK member Heather of Heather Christo Cooks.

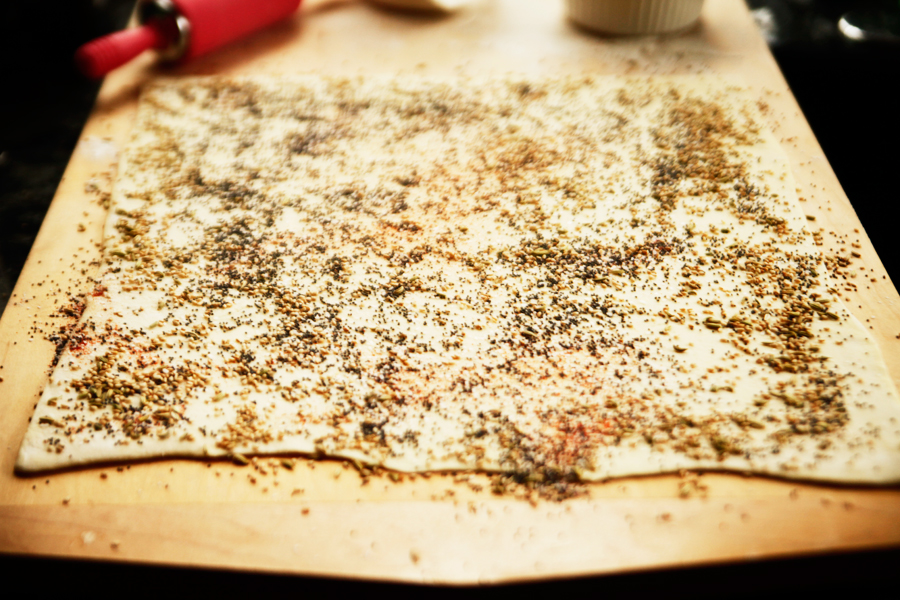
Evenly sprinkle the spices over the puff pastry. Use your hand to make sure you get it as even as possible from edge to edge.


Tasty Kitchen Blog: Spicy Cheese Breadsticks. Guest post by Alice Currah of Savory Sweet Life, recipe submitted by TK member Heather of Heather Christo Cooks.

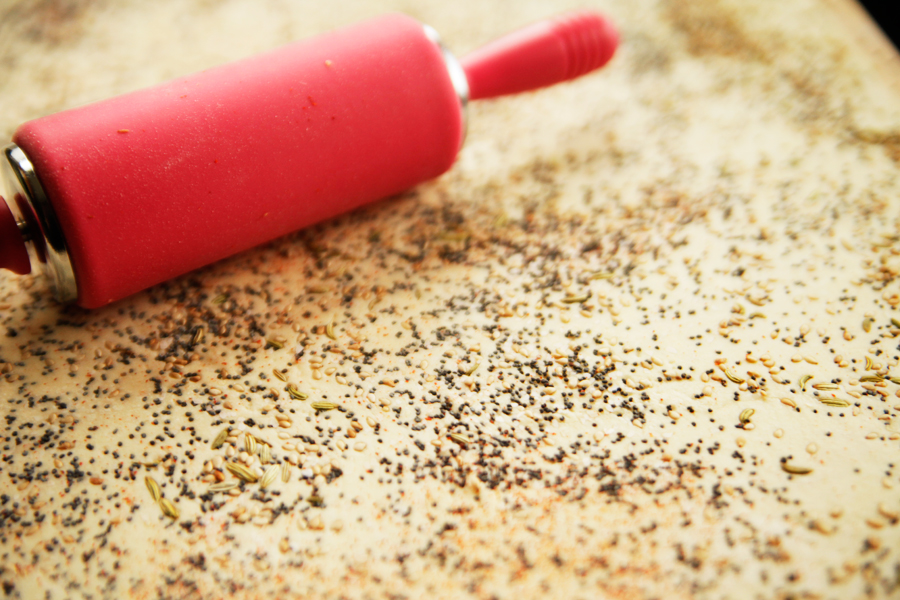
Using a rolling pin, roll over the spice so they embed themselves into the puff pastry. This is a critical step in making sure the spices remain on the puff pastry without rubbing off.


Tasty Kitchen Blog: Spicy Cheese Breadsticks. Guest post by Alice Currah of Savory Sweet Life, recipe submitted by TK member Heather of Heather Christo Cooks.

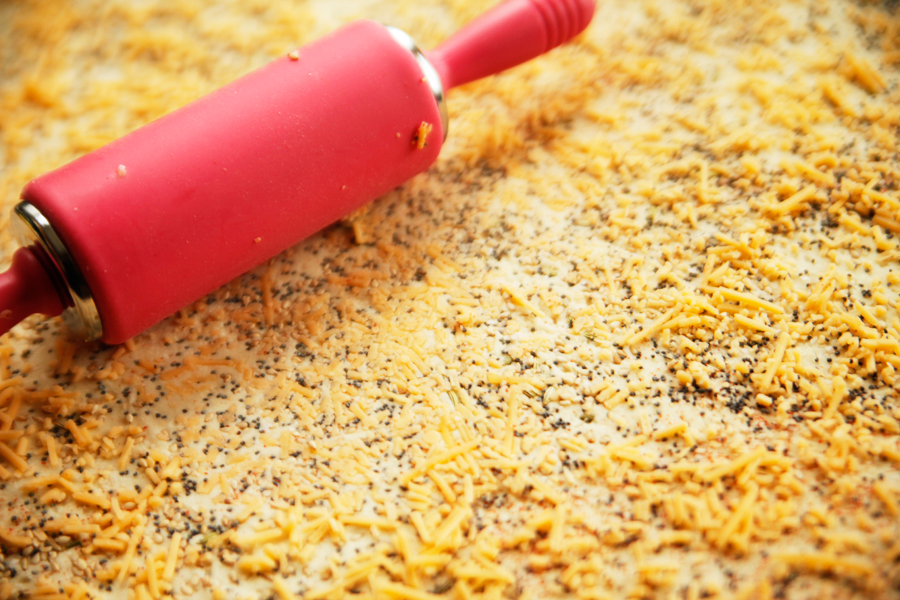
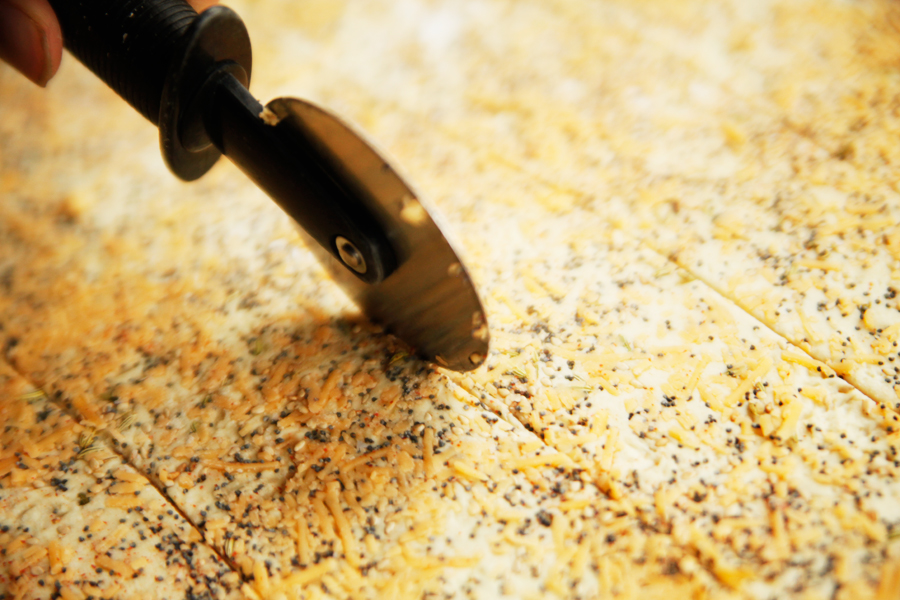
Similar to a previous step, sprinkle the spiced puff pastry evenly with the cheese, edge to edge, using your hands if necessary. Using a rolling pin, roll over the spiced puff pastry to embed the shreds of cheese into the pastry.


Tasty Kitchen Blog: Spicy Cheese Breadsticks. Guest post by Alice Currah of Savory Sweet Life, recipe submitted by TK member Heather of Heather Christo Cooks.

Cut the puff pastry into 8 even strips. You can use a pizza cutter or a knife. I like to make one cut down the middle of the pastry, then two more cuts down the center of each half, and then one last cut to halve each strip so I have 8 perfectly even strips.


Tasty Kitchen Blog: Spicy Cheese Breadsticks. Guest post by Alice Currah of Savory Sweet Life, recipe submitted by TK member Heather of Heather Christo Cooks.

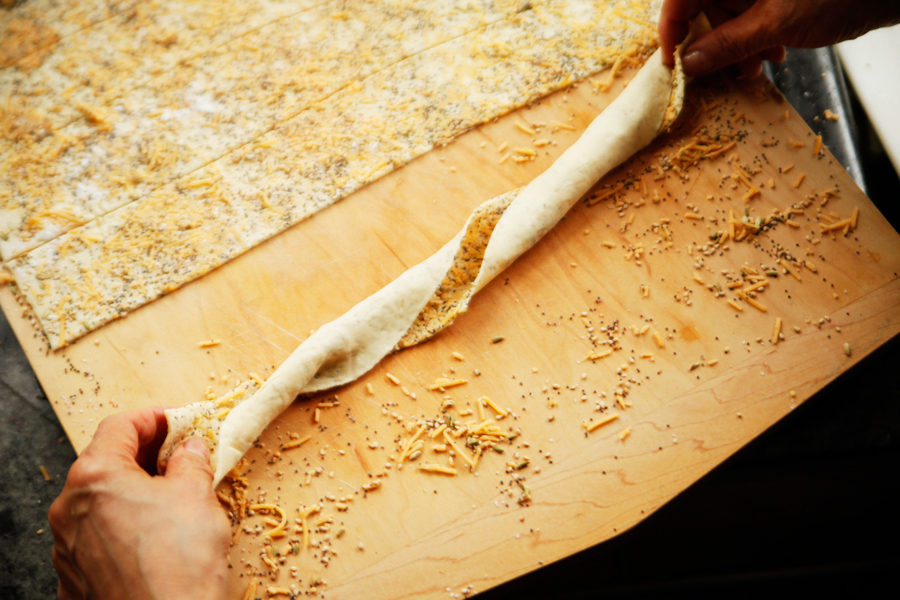
With both hands on each end of a strip, gently begin to twist each strip until it will not twist any further. Do this with all eight pieces.


Tasty Kitchen Blog: Spicy Cheese Breadsticks. Guest post by Alice Currah of Savory Sweet Life, recipe submitted by TK member Heather of Heather Christo Cooks.

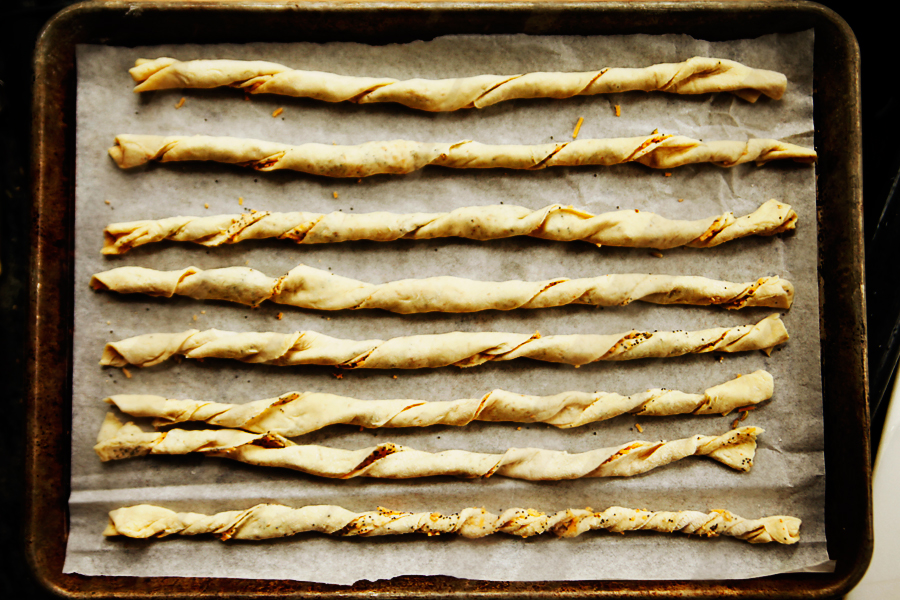
Carefully transfer the breadsticks to baking sheet lined with parchment paper.



Tasty Kitchen Blog: Spicy Cheese Breadsticks. Guest post by Alice Currah of Savory Sweet Life, recipe submitted by TK member Heather of Heather Christo Cooks.

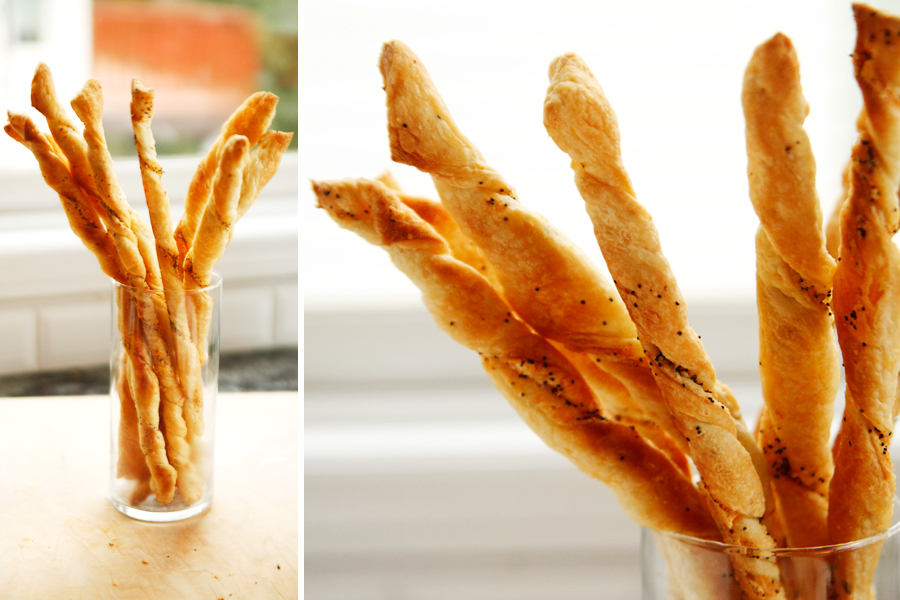
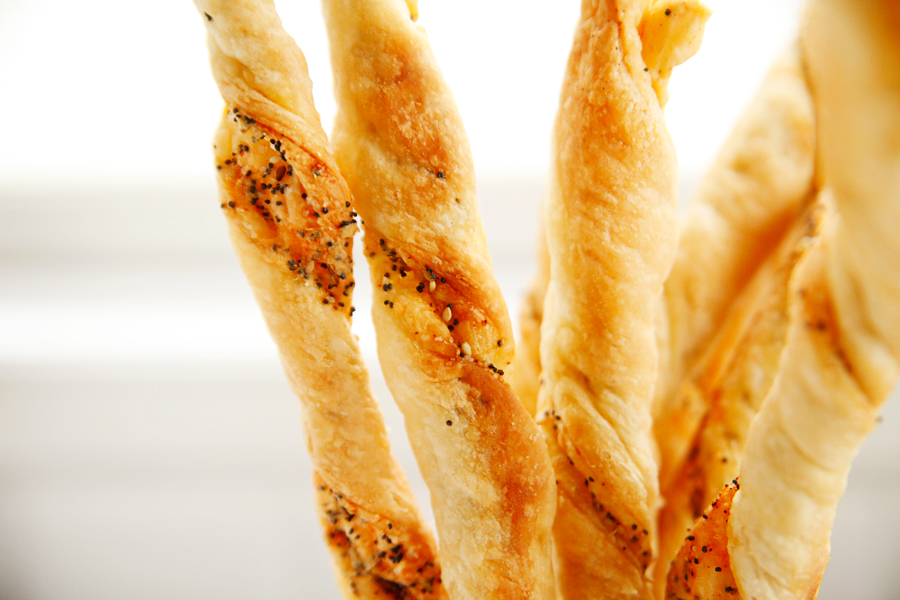
Bake the breadsticks in a preheated oven for 15 minutes. You’ll know they’re done when they look nice and golden brown with cheese oozing out of them.


Tasty Kitchen Blog: Spicy Cheese Breadsticks. Guest post by Alice Currah of Savory Sweet Life, recipe submitted by TK member Heather of Heather Christo Cooks.

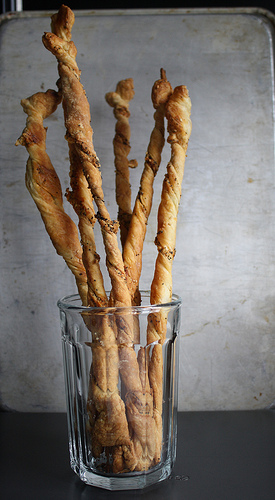
Allow the breadsticks to slightly cool before serving them. Heather suggests serving them vertically by placing them in a tall cup and fanning them out. They are almost too beautiful to eat!


Tasty Kitchen Blog: Spicy Cheese Breadsticks. Guest post by Alice Currah of Savory Sweet Life, recipe submitted by TK member Heather of Heather Christo Cooks.

Thanks so much Heather, our family loves your breadsticks!

For more great recipes and home decorating or entertaining advice, be sure to check out her blog, Heather Christo Cooks.


Printable Recipe
Spicy Cheese Breadsticks

See post on Heather Christo’s site!
5.00 Mitt(s) 2 Rating(s)2 votes, average: 5.00 out of 52 votes, average: 5.00 out of 52 votes, average: 5.00 out of 52 votes, average: 5.00 out of 52 votes, average: 5.00 out of 5

Prep Time:

Cook Time:

Difficulty: Easy

Servings: 8

8
x

Print Options

Page size Letter 3x5 4x6
Text Size Small Medium Large
Content Include description
Include prep time, etc.
Show image

Description

Flaky, hot and buttery bread sticks with little bits of melting cheese.

Ingredients

  • 1  Sheet Puff Pastry (A Box Typically Contains 2 Sheets)
  • 1 Tablespoon Sesame Seeds
  • 1 Tablespoon Poppy Seeds
  • 1 teaspoon Fennel Seeds
  • 1 teaspoon Kosher Salt
  • ¼ teaspoons Cayenne Pepper
  • ½ cups Finely Shredded Cheddar Cheese
  • Flour, For Rolling Out Dough

Preparation Instructions

Preheat the oven to 400ºF. Prepare a sheetpan with parchment or a Silpat.

On a lightly floured surface, roll out the sheet of puff pastry until it is quite thin.

In a small bowl, mix together all of the seeds and spices. Sprinkle them over the dough. Using a rolling pin, roll them into the dough.

Sprinkle the cheese over the dough. Roll the cheese into the dough.

Slice the dough into 8 even strips. Twist from both ends of each dough strip so that the dough spirals into a breadstick. Lay them on the lined sheetpan.

Bake the breadsticks for 15 minutes until golden. Let cool for a moment then transfer to a tall glass and fan out to serve.


_______________________________________

Alice Currah is the force behind Sweet Savory Life and Everyday Alice. She and her husband Rob are the proud parents of three children: Abbi, Mimi, and Elli. Alice is the winner of Saveur’s Cover Contest and is on the Forbes.com list of Eight of The Very Best Food Bloggers. She’s also a weekly writer for PBS Parents’ Kitchen Explorers. She’s the best-est.

 

Profile photo of savorysweetlife

Hawaiian Ahi Poke

Posted by in Step-by-Step Recipes

Tasty Kitchen Blog: Hawaiian Ahi Poke. Guest post by Alice Currah of Savory Sweet Life, recipe submitted by TK member Sommer of A Spicy Perspective.

 
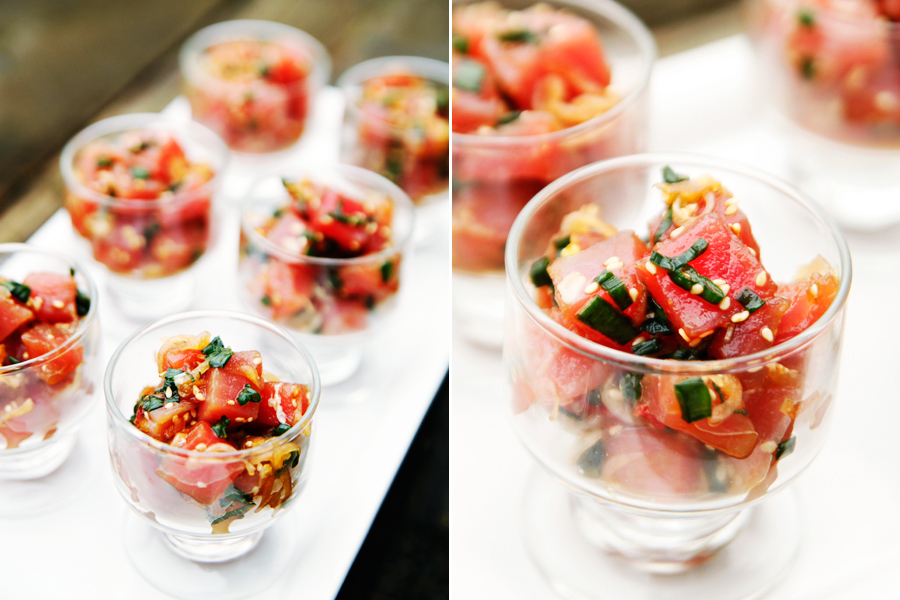
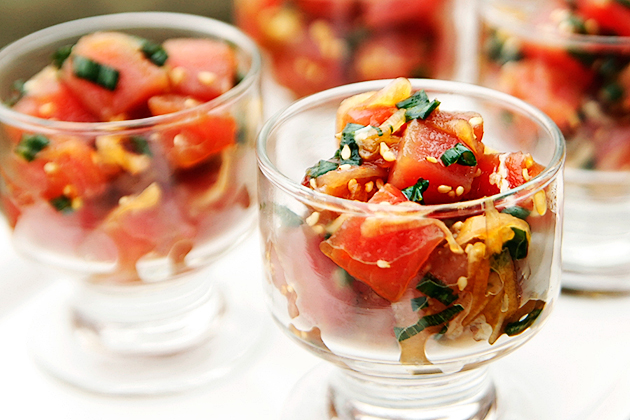
If you love ahi (tuna) sashimi or sushi, then you are going to love this easy Hawaiian Ahi Poke recipe by Tasty Kitchen member A Spicy Perspective. When served in little bowls, this dish makes a stunning starter for a dinner party.

Let’s get started.


Tasty Kitchen Blog: Hawaiian Ahi Poke. Guest post by Alice Currah of Savory Sweet Life, recipe submitted by TK member Sommer of A Spicy Perspective.

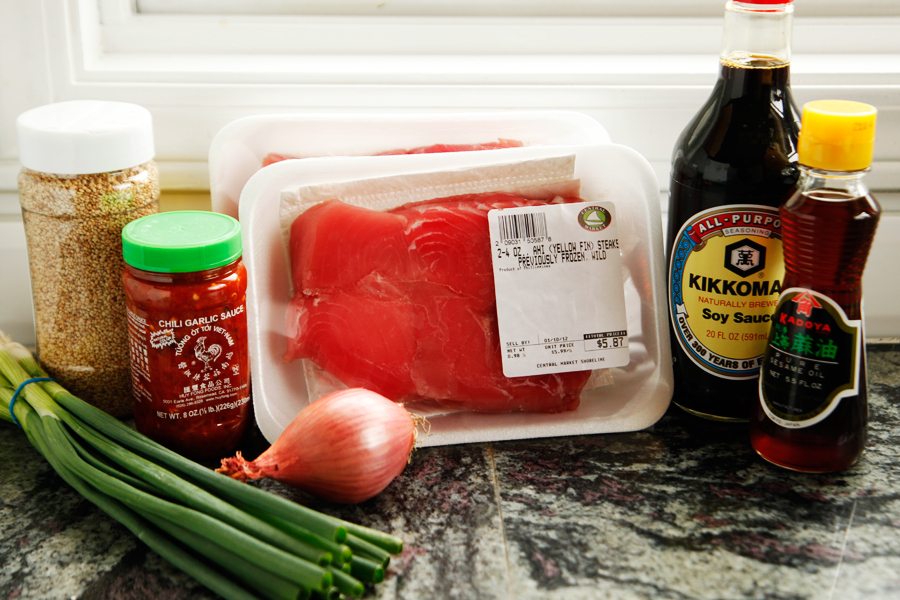
Here’s a list of ingredients you’ll need: sashimi-grade ahi steak, soy sauce, sesame oil, chili garlic sauce, shallot, scallions, and sesame seeds.


Tasty Kitchen Blog: Hawaiian Ahi Poke. Guest post by Alice Currah of Savory Sweet Life, recipe submitted by TK member Sommer of A Spicy Perspective.

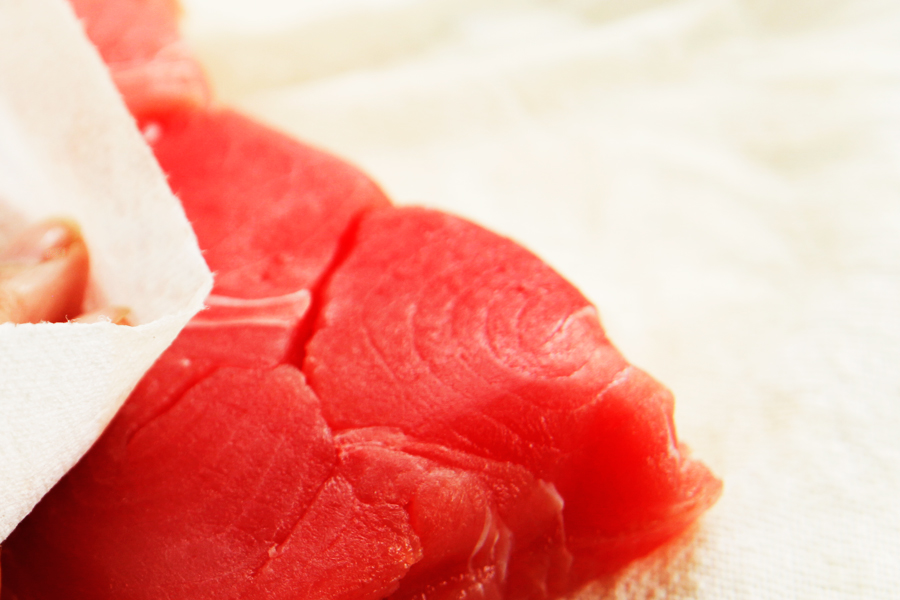
The first thing you’ll need to do is pat the ahi dry with a paper towel on both sides.


Tasty Kitchen Blog: Hawaiian Ahi Poke. Guest post by Alice Currah of Savory Sweet Life, recipe submitted by TK member Sommer of A Spicy Perspective.

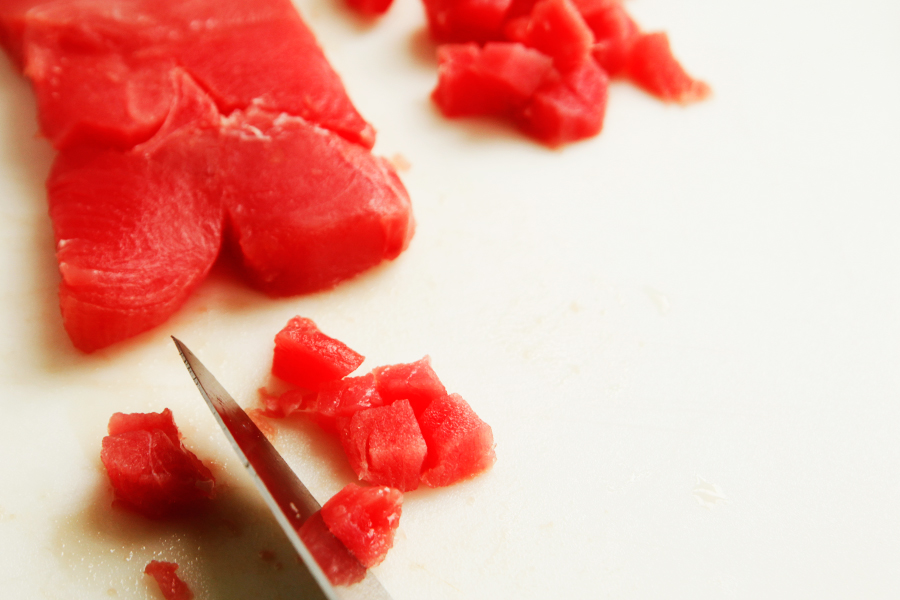
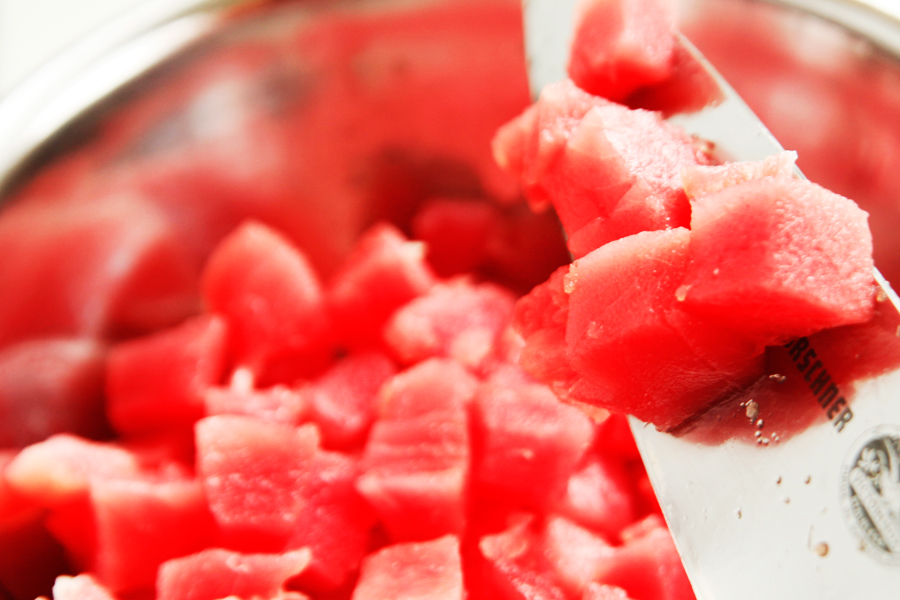
Using a sharp knife, cut the ahi into 1/2-inch cubes.


Tasty Kitchen Blog: Hawaiian Ahi Poke. Guest post by Alice Currah of Savory Sweet Life, recipe submitted by TK member Sommer of A Spicy Perspective.

Places the cubed ahi in a bowl and set a side for a couple of minutes.


Tasty Kitchen Blog: Hawaiian Ahi Poke. Guest post by Alice Currah of Savory Sweet Life, recipe submitted by TK member Sommer of A Spicy Perspective.

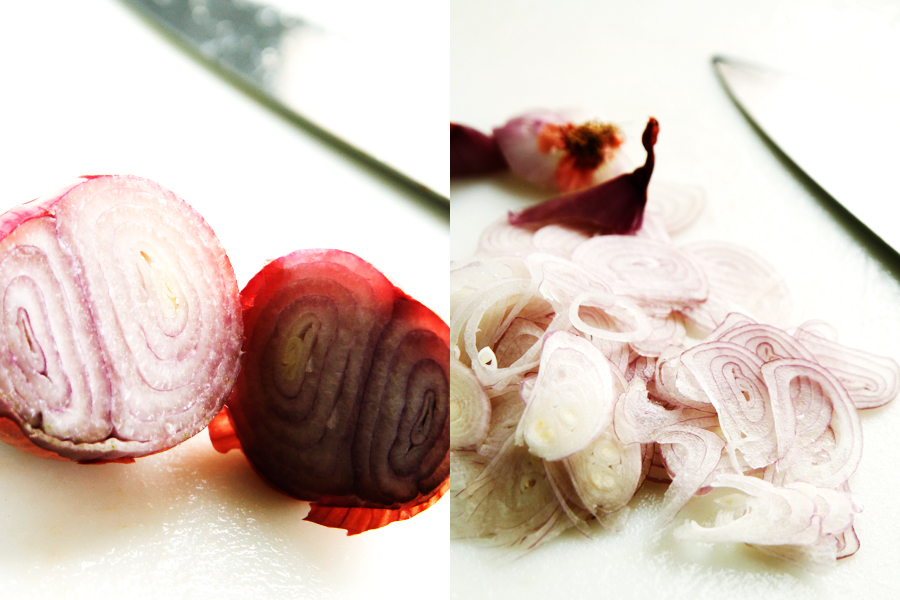
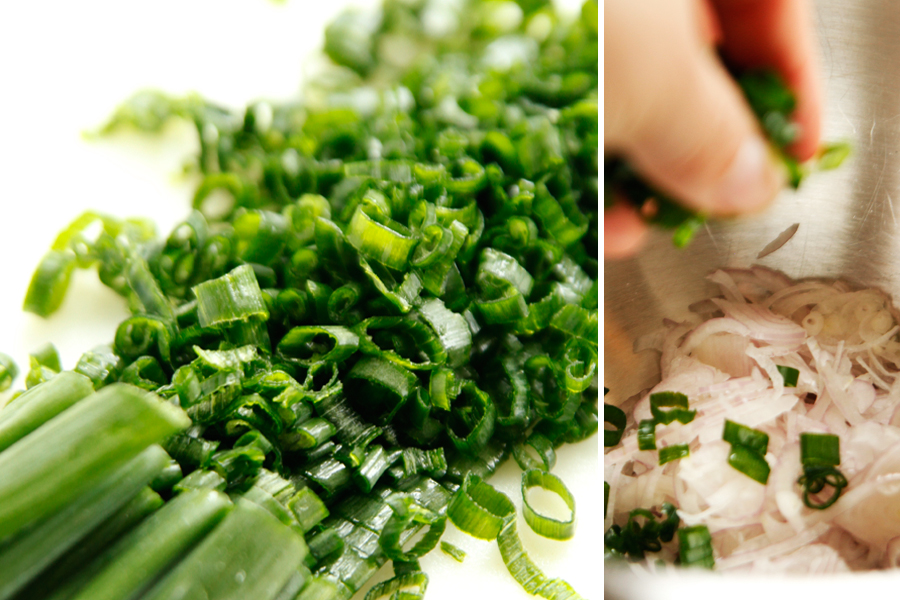
To make the sauce, start by cutting a shallot into very thin slices. Make a couple of cuts to break up any shallot rings. Place the shallots into a medium mixing bowl.


Tasty Kitchen Blog: Hawaiian Ahi Poke. Guest post by Alice Currah of Savory Sweet Life, recipe submitted by TK member Sommer of A Spicy Perspective.

Thinly slice a small bunch of scallions. Add the scallions to the bowl with the shallots.


Tasty Kitchen Blog: Hawaiian Ahi Poke. Guest post by Alice Currah of Savory Sweet Life, recipe submitted by TK member Sommer of A Spicy Perspective.

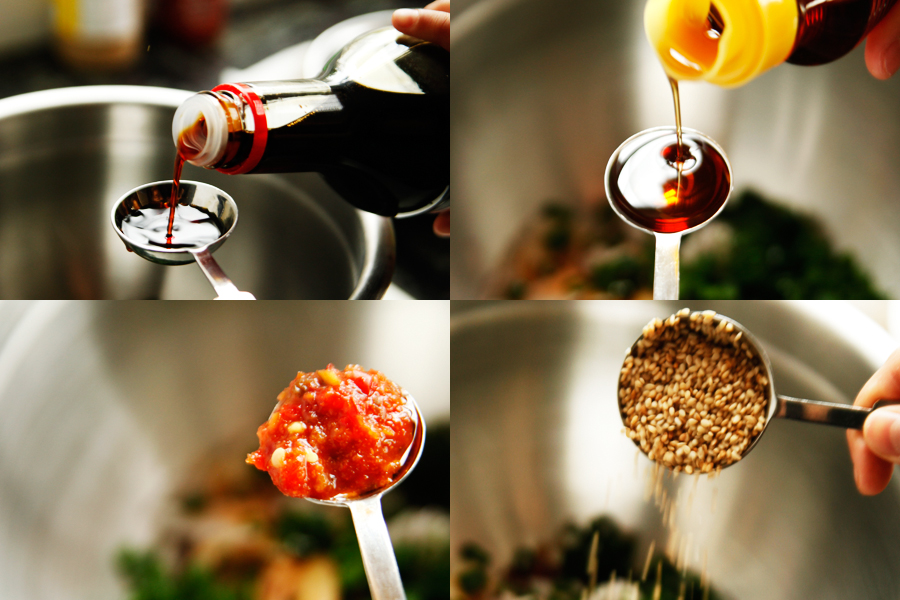
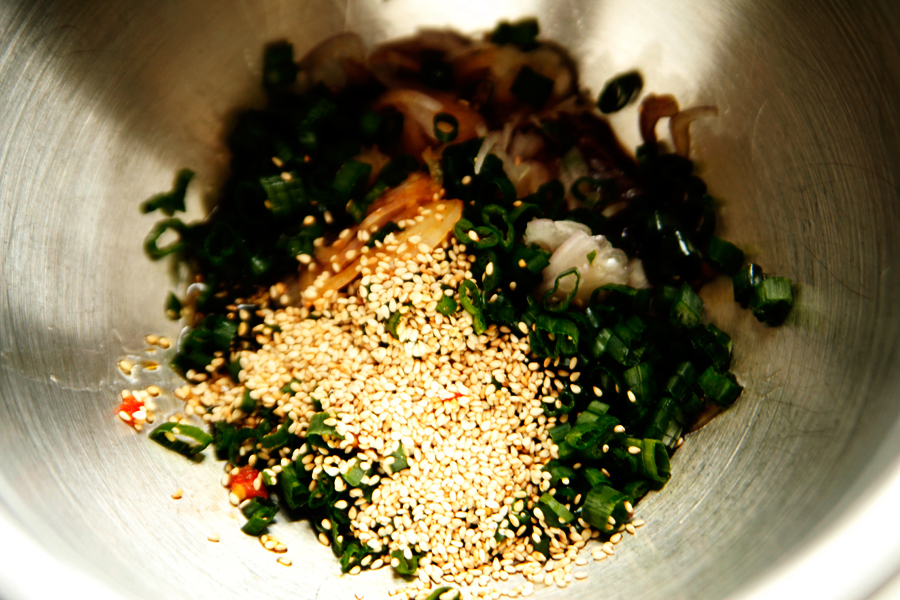
Add the soy sauce, sesame oil, chili garlic sauce, and sesame seeds to the bowl.


Tasty Kitchen Blog: Hawaiian Ahi Poke. Guest post by Alice Currah of Savory Sweet Life, recipe submitted by TK member Sommer of A Spicy Perspective.

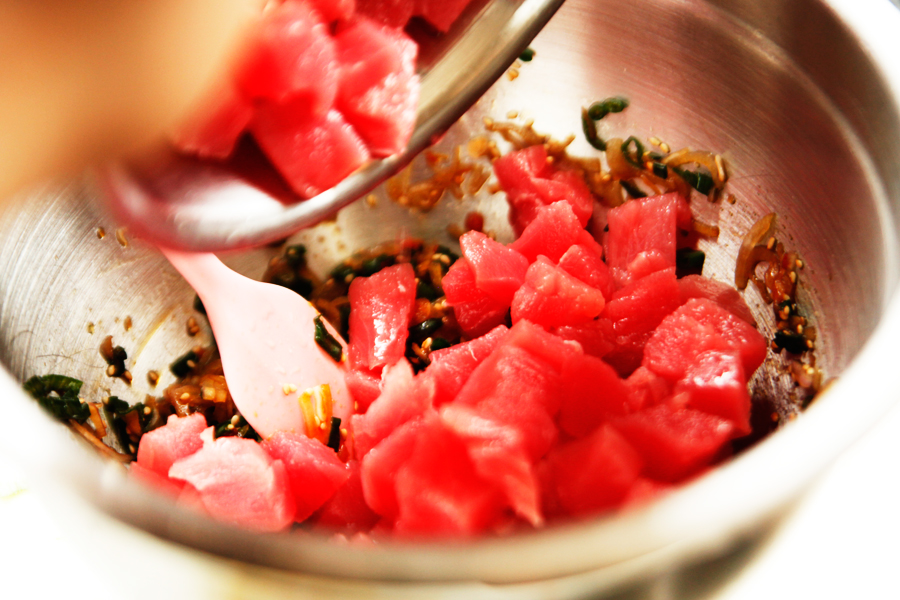
Look at how pretty all those ingredients are together!


Tasty Kitchen Blog: Hawaiian Ahi Poke. Guest post by Alice Currah of Savory Sweet Life, recipe submitted by TK member Sommer of A Spicy Perspective.

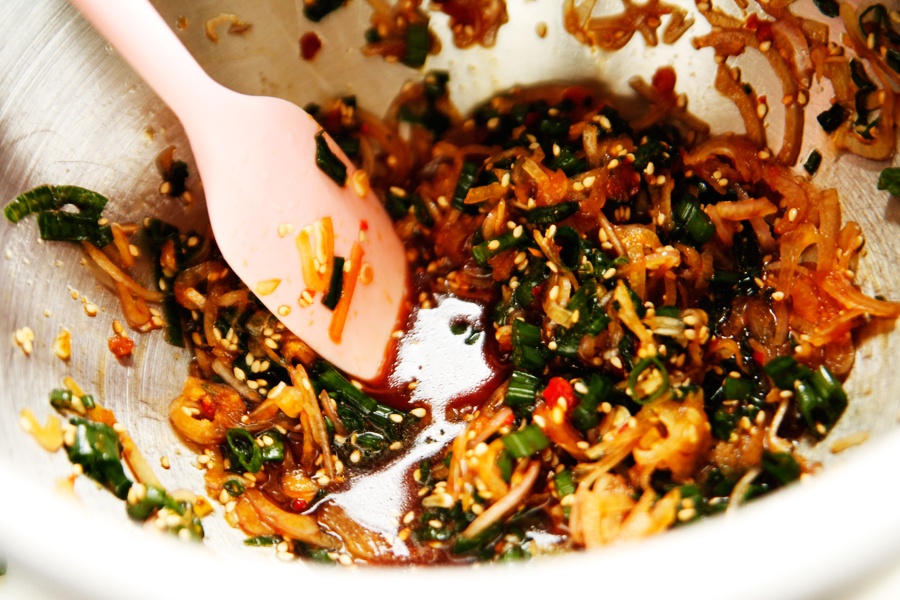
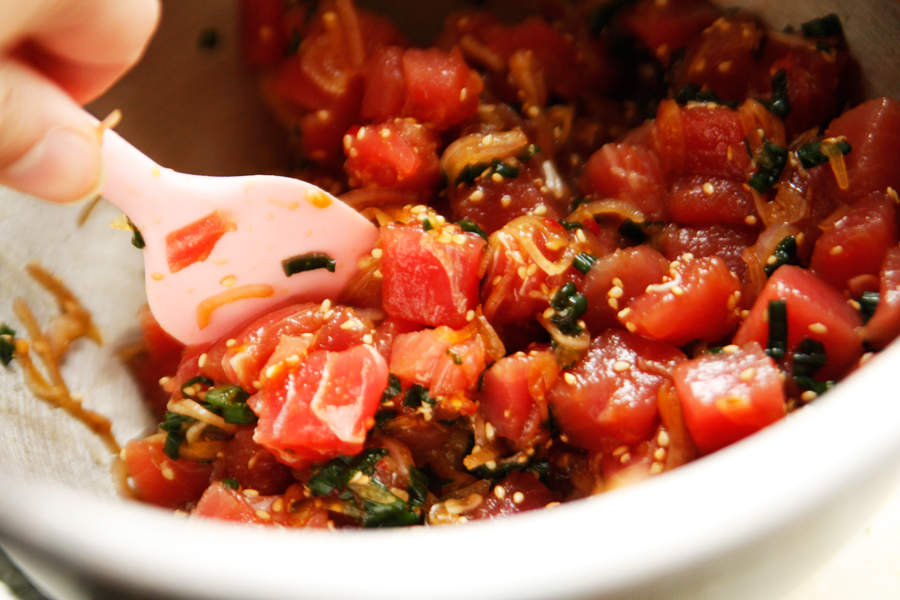
Give the sauce (which also serves as a marinade) a quick stir.


Tasty Kitchen Blog: Hawaiian Ahi Poke. Guest post by Alice Currah of Savory Sweet Life, recipe submitted by TK member Sommer of A Spicy Perspective.

Add the ahi to the marinade or add the marinade to the ahi.


Tasty Kitchen Blog: Hawaiian Ahi Poke. Guest post by Alice Currah of Savory Sweet Life, recipe submitted by TK member Sommer of A Spicy Perspective.

Gently stir the ahi until it is coated with sauce.


Tasty Kitchen Blog: Hawaiian Ahi Poke. Guest post by Alice Currah of Savory Sweet Life, recipe submitted by TK member Sommer of A Spicy Perspective.

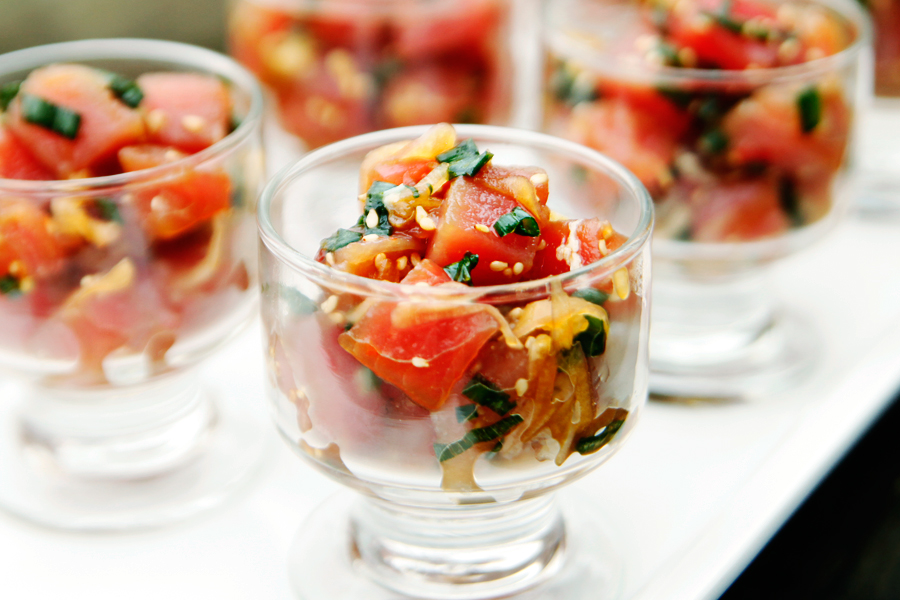
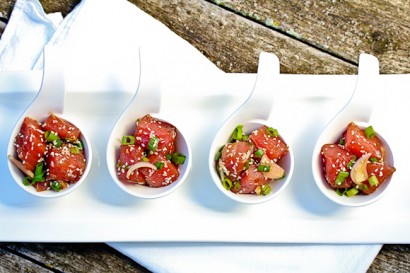
Spoon the ahi into 8 individual bowls and serve immediately.


Tasty Kitchen Blog: Hawaiian Ahi Poke. Guest post by Alice Currah of Savory Sweet Life, recipe submitted by TK member Sommer of A Spicy Perspective.

Thank you, Sommer. My husband, mother, and I enjoyed indulging ourselves in your yummy appetizer!

For more great recipes, please check out Sommer’s blog, A Spicy Perspective.


Printable Recipe

Hawaiian Ahi Poke

See post on aspicyperspective’s site!
5.00 Mitt(s) 1 Rating(s)1 vote, average: 5.00 out of 51 vote, average: 5.00 out of 51 vote, average: 5.00 out of 51 vote, average: 5.00 out of 51 vote, average: 5.00 out of 5

Prep Time:

Cook Time:

Difficulty: Easy

Servings: 8

8
x

Print Options

Page size Letter 3x5 4x6
Text Size Small Medium Large
Content Include description
Include prep time, etc.
Show image

Description

A fresh seafood salad popular all over the islands. Poke makes a splash at any holiday party served in shot glasses!

Ingredients

  • 2 whole Sashimi Grade Ahi Tuna Steaks
  • 1 whole Shallot, Sliced
  • ½ cups Chopped Green Onion
  • 3 Tablespoons Soy Sauce
  • 1 teaspoon Seasame Oil
  • 1 teaspoon Chili Garlic Paste Or Sriracha
  • 1 Tablespoon Sesame Seeds

Preparation Instructions

Pat the ahi dry, then neatly cut it into small 1/2-inch cubes. Place in a bowl.

Add the shallots, green onion, soy sauce, sesame oil, chili garlic sauce, and sesame seeds.

Gently toss. Serve immediately or cover and refrigerate.

Makes 6- 8 appetizer portions.


_______________________________________

Alice Currah is the force behind Sweet Savory Life and Everyday Alice. She and her husband Rob are the proud parents of three children: Abbi, Mimi, and Elli. Alice is the winner of Saveur’s Cover Contest and is on the Forbes.com list of Eight of The Very Best Food Bloggers. She’s also a weekly writer for PBS Parents’ Kitchen Explorers. She’s the best-est.
 

Profile photo of savorysweetlife

Rocky Road Rice Krispie Treats

Posted by in Step-by-Step Recipes

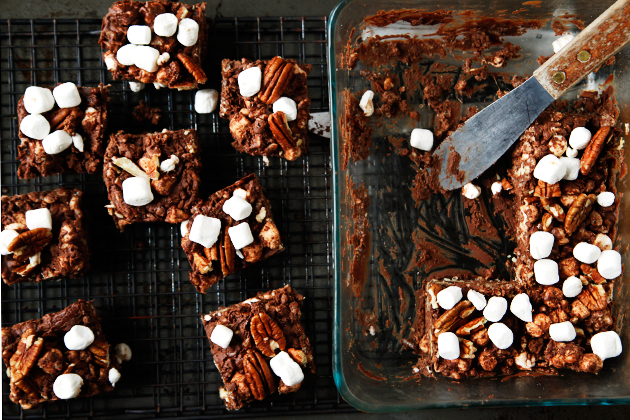
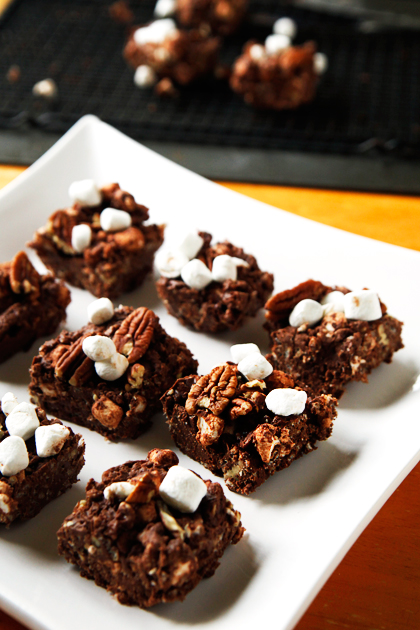
We’re so happy to have our good friend Alice back on the Tasty Kitchen Blog. She couldn’t have picked a more delicious recipe to prepare than Chrissy and Lauren’s Rocky Road Rice Krispie Treats. Great to see you, Alice!


Tasty Kitchen Blog: Rocky Road Rice Krispie Treats. Guest post by Alice Currah of Savory Sweet Life, recipe submitted by TK members Chrissy and Lauren of From the Yellow Kitchen.

 
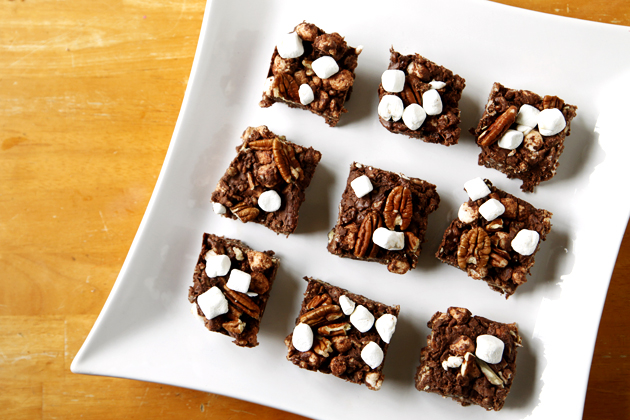
Just when I thought I had seen every variation of Rice Krispie treats, Tasty Kitchen members Chrissy/Lauren (Chrissy and Lauren of From the Yellow Kitchen) delightfully prove me wrong with their fun and creative Rocky Road Rice Krispie Treats made with chocolate, Nutella, peanut butter, marshmallows, pecans, and rice cereal. These bars are a chocolate lover’s best friend, especially since no baking is required and they only take minutes to prepare. For the record, I’m partial to these types of recipes because of the “easy factor” with a huge chocolate payoff. Who is with me?!

Let us begin.


Tasty Kitchen Blog: Rocky Road Rice Krispie Treats. Guest post by Alice Currah of Savory Sweet Life, recipe submitted by TK members Chrissy and Lauren of From the Yellow Kitchen.

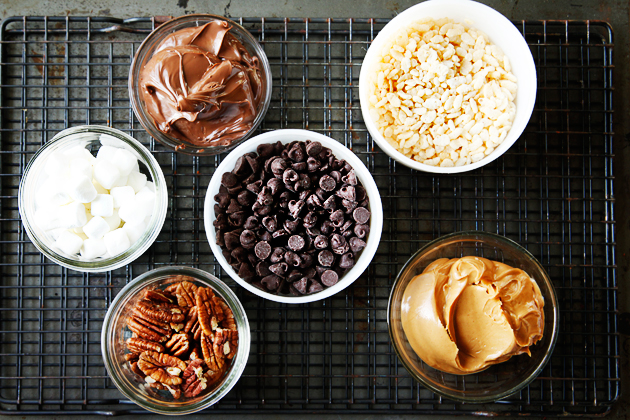
First you’ll need the following ingredients: chocolate chips, peanut butter, Nutella, mini marshmallows, pecans, and Rice Krispies. The recipe calls for semi-sweet chocolate, but you could easily substitute milk bittersweet, or dark chocolate depending on your personal preferences.


Tasty Kitchen Blog: Rocky Road Rice Krispie Treats. Guest post by Alice Currah of Savory Sweet Life, recipe submitted by TK members Chrissy and Lauren of From the Yellow Kitchen.

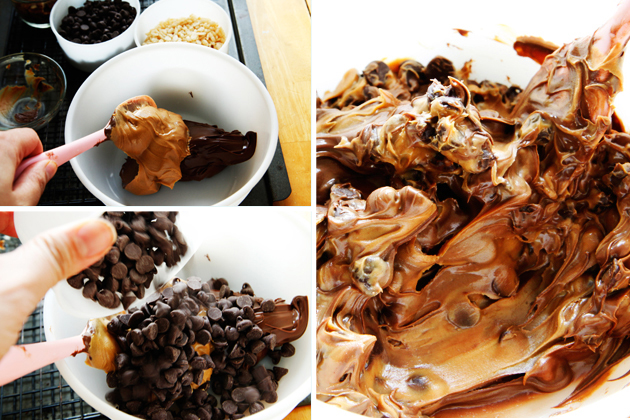
Mix the chocolate chips, peanut butter, and Nutella together in a microwave safe bowl. Heat the mixture in the microwave by cooking it in 30-second intervals, making sure to stir the mixture immediately after every interval until the chocolate chips have melted and the mixture is completely smooth.


Tasty Kitchen Blog: Rocky Road Rice Krispie Treats. Guest post by Alice Currah of Savory Sweet Life, recipe submitted by TK members Chrissy and Lauren of From the Yellow Kitchen.

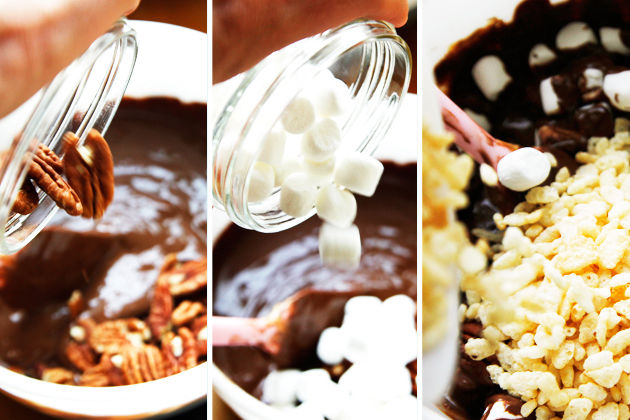
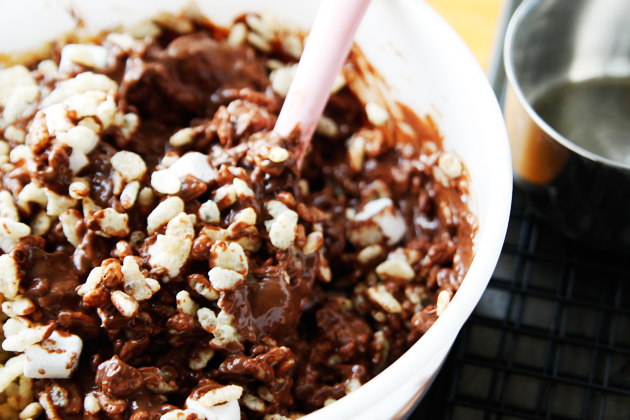
Stir in the pecans, marshmallows, and rice cereal until all the ingredients are well coated with chocolate.


Tasty Kitchen Blog: Rocky Road Rice Krispie Treats. Guest post by Alice Currah of Savory Sweet Life, recipe submitted by TK members Chrissy and Lauren of From the Yellow Kitchen.

I added an additional cup of cereal to mine because I thought it could use a bit more. Use your own judgment in deciding to add more cereal, pecans, or marshmallows.


Tasty Kitchen Blog: Rocky Road Rice Krispie Treats. Guest post by Alice Currah of Savory Sweet Life, recipe submitted by TK members Chrissy and Lauren of From the Yellow Kitchen.

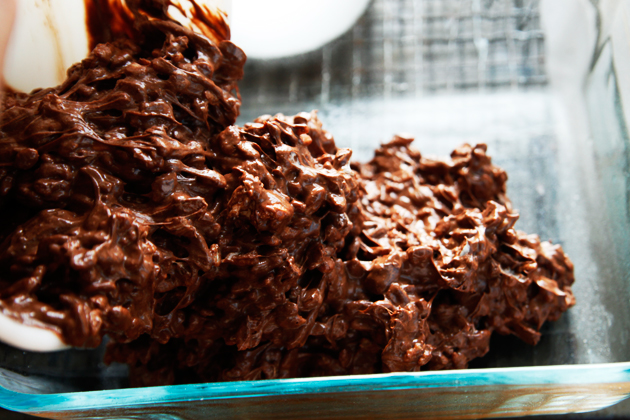
Transfer the mixture to an 8×8 pan or small baking dish coated in non-stick spray.


Tasty Kitchen Blog: Rocky Road Rice Krispie Treats. Guest post by Alice Currah of Savory Sweet Life, recipe submitted by TK members Chrissy and Lauren of From the Yellow Kitchen.

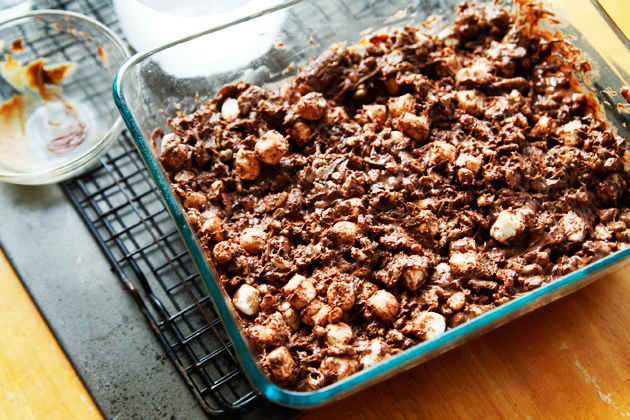
Spread the mixture until it is evenly distributed.


Tasty Kitchen Blog: Rocky Road Rice Krispie Treats. Guest post by Alice Currah of Savory Sweet Life, recipe submitted by TK members Chrissy and Lauren of From the Yellow Kitchen.

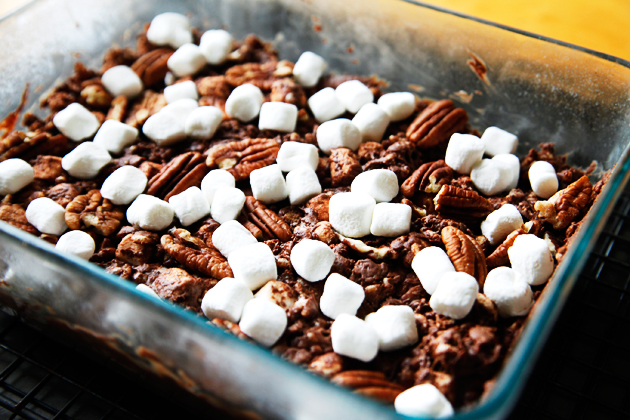
Add more pecans and marshmallows on the top and press down.


Tasty Kitchen Blog: Rocky Road Rice Krispie Treats. Guest post by Alice Currah of Savory Sweet Life, recipe submitted by TK members Chrissy and Lauren of From the Yellow Kitchen.

Place the pan in the refrigerator for one hour before cutting into squares. Tip: Forty minutes in the freezer works nicely, too!


Tasty Kitchen Blog: Rocky Road Rice Krispie Treats. Guest post by Alice Currah of Savory Sweet Life, recipe submitted by TK members Chrissy and Lauren of From the Yellow Kitchen.

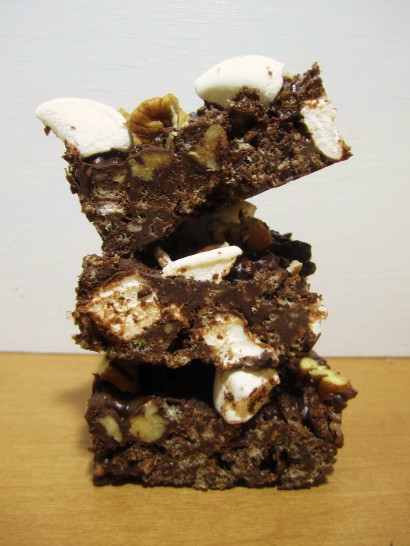
The texture on these bars is not like a traditional rice cereal treat. It is more on par with a yummy chocolate bar somewhere between fudge and a haystack. I would also recommend allowing the chocolate mixture to cool to room temperature before adding marshmallows, otherwise they melt and you don’t get those gorgeous (whole) marshmallow chunks in the middle of each bar.


Tasty Kitchen Blog: Rocky Road Rice Krispie Treats. Guest post by Alice Currah of Savory Sweet Life, recipe submitted by TK members Chrissy and Lauren of From the Yellow Kitchen.

My suggestions and tips are slightly different than the original recipe (based on my preferences). The original recipe is a good base which can easily handle more amounts of the listed ingredients based on your own personal preferences. Check out their original blog post too, for suggested variations.

Thanks ladies!


Printable Recipe

Rocky Road Rice Krispie Treats

See post on LittleYellowKitchen’s site!
4.86 Mitt(s) 7 Rating(s)7 votes, average: 4.86 out of 57 votes, average: 4.86 out of 57 votes, average: 4.86 out of 57 votes, average: 4.86 out of 57 votes, average: 4.86 out of 5

Prep Time:

Cook Time:

Difficulty: Easy

Servings: 9

9
x

Print Options

Page size Letter 3x5 4x6
Text Size Small Medium Large
Content Include description
Include prep time, etc.
Show image

Description

All the ingredients for a sweet and crispy Rocky Road treat with a little peanut butter and Nutella to top it all off.

Ingredients

  • 1 cup Semi-Sweet Chocolate Chips
  • ½ cups Peanut Butter
  • ½ cups Nutella
  • ½ cups Mini Marshmallows
  • ¼ cups Pecans
  • ¾ cups Rice Krispies

Preparation Instructions

Melt the chocolate chips, peanut butter and nutella for 2 minutes in the microwave. Stir.

Mix in the marshmallows and pecans. Fold in the Rice Krispies.

Pour mixture into a well-greased 8×8 glass baking dish. Refrigerate for 1 hour.

Optional: top with extra pecan pieces and marshmallows.


_______________________________________

Alice Currah is the force behind Sweet Savory Life and Everyday Alice. She and her husband Rob are the proud parents of three children: Abbi, Mimi, and Elli. Alice is the winner of Saveur’s Cover Contest and is on the Forbes.com list of Eight of The Very Best Food Bloggers. She’s also a weekly writer for PBS Parents’ Kitchen Explorers. She’s the best-est.
 

Profile photo of savorysweetlife

Streusel-Topped Pumpkin Bread

Posted by in Baking, Step-by-Step Recipes

Tasty Kitchen Blog: Streusel-Topped Pumpkin Bread. Guest post by Alice Currah of Savory Sweet Life, recipe submitted by TK member Shaina Olmanson of Food for My Family.

 
Fall has arrived with all her glory and I guarantee there is an oven somewhere baking a scrumptious pumpkin treat. Today I’m sharing a really … really … REALLY awesome Streusel-topped Pumpkin Bread which I absolutely love, submitted by TK member Shaina of Food For My Family.


Tasty Kitchen Blog: Streusel-Topped Pumpkin Bread. Guest post by Alice Currah of Savory Sweet Life, recipe submitted by TK member Shaina Olmanson of Food for My Family.

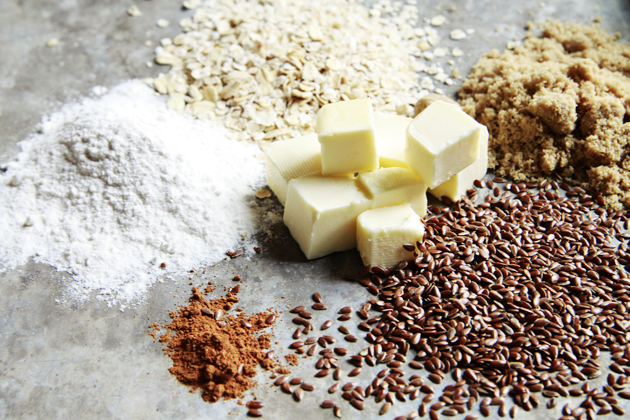
The recipe has two parts to it: the streusel topping …


Tasty Kitchen Blog: Streusel-Topped Pumpkin Bread. Guest post by Alice Currah of Savory Sweet Life, recipe submitted by TK member Shaina Olmanson of Food for My Family.

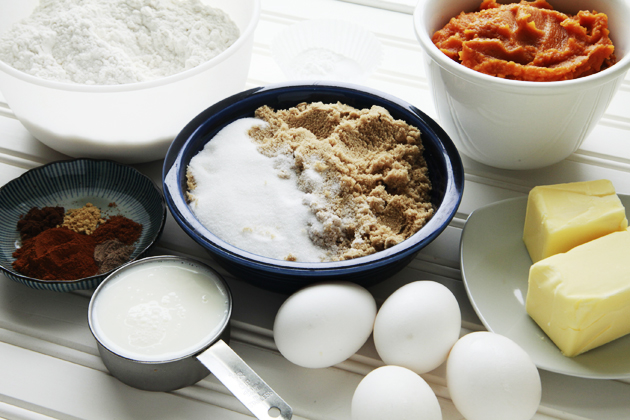
And the bread.


Tasty Kitchen Blog: Streusel-Topped Pumpkin Bread. Guest post by Alice Currah of Savory Sweet Life, recipe submitted by TK member Shaina Olmanson of Food for My Family.

To make the streusel topping, mix butter, brown sugar, flour, and flax seed using a food processor, pastry cutter, fork, or fingers until combined.


Tasty Kitchen Blog: Streusel-Topped Pumpkin Bread. Guest post by Alice Currah of Savory Sweet Life, recipe submitted by TK member Shaina Olmanson of Food for My Family.

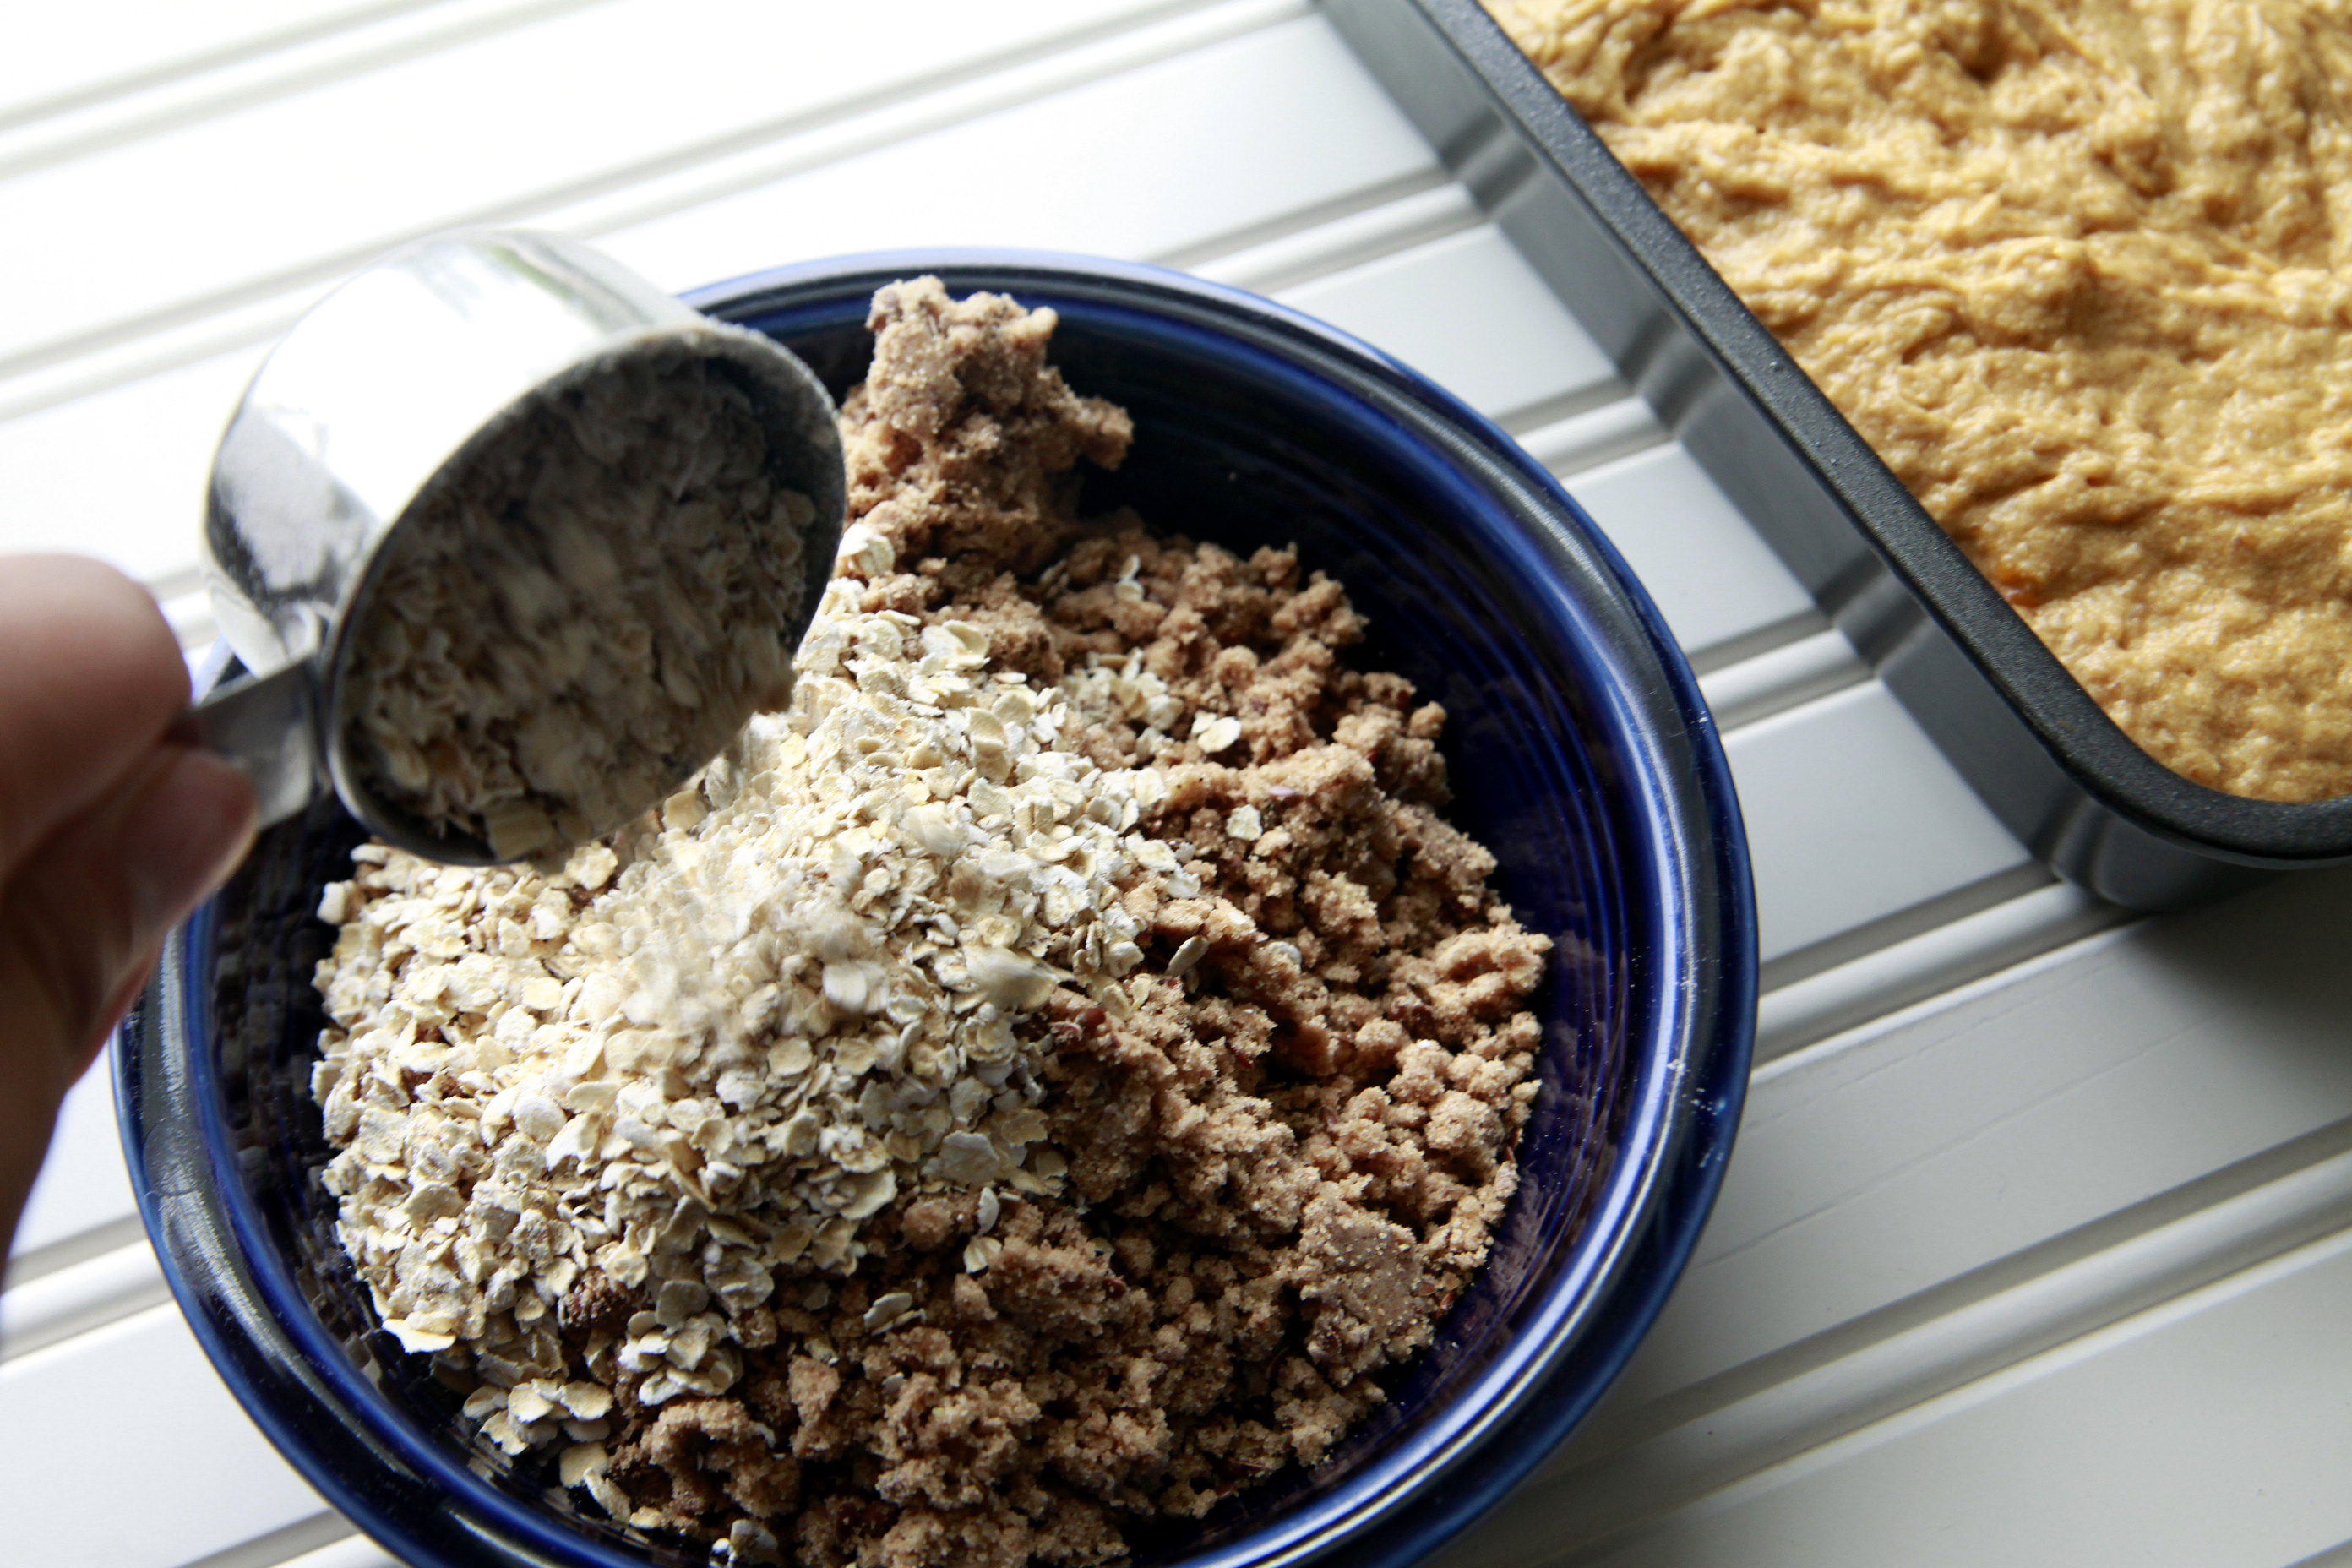
Mix in the oats. The reason I add the oats after everything else is combined is because I didn’t want the food processor to grind the oats. Set this mixture aside. We’ll bring it back in the end.


Tasty Kitchen Blog: Streusel-Topped Pumpkin Bread. Guest post by Alice Currah of Savory Sweet Life, recipe submitted by TK member Shaina Olmanson of Food for My Family.

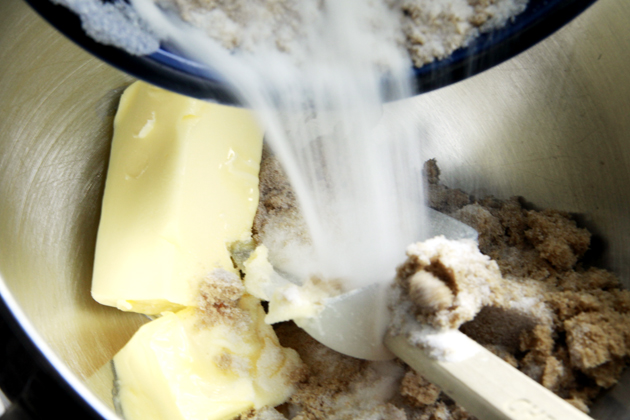
For the bread, cream the butter and sugars …


Tasty Kitchen Blog: Streusel-Topped Pumpkin Bread. Guest post by Alice Currah of Savory Sweet Life, recipe submitted by TK member Shaina Olmanson of Food for My Family.

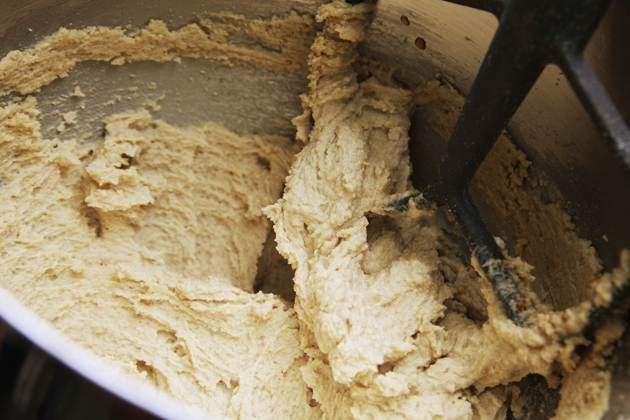
Until light and fluffy.


Tasty Kitchen Blog: Streusel-Topped Pumpkin Bread. Guest post by Alice Currah of Savory Sweet Life, recipe submitted by TK member Shaina Olmanson of Food for My Family.

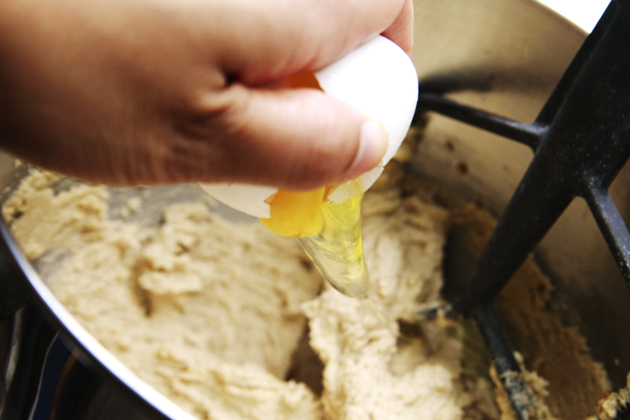
Add vanilla and add eggs one at a time, making sure to scrape down the bowl until batter is well combined.


Tasty Kitchen Blog: Streusel-Topped Pumpkin Bread. Guest post by Alice Currah of Savory Sweet Life, recipe submitted by TK member Shaina Olmanson of Food for My Family.

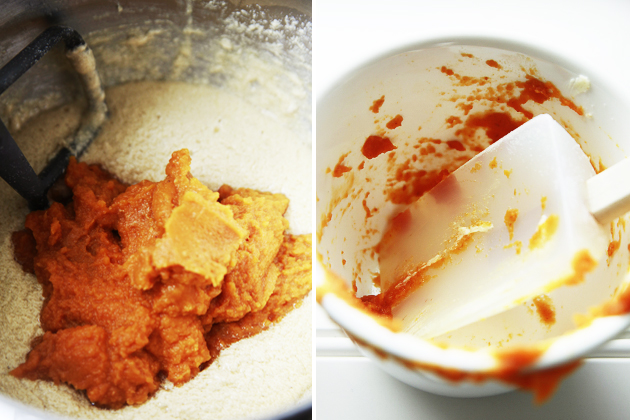
Mix in the pumpkin puree …


Tasty Kitchen Blog: Streusel-Topped Pumpkin Bread. Guest post by Alice Currah of Savory Sweet Life, recipe submitted by TK member Shaina Olmanson of Food for My Family.

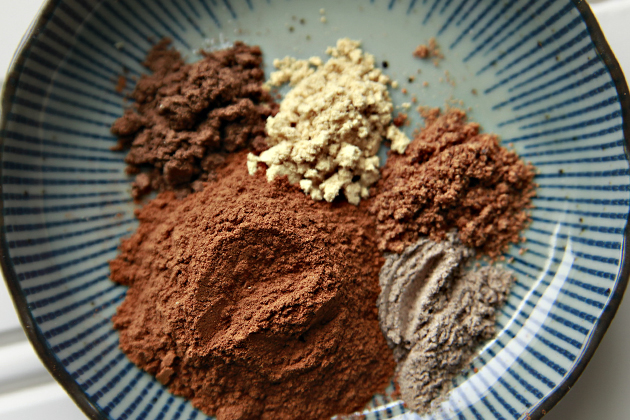
Spices …


Tasty Kitchen Blog: Streusel-Topped Pumpkin Bread. Guest post by Alice Currah of Savory Sweet Life, recipe submitted by TK member Shaina Olmanson of Food for My Family.

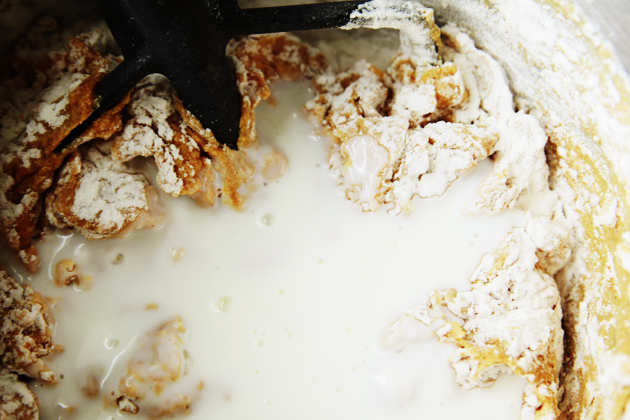
And then flour and buttermilk.


Tasty Kitchen Blog: Streusel-Topped Pumpkin Bread. Guest post by Alice Currah of Savory Sweet Life, recipe submitted by TK member Shaina Olmanson of Food for My Family.

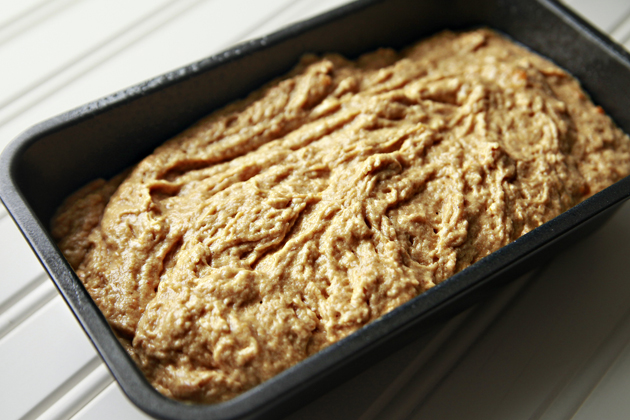
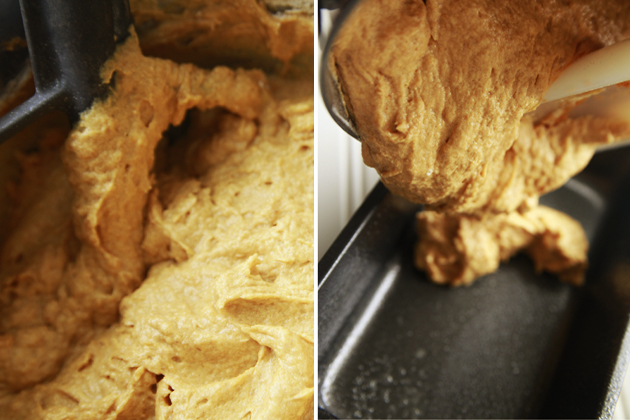
Batter should be light orange and thick. Divide batter between two prepared loaf pans.


Tasty Kitchen Blog: Streusel-Topped Pumpkin Bread. Guest post by Alice Currah of Savory Sweet Life, recipe submitted by TK member Shaina Olmanson of Food for My Family.

Fill the pans approximately 3/4 full.


Tasty Kitchen Blog: Streusel-Topped Pumpkin Bread. Guest post by Alice Currah of Savory Sweet Life, recipe submitted by TK member Shaina Olmanson of Food for My Family.

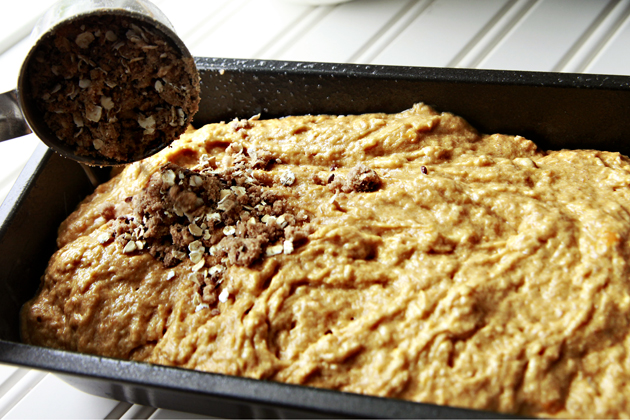
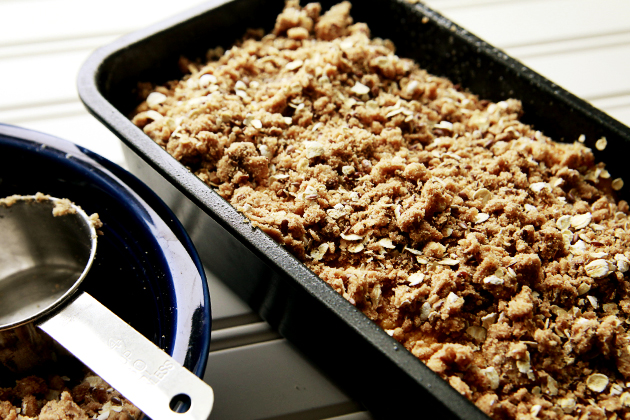
Top off each loaf with half the streusel mixture.


Tasty Kitchen Blog: Streusel-Topped Pumpkin Bread. Guest post by Alice Currah of Savory Sweet Life, recipe submitted by TK member Shaina Olmanson of Food for My Family.

Bake for 70-80 minutes. Be sure to check and see if the bread is done by inserting a toothpick into the center of the cake. If the toothpick is clean when you remove it, the bread is ready to be pulled from the oven. If any raw batter sticks to the toothpick, allow the bread to bake 8-10 minutes longer and test again.


Tasty Kitchen Blog: Streusel-Topped Pumpkin Bread. Guest post by Alice Currah of Savory Sweet Life, recipe submitted by TK member Shaina Olmanson of Food for My Family.

Once the bread is removed from the oven, allow the bread to cool for 10 minutes before removing from the pan.


Tasty Kitchen Blog: Streusel-Topped Pumpkin Bread. Guest post by Alice Currah of Savory Sweet Life, recipe submitted by TK member Shaina Olmanson of Food for My Family.

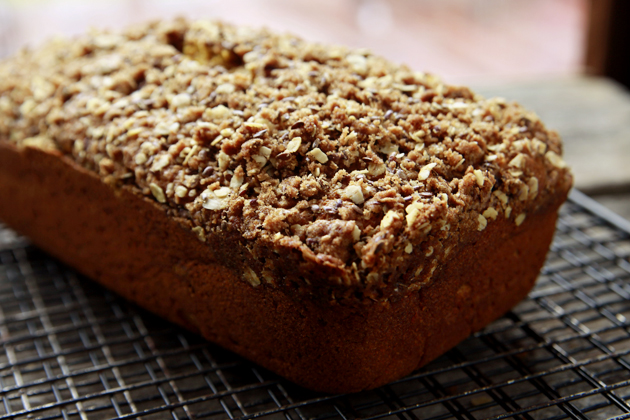
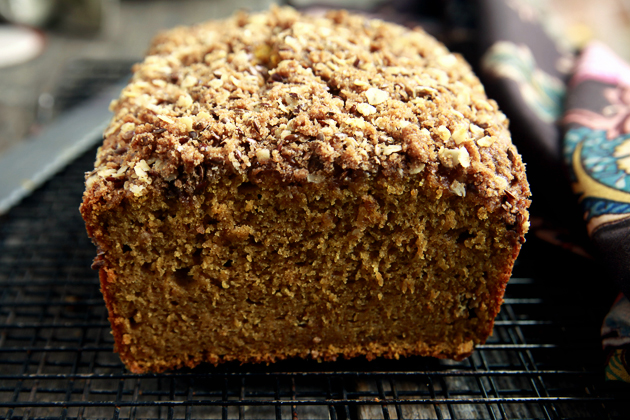
This bread can be served warm or at room temperature and will stay moist for a few days if stored in a Ziploc bag or container.


Tasty Kitchen Blog: Streusel-Topped Pumpkin Bread. Guest post by Alice Currah of Savory Sweet Life, recipe submitted by TK member Shaina Olmanson of Food for My Family.

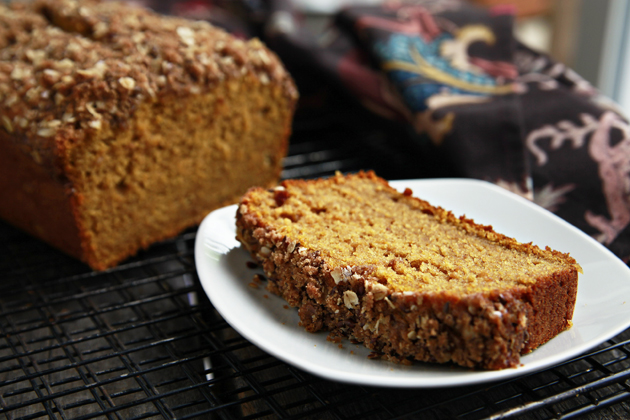
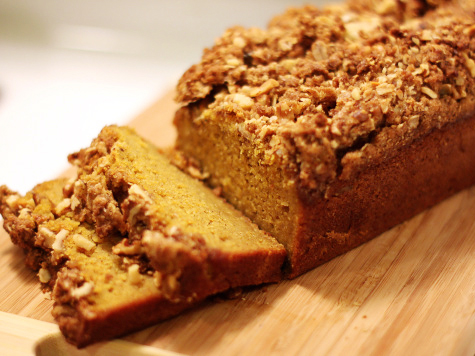
The streusel topping on the pumpkin loaf is the perfect balance of wholesome goodness and sweetness without overpowering the flavor of the bread. I found the texture, sweetness, moistness, and spice blend to be in perfect harmony. If you plan on baking one pumpkin bread recipe this fall, this is the one for you!


Tasty Kitchen Blog: Streusel-Topped Pumpkin Bread. Guest post by Alice Currah of Savory Sweet Life, recipe submitted by TK member Shaina Olmanson of Food for My Family.

Thanks again, Shaina. I love your blog, Food For My Family, and this recipe!


Printable Recipe

Streusel-Topped Pumpkin Bread

See post on Food for My Family’s site!
4.76 Mitt(s) 21 Rating(s)21 votes, average: 4.76 out of 521 votes, average: 4.76 out of 521 votes, average: 4.76 out of 521 votes, average: 4.76 out of 521 votes, average: 4.76 out of 5

Prep Time:

Cook Time:

Difficulty: Easy

Servings: 16

16
x

Print Options

Page size Letter 3x5 4x6
Text Size Small Medium Large
Content Include description
Include prep time, etc.
Show image

Description

A moist and dense pumpkin bread perfect for a cup of coffee on a cold fall morning but delectable enough to make the dessert table.

Ingredients

  • ¾ cups Butter, Softened
  • ¾ cups Granulated Sugar
  • ¾ cups Dark Brown Sugar
  • 1 teaspoon Vanilla
  • 4 whole Eggs
  • 2-½ cups Pumpkin Puree
  • 3 cups All-purpose Flour
  • 3 teaspoons Baking Powder
  • ¾ teaspoons Baking Soda
  • 1 teaspoon Salt
  • 1-½ teaspoon Cinnamon
  • ¼ teaspoons Ground Ginger
  • ¼ teaspoons Allspice
  • ¼ teaspoons Grated Nutmeg
  • ⅛ teaspoons Cardamom
  • ½ cups Buttermilk
  • _____
  • FOR THE STREUSEL TOPPING:
  • ¼ cups Butter, Softened
  • ½ cups Brown Sugar
  • ¼ cups Oatmeal
  • ¼ cups All-purpose Flour
  • 1 teaspoon Cinnamon
  • 3 Tablespoons Ground Flax Seed
  • ¼ cups Chopped Pecans (optional)

Preparation Instructions

Preheat your oven to 350º F. Grease and flour the bottom of two 8″ loaf pans. To make the topping, mix together all the topping ingredients using a fork or pastry cutter until combined thoroughly.

In a large bowl or mixer, cream together butter, granulated sugar and brown sugar. Add vanilla and eggs and mix until incorporated. Stir in pumpkin puree.

In a separate bowl, add flour, baking powder, baking soda, salt, cinnamon, ground ginger, allspice, nutmeg and cardamom. Whisk together until no lumps remain. Add half of the flour mix to the pumpkin mix, blending well. Beat in buttermilk. Add remaining flour mix and beat lightly until smooth.

Pour batter evenly into the two prepared 8″ pans. Cover each with half of the topping mix. Bake at 350º F for 70-80 minutes until a toothpick inserted in the center comes out clean. Slice and enjoy.


_______________________________________

Alice Currah is the force behind Sweet Savory Life and Everyday Alice. She and her husband Rob are the proud parents of three children: Abbi, Mimi, and Elli. Alice is the winner of Saveur’s Cover Contest and is on the Forbes.com list of Eight of The Very Best Food Bloggers. She’s the best-est.
 

Profile photo of savorysweetlife

Hot Chocolate Triple Chocolate Chip Cookies

Posted by in Baking, Step-by-Step Recipes

Note: The wonderful Alice strikes again, selecting a fantastic cookie recipe from among Tasty Kitchen’s (almost) 20,000 recipes (wow!) and taking photos for us, step-by-step. These look so incredibly delicious.     What exactly is a hot chocolate triple chocolate chip cookie? This cookie addict just had to find out! Browsing through all the delicious…
Profile photo of savorysweetlife

Nutella and Banana Wontons

Posted by in Step-by-Step Recipes

Our good friend Alice of Sweet Savory Life is back with another fun recipe, this time from Tasty Kitchen member Miss Mischief. She also patiently shows us how to properly fill, seal and fry wontons, so you can take this idea and run with it! But please listen to Alice and don’t run where there’s […]

Profile photo of savorysweetlife

Banana Split Ice Cream Cake

Posted by in Step-by-Step Recipes

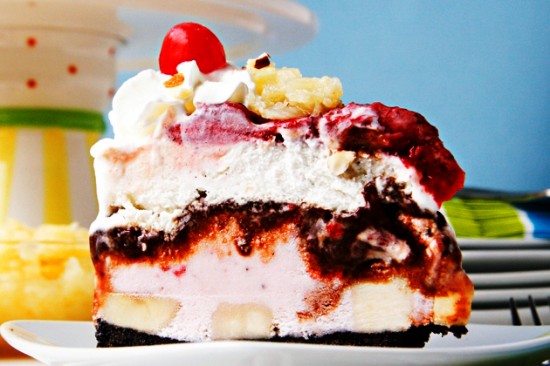
Today is a special day because we’re welcoming the brand new PW design. Our little corner here is getting its very own spot in the front page of The Pioneer Woman and if you haven’t been there yet today, check it out! There are tons of new features to play with, and it’s new and […]

Profile photo of savorysweetlife

Stuffed French Toast

Posted by in Step-by-Step Recipes

Since Ree is somewhere in D.C. right now with her gushing armpits (sorry for that visual on a cooking blog), we’ve invited a very special guest to host the Tasty Recipe post this week. Quite coincidentally, this lovely lady was also our very first member featured here in the Tasty Kitchen blog. She’s fabulous in […]