The Pioneer Woman Tasty Kitchen
Profile photo of Erika (TK)

Let’s Talk Pie

Posted by in Kitchen Talk

Tasty Kitchen Blog: Let's Talk Pie! (Easy Chocolate Pie, recipe submitted by TK member Sissy of Sissy Reads, guest post and photo by Laurie McNamara of Simply Scratch)

 
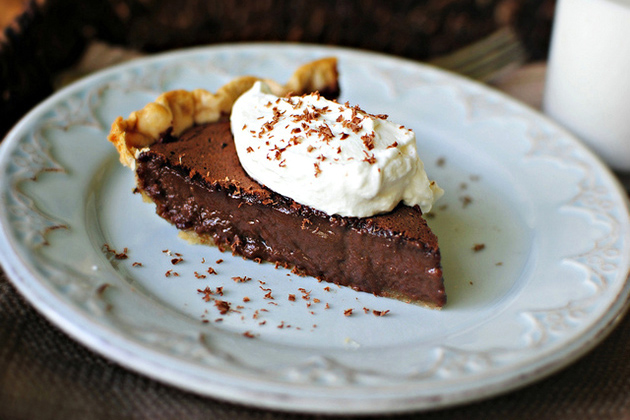
“There’s nothing prettier than pie, with scalloped edges and slits in the top for the heat to escape. Pie gives you the sense that you’re a square person, living in a square country. A pie says home … I wish I invented pie.” (Name that movie.)

Sweet or savory, baked or frozen, double crust or even crustless, offer someone pie and you’re almost sure to get a smile and an eager, “Yes, please!” Pies are welcome at the table any time of the year but we tend to really bring our A-game around the holiday season. Which, coincidentally, is right about now. So here’s our topic for this week:

Got any great pie tips?

Even if you don’t have any tips, do you have any questions that perhaps other members can answer for you? Any persistent pie issues you’d like to solve or techniques you wish you’d finally master?


Tasty Kitchen Blog: Let's Talk Pie! (Pie Crust Tutorial from Calli of Make It Do)

 
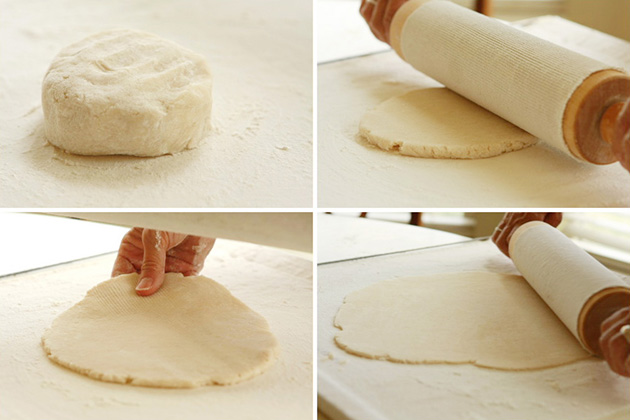
Let me start by saying I will be of absolutely no help to you whatsoever. I think I understand enough to be able to properly follow a recipe and that’s about it. We have an awesome pie crust tutorial here at Tasty Kitchen Blog, courtesy of our friend Calli of Make it Do and I love her method as well as the nifty pie-making tools she uses.


Tasty Kitchen Blog: Let's Talk Pie!

 
Around these TK parts, Nanci is probably the one most well-equipped to provide tips for making pies, particularly when it comes to the crust. She uses her great grandmother’s crust recipe (which is super flaky and tender) and her mom has been tutoring her over the last year or so, so that she can pass along the family pie-making tradition. 

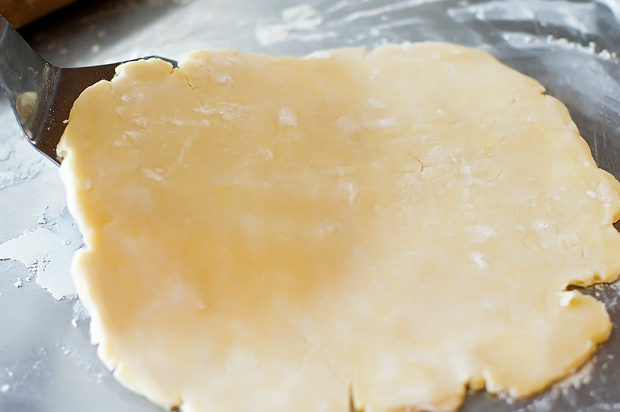
Nanci’s grandmother’s recipe just calls for flour, Crisco, ice water and salt. She says the key for her is working with very cold ingredients, from the Crisco (which she keeps in the fridge until she’s ready to cut it into the dry ingredients) to the water. Nanci likes to make her pie dough the night before she makes her pie, so that the dough is really cold when she rolls it out. She also freezes her marble rolling pin. Having that frozen surface to roll out the dough seems to work great to keep the Crisco nice and cold.


Tasty Kitchen Blog: Let's Talk Pie! (Grandma Inez’s Pineapple Pie, recipe and photo by Natalie Perry of Perry’s Plate

 
Now it’s your turn! All pie-related tips, questions, problems, troubleshooting tricks are welcome. I can’t wait to read what you share! Hopefully, I will finally be able to advance from my pie-novice status and actually know exactly what I’m doing the next time I attempt a pie.

Thanks, and happy Wednesday, everyone!


Profile photo of georgiapellegrini

Twice-Baked Stuffed Butternut Squash

Posted by in Step-by-Step Recipes

Tasty Kitchen Blog: Twice-Baked Butternut Squash with Quinoa, Pecans and Parmesan. Guest post by Georgia Pellegrini, recipe submitted by TK member Jess of Inquiring Chef.

 
Seeing as superfood quinoa is all the rage these days, I was excited to try this Twice-Baked Butternut Squash with Quinoa, Pecans, and Parmesan recipe from TK member Jess. This deliciously comforting dish incorporates the season’s sweet butternut squash with cheese, pecans, and of course, the all-mighty quinoa.


Tasty Kitchen Blog: Twice-Baked Butternut Squash with Quinoa, Pecans and Parmesan. Guest post by Georgia Pellegrini, recipe submitted by TK member Jess of Inquiring Chef.

To make it, you will need: butternut squash, salt, pepper, water, uncooked quinoa, pecan halves (roughly chopped and toasted in a pan; I used almonds since I had those on hand), a shallot that has been chopped and sautéed in olive oil, dried oregano, panko breadcrumbs, unsalted butter (melted), and shredded Parmesan.


Tasty Kitchen Blog: Twice-Baked Butternut Squash with Quinoa, Pecans and Parmesan. Guest post by Georgia Pellegrini, recipe submitted by TK member Jess of Inquiring Chef.

After washing the butternut squash, cut length-wise.


Tasty Kitchen Blog: Twice-Baked Butternut Squash with Quinoa, Pecans and Parmesan. Guest post by Georgia Pellegrini, recipe submitted by TK member Jess of Inquiring Chef.

Scoop out the seeds.


Tasty Kitchen Blog: Twice-Baked Butternut Squash with Quinoa, Pecans and Parmesan. Guest post by Georgia Pellegrini, recipe submitted by TK member Jess of Inquiring Chef.

Sprinkle salt and pepper on top …


Tasty Kitchen Blog: Twice-Baked Butternut Squash with Quinoa, Pecans and Parmesan. Guest post by Georgia Pellegrini, recipe submitted by TK member Jess of Inquiring Chef.

And place the squash halves cut-side up in a large baking dish. Pour ¼ inch of water in the bottom of the pan.


Tasty Kitchen Blog: Twice-Baked Butternut Squash with Quinoa, Pecans and Parmesan. Guest post by Georgia Pellegrini, recipe submitted by TK member Jess of Inquiring Chef.

Cover tightly with foil. Bake for 30 minutes, or until tender, in an oven that’s been preheated to 450ºF.


Tasty Kitchen Blog: Twice-Baked Butternut Squash with Quinoa, Pecans and Parmesan. Guest post by Georgia Pellegrini, recipe submitted by TK member Jess of Inquiring Chef.

Meanwhile, prepare the quinoa according to the directions on the box.


Tasty Kitchen Blog: Twice-Baked Butternut Squash with Quinoa, Pecans and Parmesan. Guest post by Georgia Pellegrini, recipe submitted by TK member Jess of Inquiring Chef.

It will turn out fluffy like this.


Tasty Kitchen Blog: Twice-Baked Butternut Squash with Quinoa, Pecans and Parmesan. Guest post by Georgia Pellegrini, recipe submitted by TK member Jess of Inquiring Chef.

Scrape the flesh out of the roasted squash halves, leaving a layer of about ¼ inch.


Tasty Kitchen Blog: Twice-Baked Butternut Squash with Quinoa, Pecans and Parmesan. Guest post by Georgia Pellegrini, recipe submitted by TK member Jess of Inquiring Chef.

Then transfer the squash and cooked quinoa to a mixing bowl.


Tasty Kitchen Blog: Twice-Baked Butternut Squash with Quinoa, Pecans and Parmesan. Guest post by Georgia Pellegrini, recipe submitted by TK member Jess of Inquiring Chef.

Add oregano, toasted pecans …


Tasty Kitchen Blog: Twice-Baked Butternut Squash with Quinoa, Pecans and Parmesan. Guest post by Georgia Pellegrini, recipe submitted by TK member Jess of Inquiring Chef.

Salt …


Tasty Kitchen Blog: Twice-Baked Butternut Squash with Quinoa, Pecans and Parmesan. Guest post by Georgia Pellegrini, recipe submitted by TK member Jess of Inquiring Chef.

And half of the cheese.


Tasty Kitchen Blog: Twice-Baked Butternut Squash with Quinoa, Pecans and Parmesan. Guest post by Georgia Pellegrini, recipe submitted by TK member Jess of Inquiring Chef.

Stir it all to combine!


Tasty Kitchen Blog: Twice-Baked Butternut Squash with Quinoa, Pecans and Parmesan. Guest post by Georgia Pellegrini, recipe submitted by TK member Jess of Inquiring Chef.

In a separate bowl, combine the breadcrumbs, butter, and remaining Parmesan. The breadcrumb topping will look something like this.


Tasty Kitchen Blog: Twice-Baked Butternut Squash with Quinoa, Pecans and Parmesan. Guest post by Georgia Pellegrini, recipe submitted by TK member Jess of Inquiring Chef.

Spoon the squash mixture into the shells, making it as compact as you can.


Tasty Kitchen Blog: Twice-Baked Butternut Squash with Quinoa, Pecans and Parmesan. Guest post by Georgia Pellegrini, recipe submitted by TK member Jess of Inquiring Chef.

Sprinkle the breadcrumb mixture on top. Bake uncovered until the tops are browned, about 20-25 minutes.


Tasty Kitchen Blog: Twice-Baked Butternut Squash with Quinoa, Pecans and Parmesan. Guest post by Georgia Pellegrini, recipe submitted by TK member Jess of Inquiring Chef.

You now have a flavorful and healthy dish to serve to your family. It is absolutely delicious! For more beautiful recipes from Jess, visit her Inquiring Chef website! She’s a Kansas native currently residing in Bangkok, and her site is just bursting with flavors from all over the world.


Printable Recipe

Twice-Baked Butternut Squash with Quinoa, Pecans and Parmesan

See post on inquiringchef’s site!
5.00 Mitt(s) 2 Rating(s)2 votes, average: 5.00 out of 52 votes, average: 5.00 out of 52 votes, average: 5.00 out of 52 votes, average: 5.00 out of 52 votes, average: 5.00 out of 5

Prep Time:

Cook Time:

Difficulty: Easy

Servings: 8

8
x

Print Options

Page size Letter 3x5 4x6
Text Size Small Medium Large
Content Include description
Include prep time, etc.
Show image

Description

Stuffed butternut squash with quinoa, pecans and Parmesan cheese. A pretty side dish for a holiday meal.

Ingredients

  • 4 pounds Pounds Of Butternut Squash (4 Pounds Is Roughly 2 Regular, Or 4 Small)
  • Salt And Pepper
  • 1-⅓ cup Water
  • ⅔ cups Uncooked Quinoa
  • ⅔ cups Pecan Halves, Roughly Chopped
  • 2 teaspoons Olive Oil
  • 1 whole Small Shallot, Minced
  • ½ teaspoons Dried Oregano
  • ¼ teaspoons Salt
  • ¾ cups Panko Breadcrumbs
  • 3 Tablespoons Unsalted Butter, melted
  • 4 ounces, weight Shredded Parmesan Cheese

Preparation Instructions

Preheat the oven to 450 F. Wash the outside of the squash. Cut the squash in half lengthwise and scoop out the seeds (I use an ice cream scoop). Place the squash halves cut-side up in a large baking dish. Sprinkle the surface of the squash with salt and pepper. Pour ¼ inch of water in the bottom of the pan and cover the pan tightly with foil. Bake the squash until it is tender when pierced with a fork, 30-50 minutes depending on the size (my little ones were done in 30 minutes). Remove from the oven, discard foil and allow the squash to cool.

Reduce oven temperature to 400 F.

Meanwhile, cook the quinoa by bringing 1 and ⅓ cup water to boil in a small pot. Add the quinoa, reduce heat to a simmer and put a lid on the pot. Simmer for 15 minutes. Remove the pan from the heat.

Heat a skillet over medium heat. Toast the pecans until fragrant, about 5 minutes. Set pecans aside in a bowl. In the same skillet over medium heat, combine the olive oil and shallots. Cook, stirring frequently, until the shallots soften, about 5 minutes. Remove the skillet from the heat.

Using a spoon or an ice cream scoop, gently scrape the flesh out of the roasted squash halves, leaving a layer of about ¼ inch of squash remaining in the shell. (Leave the squash shells in the baking dish.)

In a large bowl combine the squash, cooked quinoa, pecans, shallot, oregano and salt. In another small bowl whisk together the panko breadcrumbs and butter. Add 2 tablespoons of the Parmesan cheese to the panko. Add the remaining Parmesan to the squash mixture and stir to combine all of the ingredients.

Gently spoon the squash mixture into the squash shells. Sprinkle the panko and Parmesan mixture over the top. Return squash to the oven and bake, uncovered, until the tops are golden brown, 20-25 minutes.


_______________________________________

There’s so much to say about Georgia, we don’t know where to start. Leaving Wall Street for the French Culinary Institute, followed by a stint at the Gramercy Tavern and La Chassagnette in France, her passion for food and food traditions are evident and inspiring. Visit her site at Georgia Pellegrini, where you’ll find more recipes, photos, learn all about her wonderful books Girl Hunter and Food Heroes, and enjoy her latest adventures.


Profile photo of Erika (TK)

Let’s Talk Gravy

Posted by in Holidays, Kitchen Talk

Welcome to part 2 of Kitchen Talk this week! Today, we’ll talk about gravy. Because gravy’s where it’s at, friends. So here we go:

Why do they call it gravy? Is it very, very somber? Is it so delicious it could raise the dead?

Share your answers below! Inquiring minds want to know.

Just kidding. (I’m not doing that again, promise.)


Tasty Kitchen Blog: Let's Talk Gravy!

Gravy. Luscious, rich gravy. I know I confessed that roasting a turkey is not my favorite thing to do in the kitchen or even my favorite thing to eat, but gravy is another matter altogether. I’ll rarely pass up gravy. I love it on mashed potatoes, on burgers, fries, meatballs, biscuits, plain rice, and pretty much anything you put on my plate. Homemade gravy is the best, and can elevate even a mediocre bird to star status. So tell us:

What are your favorite tips for making gravy?


Tasty Kitchen Blog: Let's Talk Gravy!

If you despise liver and the mere thought of it makes you gag, you can skip to the next paragraph. If you’re on the fence about it, my tip is to give it a chance because I think it adds such a deep, meaty flavor to gravy. Most folks can’t get past the idea of liver bits in their gravy, so what I do is make gravy the usual way but leave it slightly loose. When the gravy is done, I whisk in a tablespoon or two of pate, then take the gravy off heat. If I’m really feeling naughty, I’ll sauté some chopped mushrooms in a little butter until browned in the edges and throw that in the gravy as well. And if I’m feeling naughty and crazy, I’ll throw the sautéed mushrooms and pate into a blender with a cup of the loose gravy and blend it until smooth. I mix that into the gravy with a touch of cream and sherry because I like to live on the edge. Then I tell everyone I forgot to make gravy and keep it all to myself.

Nanci’s favorite tip is to use the drippings from the fresh roasted turkey and make the gravy right at the end before serving. She says if you’d like to have extra broth for the gravy, you can boil the neck and giblets (except the liver) in a little water with salt and pepper. She typically brings the giblet mixture to a boil then lowers the heat to low and cooks that for 2 hours. If you need to thicken your gravy, Nanci says remember never to add dry flour or cornstarch directly into the hot liquid. Mix some flour or cornstarch with a bit of cold water before adding it into the hot gravy, drizzling it in slowly and whisking rapidly. She prefers flour instead of cornstarch because she feels it has better flavor for thickening gravy.

Betsy’s tip is one she learned from Ree, and that’s to use low-sodium chicken broth. She says it’s a must, especially if you brine your turkey. She adds, “When you make the roux, make sure to let it brown well before adding the other liquids. You don’t want that raw flour flavor.” Her sister-in-law likes to add a glug of half-and-half toward the end just to give it a bit more creaminess, and Betsy agrees that it can’t hurt any.


Tasty Kitchen Blog: Let's Talk Gravy! (The Best Turkey Gravy Ever, submitted by TK member Amanda of I am Mommy, I am Baker)

Finally, Tasty Kitchen member Amanda has a great tip for making The Best Turkey Gravy Ever that I can’t wait to try. (Click on her gravy photo above to get the printable recipe, though really, it’s so genius yet incredibly simple that you probably won’t even need to print it out.) Her tip involves basting the turkey with bacon grease one hour before it’s done. That’s it. Then you make gravy your usual way, and I can already imagine the kind of flavor that bacon grease will add to the drippings.


Tasty Kitchen Blog: Let's Talk Gravy!

 
How about you? Do you have any favorite tips for making gravy? Let’s share!


Profile photo of Erika (TK)

Let’s Talk Turkey

Posted by in Holidays, Kitchen Talk

Tasty Kitchen Blog: Let's Talk Turkey!

 
It’s time for a special two-part edition of Kitchen Talk, and today, our topic is turkey. So, let’s have it:

Why do they call 3 strikes in a row a turkey?

Leave your comments below, then stay tuned tomorrow for another related topic!

Just kidding. (Although I really do want to know why.)

Okay, seriously now. Here’s our topic for today:

What are your favorite tips for preparing a whole turkey?


Tasty Kitchen Blog: Let's Talk Turkey!

I confess, cooking a whole turkey intimidates me. It’s huge, it takes hours in the oven, it’s huge, it seems to take forever to defrost properly, and it’s huge. I think I was in my early twenties when I first laid eyes on a whole roasted turkey. I only remember that it took up almost the entire table. I don’t recall enjoying it all that much; I think it was dry and a bit bland.

Years later, my sister-in-law had an extra turkey in her freezer and gave it to me. I had watched enough Food Network shows to be convinced that brining was the way to go, so I went with an Emeril concoction that involved apple cider, beer, cinnamon sticks, cloves, peppercorns, orange zest, garlic, ginger, and salt. Shortly after putting the turkey into the murky brine, we had a family emergency and I ended up having to leave the turkey in the fridge brining for almost 3 days. We roasted it anyway (not sure if that was completely safe, but we’re all still alive so far) and it was super moist and tasted like honey roasted turkey. As a bonus, I reheated leftovers in a skillet with some butter and smoked paprika and had smoked honey roasted turkey sandwiches for about 17 days.

I realize it’s not a very exciting turkey story, but I really don’t have much turkey cooking experience. I do know that I once tasted a whole fried turkey that was later basted with spicy barbecue sauce and I think that is still the best turkey I’ve ever had. But frying a whole turkey scares me (because it’s huge!) so please invite me over if you have a responsible adult, preferably a fireman, frying a turkey for dinner.


Tasty Kitchen Blog: Let's Talk Turkey!

My only tip is a basic one: brine, and use a brining bag. I used to balk at spending money for brining bags, but really, it’s the best way to go. You end up needing so much more brining liquid if you use a giant pail, and it’s unwieldy. And did I mention you’re going to need a big pail? For the huge turkey?

Nanci is much better at roasting turkeys than I am, and the biggest tip she can give is to get your turkey early if buying it frozen and let it thaw in a pan in the refrigerator for several days. Big turkeys can take 5 to 7 days to properly thaw. It’s hard to safely rush thawing a turkey so it’s best to plan ahead. She says, “I know. Your fridge feng shui will be off with that monster in there for so long but hang in there. Or buy fresh the day before! And obviously don’t forget to clean out both cavities before you cook the turkey (been there, done that, and it’s a mess). It’s also key to use a meat thermometer or pop-up timer because many times it will get fully cooked before you expect it to be done.”

Ree stopped by to share her favorite tip with us, too. She says, “If you brine your turkey, rinse it then soak it in a sink of cold water for 15 minutes after removing it from the brine. That helps with the issue of salty drippings.”


Tasty Kitchen Blog: Let's Talk Turkey!


Now let’s hear from you! What tips do you have for preparing a whole turkey? Do you brine? If you do, have any favorite brine recipes or flavors? Do you have a special technique for carving the bird when it’s done? Share your wisdom below, and do come back tomorrow for part two of this week’s Kitchen Talk!


Profile photo of georgiapellegrini

Apple Meatballs in Wine Sauce

Posted by in Step-by-Step Recipes

  I love discovering new, creative ways to incorporate seasonal fruits into traditional dishes, like these Apple Meatballs in Wine Sauce from Tasty Kitchen member Nancy. You are going to love these—they’re full of texture and sweet and tangy flavor.       For the meatballs, you will need: ground turkey, ground pork, a diced […]

Profile photo of Erika (TK)

The Theme is … Leftover Candy!

Posted by in The Theme Is...

  I’m going to take a wild guess and say quite a few of you may have a tad too much candy in the house right now. (Not that there’s anything wrong with that.) Or you might be tempted by the ubiquitous candy sales and specials that stores put up right after October 31, and […]

Profile photo of Erika (TK)

Keeping Things Fresh

Posted by in Kitchen Talk

Do you have any tips for keeping produce fresh longer? Come join the conversation!

Profile photo of georgiapellegrini

Cream of Broccoli Soup

Posted by in Step-by-Step Recipes

   I had oceans of frozen broccoli in my freezer recently, and I was looking for new ways to cook it up into something delicious. There’s only so many times a girl can eat broccoli with melted cheese. Well, maybe not, but still this Cream of Broccoli Soup from Rebecca caught my eye as […]