The Pioneer Woman Tasty Kitchen
Profile photo of georgiapellegrini

Spicy Margarita Shrimp

Posted by in Step-by-Step Recipes

Tasty Kitchen Blog: Spicy Margarita Shrimp. Guest post by Georgia Pellegrini, recipe submitted by TK member Damielo.

 
In this hot, hot weather, I rarely want to turn the oven on, so this Spicy Margarita Shrimp from TK member Damelio called my name because most of the cooking happens in the marinade. Plus I love a good margarita and was intrigued by the idea of using some of those same ingredients to flavor the shrimp!


Tasty Kitchen Blog: Spicy Margarita Shrimp. Guest post by Georgia Pellegrini, recipe submitted by TK member Damielo.

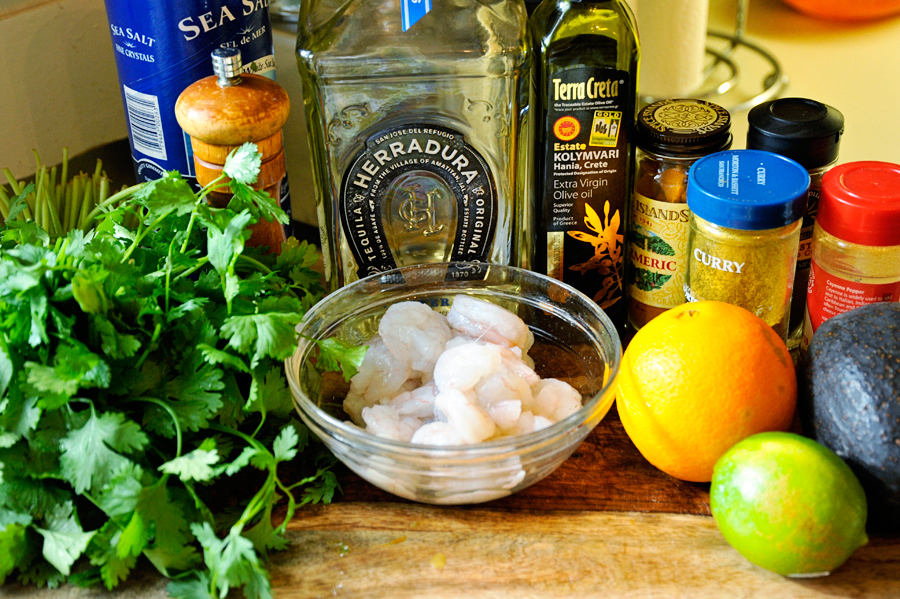
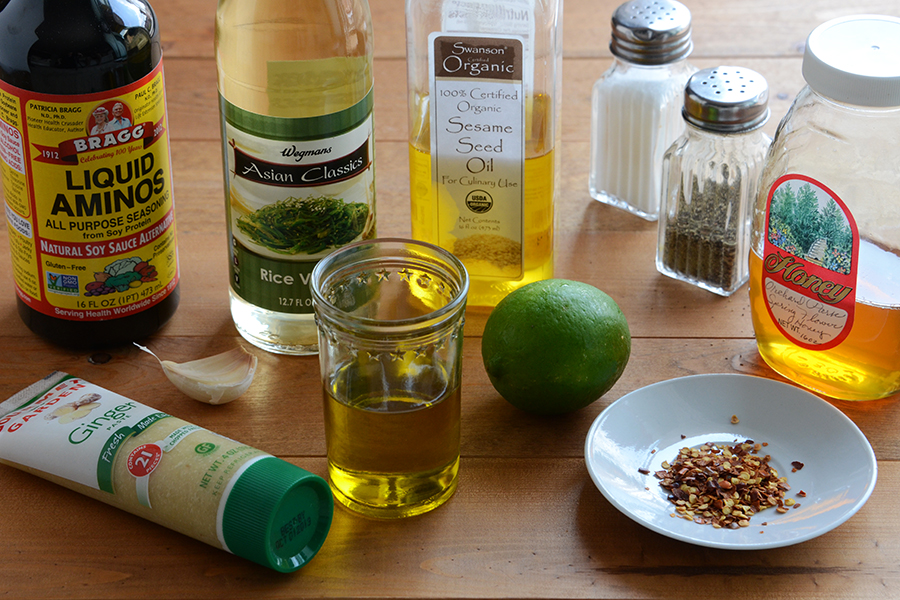
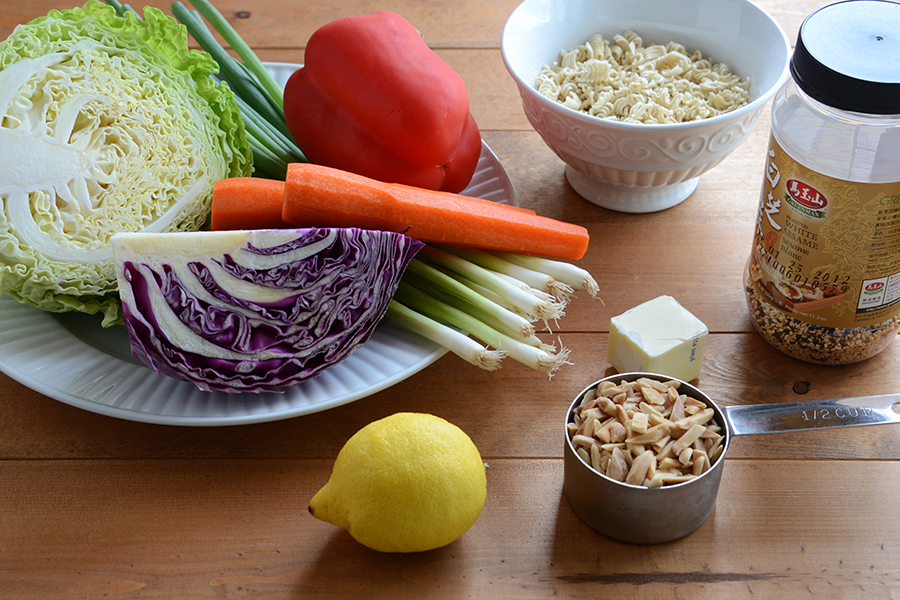
To make it you will need: cilantro, shrimp, orange, lime, avocado, curry, cumin, turmeric, cayenne, olive oil, tequila, triple sec (if you have it—I didn’t and it still worked wonderfully with just tequila), salt and pepper.


Tasty Kitchen Blog: Spicy Margarita Shrimp. Guest post by Georgia Pellegrini, recipe submitted by TK member Damielo.

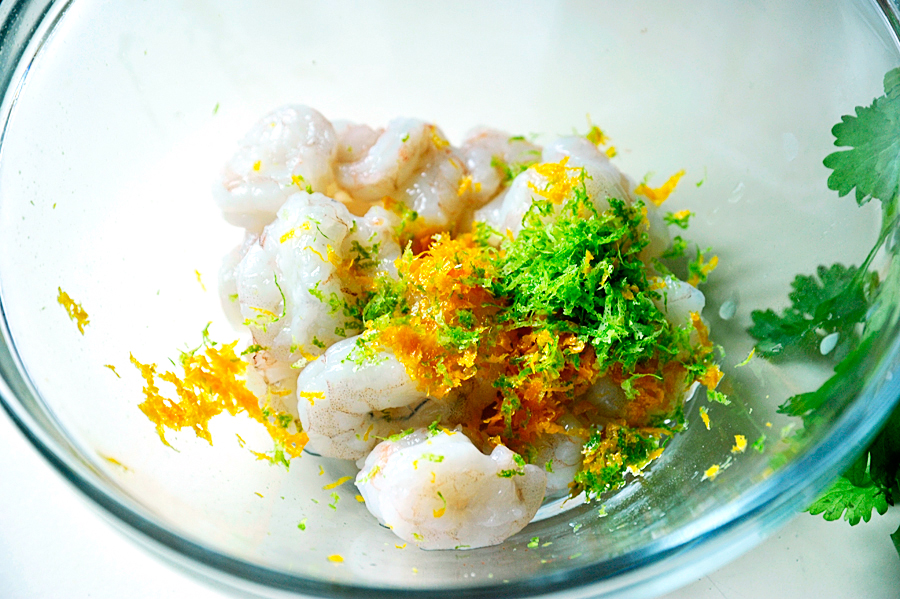
Combine the shrimp with the orange and lime zest in a small bowl.


Tasty Kitchen Blog: Spicy Margarita Shrimp. Guest post by Georgia Pellegrini, recipe submitted by TK member Damielo.

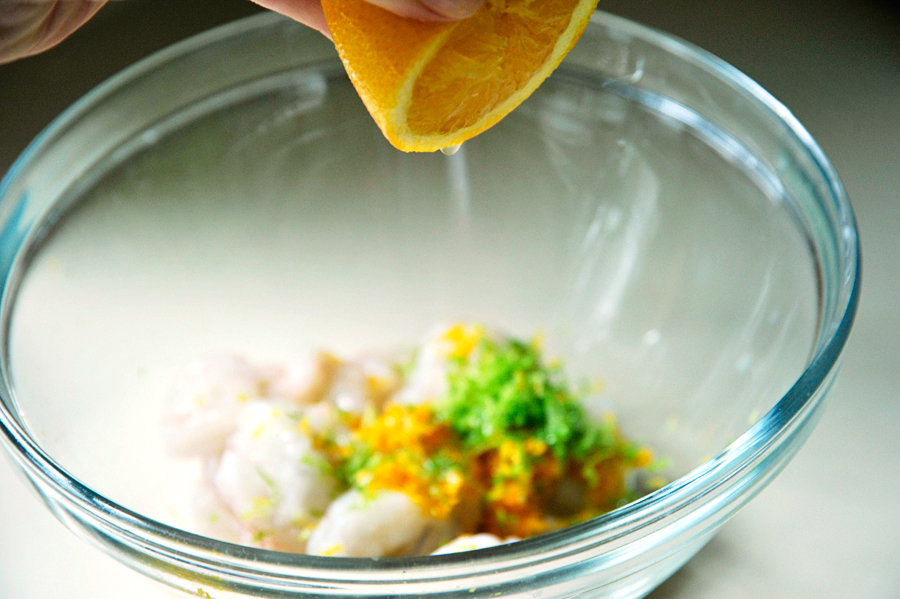
Then add the acidic marinade ingredients to help cook the shrimp. First the orange juice …


Tasty Kitchen Blog: Spicy Margarita Shrimp. Guest post by Georgia Pellegrini, recipe submitted by TK member Damielo.

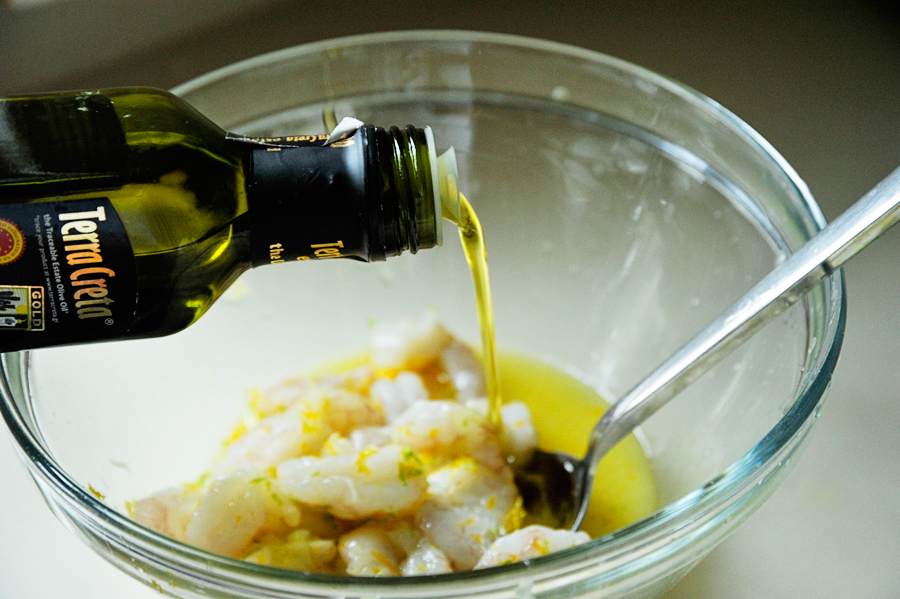
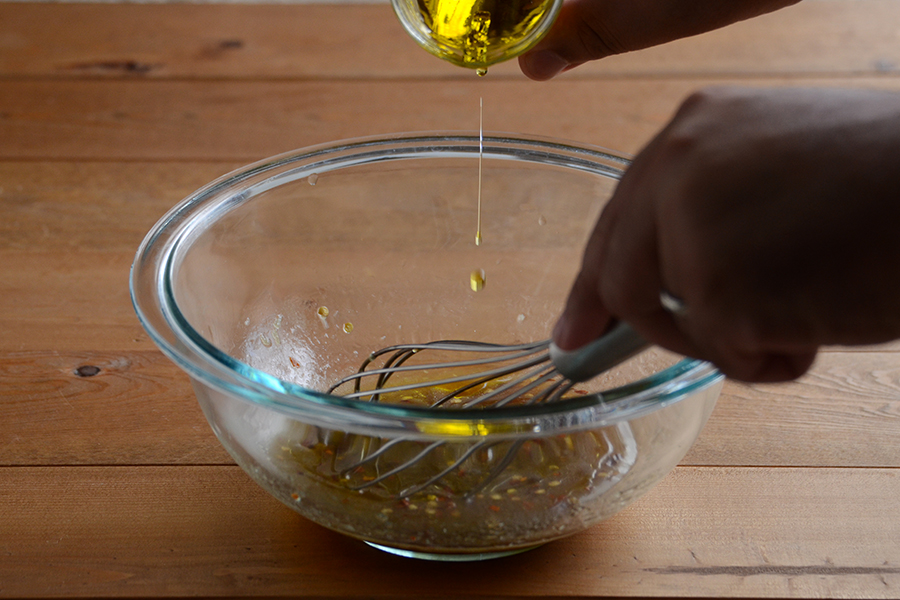
Along with the olive oil …


Tasty Kitchen Blog: Spicy Margarita Shrimp. Guest post by Georgia Pellegrini, recipe submitted by TK member Damielo.

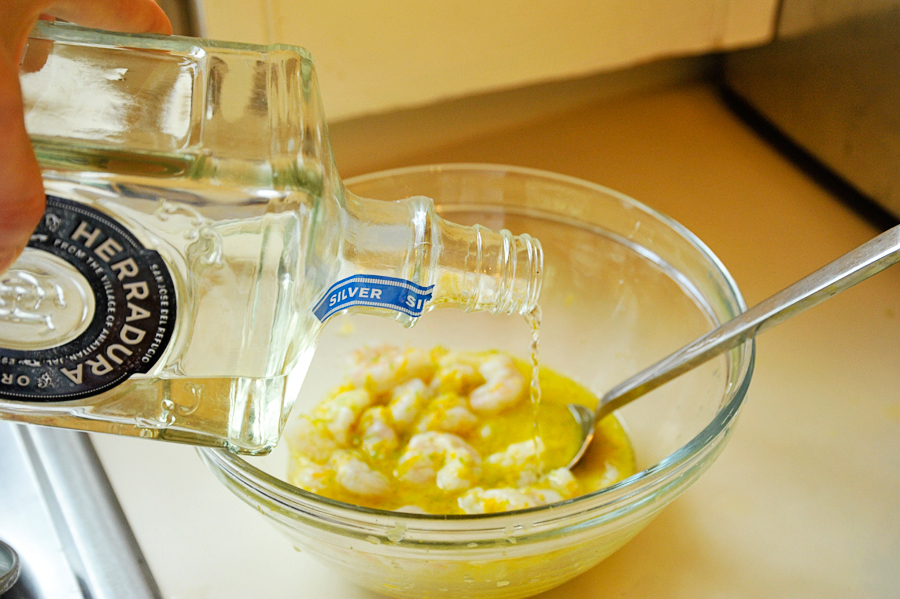
And tequila and triple sec.


Tasty Kitchen Blog: Spicy Margarita Shrimp. Guest post by Georgia Pellegrini, recipe submitted by TK member Damielo.

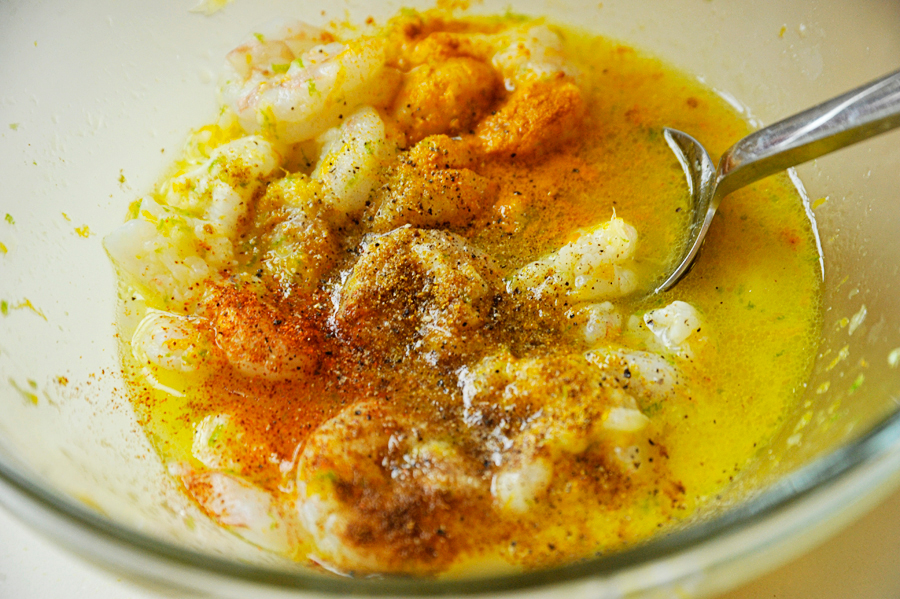
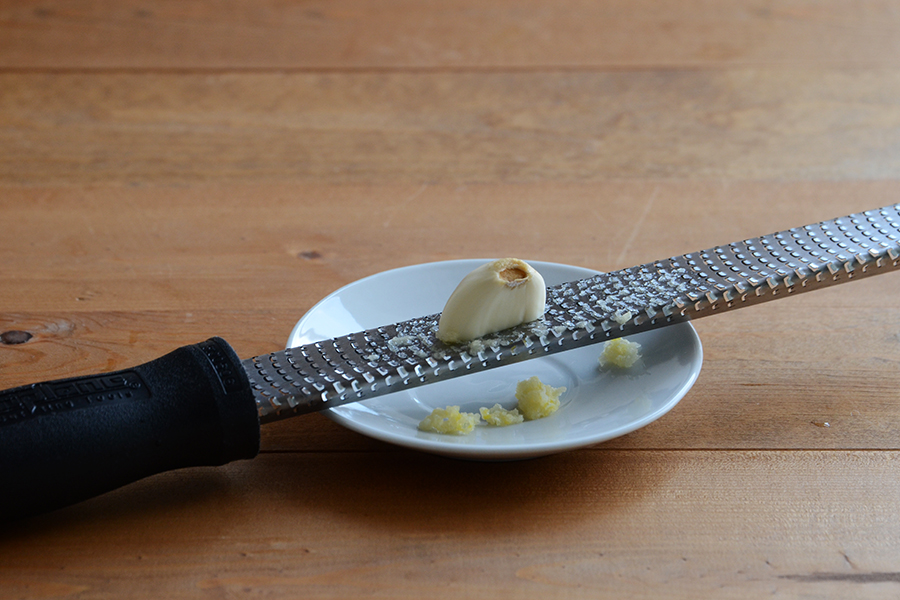
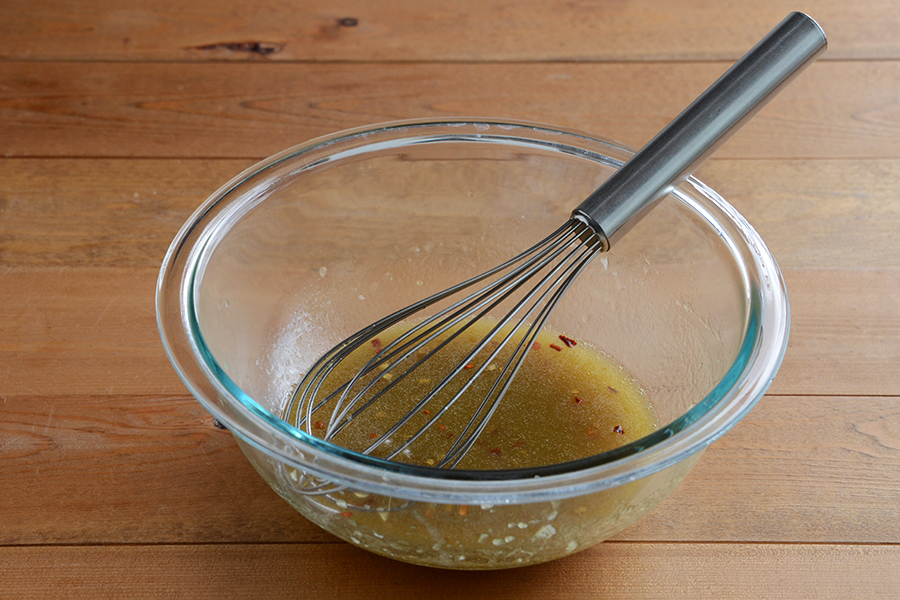
Next add all of your spices and give it a stir.


Tasty Kitchen Blog: Spicy Margarita Shrimp. Guest post by Georgia Pellegrini, recipe submitted by TK member Damielo.

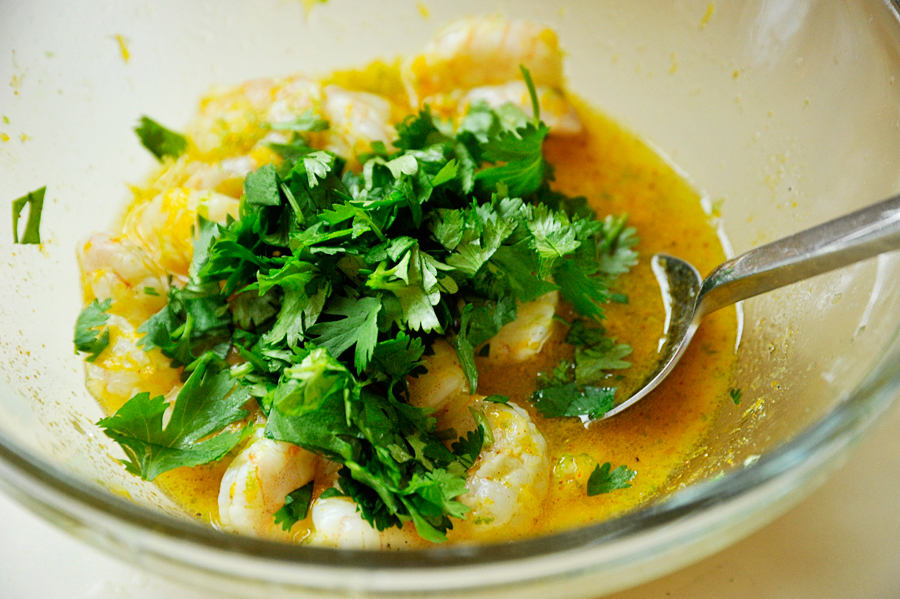
Toss in the cilantro last, stir, cover and refrigerate for at least an hour but not much more than that, so you don’t overcook it.


Tasty Kitchen Blog: Spicy Margarita Shrimp. Guest post by Georgia Pellegrini, recipe submitted by TK member Damielo.

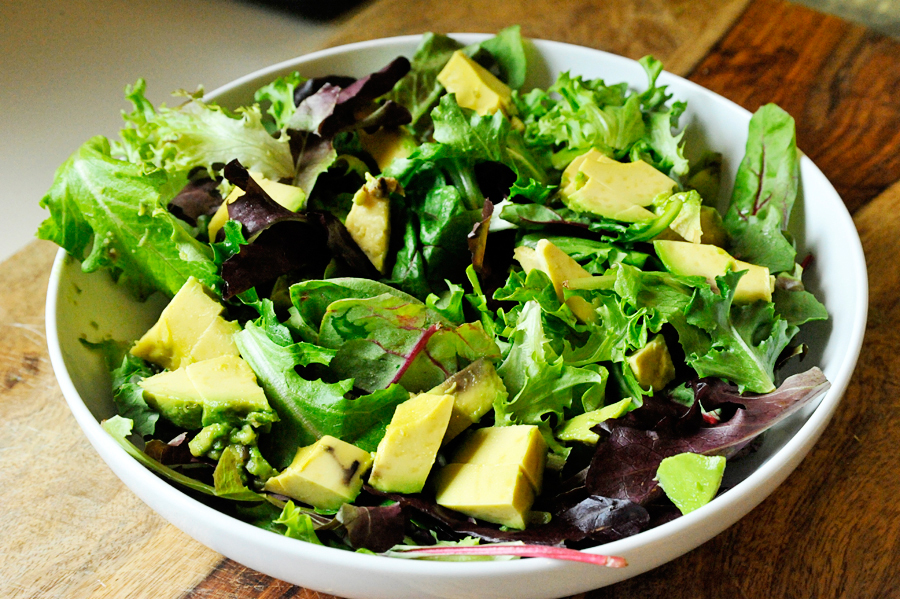
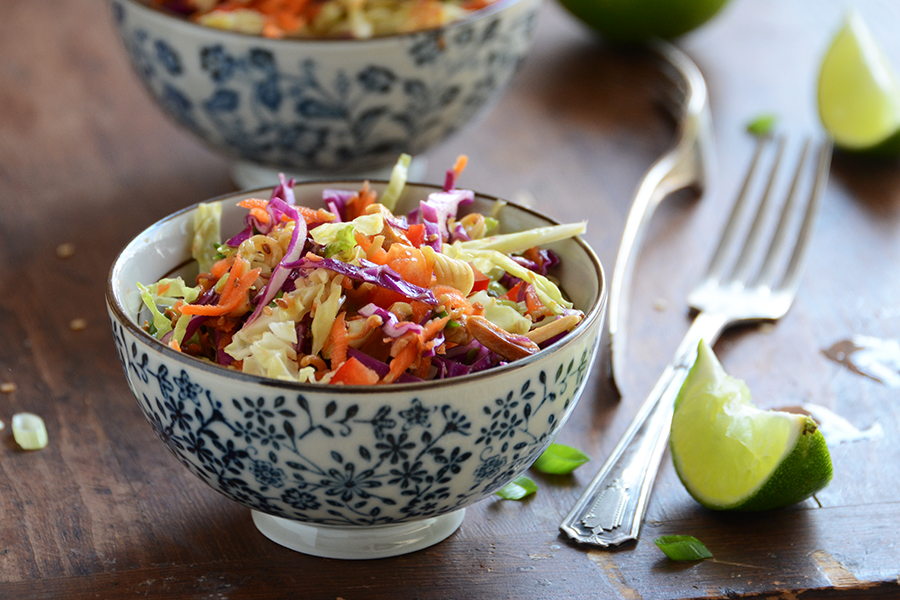
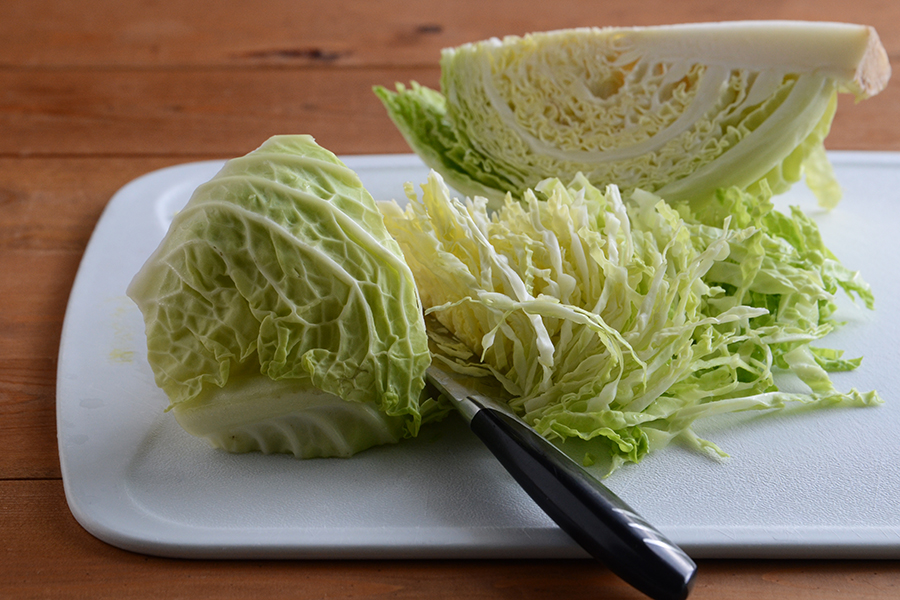
While it marinates, prepare a grain or salad to serve with your shrimp. You could use couscous, quinoa, rice, or a big green salad. Chop up the avocado and add it to your base.


Tasty Kitchen Blog: Spicy Margarita Shrimp. Guest post by Georgia Pellegrini, recipe submitted by TK member Damielo.

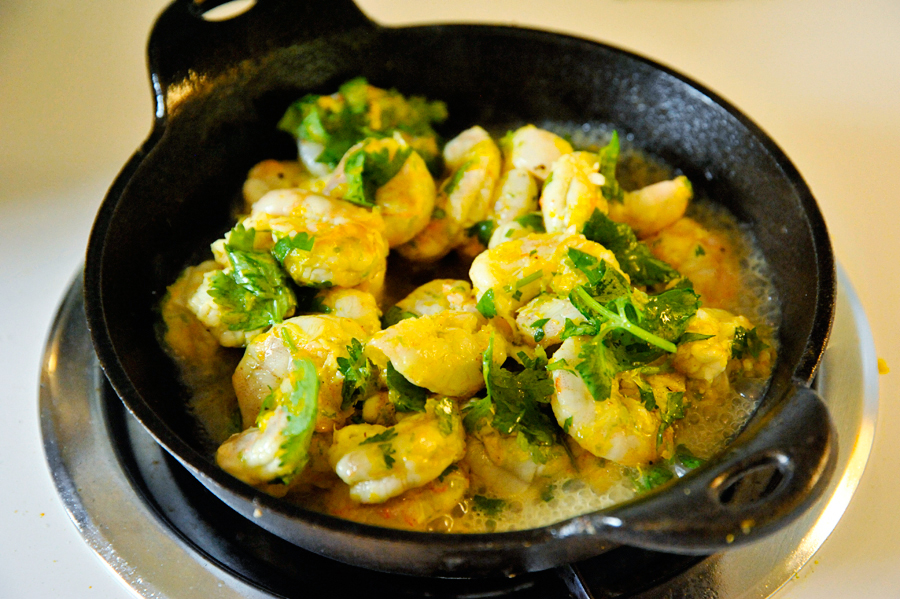
Then when the shrimp has been well marinated, add it to a skillet and cook it for a few minutes on each side, depending on the size of your shrimp, until reddish and firm.


Tasty Kitchen Blog: Spicy Margarita Shrimp. Guest post by Georgia Pellegrini, recipe submitted by TK member Damielo.

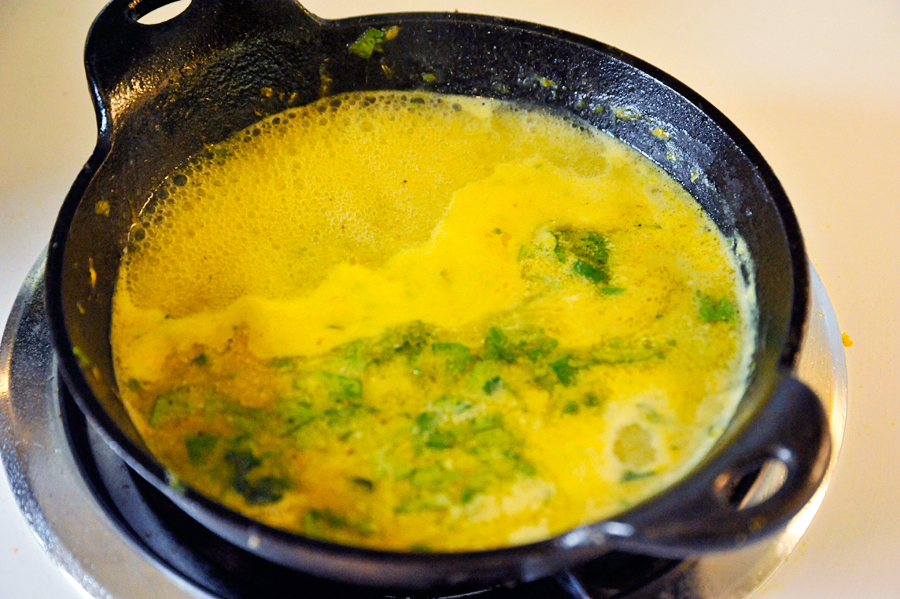
Remove the shrimp with a slotted spoon and reduce the marinade by about half to drizzle over your salad or grains.


Tasty Kitchen Blog: Spicy Margarita Shrimp. Guest post by Georgia Pellegrini, recipe submitted by TK member Damielo.

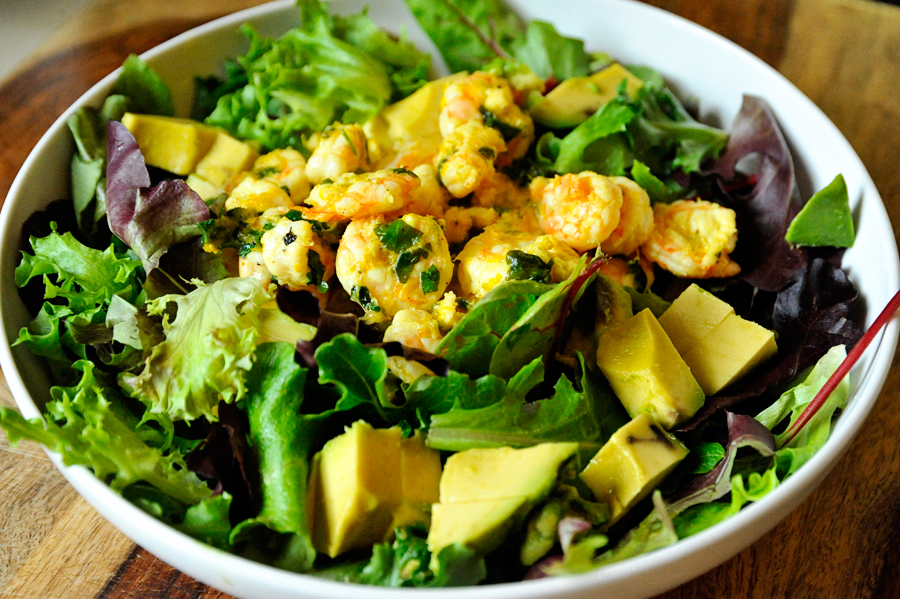
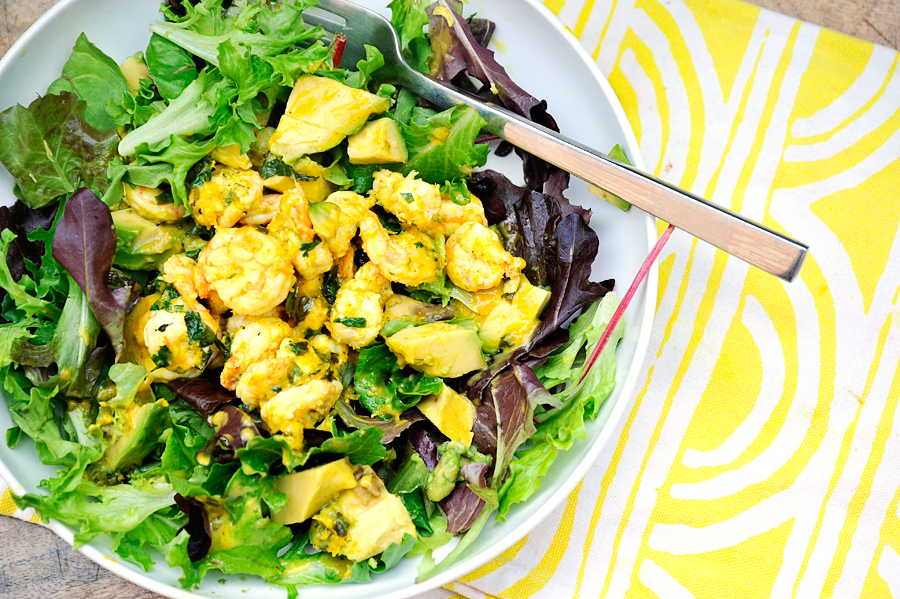
Add the shrimp and sauce and serve!


Tasty Kitchen Blog: Spicy Margarita Shrimp. Guest post by Georgia Pellegrini, recipe submitted by TK member Damielo.

This is a wonderful tangy and flavorful dish and would work well in so many forms. Even try skewering the shrimp and adding it to a summer barbecue! It will be bursting with flavor. Thank you to Damelio for sharing it with us!


Printable Recipe

Spicy Margarita Shrimp

4.46 Mitt(s) 13 Rating(s)13 votes, average: 4.46 out of 513 votes, average: 4.46 out of 513 votes, average: 4.46 out of 513 votes, average: 4.46 out of 513 votes, average: 4.46 out of 5

Prep Time:

Cook Time:

Difficulty: Easy

Servings: 2

2
x

Print Options

Page size Letter 3x5 4x6
Text Size Small Medium Large
Content Include description
Include prep time, etc.
Show image

Description

This marinade is easy and versatile; this dish can be made using shrimp, white fish, or chicken. Serve this as a meal on a bed of rice or greens, or serve alone on skewers for an appetizer.

Ingredients

  • 1 pound Shrimp, Raw, Peeled And Deviened
  • 1 whole Avocado, diced
  • FOR THE MARINADE:
  • 2 whole Limes
  • 2 whole Oranges
  • ¼ cups Olive Oil
  • ⅛ cups Tequila
  • 1 Tablespoon Triple Sec
  • ½ teaspoons Curry Powder
  • 1 teaspoon Salt
  • ¼ teaspoons Turmeric
  • ½ teaspoons Ground Cumin
  • ¼ teaspoons Cayenne Pepper
  • ¼ teaspoons Black Pepper
  • ¼ cups Fresh Cilantro, Chopped

Preparation Instructions

For the marinade: Zest the oranges and limes into a bowl. Juice the oranges and limes into the same bowl. Add remaining marinade ingredients. Whisk together, then add the shrimp. Refrigerate for about 1 hour (try not to go over, as the acid will start to “cook” the shrimp).

At this point I make a pot of rice, couscous, or quinoa (instead of cooking the grain in water, I cook in vegetable or chicken stock).

To cook the shrimp, remove from the marinade and either skewer and grill, or saute in a frying pan with a little olive oil. If using a pan, pat shrimp with paper towels first so the extra marinade doesn’t scorch in the pan. Remove shrimp from grill or pan and set aside.

Pour remaining marinade into the pan and cook until reduced by about half, about 5 minutes.

To serve: cover a plate with rice, couscous, quinoa, etc., or a bed of greens. Top this with the diced avocado, then the shrimp. Pour sauce over entire dish. This dish can be eaten hot or room temperature.


_______________________________________

There’s so much to say about Georgia, we don’t know where to start. Leaving Wall Street for the French Culinary Institute, followed by a stint at the Gramercy Tavern and La Chassagnette in France, her passion for food and food traditions are evident and inspiring. Visit her site at Georgia Pellegrini, where you’ll find more recipes, photos, learn all about her wonderful books Girl Hunter and Food Heroes, and enjoy her latest adventures.


Profile photo of Erika (TK)

Looks Delicious! Summer Weekend Burgers

Posted by in Looks Delicious!

Tasty Kitchen Blog: Looks Delicious! Summer Weekend Burgers

Daddio's Blue Ribbon Burger, submitted by TK member John of Patio Daddio BBQ. Grilled Cilantro Burger Sliders with Teriyaki and Pineapple, submitted by TK member Nancy of Coupon Clipping Cook.

 
It’s Friday! Even better, that indescribably horrid heatwave has finally broken ’round these parts, which means it’s safe to venture outdoors again. We’ve been wanting to fire up the grill for days now but it’s just been too hot and humid that I swear the meat arrives almost half-cooked after walking all 15 steps to our backyard grill.

This weekend, though, is a different story. In fact, it almost feels like a different planet. A two-week-long heatwave can do that to you. So, if like me, you’re planning some long-anticipated grill time, then boy do I have a couple of burgers for you. I spotted these recent TK submissions—both with an Asian twist—and can’t wait to try them.

Now you all know we love John of Patio Daddio BBQ, and I’m telling you, when he names a burger Daddio’s Blue Ribbon Burger, you want one. Or three. His burger features a jalapeno-cheese roll, grilled onions, and he kicks up his ketchup with gochujang, which is a Korean red fermented chili paste. It’s a serious burger.

Then we have these Grilled Cilantro Burger Sliders with Teriyaki and Pineapple from Nancy of Coupon Clipping Cook. She seasons her sliders with cilantro, red pepper flakes, green onions, and garlic, then serves them with homemade teriyaki sauce and grilled pineapple. Heaven.

So go fire up the grill this weekend and make some burgers! That is, if it doesn’t already feel like a grill outside. (That made no sense, I know.) If it’s too hot where you are, then do what I did the past two weeks and live on ice cream. (Apparently, I have neither sense nor shame.)

Enjoy the weekend everyone!


Printable Recipe

Daddio’s Blue Ribbon Burger

See post on patiodaddio’s site!
0.00 Mitt(s) 0 Rating(s)0 votes, average: 0.00 out of 50 votes, average: 0.00 out of 50 votes, average: 0.00 out of 50 votes, average: 0.00 out of 50 votes, average: 0.00 out of 5

Prep Time:

Cook Time:

Difficulty: Easy

Servings: 4

4
x

Print Options

Page size Letter 3x5 4x6
Text Size Small Medium Large
Content Include description
Include prep time, etc.
Show image

Description

A serious signature burger, seriously accessorized.

A custom blended burger nestled in a jalapeno-cheese roll smeared with a good dose of spicy ketchup. Then topped with a slice of medium cheddar cheese, chopped bacon, a slice of grilled onion, ripe tomato, and crisp lettuce. How can you go wrong?

Ingredients

  • 2 pounds Ground Beef (50% Chuck, 30% Tri-tip, And 20% Shoulder, Or 80/20)
  • 2 teaspoons Montreal Steak Seasoning (I Used McCormick's® Grill Mates®)
  • 4 slices White Onion (1/4-inch Thick Slices)
  • 3 Tablespoons Ketchup
  • 1 Tablespoon Gochujang Sauce (I Used Annie Chung's)
  • 4 slices Medium Cheddar Cheese (I Used Tillamook®)
  • 4 whole Jalapeno-cheese Rolls, Sliced Sandwich Style
  • 2 strips Bacon, Cooked And Chopped (I Used The Best On The Planet -- Benton's)
  • 8 slices Tomato (1/4-inch Thick Slices)
  • 4 leaves Green Leaf Lettuce, Washed And Patted Dry
  • Canola Oil Cooking Spray

Preparation Instructions

Note: I used a custom blend of beef, but if you don’t want to deal with custom blend, or you don’t have access to great beef, just use a good quality 80/20 ground beef.

Start your grill and prepare for direct cooking at high heat (450-500ºF). Put a cast iron griddle on the grates to preheat.

Divide the beef into four evenly sized balls (8 ounces each) and gently form them into 4-inch diameter patties of even thickness. Use your index finger to put an indentation in the center of each patty. This helps them stay flat while cooking. Season each side of each burger with 1/4 teaspoon of the steak seasoning then put the patties on a platter and set aside.

Thoroughly mix the ketchup and Gochujang sauce in a small bowl and set aside.

When the grill and griddle are preheated, put the burgers on the griddle and cook for four minutes. While the burgers are cooking, spray both sides of each onion slice with cooking spray and grill them on a vacant spot on the grill. Remove the onion slices to a plate once they’ve softened a little and have some grill marks.

After four minutes flip the burgers and cook them another four minutes, or until they reach an internal temperature of 145ºF. Add a slice of cheese to each burger during the last minute of cooking. When they are done remove them to a clean platter and set aside.

Caution: If you’re using standard pre-packaged ground beef, you must cook it to an internal temperature of 165ºF.

Toast the buns over direct heat until golden.

Smear half a tablespoon of the ketchup mixture on the cut side of each bun half. Add a burger to the bottom half of each bun and top each with a quarter of the chopped bacon, a slice of onion, two slices of tomato and a leaf of lettuce. Add the top bun.

Serve and enjoy!


Printable Recipe

See post on Nancy @ Coupon Clipping Cook’s site!
0.00 Mitt(s) 0 Rating(s)0 votes, average: 0.00 out of 50 votes, average: 0.00 out of 50 votes, average: 0.00 out of 50 votes, average: 0.00 out of 50 votes, average: 0.00 out of 5

Prep Time:

Cook Time:

Difficulty: Easy

Servings: 2

2
x

Print Options

Page size Letter 3x5 4x6
Text Size Small Medium Large
Content Include description
Include prep time, etc.
Show image

Description

These sliders will make your day. As a bonus they’re made with a quick and easy homemade teriyaki sauce.

Ingredients

  • FOR THE TERIYAKI SAUCE:
  • 2 cloves Garlic, Diced
  • ¼ cups Soy Sauce
  • 1 Tablespoon Plus 1 Teaspoon Hoisin Sauce
  • ¼ teaspoons Sesame Oil
  • 3 teaspoons Rice Vinegar
  • 1 can (8 Oz. Size) Sliced Pineapple, Pineapple And Juice, Divided
  • 3 teaspoons Honey
  • FOR THE CILANTRO BURGERS:
  • ¾ pounds Ground Beef
  • ¼ cups Chopped Cilantro
  • 1 teaspoon Dried Red Pepper Flakes
  • 2  Green Onions, diced
  • 4 dashes Salt
  • 1 clove Garlic, Diced
  • 4 slices Swiss Cheese
  • FOR THE ASSEMBLY:
  • 4 slices Canned Pineapple
  • 4 whole Slider Buns (Or Small Dinner Rolls)

Preparation Instructions

For the teriyaki sauce:

In a medium size saucepan, add the chopped garlic, soy sauce, Hoisin sauce, sesame oil, rice vinegar, and all of the pineapple juice from the 8 ounce can of sliced pineapple. Add the honey and stir all ingredients together. Cook the sauce on low to medium heat until it starts to thicken (about 15 to 20 minutes). Stir the sauce as it’s cooking. Once the sauce starts to thicken, remove pan from the heat and set aside.

For the cilantro burgers:

Heat the barbeque grill on medium heat. In a medium size bowl add the ground beef, cilantro, red pepper flakes, green onions, salt and garlic. Mix together and make 4 small thick patties.

When the grill is medium-hot add the burgers onto the grill and cook for about 4 to 5 minutes on each side (or longer if you prefer the burgers more well done). For the last minute of cooking time, place a slice of Swiss cheese on top of each burger. Remove burgers from the grill onto a plate, cover with foil and set aside.

For the assembly of the sliders:

While the burgers are cooking, add the slices of pineapple to the grill. As soon as you see grill marks on the bottom side of the pineapple (about 2 to 3 minutes), turn it over. Then as soon as there are grill marks on the other side, remove the pineapple from the grill onto a plate and set aside.

Slice the buns in half horizontally and lay them out with the cut sides facing up. Drizzle the teriyaki sauce on the sides that are facing up. Then add a slice of grilled pineapple and a cilantro burger to each bottom side of the bun. Next, drizzle more of the teriyaki sauce on top of the burger. Cover the slider with the top sides of the bun and serve warm. These can be served as is or topped with sliced tomatoes, fresh spinach leaves or lettuce and mayonnaise.


Profile photo of georgiapellegrini

Lemon Ricotta Blueberry Bread

Posted by in Baking, Step-by-Step Recipes

Tasty Kitchen Blog: Lemon Blueberry Ricotta Bread. Guest post by Georgia Pellegrini, recipe submitted by TK member Anita of Hungry Couple.

 
I’m not a big baker; I prefer to improvise in the kitchen, which doesn’t really work with baked goods. But I decided to be a little adventurous this time because I love how fluffy baked goods are when ricotta is incorporated. Also, blueberries are in their peak season! You will love this Lemon Blueberry Ricotta Bread from TK member Anita at Hungry Couple. It is sweet yet tangy from the lemon and super moist and fluffy from the ricotta. My taste testers absolutely devoured it.


Tasty Kitchen Blog: Lemon Blueberry Ricotta Bread. Guest post by Georgia Pellegrini, recipe submitted by TK member Anita of Hungry Couple.

To make it you will need: lemons, blueberries, eggs, vanilla, ricotta, butter, baking powder, salt, flour, buttermilk, and sugar.


Tasty Kitchen Blog: Lemon Blueberry Ricotta Bread. Guest post by Georgia Pellegrini, recipe submitted by TK member Anita of Hungry Couple.

Combine the eggs and sugar in a bowl and whisk until they are light yellow and fluffy.


Tasty Kitchen Blog: Lemon Blueberry Ricotta Bread. Guest post by Georgia Pellegrini, recipe submitted by TK member Anita of Hungry Couple.

You will see noticeable air bubbles and it will have a creamy appearance.


Tasty Kitchen Blog: Lemon Blueberry Ricotta Bread. Guest post by Georgia Pellegrini, recipe submitted by TK member Anita of Hungry Couple.

Next add the softened butter …


Tasty Kitchen Blog: Lemon Blueberry Ricotta Bread. Guest post by Georgia Pellegrini, recipe submitted by TK member Anita of Hungry Couple.

… and buttermilk. Combine well.


Tasty Kitchen Blog: Lemon Blueberry Ricotta Bread. Guest post by Georgia Pellegrini, recipe submitted by TK member Anita of Hungry Couple.

Then add the wonderful ricotta!


Tasty Kitchen Blog: Lemon Blueberry Ricotta Bread. Guest post by Georgia Pellegrini, recipe submitted by TK member Anita of Hungry Couple.

Whisk it until it is uniform in consistency.


Tasty Kitchen Blog: Lemon Blueberry Ricotta Bread. Guest post by Georgia Pellegrini, recipe submitted by TK member Anita of Hungry Couple.

Next add your flavorings, including vanilla …


Tasty Kitchen Blog: Lemon Blueberry Ricotta Bread. Guest post by Georgia Pellegrini, recipe submitted by TK member Anita of Hungry Couple.

… and lemon zest!


Tasty Kitchen Blog: Lemon Blueberry Ricotta Bread. Guest post by Georgia Pellegrini, recipe submitted by TK member Anita of Hungry Couple.

In a separate bowl, combine the flour, baking powder and salt.


Tasty Kitchen Blog: Lemon Blueberry Ricotta Bread. Guest post by Georgia Pellegrini, recipe submitted by TK member Anita of Hungry Couple.

Incorporate the dry ingredients into the wet until mixed.


Tasty Kitchen Blog: Lemon Blueberry Ricotta Bread. Guest post by Georgia Pellegrini, recipe submitted by TK member Anita of Hungry Couple.

Make the consistency as uniform as possible.


Tasty Kitchen Blog: Lemon Blueberry Ricotta Bread. Guest post by Georgia Pellegrini, recipe submitted by TK member Anita of Hungry Couple.

Then add the blueberries …


Tasty Kitchen Blog: Lemon Blueberry Ricotta Bread. Guest post by Georgia Pellegrini, recipe submitted by TK member Anita of Hungry Couple.

… and fold them in.


Tasty Kitchen Blog: Lemon Blueberry Ricotta Bread. Guest post by Georgia Pellegrini, recipe submitted by TK member Anita of Hungry Couple.

Pour the batter into a buttered and floured loaf pan and bake in a preheated 350ºF oven for 1 hour.


Tasty Kitchen Blog: Lemon Blueberry Ricotta Bread. Guest post by Georgia Pellegrini, recipe submitted by TK member Anita of Hungry Couple.

Let cool to room temperature and then dust with powdered sugar as desired and to make it look pretty, of course.


Tasty Kitchen Blog: Lemon Blueberry Ricotta Bread. Guest post by Georgia Pellegrini, recipe submitted by TK member Anita of Hungry Couple.

You will love this cake—it is moist, lemony, bursting with blueberries and just melts in your mouth. Thank you to Anita for sharing this with us! Please visit her website Hungry Couple for other delicious treats.


Printable Recipe

Lemon Blueberry Ricotta Bread

See post on Anita at Hungry Couple’s site!
4.88 Mitt(s) 8 Rating(s)8 votes, average: 4.88 out of 58 votes, average: 4.88 out of 58 votes, average: 4.88 out of 58 votes, average: 4.88 out of 58 votes, average: 4.88 out of 5

Prep Time:

Cook Time:

Difficulty: Easy

Servings: 10

10
x

Print Options

Page size Letter 3x5 4x6
Text Size Small Medium Large
Content Include description
Include prep time, etc.
Show image

Description

The delicious combination of blueberries and fresh lemon zest in an easy-to-make sweet quick bread.

Ingredients

  • 2 whole Eggs
  • 1-¼ cup Sugar
  • 1 stick Unsalted Butter, At Room Temperature
  • ½ cups Ricotta Cheese
  • 1 teaspoon Vanilla
  • 3 whole Lemons, Zest Only
  • ½ cups Buttermilk
  • 1-¾ cup All-purpose Flour
  • 2 teaspoons Baking Powder
  • ½ teaspoons Salt
  • 1 cup Blueberries
  • Powdered Sugar For Dusting (optional)

Preparation Instructions

Add the eggs and sugar to a large bowl and beat until thoroughly combined and lightened in color. Beat in the butter followed by the ricotta cheese, vanilla, lemon zest and buttermilk.

In a separate bowl, combine the flour, baking powder and salt. Beat the dry ingredients into the wet until mixed. Fold in the blueberries and mix by hand just until combined.

Pour the batter into a buttered and floured loaf pan and bake in a preheated 350ºF oven for 1 hour or until a cake tester comes out clean. Allow to cool before removing from the pan and dust with powdered sugar, if desired.


_______________________________________

There’s so much to say about Georgia, we don’t know where to start. Leaving Wall Street for the French Culinary Institute, followed by a stint at the Gramercy Tavern and La Chassagnette in France, her passion for food and food traditions are evident and inspiring. Visit her site at Georgia Pellegrini, where you’ll find more recipes, photos, learn all about her wonderful books Girl Hunter and Food Heroes, and enjoy her latest adventures.


Profile photo of Faith (An Edible Mosaic)

Crunchy Asian Slaw

Posted by in Step-by-Step Recipes

Tasty Kitchen Blog: Crunchy Asian Slaw. Guest post by Faith Gorsky of An Edible Mosaic, recipe submitted by TK member Andrea of Recipes for Divine Living.

 
Summer is synonymous with potlucks, picnics, and BBQs. Starting with Memorial Day and ending with Labor Day, and of course not forgetting Independence Day and regular backyard get-togethers, it seems like there’s something going on every week! Where I live, summer is a short and sweet affair so we have to make the most of it.

I know a lot of people who have a signature dish they make for summer parties. We usually ask everyone to choose a course and bring a dish to pass instead of planning the entire menu, but based on who is coming, we know exactly what we’ll be having for dinner. If my mom is coming, she’s bringing a side dish and it’s one of two things: her homemade taco salad or her homemade baked beans. I have a friend who is known for her killer chocolate chip cookies, and another friend who makes what I think is the best fruit salad in the world (I need to get her recipe—I have no idea why hers is so much better!).

I don’t really have a signature summer party dish. If there’s a type of dish that hasn’t been claimed, such as a side, meat, or dessert, I’ll just bring that. But then I saw Tasty Kitchen member Andrea’s recipe for this irresistible-looking Crunchy Asian Slaw, and this salad makes me want to claim it as my signature for future summer picnics! It’s fresh with bold flavors and a great nutty crunch factor. It’s the perfect summer party food.

Give it a try!


Tasty Kitchen Blog: Crunchy Asian Slaw. Guest post by Faith Gorsky of An Edible Mosaic, recipe submitted by TK member Andrea of Recipes for Divine Living.

Whip up the dressing first. You’ll need garlic, Fresno peppers, ginger, tamari or soy sauce, rice vinegar, honey, sesame oil, lime (my last one), olive oil, and salt and pepper.

I couldn’t find Fresno peppers so instead I used 1/2 teaspoon crushed red pepper flakes in place of each Fresno pepper (or you could use a jalapeño pepper for each Fresno pepper). Also, for the life of me I couldn’t find fresh ginger (which I usually never have trouble finding!), so I used 1 teaspoon fresh ginger in the squeeze tube. And I used Liquid Aminos instead of tamari or soy sauce because that’s what I had on hand. That’s the beauty of cooking (as opposed to baking)—recipes are usually quite forgiving!


Tasty Kitchen Blog: Crunchy Asian Slaw. Guest post by Faith Gorsky of An Edible Mosaic, recipe submitted by TK member Andrea of Recipes for Divine Living.

Mince the garlic or grate it on a microplane.

Whisk together all the dressing ingredients except the olive oil, salt, and pepper. Then gradually stream in the olive oil as you whisk.


Tasty Kitchen Blog: Crunchy Asian Slaw. Guest post by Faith Gorsky of An Edible Mosaic, recipe submitted by TK member Andrea of Recipes for Divine Living.

I’m normally a one-woman show, but I was lucky enough to make this on a day when my husband was home, so he is my hand model.

Once it’s whisked up, give the dressing a taste and add salt and pepper if desired.


Tasty Kitchen Blog: Crunchy Asian Slaw. Guest post by Faith Gorsky of An Edible Mosaic, recipe submitted by TK member Andrea of Recipes for Divine Living.

Here’s how the dressing looks finished. Set it aside for now and move on to the veggies.


Tasty Kitchen Blog: Crunchy Asian Slaw. Guest post by Faith Gorsky of An Edible Mosaic, recipe submitted by TK member Andrea of Recipes for Divine Living.

For the slaw you’ll need: Napa cabbage, red cabbage, carrot (I used 2 small-medium carrots instead of 1 large), red pepper, green onion, butter, crushed ramen noodles, sesame seeds, slivered almonds, and lime (I was out of lime, so I grabbed a lemon instead).

A quick tip: I’ve found that the easiest way to crush ramen noodles is while they’re still in the package. You can do it with your hand or using a heavy object (like a rolling pin) but don’t be too rough or the package will explode open!


Tasty Kitchen Blog: Crunchy Asian Slaw. Guest post by Faith Gorsky of An Edible Mosaic, recipe submitted by TK member Andrea of Recipes for Divine Living.

Thinly slice the Napa cabbage …


Tasty Kitchen Blog: Crunchy Asian Slaw. Guest post by Faith Gorsky of An Edible Mosaic, recipe submitted by TK member Andrea of Recipes for Divine Living.

And the purple cabbage (note that there is more cabbage pictured than what you need in this salad; I was also chopping it for something else).


Tasty Kitchen Blog: Crunchy Asian Slaw. Guest post by Faith Gorsky of An Edible Mosaic, recipe submitted by TK member Andrea of Recipes for Divine Living.

Shred the carrot.


Tasty Kitchen Blog: Crunchy Asian Slaw. Guest post by Faith Gorsky of An Edible Mosaic, recipe submitted by TK member Andrea of Recipes for Divine Living.

Chop the red pepper.


Tasty Kitchen Blog: Crunchy Asian Slaw. Guest post by Faith Gorsky of An Edible Mosaic, recipe submitted by TK member Andrea of Recipes for Divine Living.

Slice the scallion.

Add the cabbages, carrot, red pepper, and 3 of the scallions into a large bowl. Now it’s time to toast the ramen and up the crunch factor even more.


Tasty Kitchen Blog: Crunchy Asian Slaw. Guest post by Faith Gorsky of An Edible Mosaic, recipe submitted by TK member Andrea of Recipes for Divine Living.

Melt the butter in a medium skillet over medium heat.


Tasty Kitchen Blog: Crunchy Asian Slaw. Guest post by Faith Gorsky of An Edible Mosaic, recipe submitted by TK member Andrea of Recipes for Divine Living.

Add the crushed ramen, slivered almonds, and sesame seeds and cook until browned, about 4 to 5 minutes, stirring frequently. It will smell amazingly nutty and delicious. Let this mixture cool for a few minutes.


Tasty Kitchen Blog: Crunchy Asian Slaw. Guest post by Faith Gorsky of An Edible Mosaic, recipe submitted by TK member Andrea of Recipes for Divine Living.

Add the dressing and ramen mixture to the bowl of veggies.


Tasty Kitchen Blog: Crunchy Asian Slaw. Guest post by Faith Gorsky of An Edible Mosaic, recipe submitted by TK member Andrea of Recipes for Divine Living.

Give it a good toss. Sprinkle the remaining 2 sliced scallions on top along with additional sesame seeds if you want.


Tasty Kitchen Blog: Crunchy Asian Slaw. Guest post by Faith Gorsky of An Edible Mosaic, recipe submitted by TK member Andrea of Recipes for Divine Living.

Then serve up this gorgeous slaw! Instead of squeezing the extra lime on top and tossing it together, I like to serve the slaw with lime wedges on the side so people can add more if they want.

It goes well with just about anything you can whip up on the grill: BBQ chicken, burgers, steak, or even seafood. Signature dish, anyone?


Tasty Kitchen Blog: Crunchy Asian Slaw. Guest post by Faith Gorsky of An Edible Mosaic, recipe submitted by TK member Andrea of Recipes for Divine Living.

A big thank you to Andrea for sharing her delicious recipe on Tasty Kitchen! Be sure to check out her beautiful blog Recipes for Divine Living for more inspiration.


Printable Recipe

Crunchy Asian Slaw

See post on Andrea’s site!
0.00 Mitt(s) 0 Rating(s)0 votes, average: 0.00 out of 50 votes, average: 0.00 out of 50 votes, average: 0.00 out of 50 votes, average: 0.00 out of 50 votes, average: 0.00 out of 5

Prep Time:

Cook Time:

Difficulty: Easy

Servings: 4

4
x

Print Options

Page size Letter 3x5 4x6
Text Size Small Medium Large
Content Include description
Include prep time, etc.
Show image

Description

This salad is fast and easy to make and has great crunch. Awesome dressing!

Ingredients

  • FOR THE SALAD:
  • 3 cups Napa Cabbage, Thinly Sliced
  • 2 cups Green Or Purple Cabbage, Thinly Sliced
  • 1  Large Carrot, Shredded
  • ½  Red Pepper, Chopped
  • 5  Green Onions, Chopped (use 2 Of Them For Garnish)
  • 2 Tablespoons Butter
  • 1 package Ramen Noodles, Noodles Only, 3 Ounce Package
  • 1 Tablespoon Sesame Seeds + More For Garnish
  • ½ cups Slivered Almonds
  • 1 whole Lime, Juiced
  • FOR THE DRESSING:
  • 1 clove Garlic, Minced
  • 2  Fresno Peppers, Seeded And Minced
  • 1 teaspoon Ginger, Freshly Microplane Grated
  • 1 Tablespoon Tamari (regular Soy Sauce Will Work)
  • 1 Tablespoon Rice Vinegar, Preferably Seasoned
  • 1 Tablespoon Honey
  • 1 Tablespoon Sesame Oil
  • 1 whole Lime, Juiced
  • ¼ cups Olive Oil
  • 1 pinch Salt And Pepper, If Needed

Preparation Instructions

Prepare dressing by combining all of the listed ingredients (except olive oil and salt/pepper) in a medium-sized bowl. While whisking everything together, slowly stream in oil as you continue whisking. Taste and add salt and pepper if needed. Set aside.

In a large bowl combine cabbages, carrot, red pepper and 3 of the chopped green onions. Set aside.

Melt butter in a skillet over medium heat. Crunch up the ramen noodles and add them into the melted butter. Add sesame seeds and slivered almonds as well and brown everything, stirring often. Once it’s nicely browned, remove the skillet from the heat.

Add the noodle mixture to the cabbage mixture along with dressing. Toss to combine. Juice the lime over the top of the salad. Add remaining 2 green onions and more sesame seeds, if desired. Toss to combine, then serve.


_______________________________________

Faith Gorsky is the writer, recipe developer, photographer, and food stylist behind the blog An Edible Mosaic. She lives in Upstate New York and loves to travel, especially to places steeped in rich culture and history. She also enjoys reading, vintage shopping, watching movies, and is enamored with ancient cultures. She just released her first cookbook, “An Edible Mosaic: Middle Eastern Fare with Extraordinary Flair” (Tuttle Publishing), a collection of authentic Middle Eastern recipes handed down to her from her husband’s family.


Profile photo of Amber {Sprinkled With Flour}

Lemon Sugar Cookies With Lemon Buttercream Frosting

Posted by in Baking, Step-by-Step Recipes

  If there is one surefire way to make any dessert even better, it has to be turning it into a lemon concoction. I love lemons, and I especially love lemon desserts. Now that summer is in full swing, it’s the perfect time to enjoy all the magic that can come from the humble lemon. […]

Profile photo of Erika (TK)

Looks Delicious! Cilantro Sauces

Posted by in Looks Delicious!

  I love sauces. They’re a quick and easy way to make simple grilled meats and vegetables extra special, and for me, a good sauce can take any wrap or sandwich to moreish levels. I’ve had my eye on this pair of cilantro sauces from TK member Jessie ever since she submitted them: Cilantro Pesto […]

Profile photo of Faith (An Edible Mosaic)

Banana Split Cake Cups

Posted by in Step-by-Step Recipes

  Everyone I know is a fan of banana splits. Literally everyone, no matter how picky an eater they are. (Editor’s note: Hear that, Ree? Hmm?) And I’ve sort-of found that banana splits have magic properties. Take someone who’s having a bad day, put a banana split in front of them, and watch their face […]

Profile photo of Erika (TK)

Looks Delicious! 4th of July Drink Ideas

Posted by in Holidays, Looks Delicious!

  Happy Wednesday! Are you busy with your big holiday preparations? Got the grill ready, have a spare propane tank or bag of charcoal? Pie dough chilling in the fridge? Know where to get ice tomorrow for the cooler? Most folks usually have their entire menu already set by now. But if you have room […]