No Reviews
You must be logged in to post a review.

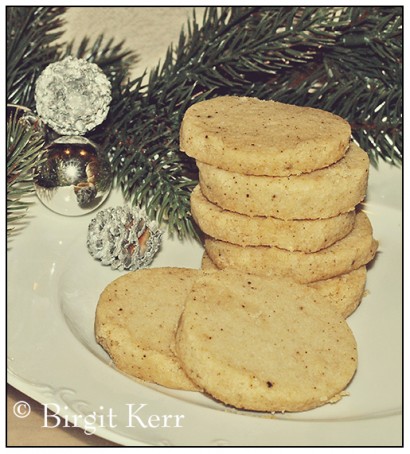
They have a really unique taste which comes from caramelizing the butter solids prior to creaming the butter. So, let me say this right off the bat – no, these cannot be done with margarine. It NEEDS TO BE BUTTER!
That’s the only way to achieve the unique taste! And as the name may suggest, the texture is like very fine sand – delicious buttery, sweet, delicious sand!
For step-by-step photos, please click on the above Related Blog Post.
1. Place the butter in a sauce pan and melt. It helps for this pan not to be a dark coated pan, as you can’t really see the butter change color. A stainless steel pan would work better. Keep the melted butter at a simmer, stirring the foam away occasionally so you can see the bottom of the pan.
DO NOT WALK AWAY from the pan – the darkening will happen pretty quickly!
As soon as the butter solids on the bottom turn a darkish golden brown, take the pan off the heat and pour the melted butter into a heavy glass dish. Don’t leave it in the saucepan as it might continue darkening the butter.
Let it cool at room temperature for 1 hour, then in the refrigerator for at least another hour or overnight.
2. Place the caramelized butter, sugar, salt and vanilla in a mixing bowl and beat (with the whisk attachment) on medium high for 2-3 minutes.
Add the flour and milk and combine the dough with the paddle attachment. The consistency of the dough should be like fine, damp sand. It should be crumbly, but when you pick some up and press between your fingers it will just hold together!
3. When thoroughly combined, empty the dough onto a sheet of aluminum foil, plastic wrap or parchment paper. Form a log of about 2-2.5 inches in diameter. Make it as even as possible. Twist the ends of the paper and place the dough log in the refrigerator overnight.
4. The next day, take out the dough log about 15 minutes before you are planning on baking the cookies. Preheat the oven to 320 F.
With a very sharp knife, make 1/4 inch slices and place on a cookie sheet. You can put these relatively close together as they won’t really rise.
If your log ended up a little messy and you like the cookies to be more uniform, just use a round cookie cutter to cut out rounds of the slices.
5. Bake for 10-12 minutes or until the edges of the cookies turn just golden brown. Once done, take the cookie sheet out of the oven, but DO NOT touch them until they are cooled down completely. They will totally fall apart when they are still warm but start to hold together quite nicely once they are cool!
They are best within the first 3 days of baking! Not that they usually last any longer anyway!
Makes about 35 cookies.
Enjoy!
3 Comments
Leave a Comment
You must be logged in to post a comment.
Birgit Kerr on 2.21.2012
Oops, that is supposed to be 375 GRAMS of flour, not cups! Thanks for catching that!
westmonster on 11.30.2010
Thank you for the very thorough instructions! One question though: How many cups of flour are needed? You wrote 375… is that 3 3/4 maybe?
mrswebbfisher on 8.23.2009
THIS RECIPE SOUNDS YUMMY. WILL HAVE TO TRY. GREAT PARTY COOKIE.