The Pioneer Woman Tasty Kitchen
Profile photo of Erika (TK)

Let’s Talk Gravy

Posted by in Holidays, Kitchen Talk

Welcome to part 2 of Kitchen Talk this week! Today, we’ll talk about gravy. Because gravy’s where it’s at, friends. So here we go:

Why do they call it gravy? Is it very, very somber? Is it so delicious it could raise the dead?

Share your answers below! Inquiring minds want to know.

Just kidding. (I’m not doing that again, promise.)


Tasty Kitchen Blog: Let's Talk Gravy!

Gravy. Luscious, rich gravy. I know I confessed that roasting a turkey is not my favorite thing to do in the kitchen or even my favorite thing to eat, but gravy is another matter altogether. I’ll rarely pass up gravy. I love it on mashed potatoes, on burgers, fries, meatballs, biscuits, plain rice, and pretty much anything you put on my plate. Homemade gravy is the best, and can elevate even a mediocre bird to star status. So tell us:

What are your favorite tips for making gravy?


Tasty Kitchen Blog: Let's Talk Gravy!

If you despise liver and the mere thought of it makes you gag, you can skip to the next paragraph. If you’re on the fence about it, my tip is to give it a chance because I think it adds such a deep, meaty flavor to gravy. Most folks can’t get past the idea of liver bits in their gravy, so what I do is make gravy the usual way but leave it slightly loose. When the gravy is done, I whisk in a tablespoon or two of pate, then take the gravy off heat. If I’m really feeling naughty, I’ll sauté some chopped mushrooms in a little butter until browned in the edges and throw that in the gravy as well. And if I’m feeling naughty and crazy, I’ll throw the sautéed mushrooms and pate into a blender with a cup of the loose gravy and blend it until smooth. I mix that into the gravy with a touch of cream and sherry because I like to live on the edge. Then I tell everyone I forgot to make gravy and keep it all to myself.

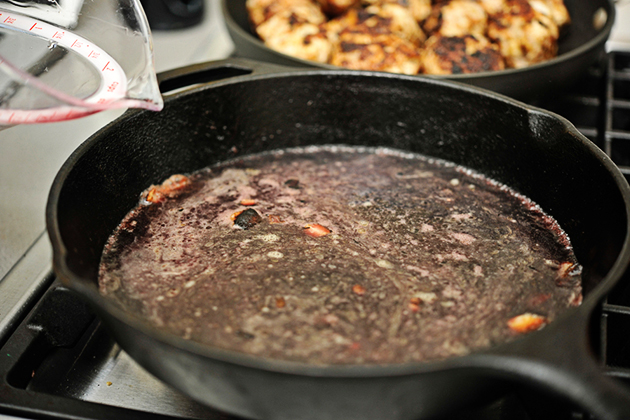
Nanci’s favorite tip is to use the drippings from the fresh roasted turkey and make the gravy right at the end before serving. She says if you’d like to have extra broth for the gravy, you can boil the neck and giblets (except the liver) in a little water with salt and pepper. She typically brings the giblet mixture to a boil then lowers the heat to low and cooks that for 2 hours. If you need to thicken your gravy, Nanci says remember never to add dry flour or cornstarch directly into the hot liquid. Mix some flour or cornstarch with a bit of cold water before adding it into the hot gravy, drizzling it in slowly and whisking rapidly. She prefers flour instead of cornstarch because she feels it has better flavor for thickening gravy.

Betsy’s tip is one she learned from Ree, and that’s to use low-sodium chicken broth. She says it’s a must, especially if you brine your turkey. She adds, “When you make the roux, make sure to let it brown well before adding the other liquids. You don’t want that raw flour flavor.” Her sister-in-law likes to add a glug of half-and-half toward the end just to give it a bit more creaminess, and Betsy agrees that it can’t hurt any.


Tasty Kitchen Blog: Let's Talk Gravy! (The Best Turkey Gravy Ever, submitted by TK member Amanda of I am Mommy, I am Baker)

Finally, Tasty Kitchen member Amanda has a great tip for making The Best Turkey Gravy Ever that I can’t wait to try. (Click on her gravy photo above to get the printable recipe, though really, it’s so genius yet incredibly simple that you probably won’t even need to print it out.) Her tip involves basting the turkey with bacon grease one hour before it’s done. That’s it. Then you make gravy your usual way, and I can already imagine the kind of flavor that bacon grease will add to the drippings.


Tasty Kitchen Blog: Let's Talk Gravy!

 
How about you? Do you have any favorite tips for making gravy? Let’s share!


Profile photo of Erika (TK)

Let’s Talk Turkey

Posted by in Holidays, Kitchen Talk

Tasty Kitchen Blog: Let's Talk Turkey!

 
It’s time for a special two-part edition of Kitchen Talk, and today, our topic is turkey. So, let’s have it:

Why do they call 3 strikes in a row a turkey?

Leave your comments below, then stay tuned tomorrow for another related topic!

Just kidding. (Although I really do want to know why.)

Okay, seriously now. Here’s our topic for today:

What are your favorite tips for preparing a whole turkey?


Tasty Kitchen Blog: Let's Talk Turkey!

I confess, cooking a whole turkey intimidates me. It’s huge, it takes hours in the oven, it’s huge, it seems to take forever to defrost properly, and it’s huge. I think I was in my early twenties when I first laid eyes on a whole roasted turkey. I only remember that it took up almost the entire table. I don’t recall enjoying it all that much; I think it was dry and a bit bland.

Years later, my sister-in-law had an extra turkey in her freezer and gave it to me. I had watched enough Food Network shows to be convinced that brining was the way to go, so I went with an Emeril concoction that involved apple cider, beer, cinnamon sticks, cloves, peppercorns, orange zest, garlic, ginger, and salt. Shortly after putting the turkey into the murky brine, we had a family emergency and I ended up having to leave the turkey in the fridge brining for almost 3 days. We roasted it anyway (not sure if that was completely safe, but we’re all still alive so far) and it was super moist and tasted like honey roasted turkey. As a bonus, I reheated leftovers in a skillet with some butter and smoked paprika and had smoked honey roasted turkey sandwiches for about 17 days.

I realize it’s not a very exciting turkey story, but I really don’t have much turkey cooking experience. I do know that I once tasted a whole fried turkey that was later basted with spicy barbecue sauce and I think that is still the best turkey I’ve ever had. But frying a whole turkey scares me (because it’s huge!) so please invite me over if you have a responsible adult, preferably a fireman, frying a turkey for dinner.


Tasty Kitchen Blog: Let's Talk Turkey!

My only tip is a basic one: brine, and use a brining bag. I used to balk at spending money for brining bags, but really, it’s the best way to go. You end up needing so much more brining liquid if you use a giant pail, and it’s unwieldy. And did I mention you’re going to need a big pail? For the huge turkey?

Nanci is much better at roasting turkeys than I am, and the biggest tip she can give is to get your turkey early if buying it frozen and let it thaw in a pan in the refrigerator for several days. Big turkeys can take 5 to 7 days to properly thaw. It’s hard to safely rush thawing a turkey so it’s best to plan ahead. She says, “I know. Your fridge feng shui will be off with that monster in there for so long but hang in there. Or buy fresh the day before! And obviously don’t forget to clean out both cavities before you cook the turkey (been there, done that, and it’s a mess). It’s also key to use a meat thermometer or pop-up timer because many times it will get fully cooked before you expect it to be done.”

Ree stopped by to share her favorite tip with us, too. She says, “If you brine your turkey, rinse it then soak it in a sink of cold water for 15 minutes after removing it from the brine. That helps with the issue of salty drippings.”


Tasty Kitchen Blog: Let's Talk Turkey!


Now let’s hear from you! What tips do you have for preparing a whole turkey? Do you brine? If you do, have any favorite brine recipes or flavors? Do you have a special technique for carving the bird when it’s done? Share your wisdom below, and do come back tomorrow for part two of this week’s Kitchen Talk!


Profile photo of georgiapellegrini

Apple Meatballs in Wine Sauce

Posted by in Step-by-Step Recipes

Tasty Kitchen Blog: Apple Meatballs in Wine Sauce. Guest post by Georgia Pellegrini, recipe submitted by TK member Nancy of Coupon Clipping Cook.

 
I love discovering new, creative ways to incorporate seasonal fruits into traditional dishes, like these Apple Meatballs in Wine Sauce from Tasty Kitchen member Nancy. You are going to love these—they’re full of texture and sweet and tangy flavor.


Tasty Kitchen Blog: Apple Meatballs in Wine Sauce. Guest post by Georgia Pellegrini, recipe submitted by TK member Nancy of Coupon Clipping Cook.

For the meatballs, you will need: ground turkey, ground pork, a diced apple (I recommend a finer dice), diced onion (a finer dice as well), a diced clove of garlic, grated fresh ginger root, breadcrumbs, an egg, red pepper flakes, ground black pepper, and olive oil.

For the wine sauce, you will need red wine, barbecue sauce, and teriyaki sauce.


Tasty Kitchen Blog: Apple Meatballs in Wine Sauce. Guest post by Georgia Pellegrini, recipe submitted by TK member Nancy of Coupon Clipping Cook.

Add all the meatball ingredients into a bowl except the olive oil.


Tasty Kitchen Blog: Apple Meatballs in Wine Sauce. Guest post by Georgia Pellegrini, recipe submitted by TK member Nancy of Coupon Clipping Cook.

Now go on and get in there with those pretty little hands, combining all ingredients.


Tasty Kitchen Blog: Apple Meatballs in Wine Sauce. Guest post by Georgia Pellegrini, recipe submitted by TK member Nancy of Coupon Clipping Cook.

Form your meatballs, about golfball-sized like so.


Tasty Kitchen Blog: Apple Meatballs in Wine Sauce. Guest post by Georgia Pellegrini, recipe submitted by TK member Nancy of Coupon Clipping Cook.

Pour olive oil into a skillet so that it covers the bottom of the pan.


Tasty Kitchen Blog: Apple Meatballs in Wine Sauce. Guest post by Georgia Pellegrini, recipe submitted by TK member Nancy of Coupon Clipping Cook.

Once the oil is hot, carefully place your formed meatballs into the skillet. Don’t worry if they’re a little snug in there.


Tasty Kitchen Blog: Apple Meatballs in Wine Sauce. Guest post by Georgia Pellegrini, recipe submitted by TK member Nancy of Coupon Clipping Cook.

Cook for several minutes until browned on the outside, cooked through, and no longer pink on the inside. Then set the meatballs aside on a plate.


Tasty Kitchen Blog: Apple Meatballs in Wine Sauce. Guest post by Georgia Pellegrini, recipe submitted by TK member Nancy of Coupon Clipping Cook.

Keeping all of the crunchy leftovers in the pan, mix in the wine and stir.


Tasty Kitchen Blog: Apple Meatballs in Wine Sauce. Guest post by Georgia Pellegrini, recipe submitted by TK member Nancy of Coupon Clipping Cook.

Now stir in the barbecue sauce …


Tasty Kitchen Blog: Apple Meatballs in Wine Sauce. Guest post by Georgia Pellegrini, recipe submitted by TK member Nancy of Coupon Clipping Cook.

Then the teriyaki sauce.


Tasty Kitchen Blog: Apple Meatballs in Wine Sauce. Guest post by Georgia Pellegrini, recipe submitted by TK member Nancy of Coupon Clipping Cook.

Once the wine sauce is heated through, gently place the meatballs back into the skillet of sauce.


Tasty Kitchen Blog: Apple Meatballs in Wine Sauce. Guest post by Georgia Pellegrini, recipe submitted by TK member Nancy of Coupon Clipping Cook.

Carefully mix the meatballs in the wine sauce, spooning the sauce over the meatballs to heat them through.


Tasty Kitchen Blog: Apple Meatballs in Wine Sauce. Guest post by Georgia Pellegrini, recipe submitted by TK member Nancy of Coupon Clipping Cook.

Put these on the dinner table, and watch them disappear like magic!

Thanks for the recipe, Nancy! For other wonderful dishes like this, visit her site Coupon Clipping Cook.


Printable Recipe

Apple Meatballs in Wine Sauce

See post on Nancy @ Coupon Clipping Cook’s site!
5.00 Mitt(s) 2 Rating(s)2 votes, average: 5.00 out of 52 votes, average: 5.00 out of 52 votes, average: 5.00 out of 52 votes, average: 5.00 out of 52 votes, average: 5.00 out of 5

Prep Time:

Cook Time:

Difficulty: Easy

Servings: 6

6
x

Print Options

Page size Letter 3x5 4x6
Text Size Small Medium Large
Content Include description
Include prep time, etc.
Show image

Description

Meatballs made with diced apples, ground turkey and pork in a wine sauce.

Ingredients

  • FOR THE MEATBALLS:
  • 1-¼ pound Ground Turkey
  • ¾ pounds Ground Pork
  • 1 whole Apple (Granny Smith Works Well)
  • ½ cups Diced Onion (or 1/2 Of A Small Onion)
  • 1 clove Garlic
  • 1 teaspoon Diced Fresh Ginger Root
  • ½ cups Bread Crumbs (panko Works Well)
  • 1 whole Egg
  • 1 teaspoon Red Pepper Flakes
  • 1 teaspoon Ground Black Pepper
  • ¼ cups Olive Oil (enough To Cover The Bottom Of Your Skillet)
  • FOR THE SAUCE:
  • 1 cup Red Wine
  • ¾ cups Barbeque Sauce
  • ¾ cups Teriyaki Sauce
  • Sesame Seeds, Chopped Green Onions, Chives, For Garnish (optional)

Preparation Instructions

For the meatballs:
Peel and dice the apple. Dice the onion, garlic and ginger root.

Put the ground turkey and pork into a large bowl. Add to the bowl all of the prepped veggies and the remaining meatball ingredients – everything except for the olive oil.

Roll the meat into balls that are a little bit smaller than a golf ball and set them on a plate.

In a large skillet pour in the olive oil so that it covers the bottom of the pan. Heat it over medium heat and once it’s hot, cook the meatballs for several minutes until browned on the outside and no longer pink on the inside. Once cooked, set the meatballs aside on a clean plate.

For the wine sauce:
From the skillet where the meatballs were cooked, keeping all of the crunchy leftovers in the pan, carefully drain out just the excess oil into a separate heat proof container such as a coffee mug (when the excess oil is cool, discard it).

In the skillet with the crunchy leftovers, mix in the wine and stir. Stir in the teriyaki and barbeque sauces and heat the mixture through. Then put the meatballs back into the skillet with the wine sauce. Gently mix the meatballs in the wine sauce until the meatballs are covered with the sauce and the meatballs are heated back up.

Serve over white rice.

Garnish with sesame seeds, chopped green onions and/or chives.


_______________________________________

There’s so much to say about Georgia, we don’t know where to start. Leaving Wall Street for the French Culinary Institute, followed by a stint at the Gramercy Tavern and La Chassagnette in France, her passion for food and food traditions are evident and inspiring. Visit her site at Georgia Pellegrini, where you’ll find more recipes, photos, learn all about her wonderful books Girl Hunter and Food Heroes, and enjoy her latest adventures.


Profile photo of Erika (TK)

The Theme is … Leftover Candy!

Posted by in The Theme Is...

Tasty Kitchen Blog: The Theme is Leftover Candy!

 
I’m going to take a wild guess and say quite a few of you may have a tad too much candy in the house right now. (Not that there’s anything wrong with that.) Or you might be tempted by the ubiquitous candy sales and specials that stores put up right after October 31, and a bag or two could conceivably find their way to your cart all on their own. Don’t laugh, I’ve seen it happen.

So what do you do with all that extra candy? Short of just plain sitting on the couch with a bowlful and having at it, of course. If that’s not your style, or if the presence of house guests means you need to temporarily feign some semblance of candy manners, here are a few ways to put that lovely candy to good use.


Tasty Kitchen Blog: The Theme is Leftover Candy! (Leftover Candy Hand Pies from TK member Kate of Diethood)

Leftover Candy Hand Pies: super simple and great slightly warm with a scoop of ice cream. All you need is three ingredients—two, really, if your leftover candy includes plain dark chocolate.


Tasty Kitchen Blog: The Theme is Leftover Candy! (Pies)

Tasty Kitchen Blog: The Theme is Leftover Candy! (Reese’s Peanut Butter and Chocolate Pretzel-Crust Pie from TK member Anita of Hungry Couple) Tasty Kitchen Blog: The Theme is Leftover Candy! (Chocolate Candy Bar Pie from TK member Amy Johnson of She Wears Many Hats)

Or go for the big guns and make whole pies. You can whip up a Chocolate Candy Bar Pie if your leftover candy consists mostly of plain chocolate, or make a Reese’s Peanut Butter and Chocolate Pretzel-Crust Pie if you have leftover pretzels and peanut butter candy!


Tasty Kitchen Blog: The Theme is Leftover Candy! (Take 5 Candy Bar Cookies from TK member Courtney of Neighborfood)

Take 5 Candy Bar Cookies: big cookies with big flavor, thanks to chocolate chunks, Take 5 candy bar pieces, and the salty crunch of pretzels. Go ahead and substitute your favorite leftover candy bar pieces!


Tasty Kitchen Blog: The Theme is Leftover Candy! (Cookie Bars)

Tasty Kitchen Blog: The Theme is Leftover Candy! (Sweet and Salty Candy Bar Blondies from TK member Lauren of Keep it Sweet Desserts) Tasty Kitchen Blog: The Theme is Leftover Candy! (Reese’s Peanut Butter Caramel Bars from TK member Tanya Schroeder of Lemons for Lulu)

Keeping with the cookie and sweet and salty theme, try these Sweet and Salty Candy Bar Blondies! They’re gooey and chewy and packed with honey roasted peanuts, Reese’s pieces, and Heath bars. Or skip the peanuts and go for the Reese’s Peanut Butter Caramel Bars instead. They have peanut butter, caramel candies, chocolate chips, and Reese’s peanut butter cups.

Of course, there are other options too, like chocolate bark and fudge. Or you can chop them up into small pieces, find an excuse to invite friends, family, and kids over for dessert and set up an ice cream bar with lots of candy toppings!

How about you? Any suggestions for re-purposing leftover candy? Actually, do you even have any leftover candy? If don’t, you might want to pick some up anyway and try one of the recipes here. You won’t regret it, I promise.

Have a wonderful chocolate-coated, caramel-filled weekend, everyone!