
No Reviews
You must be logged in to post a review.
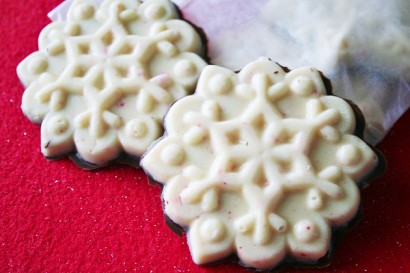
Dress up a holiday gift-giving favorite with candy molds!
Serving: 9 servings (each serving equals 2 individual 3″ pieces).
This will take about 10 minutes prep time, 10 minutes of active cooking (melting chocolate) time plus 30 minutes to 1 hour of chill time.
Special equipment: 6 Wilton snowflake candy molds with three 3″ snowflake shapes each. I bought mine at Joann Fabrics for around $1 each on sale.
1. Place candy canes into a Ziplock bag (I usually double bag because the candy can poke holes in one bag). Seal the bag. Using a mallet or even a hammer if you’re like me and can’t find the mallet when you need it, pound on those candy canes until they are crushed into tiny bits. This is a great job for kids to do, supervised of course. Or, a great job to do if you are really, really pissed and need to get some aggression out. Either reason yields the same results. Set aside.
2. In a double boiler melt the white chocolate, stirring consistently until melted. If you don’t have a double boiler, just put the chocolate into a heatproof bowl (I use one of our large, heatproof glass mixing bowls) and then place the bowl on top of a medium saucepan that has enough water simmering in the bottom of it to almost touch the bowl of chocolate. (Note: you can also melt white chocolate in the microwave. But I have found that white chocolate does not melt as evenly as regular chocolate does when nuked. So I prefer the stovetop method to ensure a smooth white chocolate mix).
3. When the white chocolate is almost totally melted, add the crushed candy canes. Stir until the candy cane bits are completely mixed in. Stir in the peppermint extract. Remove the white chocolate candy cane mixture from heat.
4. Spoon the mixture into each candy mold, carefully ensuring that the white chocolate covers the entire bottom surface of each mold and goes slightly up the sides. Do not fill it all the way to the top of the mold! Place the candy mold trays aside in the refrigerator to chill.
5. Melt the dark chocolate in the microwave at 30 second intervals until just melted. Keep heating in 30 second intervals until it’s melted. Make sure to stir in between intervals.
6. When the white chocolate peppermint molds are slightly set, take the candy mold trays out of the refrigerator and then carefully spoon the melted dark chocolate over the slightly chilled white chocolate mixture in each mold.
7. Place the candy mold trays back into the refrigerator to chill until the dark chocolate has hardened. Take the trays out of the refrigerator. Flip them over onto a plate or other flat resting surface, and gently push out the chocolate snowflakes. If the chocolate is completely set, the shapes should pop right out as soon as you flip over the trays.
8. Package them up in pretty wrapping. Then keep them in the refrigerator until you are ready to give them as gifts! Don’t forget to keep a few in the fridge for yourself and your family.
Prep: Cook:
Serves: 8 Level: Easy

Prep: Cook:
Serves: 10 Level: Easy
Prep: Cook:
Serves: 8 Level: Easy

Prep: Cook:
Serves: 12 Level: Easy
Prep: Cook:
Serves: 24 Level: Easy


No Comments
Leave a Comment!
You must be logged in to post a comment.