
No Reviews
You must be logged in to post a review.
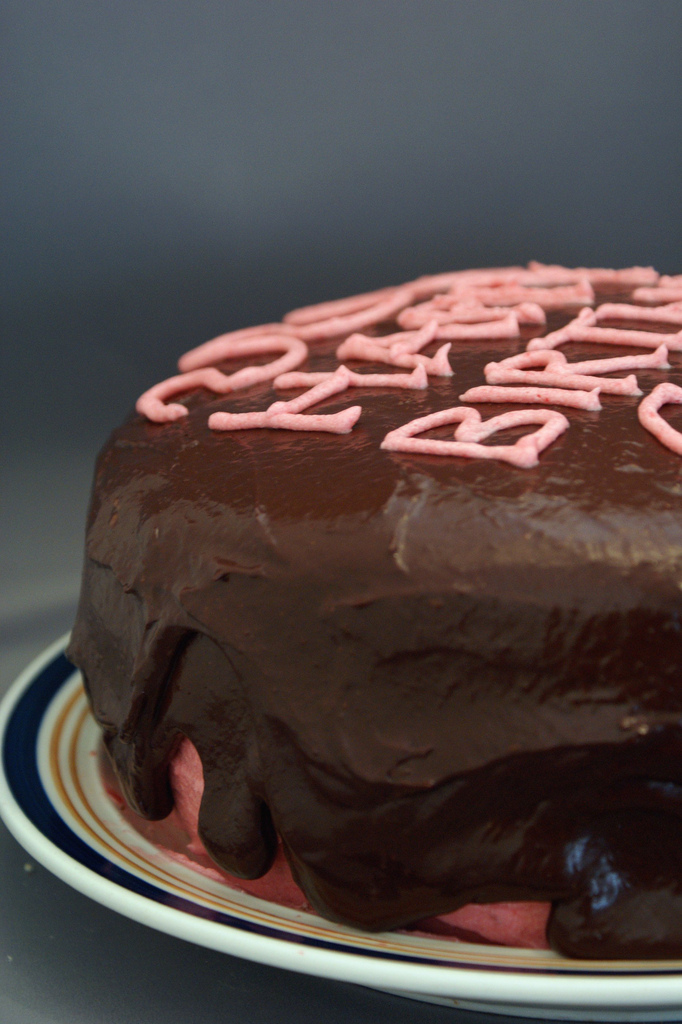
Chocolate cake layers filled with chocolate frosting and raspberry filling, then topped with raspberry buttercream, and finally drizzled with a chocolate raspberry glaze. The best cake I have ever baked!
You can optionally booze up this cake by adding some Chambord liqueur. You know, if you’re into that sort of thing.
The Best Ever Chocolate Cake:
1. Preheat the oven to 300 degrees. Grease two 9-inch cake pans with baking spray, line the bottoms with parchment paper, then spray the parchment paper.
2. Mix the flour, cocoa, baking soda, sugar, and salt, and sift together in a medium-sized bowl. In a separate bowl, combine the water, canola oil (1/2 cup + 2 TB), vanilla, and vinegar. Whisk the wet and dry ingredients together, and pour through a fine mesh strainer to break up any lumps. Whisk one more time.
3. Pour the batter evenly into the two prepared cake pans. Drop pans, one at a time, about 6 inches from the counter or floor a few times to pop the air bubbles. Bake for 30-40 minutes, until a tester inserted in the middle comes out clean. Cool completely.
Bittersweet Chocolate Buttercream Frosting:
1. Melt the chocolate (3.5 ounces) and heavy cream (1/2 cup) in a double boiler, and whisk to combine. Remove from heat and let the mixture sit, whisking occasionally, until it reaches a thick, gloppy consistency (which Deb likened to mayonnaise, which was right on). This took me about 30 minutes.
2. In a stand mixer, cream the butter (4 Tablespoons) using the whisk attachment, on medium speed until it is light and fluffy. Add the chocolate mixture and whip until thicker and lighter in color, about 2 minutes. Don’t overwhip, or it could break.
Raspberry Filling:
1. Puree the raspberries (20 ounces) in a food processor, and push liquid through a fine mesh strainer to remove any seeds.
2. Combine the sugar (1/3 cup), cornstarch, and lemon juice in a large saucepan and heat mixture, stirring constantly until it boils and thickens. Let it cool completely, so the mixture will come to a thick enough consistency.
Raspberry Buttercream:
1. Puree the raspberries (10 ounces) in a food processor, and push liquid through a fine mesh strainer to remove any seeds. Set aside 3 Tablespoons of the puree for the chocolate glaze. (To save time, I pureed the raspberries for both recipes together at once.)
2. In the bowl of a stand mixer, cream the butter (1 cup) using the whisk attachment until it is light and fluffy.
3. Slowly add 2 cups of the confectioner’s sugar, and mix until smooth. Then add 10 Tablespoons of the raspberry puree, slowly, and mix until smooth. Add the rest of the sugar, in 1/2 cup increments, and mix until fully incorporated. (If you don’t want the buttercream too sweet, you might try it at 4 1/2 cups and stop there if you like it.)
4. Finally, add the vanilla extract (1 1/2 teaspoons) and beat the mixture at medium-high speed for 2-3 minutes, until it is light and fluffy.
Note: Don’t refrigerate the buttercream if you make it in advance. It will become too hard and won’t be spreadable. It should be OK at room temperature in an airtight container. This recipe makes enough to frost an entire cake, which will be too much since you’re not using it between the cake layers. I wasn’t sure if I’d have enough if I halved the recipe, but if you’re feeling brave (or miserly!), you can try it.
Chocolate Raspberry Glaze:
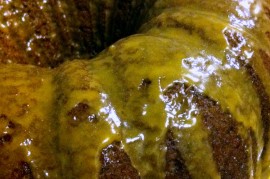
1. Melt the chocolate (8 ounces) and corn syrup together in a double boiler. Whisk often until the chocolate is fully melted and the mixture is smooth.
2. Remove the mixture from heat, and whisk in the reserved raspberry puree (from the raspberry buttercream step) and the heavy cream (1/2 cup) until it is smooth.
Note: Don’t do this part until you are ready to use it (i.e. until the cake is assembled). It needs to be warm when it is poured over the cake, so it’s oozy and drippy. I waited just a few minutes to pour mine, and it stayed a little thick.
Optional: To booze it up! Add 2 Tablespoons of Chambord raspberry liqueur when you add the raspberry puree and cream.
Assembling the cake:
1. Cut the cooled cake layers evenly in half (horizontally), so there are four thin layers. Be careful! They’ll be very delicate. If the tops have puffed up in the middle, use a bread knife to level them. Put them in the freezer to firm up, about 30 minutes to an hour.
2. Place the first layer on your cake plate. (If boozing it up, brush the top of the first cake layer with a little Chambord raspberry liqueur.) Using a spatula, spread about 1/2 cup of the raspberry filling in an even layer over the cake. Make sure it gets all the way to the edge. Spread about 1/2 cup (or one third) of the chocolate frosting over the raspberry filling. Place cake in the refrigerator to firm up, if needed. (Note: If the raspberry filling is on the runny side, put the chocolate frosting layer down first. My filling was very thick, so it worked best for me to use it first.)
3. Repeat Step 2 for the next two layers, making sure to work slowly and let it set in the refrigerator if it is slipping and sliding at all. Chilly cake is your friend! Then place the final layer of cake on top.
4. If there is unevenness in the shape of the cake, now is the time to even it out. Cut off any bits that stick out…and eat them! Gotta test for poison, right?
5. Spread a very thin layer of the raspberry buttercream around the cake for a crumb layer. This will glue the dark crumbs to the cake, so they don’t show through the light colored buttercream. Chill the cake in the refrigerator for 15 minutes until firm. Apply a regular, thick layer of the chocolate buttercream, then chill again for another 15 minutes.
6. Pour the glaze over the top of the cake and using a spatula, push the glaze just to the edge of the cake, so it spills down the sides. Refrigerate the cake for at least 30 minutes to set completely.
7. Decorate the top of the cake with leftover raspberry buttercream and/or fresh raspberries.
Prep: Cook:
Serves: 12 Level: Intermediate
Prep: Cook:
Serves: 12 Level: Easy
Prep: Cook:
Serves: 16 Level: Easy
Prep: Cook:
Serves: 32 Level: Easy
Prep: Cook:
Serves: 16 Level: Easy


One Comment
Leave a Comment
You must be logged in to post a comment.
brownie421 on 1.5.2011
I used the galze portion of this recipe today for a chocolate raspberry layer cake I made for my husband’s birthday. (I always make a chocolate raspberry cake on his b-day, 4 years in a row now, I’ve been perfecting it every year). I think the glaze is delicious. Hopefully he will too!