


No Reviews
You must be logged in to post a review.
If you’re looking for the hearty goodness of oatmeal, in the form of a delicious bread made for toasting, here’s your solution! And as a bonus… it’s nice and simple to make! Don’t be intimidate by the 3 hour “prep time”… only a few minutes are active prep, the rest is simply letting the dough rest and do it’s thing!
Spray a large (large enough for your dough to double in size) container with cooking spray. Also spray two loaf pans (well) with cooking spray.
Pour your warm liquids into the bowl of a stand mixer. Stir in the yeast and let it be for about 5 minutes. It should bubble up, showing that it’s alive and well!
Measure the flours and oats into a medium sized bowl. Stir the flour/oat mix and the molasses and butter into the yeast mixture and then mix for 1 minute only, just to combine the wet and dry ingredients.
Cover your mixer, and allow the dough to rest for 30 minutes.
Attach your dough hook. Now’s the time to throw in that salt! Knead dough (medium speed) for approximately 6 minutes. You want to hear the dough “slapping” the sides of the mixer bowl, without really sticking to it a whole lot. Your dough should feel soft and supple. When you pull on it, at the end of the kneading time, you should be able to stretch it very thin, without tearing, (aka, the “windowpane” effect).
For the first rise, scrape the dough into your greased bowl. Round the dough, then mist with additional cooking spray. Cover loosely with plastic wrap or lid. Allow to rise about 1 hour or until doubled.
Take your dough, divide it into two portions. Gently flatten each portion into a rectangle, then firmly roll up into a log, pinching the seams together. Place into your greased loaf pans. Mist with cooking spray and cover with plastic. Let the loaves rest for about 1 hour again. Or until nice and puffy. While the dough is rising, preheat your oven to 400 degrees (F).
When the dough has risen, spritz the tops of the loaves with water, and sprinkle with chopped oats.
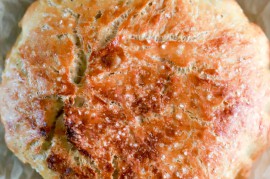
Bake for about 40 minutes, rotating the pans halfway through your baking time. You want this bread to get really nice and dark, for the flavors to develop…so bake them until the top crust is dark like molasses and bottom crust is also dark…don’t worry, the interior is still really nice and moist! If you want to use an instant read thermometer, the bread should register about 200 degrees when it is sufficiently baked through.
Remove the loaves from the oven, and wait 5 minutes. Remove the loaves from the pan, place on a cooling rack, an allow to cool before slicing. If the bread is too hot when you cut into it, you’ll deflate it! (but I won’t say I’ve never ever done that!) But good things really do come to those who wait!!
Store in a tightly closed plastic bag. Or wrap well with plastic wrap. You can stick one of the loaves in the freezer and it will keep just fine and dandy for 3 months. To use, simply thaw at room temperature for several hours. Then wrap in foil and warm in a 350 degree oven for 5-10 minutes, or use for toasting .
A few notes, from the baker:
I baked this dough in two 9×5 pans. It rose admirably, but if you want a bit more of a “mushroom shaped” taller loaf, go for two 8 1/2 by 4 1/2 inch pans instead.
Mixing all the ingredients (excepting the salt) together, and then letting them rest before kneading and continuing with the recipe, is a step that bread bakers term “autolyse”. Which simply means “to rest”. It allows the flour and water time to absorb, results in a moister dough, since you don’t have to use as much extra flour, and is especially useful when working with a high percentage of whole grains.
And the coolest part? This is a super easy bread! No “sponges”, pre-ferments, or special steps involved! Just throw your stuff in the mixer and you’re well on your way to toast heaven!
Prep: Cook:
Serves: 6 Level: Easy
Prep: Cook:
Serves: 6 Level: Easy

Prep: Cook:
Serves: 12 Level: Easy
Prep: Cook:
Serves: 12 Level: Easy

Prep: Cook:
Serves: 12 Level: Intermediate


One Comment
Leave a Comment
You must be logged in to post a comment.
vickicooks4 1 on 1.19.2011
I am working this recipe right now in hop of a good loaf. When i was younger and cooking i was not really into the oat or wheat thing. As i am now i am learning here. I like oat bread and wheat bread so far about half of what i make bread-wise comes out great. My dough is on the rest now and now wet at all i hope this is the way it is suppose to be. To get to the dough slapping part i would think it should be wetter than what it is now. I will wait and see. I am following this recipe to the t except i halved it. Wish me luck!!!!