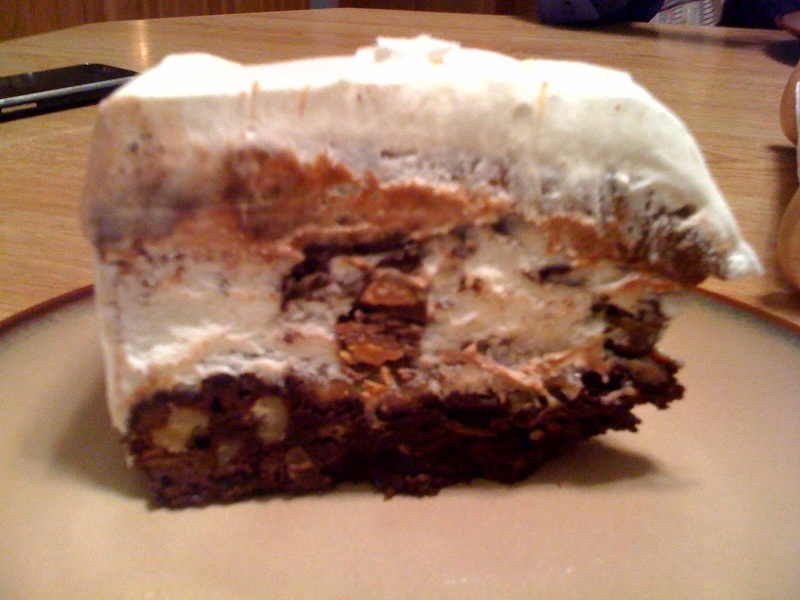
I made my cake with an 8 1/2″ springform pan, but anything from 8″-10″ should work fine, the larger pans will just yield a slightly thinner cake, and have shorter cooking time for the brownies. I chose an 8X8″ Ghirardelli brownie mix in the “caramel turtle” flavor, meaning that it already contained walnuts, and came with a caramel topping packet. I threw in a few handfuls of chocolate chips (as the optional add-in).
**Keep in mind that an 8″ square pan (which any 8X8″ mix is intended for) has a larger capacity than an 8″ round pan, so the brownies will be thicker using an 8″ springform pan, and thus will take longer to cook than the time stated on the box. The best way to tell if they are done is to watch, and insert a toothpick in when you think it’s done (it’s done when the toothpick comes out clean).
BROWNIE BOTTOM BAKING:
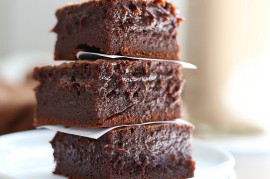
1. Make the mix according to the instructions on the box, using the required ingredients specified with your mix (typically water, eggs and oil). Add additional mix-ins to your batter as desired. This depends on the brownie variety you choose to buy. I added about 6 ounces of semi-sweet chips to mine, and swirled the caramel packet on top.
2. Bake the brownies according to your package instructions, keeping in mind the size of your pan. Mine took about 40 minutes to bake in an 8 1/2″ springform. Personally, I never mind undercooked brownies, because they are fudge-like. When in doubt, pull them out — you don’t want to over-bake. Besides, the brownies are going to be frozen, which will firm them up even if they are slightly underdone. It’s all good.
3. When the brownies come out, cool them completely. For me, this meant 30 minutes at room temperature, 30 minutes in the fridge, and about an hour in the freezer.
ICE CREAM LAYER ASSEMBLY:
4. When the brownies have been in the freezer for about 30 minutes, this is a good time to start thinking about thawing the ice cream. If it isn’t soft enough by the time the brownies have been in the freezer an hour, that’s fine. The brownies can stay in the freezer longer until the ice cream is spreadable (but not melted).
5. As an option (although I can’t really see anyone opting out of this unless your ice cream flavor just does not go with Oreos), sprinkle a layer of Oreo crumbs on top of the brownies before you layer on the ice cream. If you have an ice cream flavor that you don’t think will pair well with Oreos, just leave the cookies out — or use the vanilla Oreos! Or ginger snaps! You get the idea…you could also use fruit sauce and/or puree if you want.
6. When the ice cream is ready, spread it out evenly over the brownie layer (and cookie layer if using cookies). Freeze the whole thing for at least an hour before putting on a topping, if not longer.
7. Top with a topping of your choice. I went with a nice fudge sauce (directions below) and then Cool Whip, but there are tons of possibilities: caramel sauce, peanut butter sauce, fruit sauce, just whipped cream, etc etc.
FUDGE SAUCE DIRECTIONS:
8. Place evaporated milk, butter, sugar and chocolate (not the vanilla) in a saucepan.
9. Bring to a low boil and cook over medium heat until thickened, about 5-10 minutes, stirring constantly. It will have an almost pudding-like consistency when it is done.
10. Take off heat, add vanilla, and let cool
It might seem, during cooking, that this separates a bit, but it will gel when it cools. Just make sure to give it an occasional stir while cooling.
When the fudge sauce is cooled, pull your cake out of the freezer and spread it on top of your ice cream layer, and pop the whole thing in the freezer for several hours or, better yet, overnight. When you are ready to serve, you can remove it from the springform pan. You might have to fidget for a minute or two opening the latch, to loosen the cake from the sides.
At this point, you can garnish with whipped cream or Cool Whip, cut, and serve! I’d recommend letting the cake come to room temperature for about 5-10 minutes to make it easier to cut.
__________________________________________
VARIATIONS:
Don’t want a brownie-bottomed ice cream cake (what’s wrong with you – haha)? What about a blondie or congo bar-bottomed one? Or sugar cookie? Shortbread? Cake would work wonderfully as well — just split the batter between a 9″ springform and a 9″ round pan (or even a cupcake pan). Use the cake in the springform as the base for the ice cream cake, and you get the added bonus of some leftover cupcakes!
Don’t want Oreos? Any kind of cookie should work!
You want to make this with a fruity ice cream like peach? Use yellow cake/sugar cookie/shortbread for the crust, Golden Oreos for the crushed cookies, peach reduction sauce and whipped cream on top.
Have someone with special dietary requirements? The bottom can be made using Betty Crocker’s Gluten-Free Mixes, and you can crush up some gluten-free cookies. Use lactose-free or sugar-free ice cream if need be (Breyers is an excellent brand, and their All-Natural line is also gluten-free). I’m not sure if the sauce I made can be classified as gluten-free, but there are definitely gluten- and dairy-free fudge sauce recipes online. Cool Whip is already gluten-free, and a list of whipped toppings that do not contain casein can be found online as well.
This recipe is highly adaptable. So have fun with it!


One Comment
Leave a Comment
You must be logged in to post a comment.
Marie @ My Culinary Calling on 8.6.2010
“Don’t want a brownie-bottomed ice cream cake (what’s wrong with you – haha)? ”
haha! who wouldn’t want brownie-bottomed ice cream cake??!
I think I may make this for dessert tonight!