No Reviews
You must be logged in to post a review.

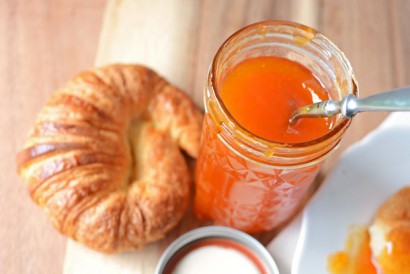
Imagine this summer squirreling away this Golden Apricot Jam to enjoy on a cold, snowy day in the winter.
Before you begin canning, it’s important that you first get properly set up. You will need to put your canning jars in the dishwasher and run it on the hottest setting with no soap. The purpose of this is to sterilize them, and so that you have hot jars to ladle your hot jam into to prevent cracking. If you don’t have a dishwasher, you can always boil the jars in water on the stove-top. You will also need to fill a hot water bath (or large pot) 3/4 full with water and turn the heat to medium-high. This will be the water that you process your jam in at the end, so if you turn the heat on now, it will be ready for you at the end of the process. The heat from the boiling water will kill bacteria and other little nasties and it will seal the lids. Finally, heat some water in a tiny saucepan for sterilizing your lids and rings. You will also need a ladle, a funnel, a magnetic lid grabber and a jar grabber.
While your jars are sterilizing and your water bath is heating it’s time to start jamming. Peel, pit and coarsely chop 4 cups apricots. This is about 2 heaping quarts or 3 wimpy quarts of fresh fruit. I like to use apricots that are very ripe. You’ll know they’re perfect if you’re able to pit and break them apart with your fingers after peeling them.
Place your apricots in a medium saucepan and smash them well using a potato smasher. Add organic cane sugar and fresh lemon juice to the saucepan and stir until combined.
Begin heating the jam on a medium-high burner with a candy thermometer clipped to the side of your pot. Continue to heat while continuously slowly stirring the jam and while scraping the bottom of the pot with a wooden spoon to keep it from burning.
Continue heating until gelling point is reached, which is 220ºF at most elevations. If you live at a high elevation plan on 228ºF. If you’re having trouble getting up to 220ºF you may need to turn your burner up to high heat. Your need to do this will largely depend on your stove.
After reaching gelling point, remove the jam from the heat and allow it to cool until it stops bubbling, so that it’s safer to handle. At this point you’re ready to fill your jars and can or “process” them using the water bath method, so that they are shelf stable.
Before ladling the jam into your jars, dip your ladle and funnel into your boiling water for approximately 1 minute to ensure they are sterile. Next, ladle the jam into the warm, sterilized canning jars that you pulled out of your dishwasher. Be sure not to touch the insides of the jars and resist the temptation to lick your fingers throughout the process (this part will be difficult). This will ensure that you maintain a sterile environment within the jars by the time you’re done.
Next, clean the rims of your jars with a paper towel that you dipped into boiling water. If there is jam on the rims of the jars when you place the lid on top, it can compromise the integrity of the seal.
Now you’re ready to sterilize your lids in the small saucepan of hot water. You’ll want to be careful not to boil the lids, as this can damage the seals, so bring the water to a boil first, remove from the heat, and then place the lids inside. Wait 5 minutes before using, so that the heat has time to work it’s bacteria-killing magic. Next, remove the lids with the magnetic lid grabber, being sure not to touch the bottoms of the lids, and place them on the jars.
Finally, place the rings on your jars. Now comes the tricky part – you will screw the ring on until it is just tight, and then go back the other direction about one-eighth of an inch, or a couple of millimeters, loosening the ring a bit. This is very important – don’t skip this step! This will allow some air to escape the jars while you’re boiling them, and then create a vacuum as they cool, sealing the jars.
Place the jars into the boiling hot water bath (or large pot) using your jar grabber. Bring the water to a full boil, place the lid on the pot, and set your timer for 15 minutes.
After the jars have boiled (or have been “processed”) for 15 minutes, remove them from the pot using your grabber again and place them upright on some dish towels to cool. Soon after the jars are removed from the pot, you should start hearing popping sounds as the jars seal. You will need to let them rest for 24 hours, so pick a place where they won’t be in the way, and won’t be a temptation for little hands or curious pets.
No Comments
Leave a Comment!
You must be logged in to post a comment.