One Review
You must be logged in to post a review.

This sourdough is slightly tangy with a lighter texture than your traditional sourdough breads. Since it makes 2 loaves, I make a plain one for sandwiches, and the other with chocolate chips for an incredible French toast. This bread is made in 3 stages, over the course of a week.
Stage 1: The Starter:
1. Fill a 2-cup liquid measuring cup with lukewarm water, and sprinkle yeast over top. Stir to combine, being sure to wipe any yeast clinging to the spoon back into the water. Let sit for 5 minutes.
2. Place flour in a tall (at least 12 inches high), wide glass container or crock. Pour the yeast water over the flour, and stir with a wooden spoon until well incorporated.
3. Let stand uncovered in a warm area (at least 70 to 80 degrees F) for at least 4 or up to 7 days.
4. Stir the starter once each day. If a crust forms, just stir it into the starter as well. The starter will start to bubble, and smell sour. If you don’t use it by the 7th day, it must be refrigerated and used within a day or two, or it will become rancid.
Stage 2: The Sponge:
1. Measure 1 cup of starter into a liquid measuring cup. Discard the rest (or see note below).
2. Wash the glass crock that you made the starter in. Pour the starter into the glass crock.
3. Add the water, flour, honey and salt into the crock, and stir with a wooden spoon to thoroughly combined. (This will take some muscle!) This will become a “sponge.”
4. Let stand uncovered in a warm place to ferment overnight.
5. The next morning, the sponge will have risen and fallen. Stir down any crust that may have formed.
6. At this point, transfer the sponge to a large bowl of a stand mixer (or continue by hand).
Stage 3: The Bread:
1. Add 1 cup of the flour, softened butter, and beaten egg to the sponge. Stir on medium speed with a paddle attachment (or by hand with a wooden spoon) until thoroughly mixed.
2. Remove paddle attachment and put on the dough hook. Add the last cup of flour and mix on medium speed until the flour is worked into the dough.
3. Then turn the speed up to medium high and “knead” for 3 minutes (or, if doing by hand, turn dough onto a lightly floured board and knead the last cup of flour into the dough, then continue kneading by hand until the dough is smooth and elastic, about 10 minutes).
4. Divide dough in half and form into two balls. Roll each ball into a rectangle, no bigger than the loaf pans.
5. Start with the side furthest from you and tightly roll the dough lengthwise into a cylinder. Pinch the seam together. Slightly flatten the ends and tuck the edges under to form a loaf. Place the loaf into a greased loaf pan. Gently push the top of the loaf to flatten a bit to fill the loaf pan. Repeat with the other half of dough.
6. Brush the tops with melted butter (about 1 tablespoon).
7. Cover loaf pans with plastic wrap and a clean towel. Let rise in a warm place until almost doubled in bulk, about 1 hour.
8. Preheat the oven to 400 degrees.
9. Bake loaves for 45 to 50 minutes, or until a light golden brown.
10. Remove pans from the oven and cool on a wire rack for 10 minutes. Remove bread from pans and rest on their sides to cool completely.
VARIATIONS:
Chocolate Chip Sourdough: knead ½ cup mini chocolate chips into half of the dough, then proceed with making loaves.
For a more rustic bread, do not brush the tops of the dough with butter and increase the cook time an additional 10-15 minutes for a darker, thicker crust. You may also skip the loaf pans, and form the dough into boules (round loaves) and make three ¼-inch deep slashs on the tops with a sharp knife. Rise and bake the boules on a sheet pan.
Note: If you want to “replenish” the remaining starter and continue to make bread every few days, pour the remaining 1 cup of starter into a container. Add 1 cup of all-purpose flour, 1 cup of lukewarm water, and stir to combine. Let stand overnight until fermented or bubbling. Use or refrigerate.
2 Comments
Leave a Comment
You must be logged in to post a comment.
ComfortablyDomestic on 1.14.2011
Oh, no! What a bummer! I’m sorry that happened. Warm, moist air is key for yeast to work and bread to rise properly. Especially sourdough. Brick bread can also be caused by under-kneading, kneading in too much flour at the end, or dead yeast. Try letting the dough rise covered in the oven with the oven light on.
chriomega on 1.10.2011
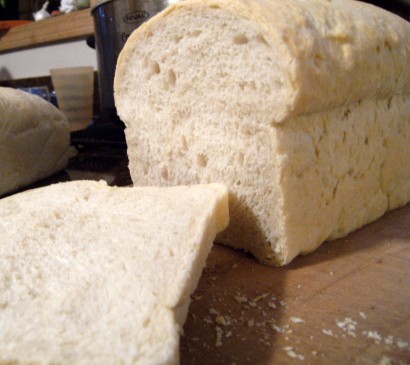
My loaves look more like bricks than the fluffly picture above. Somehow I didn’t get the intended results.
Since it’s winter time, perhaps the kitchen isn’t warm enough to get the yeast to do its job? I threw the loaves out….