The Pioneer Woman Tasty Kitchen
Profile photo of steamykitchen

Happy Chinese New Year!

Posted by in Holidays, Looks Delicious!

Tasty Kitchen Blog: Happy Chinese New Year! Guest post by Jaden Hair of Steamy Kitchen.

 
This Sunday is not only Valentine’s Day. It’s also Chinese New Year—the Year of the Tiger! Since the Chinese calendar is based on the solar and lunar patterns, every year the holiday falls on a different day. Luckily, the color red is popular for both Valentine’s Day and Chinese New Year.

It’s good luck to eat specific foods on Chinese New Year (we are very superstitious people), and different dishes have different meanings. I’m not the type of person to take chances on ruining my good fortune, so whether I absolutely believe the superstitions or not, I’m going for it. Plus, if I didn’t, my Mom would be on my case for sure. She’s in California and I’m in Florida, so our phone conversations the day before go like this every single year:

 
“Are you going to make some lettuce for prosperity?”
- Yes Mom.

“How about shrimp for happiness?”
- Yes Mom.

“Make sure you don’t sweep the floor on Chinese New Year! You’ll sweep out all the good fortune!”
- Okay Mom.

“And take the children for a haircut today, not tomorrow or they’ll cut off their good luck!”
- I already did Mom.

“Did you buy some Chinese candy to bring in joy?”
- Yup.

“AYYAHH! But don’t let the children eat too much candy or they’ll get bad teeth!”
- (Sigh.)

 
My loving mother always makes sure that I’m following the rules our ancestors have followed for generations! And I gotta say, so far so good. We’re happy, healthy and always have more than enough.

If you’re looking for some fantastic recipes for Chinese New Year, how about these:

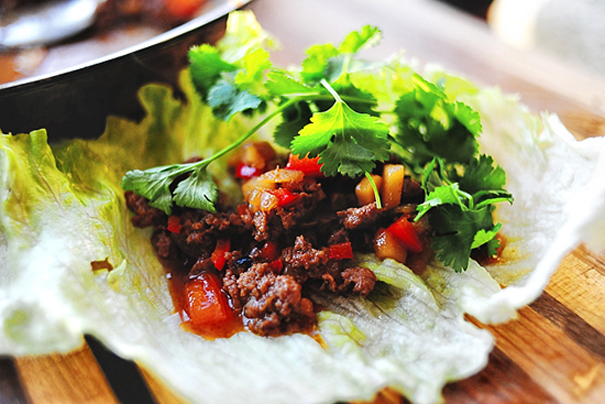
Tasty Kitchen Blog: Happy Chinese New Year! (Lettuce Wraps, recipe submitted by TK member tfenger, photo by Ree Drummond)

Lettuce Wraps by tfenger: These lettuce wraps symbolize growing wealth!

Or you can also make Chinese Takeout Garlic Shrimp by Joolsey. Shrimp in Chinese is pronounced “haa”—symbolizing laughter and happiness!


Tasty Kitchen Blog: Happy Chinese New Year! (Cheesecake Chinese Style, recipe submitted by TK member shecancook2)

Cheesecake Chinese Style by shecancook2: Here’s a twist on cheesecake. The great thing about this dessert is that they look like golden bars, which of course means wealth and prosperity!


Tasty Kitchen Blog: Happy Chinese New Year! (Asian Orange Chicken, recipe from Bobby of Blog Chef)

Asian Orange Chicken from Blog Chef: Eating oranges symbolizes wealth. This is a perfect recipe that I think I’ll be making for Chinese New Year!

Or try some Tangerine Beef by saucyblonde. This is a great dish for attracting wealth. Tangerines are always part of a Chinese New Year tablescape.*


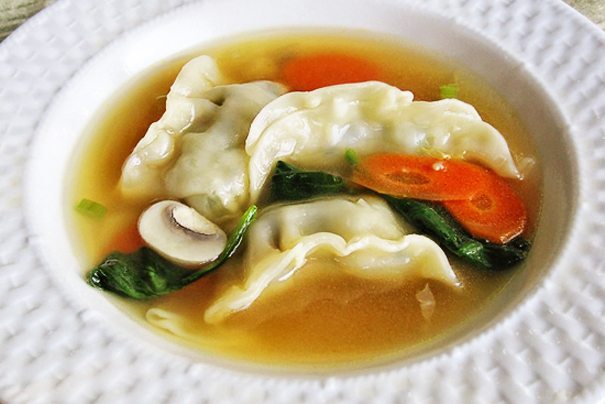
Tasty Kitchen Blog: Happy Chinese New Year! (Asian Dumpling and Vegetable Soup, recipe submitted by TK member Lauren of The Beneshes)

Asian Dumpling Soup with Vegetables by Lauren: For prosperity, make sure you have some dumplings on the table! And you don’t even have to make the dumplings from scratch. Your local Asian market, Whole Foods and many supermarkets will have frozen dumplings.


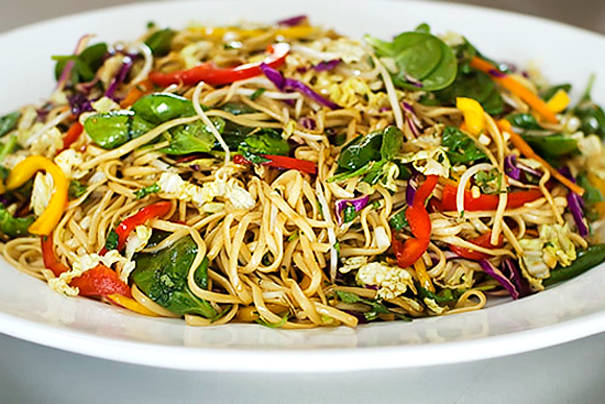
Tasty Kitchen Blog: Happy Chinese New Year! (Asian Noodle Salad, recipe from Ree Drummond)

Ree’s Asian Noodle Salad: For long, long life. But remember, do not cut the noodle strands. Leave ‘em long. Otherwise you’d be “cutting your life short!”

 
*Oh. My. Did I really use the word “tablescape“? What’s next? Interchangeable curtains in my kitchen window to match my outfit every day?

 
_______________________________________

Jaden Hair is a food writer, television personality, and food photographer based in Tampa Bay, Florida. Find more of her recipes in her blog, Steamy Kitchen, where you can also read more about Jaden’s new book, The Steamy Kitchen Cookbook, and the rave reviews it’s received!


Profile photo of steamykitchen

Compound Butter

Posted by in Kitchen Talk

One of my culinary shortcuts is called compound butter. Well, truthfully, just plain ‘ol butter is my shortcut to a better dish, but I want to show you how easy it is to make some fancy schmancy butter with some spices and fresh herbs.

Compound butter is just butter + stuff mixed in. Though calling it “compound butter” vs. just “butter + stuff mixed in” means you have to pay $3 more for it at the store. What a marketing gimmick! Seriously, though, compound butter is just flavored butter, and the possibilities are endless. Some of my favorites are:

butter + honey + cinnamon for toast
butter + chopped cranberries + orange zest for muffins
butter + garlic + basil for vegetables, shrimp (anything really)

All you have to do is mix softened butter with your choice of herbs/spices/sugars and you’re done. But I’ve found that shaping the compound butter into logs makes for easy storage (for the refrigerator or freezer), simple dividing, and an attractive little gift.

Here’s what I do:


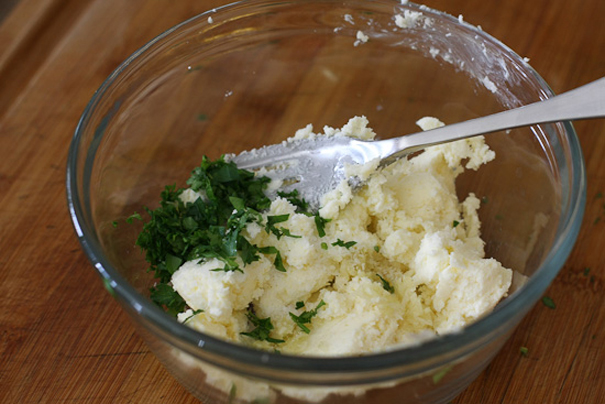
Tasty Kitchen Blog: Compound Butter. Guest post by Jaden Hair of Steamy Kitchen.

Here I’m making some garlic-parsley butter for garlic bread. Take a stick of room temperature butter, a tablespoon of finely minced parsley, a garlic clove smushed through a garlic press, and just a generous pinch of salt (only if you’re using unsalted butter).


Tasty Kitchen Blog: Compound Butter. Guest post by Jaden Hair of Steamy Kitchen.

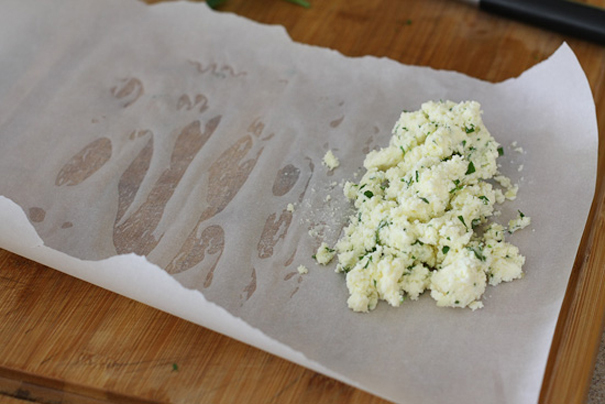
Grab a piece of parchment paper and lay it on your cutting board. I find that using a slightly damp cutting board helps the parchment stick, so that it doesn’t curl back up and over the butter (it’s a pain in the butt trying to keep that paper flat!).


Tasty Kitchen Blog: Compound Butter. Guest post by Jaden Hair of Steamy Kitchen.

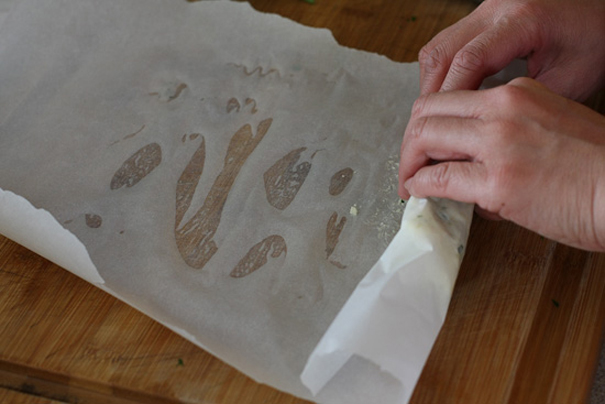
Okay, now use your hands to roll up that butter. Don’t worry about getting it perfect; I’ll show you a trick in a second.


Tasty Kitchen Blog: Compound Butter. Guest post by Jaden Hair of Steamy Kitchen.

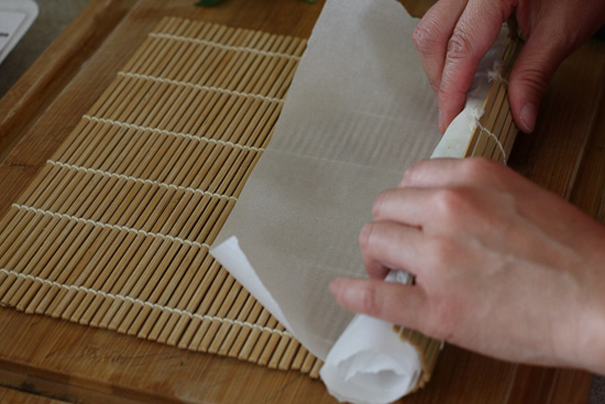
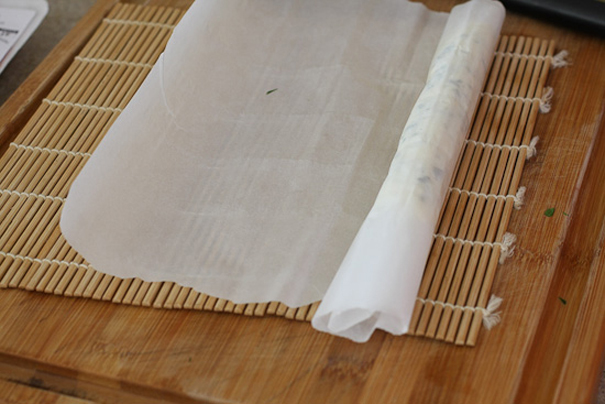
Here’s my secret weapon: a $1.50 sushi rolling mat. This mat helps me roll the butter into a tight, compact, even-shaped log. Roll the mat up partway.


Tasty Kitchen Blog: Compound Butter. Guest post by Jaden Hair of Steamy Kitchen.

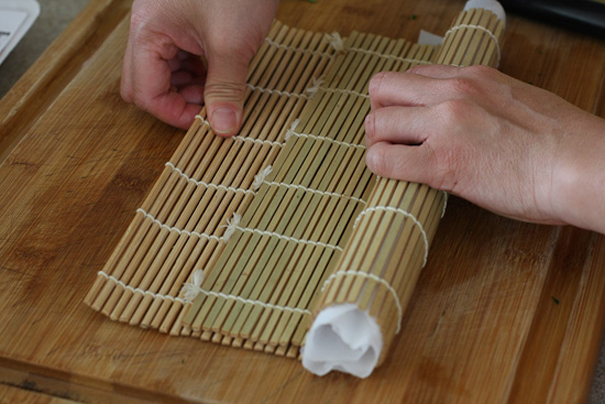
Then use your hands like above to tug and pull back to tighten the log. My left hand is tugging and tightening the roll and my right hand is pulling in the opposite direction to give the mat tension.


Tasty Kitchen Blog: Compound Butter. Guest post by Jaden Hair of Steamy Kitchen.

Once you’ve tugged and evened out the log, open up the sushi mat.


Tasty Kitchen Blog: Compound Butter. Guest post by Jaden Hair of Steamy Kitchen.

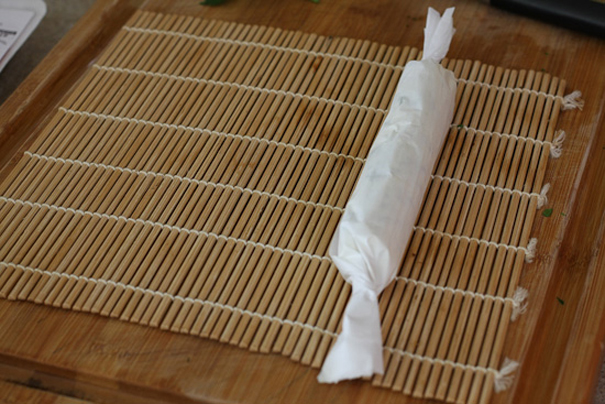
Twist the ends of the parchment paper and refrigerate (or freeze).


Tasty Kitchen Blog: Compound Butter. Guest post by Jaden Hair of Steamy Kitchen.

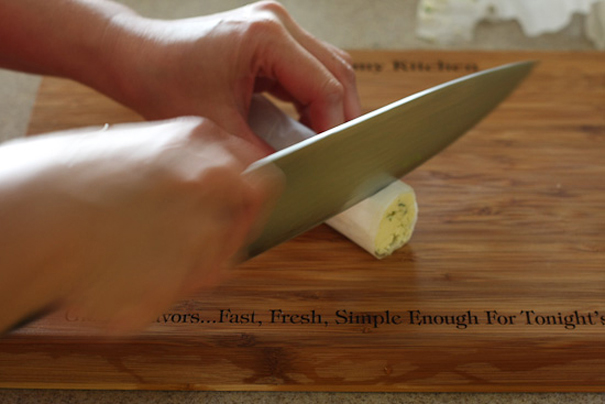
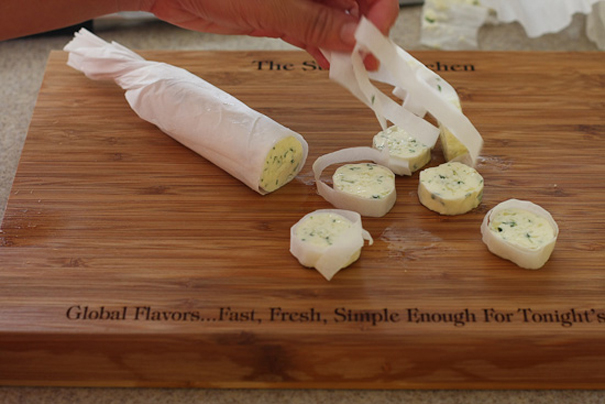
Once the log has stiffened up, it’s ready to use! If I’m only using a bit of the butter, I like to cut them into “coins.”


Tasty Kitchen Blog: Compound Butter. Guest post by Jaden Hair of Steamy Kitchen.

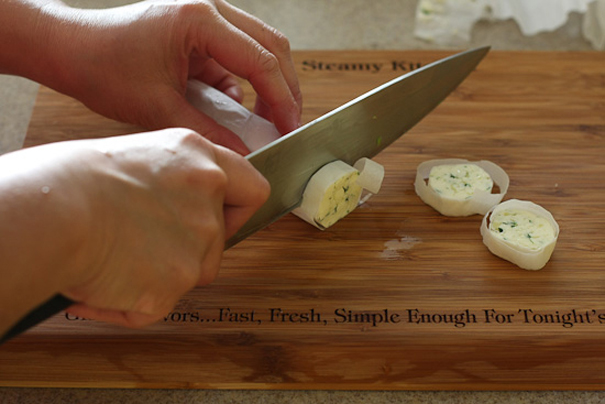
Just slice right through the parchment paper.


Tasty Kitchen Blog: Compound Butter. Guest post by Jaden Hair of Steamy Kitchen.

Then pull away the paper! You can use this butter to saute vegetables, add to a sauce, slather for garlic bread, top a freshly grilled steak or mix with pasta.

As I mentioned, these rolls make fantastic gifts—just tie a little ribbon on the ends!

 
_______________________________________

Jaden Hair is a food writer, television personality, and food photographer based in Tampa Bay, Florida. Find more of her recipes in her blog, Steamy Kitchen, where you can also read more about Jaden’s new book, The Steamy Kitchen Cookbook, and the rave reviews it’s received!


Profile photo of steamykitchen

Scallops ‘n’ Pasta

Posted by in Step-by-Step Recipes

When I tell people that I develop recipes, photograph and blog full-time, they automatically think that I have this easy, glamorous life where I flit around the kitchen singing happy songs while stirring a pot of soup, wearing a clean, crisp, cute little apron and dainty heels. And my reality is so far from that. Okay, I confess that I actually do sing happy songs in the kitchen, but usually it’s silly songs that my five and six-year-old bring home from school; and I do wear platform shoes in the kitchen, but it’s because I’m short.

It’s a wonderful career and I am very fortunate to absolutely love what I do. But, some days it can get pretty quiet in the kitchen by myself, and even to the point of lonely in the evenings on the couch, trying to decipher out what the heck is wrong with my flippin’-PHP-HTML-CSS-whatchamacallit-code on my blog.

That’s why I have a legion of close blogging friends; we consider each other sort of like coworkers. The type of friends that you could call up at 10pm and rant about so-and-so who left a rude comment or panic about “I broke my site!” We e-mail each other for advice, help and encouragement.

Ree is one of those friends, and I love her dearly. Even though we’ve only seen each other a couple of times in person, we get on like sisters—blog sisters, that is. I was absolutely thrilled when we asked me to be a regular blogger-columnist on Tasty Kitchen, and elated to see how this community of food lovers has grown so quickly!

So, once a week I’ll be blogging here, and instead of giving straight recipes, I really want to focus on kitchen secrets, cooking lessons, product reviews and anything else that you really want to learn about. Such as, how to store green onions so that they last for weeks or how to open a bottle of champagne without donking someone in the head or putting out one of your ceiling lights (guilty).

I’d love to hear what you’d like to learn! It’s so nice to meet and see you!


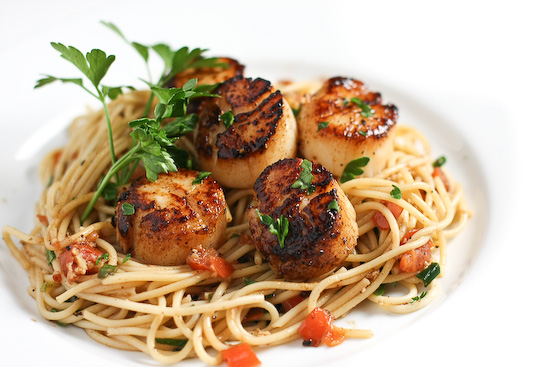
Tasty Kitchen Blog: Scallops and Pasta. Guest post by Jaden Hair of Steamy Kitchen.

Today, I’m going to teach you how to make a 15-minute seafood pasta dish. Once you’ve learned this method, you can make a super-easy, quick and perfect dish every single time. Yes, it’s simple enough that you really don’t need a recipe (but I did post the recipe for all you recipe lovers!). I’ve got secrets to share … so are you ready?

We’re using giant scallops here, but you could also use shrimp.

Here are my secrets:

1. Cook your pasta in salted water: Bring a big pot of water to boil and add enough salt so it’s slightly salty. This gives your pasta flavor and you’ll end up using less salt or sauce in your dish.

2. Everything ready to go: This dish cooks up so quickly that you really need to have all your ingredients prepped and close by. You don’t want the seafood to get cold while you’re furiously chopping tomatoes.

3. Dry seafood: Before you begin cooking, you really want to pat your seafood very very dry. And I don’t mean a sloppy dry. Use a couple of pieces of paper towel and really make sure that you blot all the moisture away. The reason this is so important is because seafood cooks really quickly. Any moisture on the seafood will end up steaming the seafood instead of pan-frying it.

4. High heat or low heat—no middle heat: Here’s my rule for cooking small pieces of seafood, like scallops, shrimp, or chunks of fish. Either go high heat or low heat, but not in the middle. The high heat will give you a wonderful sear, that charred crust that I will give up my Gucci purse for. A low, slow heat will gently cook the seafood so that it has a silky texture, but that’s for another lesson.

5. Don’t overcook your seafood: I know it’s obvious, but I do have to say it. For scallops and shrimp, they really only need a couple of minutes on each side. If you’re using small bay shrimp (about the size of a small marshmallow) – 1 1/2 minutes on each side or less.

 
Your first step is to get the water boiling for the pasta. Once boiling, add enough salt to make the water taste salty. How much you use depends on how much water you’re boiling. Start with 2 teaspoons kosher salt (or 1 teaspoon table salt), stir, taste the water and you can add more after that. Don’t worry, not all the salt will transfer to the pasta, but it will definitely give your pasta flavor. While your pasta is cooking, it’s time to prep the rest of the ingredients. When the pasta is done, you can drain it and just set aside.

Okay, now for the fun part.


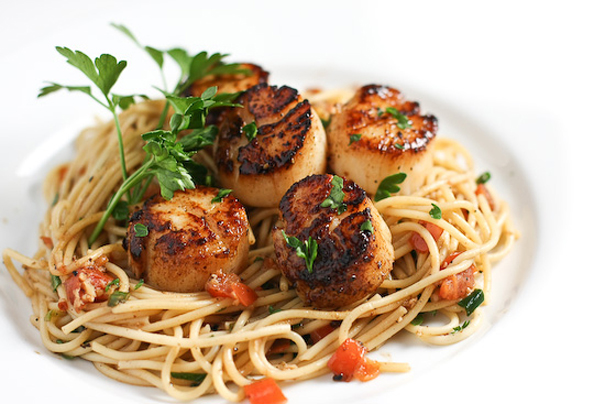
Tasty Kitchen Blog: Scallops and Pasta. Guest post by Jaden Hair of Steamy Kitchen.

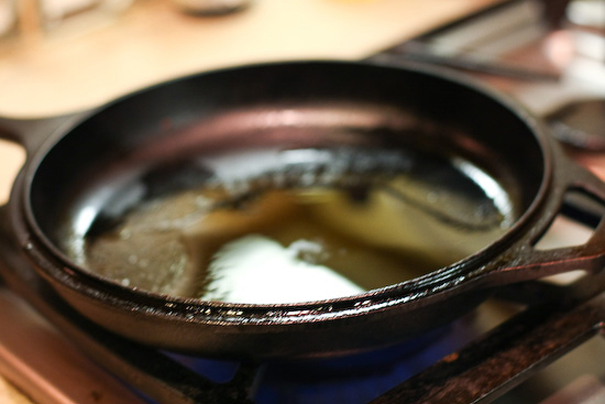
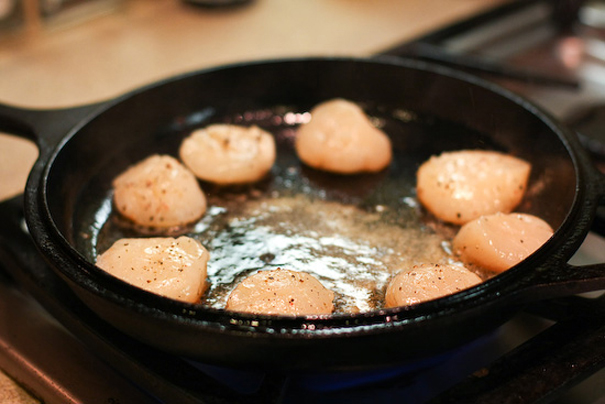
The first step is to make sure your pan is hot, super hot. I like using a cast iron frying pan, because I can get that baby heated up to maximum temperature.

Put the pan on high heat and don’t even look at the thing until it’s hot. How do you tell? Hold your hand 6 inches above the pan, and if you can’t hold it there for more than 3 seconds, you’re good to go. Swirl in a bit of olive oil.


Tasty Kitchen Blog: Scallops and Pasta. Guest post by Jaden Hair of Steamy Kitchen.

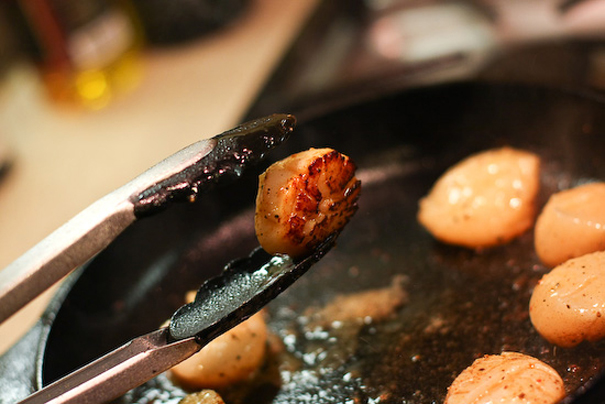
Lay the scallops (or your chosen seafood) in the pan. Do not touch them for two minutes (1 1/2 minutes if you’re cooking small shrimp or smaller scallops). Don’t you dare try to move ‘em and squish them around! This is essential to getting a good sear.

After two minutes are up:


Tasty Kitchen Blog: Scallops and Pasta. Guest post by Jaden Hair of Steamy Kitchen.

You can peek! Wow, nice crust there. Now turn them over.

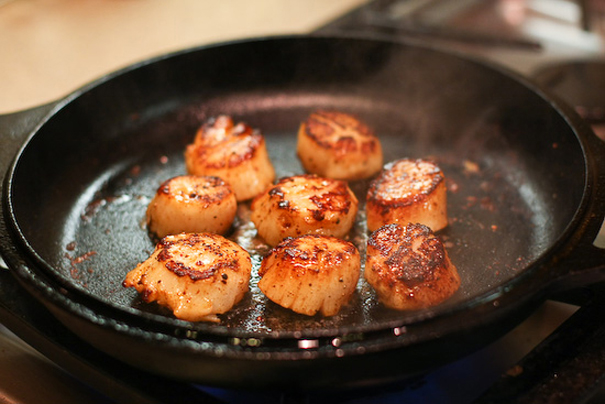
If you’re only cooking a few scallops, like I am, here’s a trick. See the empty section in the middle of the pan up above? Well, that spot is extra hot.


Tasty Kitchen Blog: Scallops and Pasta. Guest post by Jaden Hair of Steamy Kitchen.

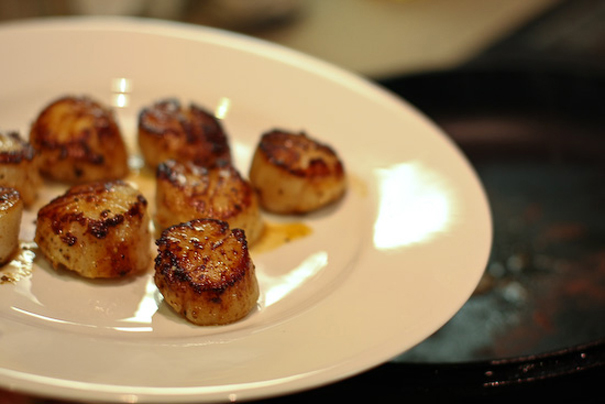
So when I flip over the scallops to cook the other side, I place the scallops in the middle—in the hot spot. Cook the second side for 1 1/2 minutes or so (they cook quickly). Look at the pan. There is no liquid at all. This is because my scallops were absolutely dry before added them into the pan. The high heat gave it a perfect, savory crust.


Tasty Kitchen Blog: Scallops and Pasta. Guest post by Jaden Hair of Steamy Kitchen.

Quickly lift them out on a plate.


Tasty Kitchen Blog: Scallops and Pasta. Guest post by Jaden Hair of Steamy Kitchen.

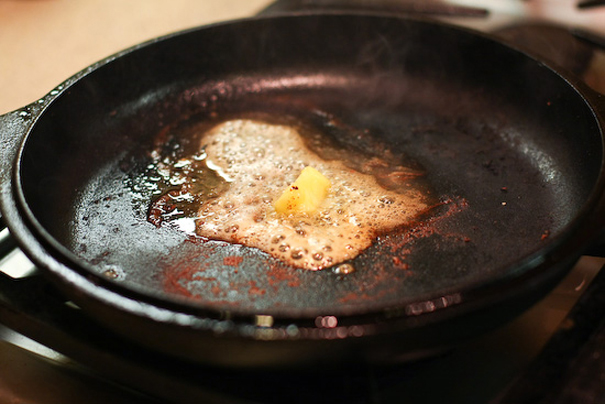
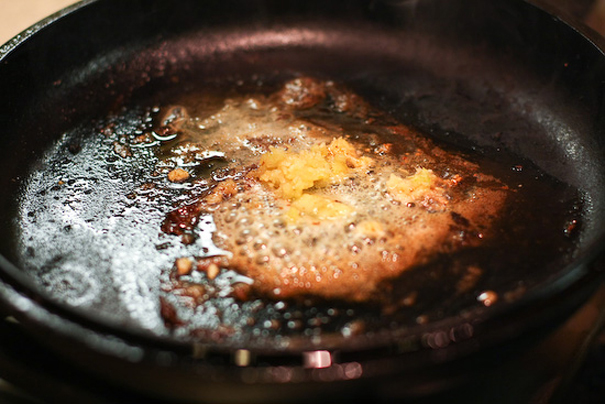
Turn the heat to low, add some butter.


Tasty Kitchen Blog: Scallops and Pasta. Guest post by Jaden Hair of Steamy Kitchen.

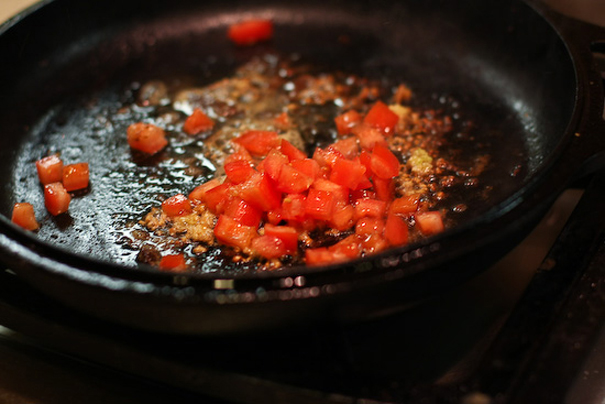
Then some garlic and/or onions …


Tasty Kitchen Blog: Scallops and Pasta. Guest post by Jaden Hair of Steamy Kitchen.

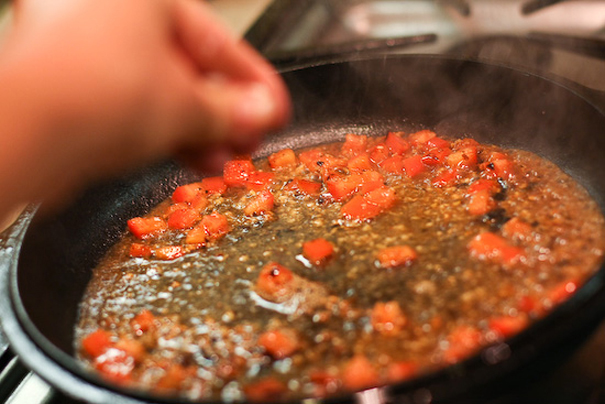
Diced tomatoes …


Tasty Kitchen Blog: Scallops and Pasta. Guest post by Jaden Hair of Steamy Kitchen.

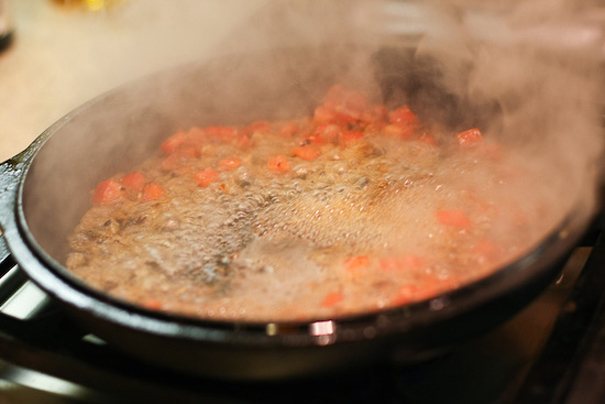
Now turn the heat to high and add a cup of white wine, beer or vegetable stock. Let it simmer and bubble for 30 seconds. Use your spatula to scrape up the crusty pan bits (there’s flavor in the pan bits!).


Tasty Kitchen Blog: Scallops and Pasta. Guest post by Jaden Hair of Steamy Kitchen.

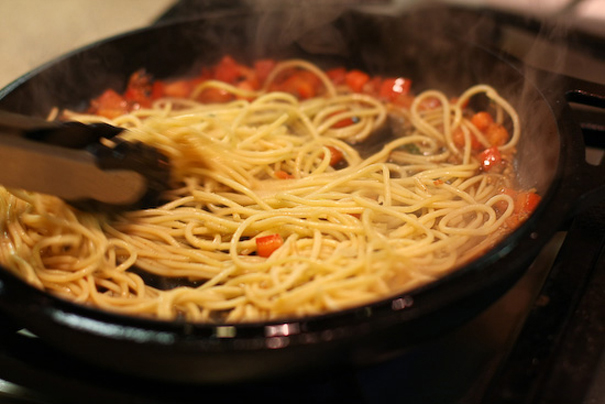
Season with a generous pinch of salt and pepper.


Tasty Kitchen Blog: Scallops and Pasta. Guest post by Jaden Hair of Steamy Kitchen.

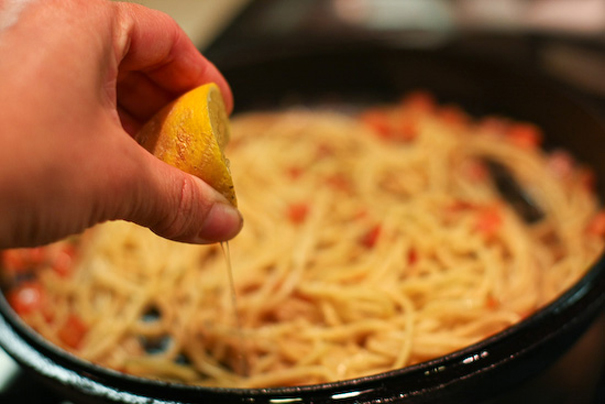
Add your cooked/drained pasta.


Tasty Kitchen Blog: Scallops and Pasta. Guest post by Jaden Hair of Steamy Kitchen.

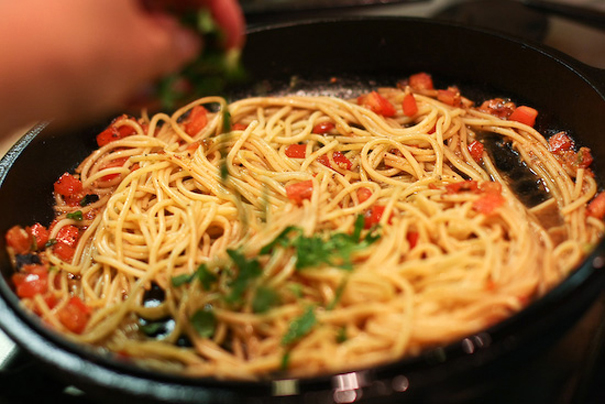
Squeeze a bit of lemon to give it a bit of brightness.


Tasty Kitchen Blog: Scallops and Pasta. Guest post by Jaden Hair of Steamy Kitchen.

Garnish with your fresh herb of choice (any of: parsley, cilantro, basil, chives).

And that’s it!


Tasty Kitchen Blog: Scallops and Pasta. Guest post by Jaden Hair of Steamy Kitchen.

Serve the scallops snuggled in with the pasta.


Printable Recipe

Scallops ‘n Pasta

See post on steamykitchen’s site!
4.92 Mitt(s) 13 Rating(s)13 votes, average: 4.92 out of 513 votes, average: 4.92 out of 513 votes, average: 4.92 out of 513 votes, average: 4.92 out of 513 votes, average: 4.92 out of 5

Prep Time:

Cook Time:

Difficulty: Easy

Servings: 2

2
x

Print Options

Page size Letter 3x5 4x6
Text Size Small Medium Large
Content Include description
Include prep time, etc.
Show image

Description

A super-easy and quick 15-minute seafood pasta dish. This recipe uses giant scallops, but you could also use shrimp.

Ingredients

  • 4 ounces, weight Dried Pasta Of Your Choice
  • 10 whole Giant Dry-packed Sea Scallops Or Jumbo Shrimp
  • 1 Tablespoon Olive Oil
  • 1 Tablespoon Butter
  • 1 clove Garlic, Finely Diced
  • 1 whole Tomato, Chopped
  • 1 cup White Wine, Beer, Or Vegetable Stock
  • 1 sprig Parsley, Finely Minced
  • Just A Bit Of Freshly Squeezed Lemon Juice
  • Salt And Pepper

Preparation Instructions

1. Cook the pasta in salted water per the instructions on the box. Drain and set aside.

2. In the meantime, prep all the ingredients and have them at the ready nearby. For the scallops (or shrimp), use a couple of layers of paper towels and pat very dry. Move the scallops to a clean sheet of paper towel and pat dry once more. Season with salt and pepper on both sides.

3. Heat a large frying pan or saute pan over high heat. When hot, swirl in the olive oil. Add the scallops to the pan, not touching. Give each scallop ample room so that they can sear properly. Cook for 2 minutes without touching (1 1/2 minutes if using smaller pieces of scallops or shrimp) then flip and cook for another 1-2 minutes until cooked through. Remove to a plate.

4. Turn the heat to low. Add the butter and the garlic. Saute for just 10 seconds and then add the tomatoes.

5. Turn the heat to high and add in the white wine (or beer or vegetable stock). Let it bubble a bit for 30 seconds and use your spatula to scrape up the bits in the pan. Season with salt and pepper (go light on the salt … remember your pasta is lightly salted now), throw in the parsley and then add in your cooked pasta. Stir well to let the sauce coat the pasta. Serve with the scallops.


_______________________________________

Jaden Hair is a food writer, television personality, and food photographer based in Tampa Bay, Florida. Find more of her recipes in her blog, Steamy Kitchen, where you can also read more about Jaden’s new book, The Steamy Kitchen Cookbook, and the rave reviews it’s received!