

No Reviews
You must be logged in to post a review.
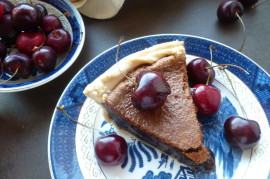
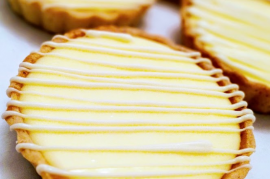
Mexican Dark Chocolate Tart is a beautiful and delicious way to eat chocolate. It is a case in point of how American Southwestern cuisine accommodates itself to all sorts of occasions—including elegant ones. The 3 1/2 hours estimated cooking time need not deter a cook with many demands on her time, because for most of these hours the tart is simply chilling in the refrigerator.
You will also need:
1. A 10-inch, straight-sided tart pan with a removable bottom.
2. Waxed paper.
3. An electric mixer.
4. A bowl for mixing the chocolate filling.
5. A sheet of plain white printing paper and scissors to make a stencil to use for decorating the tart. (Instructions are given below.)
6. A small strainer.
Mixing the tart shell pastry (for a 10-inch tart):
1. Sift the cocoa and flour together onto a sheet of waxed paper or into a bowl.
2. Place the butter and sugar in the bowl of an electric mixer and beat it until it is light and fluffy. Beat in the cinnamon and vanilla.
3. Beat in the sifted cocoa and flour.
4. Shape the dough into a circle. If it is very soft, wrap it in waxed paper and refrigerate it for about 30 minutes. (Longer chilling will harden the dough and make it difficult to roll out.)
Forming and baking the tart shell:
1. Place the dough between two sheets of waxed paper and roll it out into a circle about 12-inches in diameter. Remove the top sheet of waxed paper and invert the pastry into the tart pan.
2. Peel off the second sheet of waxed paper and press the dough into the bottom and up the sides of the pan. The dough is more like cookie dough than pie crust pastry and may tear, but it can easily be pressed back together and molded into the pan.
3. Press the pastry firmly against the sides of the pan to help prevent shrinkage during baking. (Because of its consistency, the pastry shell can’t be lined with paper and weighted down with dried beans to prevent shrinking when it is baked.)
3. Chill the unbaked tart shell for 30 minutes, or until it is firm.
4. While the tart chills, preheat the oven to 375 F. Prick the bottom of the chilled tart shell with a fork and bake it for about 15 minutes.
5. As soon as it comes out of the oven, press the hot pastry up against the inside rim of the tart pan with the tines of a fork where the sides of the shell have collapsed a little during baking.
6. Cool the tart at room temperature while making the filling.
For the chocolate filling:
1. Put the chopped chocolate into a large heatproof bowl.
2. Heat the cream in a saucepan over medium heat until just before it is ready to boil. Then pour it over the chocolate. (The temperature to which you heat the cream isn’t important. It is only important that the cream is very hot when you pour it over the chocolate.)
3. Let the chocolate and hot cream sit for 3 minutes, then stir until the chocolate is melted and the mixture is smooth.
4. Pour the chocolate into the shell.
5. Spread the filling out smoothly in the shell, to the edges of the tart’s rim.
6. Refrigerate the tart for about 3 hours, or until the filling is very firm.
Decorating the tart:
Note: Decorate the tart right before serving it or, if decorating it in advance, keep it in a cool, dry place so that the powdered sugar doesn’t become damp.
1. Make a stencil: Draw or trace a simple design in the middle of a plain sheet of printing paper. The tart in the photo is decorated with a coyote. Cut around the edges of your drawing and remove it, keeping the sheet of paper intact. This is your stencil.
2. Un-mold the tart by pressing up on the bottom of the pan and loosening the crust from the sides of the ring. Remove the ring and place the tart, still sitting on the circular bottom of the pan, on a flat serving tray or wherever you intend to cut it.
3. Put some powdered sugar in a small strainer and sift it all over the tart.
4. Place the stencil over the tart, centering the cut-out over the middle of the tart. Put cocoa in the strainer and sift it over the cut-out space in the stencil.
Note: The tart may be made, but not decorated a day in advance. For photos of how to decorate the tart, please see the recipe on the diplomatickitchen’s blog.
An acknowledgement: Mexican Chocolate Tart is adapted from a recipe in Southwest: The Beautiful Cookbook. Through photos, commentary and recipes, this interesting book describes a culture that has a strong love of its past, but is not frozen in it—whose traditions are very much alive and adaptable.
Prep: Cook:
Serves: 6 Level: Easy
Prep: Cook:
Serves: 12 Level: Intermediate
Prep: Cook:
Serves: 16 Level: Easy
Prep: Cook:
Serves: 24 Level: Intermediate

Prep: Cook:
Serves: 12 Level: Easy


No Comments
Leave a Comment!
You must be logged in to post a comment.