Dissolve yeast and 1/2 teaspoon of sugar in 1 cup warm water.
While the yeast is proofing, add the remaining 1 cup of warm water, melted butter, remaining 1/2 cup sugar, and eggs to the mixing bowl of an electric mixer such as a Bosch or KitchenAid. When the yeast has doubled (it only takes a few minutes), add it to bowl. Mix on low speed just until the ingredients are combined.
Add 4 cups flour, powdered milk, dough enhancer, and salt. Mix on a medium speed for 7-10 minutes. Turn off mixer and let mixture rest for 10 minutes.
Add 2 more cups flour and mix on medium speed until ingredients are well incorporated. With mixer running, add more flour, 1/2 cup at a time, just until the dough cleans the side of the bowl. This is an important step because it marks the difference between a roll that has just the right amount of flour and one that has too much or too little flour. Turn the mixer to a higher knead setting and let the mixer do its thing for 8-10 minutes until the dough is very smooth and elastic.
Turn off the mixer and let the dough rest for 10 minutes. I leave the dough in the mixer bowl. This is where you really save time on this recipe. After the dough has rested, you can start forming the rolls.
Lightly butter a 9 ” x 13″ metal pan. Use a metal pan, not a glass baking dish. Pinch off enough dough to form a 1 1/2″ ball. You can vary the size of your rolls by how much dough you choose to make each one. Sometimes you might decide that you want bigger rolls if you are using these for sandwiches, sometimes you might be in the mood for something a little more traditional. Look at the amount of dough you are using for your roll and imagine it double its visible size. That’s how big your finished product will be—maybe even a little bigger. I make my rolls so that I can get 4 rolls across the pan and 5 rolls lengthwise.
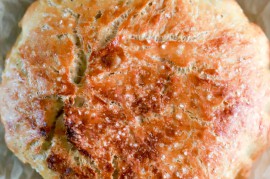
Dip each roll into some melted butter before putting them into the pan. The butter provides two things: it allows the rolls to make a wonderful top and bottom (the corner rolls are my favorite because they have two outside browned sides, a brown bottom, and a lovely golden brown top) and the rolls separate easily from each other after they are baked.
Cover the pan with plastic wrap and set the rolls in a warm place to rise. It takes about an hour for the rolls to rise; sometimes only 30-45 minutes, depending on how happy the yeast is that day. You can get some good talking done while the rolls are rising.
Once the rolls have doubled in bulk, remove the plastic wrap and bake the rolls at 375ºF until they are golden brown, about 20 minutes. You can brush a little more butter on them, if you want to. It makes them extra pretty.
By the way, this recipe can make about 4 dozen rolls. You could make a pan of rolls and use the rest of the dough for cinnamon rolls or scones. Just a thought.


14 Comments
Leave a Comment
You must be logged in to post a comment.
Terri @ that's some good cookin' on 7.5.2012
Hi Rebekah. Yes, you can make this recipe by hand and you can also use regular milk instead of dry milk. On my blog, however, I have a favorite yeast dinner roll that requires only mixing with a big spoon. I give a step by step tutorial the No-Knead Dinner roll. This is the link http://www.tsgcookin.com/2010/07/no-knead-dinner-rolls.html I have made this roll recipe hundreds of times and I still can’t believe how easy it is.
If you wish to use the “Sunday Best” Dinner Roll recipe and make it by hand, make the following changes to the recipe:
1. For the water–use only 1/2 cup warm water to proof the yeast.
2. Replace the remaining water with milk, 1 1/2 cups.
3. Warm the milk prior to using it in the recipe, either in the microwave or in a pan on the stove-top. It just needs to be warm, not hot.
4. Proof the yeast in a large bowl (with the 1/2 cup warm water and 1/2 teaspoon of sugar).
5. After the yeast is nice and bubbly, add the milk, butter, remaining sugar, eggs, salt, and dough enhancer (if using). Stir these ingredients together, then add 4 cups of the flour. Stir with a large, heavy duty spoon (such as a wooden spoon) until mixture is smooth.
5. Add enough of the remaining flour to form a soft dough. At this point, turn the dough out onto a floured counter-top. Knead the dough with your hands, adding flour a little at a time as needed. Be careful not to add too much flour. The dough should be soft, but you should still be able to knead it. Too much flour will cause the rolls to be heavy and dense. It takes practice to know when the right amount of flour has been added. Continue to knead the dough until it is smooth and elastic. When the dough has been kneaded enough, you will see very tiny bubbles on the surface of the dough.
6. Put the dough in a buttered or greased bowl, turn the dough over once so that a lightly greased surface is facing up. Cover the bowl with a damp kitchen towel or some plastic wrap. Put the bowl of dough in a warm place to rise until double in bulk, usually about an hour. Punch down and work the dough a little bit to get the large gas bubbles out of it.
7. Allow dough to rest, covered, for about 10 minutes. Follow the remainder of the directions in the recipe for forming, raising, rising, and cooking the rolls.
Feel free to send me a message from my TK profile page if you have any questions.
Rebekah Godt on 7.4.2012
Can you make this with out a bread machine or a mixer. I don’t own either of those. They are way to expensive for me. I’ve been looking for a recipe without a mixer. Also can you use regular milk instead of dry?
Terri @ that's some good cookin' on 4.7.2012
There shouldn’t be a problem with skipping the dough enhancer. I use it to give a softer, lighter texture to the rolls. In my area of the country, dough enhancer is usually found in the baking isle near the flour & yeast. A good quality bread flour for the rolls will also work great!
hauenstein0825 on 4.6.2012
What should I do if I don’t have a dough enhancer? Is it necessary? If so, where can I find it?
Terri @ that's some good cookin' on 3.7.2012
@ Stella B’s Kitchen–Good substitution with vital wheat gluten. It will give you a more tender roll, but I suspect you already figured that out!