No Reviews
You must be logged in to post a review.

A great addition to any meal.
1. In a large mixing bowl, dissolve the sugar in warm water, and then stir in the yeast using the flat blade in your mixer.
2. Allow to proof until yeast resembles a creamy foam. (This step is optional.)
3. Mix salt and oil into the yeast.
4. Replace the flat blade beater with the dough hook.
5. Mix in flour one cup at a time on low speed.
6. Once all the dry ingredients are in, come up to medium speed for 5 minutes.
Note: If you do not have a mixer with a dough hook, simply knead the dough on a lightly floured surface until smooth.
7. Then take the dough out, fold it over on itself to redistribute the yeast, make a ball, and place it back in the same bowl after you drizzle a tablespoon of oil (veggie or olive) and turn the dough to coat evenly.
8. Allow the dough to rise at warm room temperature until doubled in bulk, about 1 hour.
Note: A closed unlit gas oven is an excellent draft-free place. The heat from the pilot provides adequate warmth for proper rising. With an electric oven, turn to 150°F for about 3 minutes, then turn off the heat and open the door for 3 minutes. Place the bowl of dough in the oven and quickly close the door. This will give you an approximate temperature of 85°F, just right for even and fairly quick rising.
Dough is ready when its surface is dotted with bubbles.
9. Punch dough down.
10. Knead for a few minutes, and divide in half.
11. Shape into two balls.
12. Lightly coat the bottom of two black cast iron pots with PAM® non-stick cooking spray.
13. Place the dough balls in the cast iron pots.(You may also use two well-oiled 9×5 inch loaf pans.)
14. Allow to rise for 30 minutes or so.
Note: When it is ready, dough will be more than double in size and will not readily spring back when poked with a finger.
15. Bake at 350°F for 30 minutes.
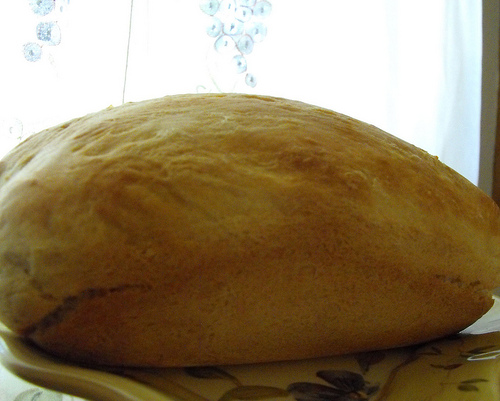
16. Dump the bread from the black cast iron pots and let it cool on a rack for at least 1 hour before slicing.
Yields 2 loaves.
4 Comments
Leave a Comment
You must be logged in to post a comment.
competeforfood on 4.19.2010
Thanks so much for this recipe. I made this bread this weekend with my mother who has arthritis and other arm ailments and can no longer make bread from scratch. If you have older parents you’ve probably seen the sadness in their eyes when they can no longer do as much as they used to. I got myself a Kitchenaid and used this recipe (along with a few of my mother’s additions and subtractions) to make this delicious bread. We ate half of it on Saturday so while she was at work on Sunday I made her a few more rolls. She’s so excited to have home made bread and she doesn’t have to buy any bread this week. I’m going to check out the site for other recipes I can share with my mother. Thanks!
sherylv on 10.26.2009
I’ve made this twice now and got rave reviews both times. I plan to make this at least once a week, it’s so easy!
mommyof3 on 10.16.2009
Yummm! Let me say, I am terrible at making bread. I have tried and tried and not given up. This bread turned out wonderfully for me. It is so tasty and good too! Love it!! Thanks so much for sharing, finally a loaf of bread that I can make.
kaceyrose on 10.14.2009
AWESOME bread. Made this today, followed directions exactly, and it is by far the best homemade white bread I have ever made. Even, fine texture, not too sweet, rose beautifully, soft on the inside with a wonderful crust. I made it in a regular tin loaf pan and spritzed the oven walls with water after it got up to temperature and right before I put the loaf in.
Fabulous recipe, Frank! I may never buy regular bread again -