The Pioneer Woman Tasty Kitchen
Profile Photo

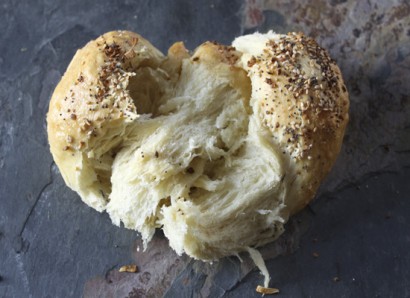
Braided Sesame Semolina Bread

5.00 Mitt(s) 2 Rating(s)2 votes, average: 5.00 out of 52 votes, average: 5.00 out of 52 votes, average: 5.00 out of 52 votes, average: 5.00 out of 52 votes, average: 5.00 out of 5

Prep:

Cook:

Level: Intermediate

System:

20
x

Print Options

Page size Letter 3x5 4x6
Text Size Small Medium Large
Content Include description
Include prep time, etc.
Show image

Description

This is a bread of beauty: golden brown, crispy crust topped with crunchy seeds (and perhaps spices) and a soft, yielding interior. I’ve been making this bread for somewhere near ten years after being inspired by a recipe in the King Arthur Baker’s Catalogue. It’s a hard recipe to mess up beyond edibility which makes it a great bread for beginners. And it tastes amazing, so veteran bakers will go back to it time and again.

Ingredients

  • FOR THE DOUGH:
  • 4 cups All-purpose Flour
  • 2 cups Semolina Flour
  • 3 teaspoons Instant Yeast
  • 3 teaspoons Kosher Salt
  • 4 Tablespoons Sugar Or Non-diastatic Malt Powder
  • 4 Tablespoons Extra Virgin Olive Oil
  • 2 cups Lukewarm Water
  • 1 whole Egg White
  • _____
  • FOR THE OPTIONAL TOPPINGS:
  • Sesame Seeds
  • Dried Onion Flakes
  • Dried Garlic Flakes
  • Poppy Seeds
  • Coarse Salt

Preparation

To mix the dough by hand:

Add all dough ingredients except the egg white and toppings to a large mixing bowl and stir together with a sturdy wooden spoon until you form a shaggy but cohesive dough. Let the dough rest for 30 minutes, covered with a clean towel. Turn out onto a lightly floured counter top and knead until smooth and elastic, about 10 minutes. Transfer dough to a clean bowl, cover with a damp towel and let rise in a warm, draft-free place until doubled in size, about 2 hours.

To mix the dough using a stand mixer:

Add all ingredients except the egg white and toppings to the work bowl of your stand mixer fitted with the dough hook. Turn mixer on to the lowest setting and mix until a shiny, elastic dough forms. Remove the bowl from the mixer, cover the bowl with a damp towel and let rise in a warm, draft-free place until doubled in size, about 2 hours.

To mix the dough in a bread machine:

Add all ingredients except the egg white and toppings to the pan of your bread machine that has been fitted with the dough paddle(s). Set the bread machine on the dough setting and press start. When the cycle is completed, proceed with shaping.

To shape the dough:

Turn the dough out onto a clean surface and form into a neat mass. Divide the dough in half, then divide each half into 3 pieces. Cover three of the pieces with a towel while working with the other three.

Pat one piece into a rough oval. Use the side of your hand to press an indentation along the length of the dough piece. Fold the dough together along the length of the indentation and roll lightly with your hands to form a thick rope between 12 and 14 inches long. Repeat with the other two pieces so that you have 3 ropes of roughly equal length. Line them up parallel to each other, with the ends facing you.

To braid the dough:

Gently grasp the end of the rope on the far left. Lift it to about the center, leaving the far end on the counter, cross it over the rope nearest to it and lay it down. Now grasp the end of the piece on the far right and lift it to about the center, leaving its far end on the counter, cross it over the (now) center rope (which is the first one you moved) and lay it down. This is the manoeuver you will repeat: far left over center, far right over center, and so on, until you have ends too short to continue. At that point, pinch the ends together and tuck under the braid. Now go back to the center of the loaf and finish braiding the loaf toward the top. When you reach the ends, pinch together and tuck under. Cover the loaf lightly and let rise in a warm place until puffy in appearance and about doubled in size.

Preheat oven to 400°F. Whisk the egg white until it is frothy. Paint generously onto the risen bread braids and sprinkle the braids with desired toppings.

Bake for 18–22 minutes or until a golden brown color and firm on top. Turn the oven off, prop the door open a little (two inches, if you can make your door behave) and let cool for at least an hour. Or tear into the loaves with your teeth. I won’t tell.

3 Comments

You must be logged in to post a comment.

Profile photo of inspiredrd

inspiredrd on 4.25.2011

We had this yesterday for Easter. The bread was beautiful and delicious! I posted about it here: http://inspiredrd.com/2011/04/cooking-with-kids-easter-eggs-and.html#more

Profile photo of Rebecca

Rebecca on 3.16.2011

You are so welcome, Shari. I’m glad it helps!

Profile photo of shari

shari on 3.15.2011

I just love the way you always give instructions for every possible way to make bread. There have been a few recipes I’ve seen that I would’ve tried but they were for a bread machine, and I don’t have one. I always make bread by hand or in the mixer(which I prefer). Just wanted to thank you for being so considerate!

2 Reviews

You must be logged in to post a review.

Profile photo of Lois DeRaadt

Lois DeRaadt on 2.24.2012

Thank you for this recipe! I used my bread machine and substituted 1 cup of whole wheat flour for white flour.
It turned out beautiful!! I not only love this recipe, but every single one of your recipes have become our favorites!! So thanks a bunch!

Profile photo of okie51

okie51 on 4.24.2011

This recipe is amazing! I was looking for a braided bread for Easter dinner but didn’t want anything sweet. I also wanted to make the bread with my grandson, who just turned 4. This had only a few ingredients, all easy to find. We made the bread in the Kitchenaid mixer. It rose beautifully. The instructions for forming the ropes worked so well- they looked great and were easy to braid. The recipe even makes 2 loaves-
we made one topped only with sesame seeds and one topped with sesame, onion flakes, minced dried garlic and poppy seeds. The bread looked beautiful, golden brown and tasted delicious. We were so proud of ourselves that we made it. We are both beginner bread makers, the instructions were so easy to follow. Thank you for the great post! I highly recommend it to anyone-

Related Recipes

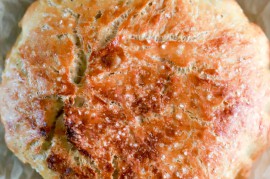
Easiest No-Knead Bread in a Dutch Oven
Profile Photo by Lindsay @ My Therapist Cooks in Breads
Mark Bittman’s no-knead bread is the easiest, most foolproof path to...
5.00 Mitt(s) 1 Rating(s)1 vote, average: 5.00 out of 51 vote, average: 5.00 out of 51 vote, average: 5.00 out of 51 vote, average: 5.00 out of 51 vote, average: 5.00 out of 5

Prep: Cook:

Serves: 6 Level: Easy


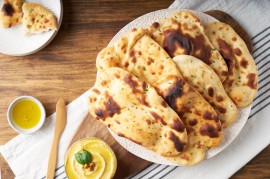
No Yeast Naan
Profile Photo by Liz Voltz in Breads
Quick and easy Naan flat bread made without yeast. Comes together...
0.00 Mitt(s) 0 Rating(s)0 votes, average: 0.00 out of 50 votes, average: 0.00 out of 50 votes, average: 0.00 out of 50 votes, average: 0.00 out of 50 votes, average: 0.00 out of 5

Prep: Cook:

Serves: 6 Level: Easy


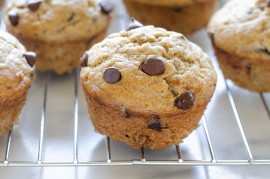
Sourdough Banana Muffins
Profile Photo by PW Food & Friends in Breads
Use up your excess sourdough discard/starter in these yummy banana muffins! From...
0.00 Mitt(s) 0 Rating(s)0 votes, average: 0.00 out of 50 votes, average: 0.00 out of 50 votes, average: 0.00 out of 50 votes, average: 0.00 out of 50 votes, average: 0.00 out of 5

Prep: Cook:

Serves: 12 Level: Easy


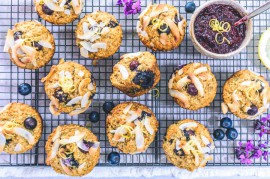
Coconut Blueberry Wholemeal Muffins
Profile Photo by Cheryl Whyte in Breads
Sometimes you just need something a little sweet, right!? Well, I’ve...
5.00 Mitt(s) 1 Rating(s)1 vote, average: 5.00 out of 51 vote, average: 5.00 out of 51 vote, average: 5.00 out of 51 vote, average: 5.00 out of 51 vote, average: 5.00 out of 5

Prep: Cook:

Serves: 12 Level: Easy


Sourdough Naan
Profile Photo by PW Food & Friends in Breads
Naturally leavened Indian flatbread cooked in a cast iron skillet! From Erica...
0.00 Mitt(s) 0 Rating(s)0 votes, average: 0.00 out of 50 votes, average: 0.00 out of 50 votes, average: 0.00 out of 50 votes, average: 0.00 out of 50 votes, average: 0.00 out of 5

Prep: Cook:

Serves: 12 Level: Intermediate