Visit the related blog post for more detailed “how to” photos to accompany this recipe!
The key to a fun sushi-making experience is to prep, prep, prep all of your ingredients beforehand, so that you can have fun assembling.
Rice:
Rinse and drain the rice under cold water a few times until the water is no longer milky. Then cook the rice according to your rice cooker’s instructions. (You can also cook it in a saucepan on the stove, but it’s really difficult to have it not get super clumpy.)
While it cooks, prepare the rice seasoning mixture. In a small saucepan over medium-high heat, stir together the rice vinegar, sugar and salt, and bring to a boil. Remove from heat.
Once the rice is cooked, remove it from the rice cooker and spread it out in a pan (or cookie sheet, or whatever works) and sprinkle with the rice seasoning mixture. Then cover it with a damp towel and let it cool until the rice is at room temperature. (You can pop it in the fridge to speed this up.)
Filling:
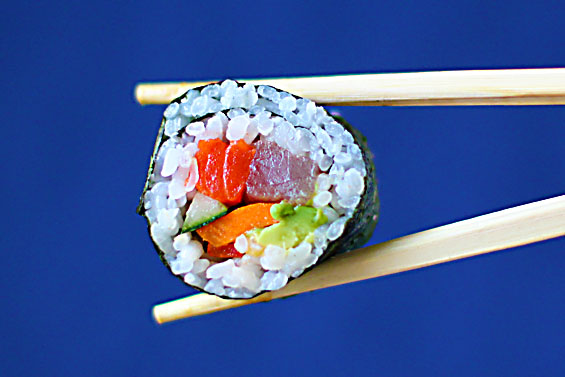
The filling is the fun part! Choose whatever filling ingredients you’d like, and just basically cut everything into long, small strips. (When cutting filets of meat or seafood, just be sure to cut against the grain.)
Spicy sauce:
This is optional, but adds great flavor to any sushi. Just whisk together the mayo and Sriracha together in a small bowl until combined.
Dipping sauce:
Combine soy sauce, and then whisk in (or use your chopsticks to blend in) as much or as little wasabi as you’d like. (Always start with less and add more, if you’ve never used wasabi!)
Bamboo mat:
Finally, prepare your bamboo mat. (You can either use little sushi mats, or just get a large bamboo placemat. I found mine at Dollar Tree.) Basically, you just need to completely wrap it in plastic (Saran) wrap. I usually do two layers, just so it doesn’t accidentally come off, but make it happen however you’d like. This helps the rice not stick to the mat during the assembly/rolling process.
Assembly:
My favorite part! For sushi rolls, you can either make them with the rice on the inside (considerably easier) or on the outside.
To begin, lay out a piece of nori on your plastic-wrapped bamboo mat. Then have your bowl with water and rice vinegar sitting nearby. Dip your fingers in the water/vinegar mixture (this helps the rice not stick to your fingers), and then pick up a small handful of rice and gently press it onto the nori. The goal is to spread out the rice so that it’s uniformly thin (or if you like a lot of rice, you can make it fairly thick), and that it extends clear to the edges of the nori. (Although then if you’re making rolls with rice on the inside, be sure to leave an extra centimeter on the bottom edge of the nori uncovered, so that you can seal the roll at the end.)
(I recommend dipping your fingers in the water/vinegar mixture constantly, to be sure that the rice sticks to the nori and not your fingers!)
For rolls with rice on the inside:
Go ahead and layer your sliced filling ingredients (along with some spicy sauce if you’d like) along the top of the nori, on top of the rice. Try to lay out the ingredients as close together as possible.
For rolls with rice on the outside:
Carefully flip over the rice/nori sheet, and gently press down to compress the rice. Then layer the sliced filling ingredients at the top of the nori as mentioned above.
Then it’s time to rock and roll!
The idea is to use your bamboo mat to help roll the sushi tightly, rather than just picking up the nori to roll it with your fingers. So very carefully, lift up the mat underneath the top of the nori (where your filling is), and begin to roll it over, making sure that the initial edge gets tucked under before rolling out the entire thing. Again, the goal is to try and roll it as tightly and evenly as possible. If you need to back up and re-roll to make it a little tighter, go for it!
Once you finish, I generally give the sushi a few more gentle rolls with the bamboo mat to make sure it’s nice and evenly round. (And if you’re doing rolls with rice on the inside, just add a little water to the uncovered nori in order to seal the roll.) You can then sprinkle some sesame seeds on the outside of the roll (if rice is on the outside), and then give it another roll with the bamboo mat to seal them on.
Then take a (very sharp!) knife, and begin to cut the rolls into your desired thickness of bites. Since the rice often sticks to the knife, I like to have a wet towel nearby to wipe off the knife blade after every 1-2 cuts. (It’s better to refrigerate the rolls for 10 minutes before cutting them into bites, so that the ingredients can “set.” But if you’re impatient like me, you can go ahead and dive in!)
Repeat to make as many rolls as you’d like. Then serve the rolls laid out next to your dipping sauce, and some ginger if you’d like!
Ali’s tip:
If your rolls aren’t tight enough, you may have added too much filling. Or, you likely didn’t get the initial roll (where you tuck the edge under) tight enough. Don’t be afraid to re-roll to get it your desired level of compactness.
But either way, it still tastes good!
Also, if you are using ANY sort of raw fish or meat, be absolutely sure that you buy it at a “sushi-grade” level of freshness. The staff at your meat counter can help you with this. Then be sure to keep it refrigerated except when you’re actually rolling the rolls, and serving the sushi.


No Comments
Leave a Comment!
You must be logged in to post a comment.