No Reviews
You must be logged in to post a review.

Making your own sourdough starter from scratch is easy, but it takes a little time and patience!
Note: Takes 5 to 10 days of preparation, mostly inactive time. Makes 150 grams starter.
From Erica Kastner of Buttered Side Up.
Making the starter:
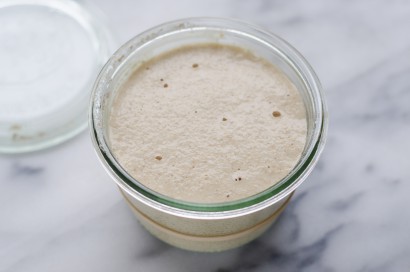
In a clean jar, weigh out 50 grams each of whole wheat flour and water. Mix well. Put a rubber band around the jar at the height of the starter to give a visual indication when the starter has risen. Cover the jar loosely with a glass or plastic lid, or a clean napkin secured with a rubber band.
Set the jar aside in a warm spot out of direct sunlight for 24–48 hours.
First feeding:
Check the starter after 24 hours. If there is no change except for a bit of grayness on top, wait another 24 hours. Once you see any activity (bubbles and/or increase in volume), it’s time to feed the starter!
Mix together a 50/50 blend of whole wheat and organic all-purpose flour. This will be what you feed your starter with!
Discard half of the starter. Add 50 grams each of the flour mix and water. Stir very well, cover loosely, adjust the rubber band if needed, and set aside as before.
Second feeding:
After 12–24 hours, you should see some activity in your starter (bubbles and increase in volume). Discard all but 50 grams of the starter. Add 50 grams each of the flour mix and water. Mix very well, cover loosely, adjust the rubber band if needed, and set aside as before.
Subsequent feedings:
Feed exactly the same way as the second feeding.
Continue feeding your starter every 12–24 hours until it doubles in volume every 8–12 hours, has a pleasant, yeasty smell, and passes the float test (see note). Once it passes the float test, your starter is ready to be baked with!
The whole process of getting your starter established can take anywhere from 5–10 days. Be patient and use your eyes, nose, and the float test to determine if it’s ready.
You can switch to feeding the starter organic unbleached all-purpose flour if you like. Continue feeding your starter once a day for a total of 2 weeks.
Keeping your starter in the refrigerator:
At this point you can start storing your starter in the refrigerator: Feed your starter one last time, let it sit at room temperature for about half an hour, then place it in the refrigerator.
Feed your starter at least once a week: Take it out of the refrigerator and let it sit at room temperature for about an hour. Discard all but 50 grams of the starter, and feed with 50 grams each of flour and water (or however much you need for your recipe).
You can either let the starter sit until it doubles and passes the float test (to use in a recipe), or just let it sit for half an hour and stick it back in the fridge.
Keeping your starter at room temperature:
You can store your starter at room temperature indefinitely if you make sure to feed it almost every day. A missed day here and there won’t hurt an established starter, but if you starve it too long, it will die.
Note: For the float test, drop a small amount of starter into a glass of room-temperature water. If it floats, the starter passed the test! If it sinks, you either need to let the starter sit longer to develop more bubbles, or feed it again and let it sit until it passes the float test (usually 6–12 hours).
One Comment
Leave a Comment
You must be logged in to post a comment.
Joan Mayo on 6.22.2023
If you discard all but 50 g each time, how do you increase the amount to bake with? What did I miss?