No Reviews
You must be logged in to post a review.

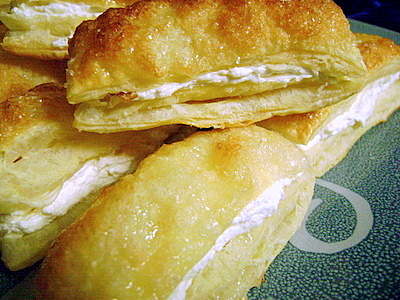
These will make you a rock star any place you bring them! What I love about them is the filling can be made ahead and with the variety of extracts out on the market, you can change it up SO many ways. How about peppermint extract and tint it pink at Christmastime? Or green with mint extract? The possibilities? Endless! I always have puff pastry in the freezer at the ready to make these. Big TA DA… And easy, too!
FOR THE PUFF PASTRY:
Remove the puff pastry from the box. Take it out of the wrapper and allow it to sit on the counter at room temperature for 20-30 minutes.
Carefully open one pastry sheet along the creases. Place remaining sheet in the refrigerator to keep it cold (I cut the pastry when it’s partially frozen—as long as I can unfold it and it doesn’t tear, it’s fine. The pastry seems to puff higher during baking if it’s cold when it goes in the oven).
Using a long, sharp knife, cut each strip of pastry at the creases, forming 3 strips. Cut each strip widthwise into 7 pieces, cutting straight down with the knife—don’t drag the knife across the pastry.
Flip each cut piece over and place on lightly greased baking sheets, leaving room between each piece (I usually use 3 baking sheets).
Combine egg and milk in a small bowl. Lightly brush this over the pastry. Sprinkle with the coarse sugar. Repeat with remaining puff pastry sheet.
Bake at 400 F for 10-12 minutes or until golden brown. Remove to a wire rack and cool completely.
Using a serrated knife, slice each puff horizontally to make top and bottom halves.
FOR THE CREAM FILLING:
Place flour in a small saucepan and slowly whisk in milk. Cook and whisk constantly over low heat until mixture thickens and comes to a boil. Remove from heat and place mixture into a small bowl. Cover bowl with a paper towel and cool to room temperature.
Place cooled mixture into the bowl of an electric mixer and beat until fluffy. Add remaining filling ingredients one at a time, and continue beating on medium-high speed for 5-10 minutes or until light and fluffy. (I use my KitchenAid mixer – I start with the paddle, then when all the ingredients are very well mixed, I switch to the whisk attachment and let that do the rest of the work).
The mixture should look like a whipped cream type frosting. I rub a little of it between my fingers to make sure the sugar has totally dissolved.
TO ASSEMBLE:
Spread about 1 tablespoon of filling on the bottom half of each pastry (be generous—you can always go back if you run out of filling and “borrow” from one pastry to fill another…been there, done that!). Then replace the tops.
Store in refrigerator.
Makes 42 pastries.
9 Comments
Leave a Comment
You must be logged in to post a comment.
littlesophia on 1.2.2010
I think using all shortening & no butter wouldn’t be a good idea; not enough flavor. Each piece is about 1 x 2 or 1 x 2.5 inches.
bookofsnow on 1.2.2010
ok I am planning to make this but I live outside the USA. We have pastry like this but in premade squares, not whole sheets. Can you give measurements for these strips?
bookofsnow on 1.2.2010
Would it be ok to substitute the shortening for butter?
littlesophia on 1.1.2010
made these for dessert last night and I had to create an acct here JUST so I can tell you how good they are! I baked the first batch sprinkling raw sugar on the top before baking. 2nd batch I got distracted and forgot to sprinkle, so caramelized sugar and drizzled it on top after baking & filling. Delicious !
msholiday on 8.29.2009
These were very very good. Really too good for my waistline. I added a dab of strawberry jam to some of them, and guess what…… it made my skirt fly up.