No Reviews
You must be logged in to post a review.

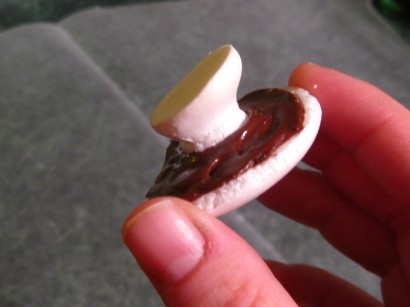
There is no experience in the world like biting into a glorious baked meringue mushroom filled with chocolate. The texture is sort of like a cross between a French macaron sandwich and a Pepperidge Farm Milano cookie. Utterly magical, but you can only make them in very dry weather, as humidity will cause the meringue to stick. Check out my corresponding blog post for many extra how-to photos.
Preheat oven to 375 degrees F. Cover two cookie sheets with parchment paper or very lightly sprayed foil, shiny-side-down.
In a mixing bowl, beat the egg whites and vanilla on high speed until fluffy. Gradually beat in sugar and cream of tartar until completely incorporated. Keep beating. Meringue will be ready when it forms very stiff peaks and remains in perfect mounds after beater is turned off completely, or when a spoon can stand erect in the mixture without falling over.
Fan open a gallon-sized freezer bag and rest it, one point down, in a tall bowl or glass to hold it upright. Spoon meringue into the open bag. Twist the bag shut and cut the bottom pointed tip off the bag. Start with a small tip; you can always make it larger if you need to.
Begin piping equal amounts of caps and stems (the sizes of standard mushroom caps and stems) onto your cookie sheets. The stiffness of the meringue should allow you to pull the stems upward while keeping them upright. When rounding your cap shapes, make sure you disconnect your tip somewhere other than the very tops of the little domes, or they will dry with pointed tops like witch hats, which you don’t want. To perform minor smoothing, wet your fingertips with water to avoid sticking or pulling of the meringue.
Once all meringue has been piped into an equal number of caps and stems, you can sprinkle the tops of the wet caps with cocoa powder if desired, to resemble dirt.
Place sheets into preheated oven, shut the door, and IMMEDIATELY turn the oven COMPLETELY OFF. Leave the mushrooms in the warm oven for at least 2 hours, or longer if possible. Overnight is even fine. Don’t open the oven door until you’re ready to take them out. Checking on them is not necessary; they won’t burn because the oven isn’t on.
Once ‘baked’, carefully loosen the caps and stems from the cookie sheet individually. Take a small, sharp knife and gently chisel a small, round nook in the center of the underside of each mushroom cap. This will create a space for the point of the stem to rest and keep them connected later.
Melt chocolate chips in a microwave-safe bowl for one minute; stir well and recover. Return chips to the microwave and continute heating at 20-second intervals, stirring between each cycle, until melted.
Use a butterknife to smear chocolate around the underside of each mushroom cap in a circular motion, being sure to let a little bit sink into the stem hole you created. As soon as you coat each cap bottom, immediately insert the pointed top of a stem piece and press gently together.
Place the assembled mushrooms upside down (stems up) on the cookie sheet and allow to rest this way until the chocolate has cooled and hardened, sealing the stem into the cap.
Store in an airtight container in a very dry place. (Never refrigerate.)
No Comments
Leave a Comment!
You must be logged in to post a comment.