No Reviews
You must be logged in to post a review.

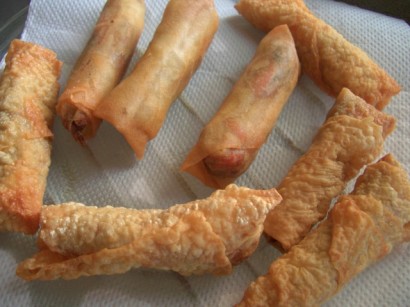
Best. Spring. Rolls. Ever. Fact.
*Note: The preparation seems like a long time but mainly involves cutting up the vegetables! You can cut this time if you are using a food processor or mandolin.
*Note: Dried shiitake mushrooms are not used in the same quantities as regular mushrooms. They are used to impart flavour and only a few are needed. They must be soaked in water for an hour or so beforehand until plumped up.
*A a vegetarian version can be made, replacing the minced pork with the same amount of cooked vermicelli noodles.
1. If using frozen spring roll sheets, take them out of the freezer now. Then wash and finely shred the beans, carrot and bamboo shoots. Shred by using a mandolin or just cut crosswise on the diagonal. All the vegetables should be like matchsticks. This is time-consuming but necessary as the finer the cut, the more water will evaporate. The final mixture needs to be as dry as possible after being fried so the spring roll won’t get soggy.
2. Mince the dried mushrooms and garlic. Marinate the pork with the sesame oil and sugar.
3. Fry the garlic off first in a tiny bit of vegetable oil. Then add the pork. Fry on a medium heat until most of the water in the meat has evaporated and it is looking fairly dry and loose in texture. Remove from the pan and set aside in a dish.
4. Wipe the pan clean then add the vegetables and fry until they are cooked and crunchy (5 minutes at most), not wilted and soggy. Again, we are frying off the moisture in the vegetables so a higher heat is needed, not a low flame.
5. Taste your vegetables for the right amount of crunchiness, then add your meat back into the pan. Add the soya sauce and fry for 1-2 minutes more, mixing well.
6. If the mixture looks very wet, place a sieve or fine colander over a big bowl and drain your mixture through the sieve. Leave the filling for 20 minutes to an hour to cool down and get as dry as possible.
7. Prepare your spring roll wrapping station. You will need a clean table top or flat board, and a small bowl of egg wash (1 egg whisked well with a fork). Make sure your hands are clean! Carefully separate your wrappers and have one platter ready for the wrapped rolls.
Wrapping the rolls:
Wrappers come in many forms, rice paper, round, square, made with flour, etc. I usually go for the generic square, flour ones.
1. Using one wrapper, place it in front of you with one point facing your belly so that it looks like a diamond / kite shape. Work from one corner.
2. Fill the wrapper with 1 spoonful of filling and roll to the opposite end, tucking in the corners on either side like an envelope.
3. Use one finger dipped in egg wash to baste on the opposite end and roll the wrapper up tight. And that’s it! Takes a few to get into the rhythm and get them looking right, but you’ll soon be getting through a dozen without any problems.
4. If cooking straight away, heat a wide flat pan and pour in enough oil to coat the bottom of the pan well but not so that the rolls are swimming in oil. Heat on a high heat, then turn the heat down. To know if the oil is hot enough, put in a tiny square of wrapper in. It should sizzle and brown quickly.
5. Put the rolls in but not too tightly so that you can turn them easily. Fry them for a few minutes on each side until they are golden brown. Lift them out and drain on paper towels. Serve with worcestershire or Thai sweet chili sauce or Chinese fruit vinegar (much sweeter than normal vinegar).
6. If not cooking straight away, put the uncooked rolls in a box and keep them for up to a couple of months in the freezer. This makes great party food or starters for a nice meal with friends.
Happy Wrapping!
No Comments
Leave a Comment!
You must be logged in to post a comment.