No Reviews
You must be logged in to post a review.

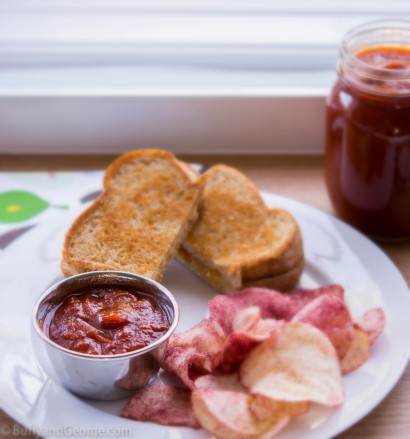
Real ketchup flavour you and your kids will love! Roasting the tomatoes in the oven gives you some ‘hands-off’ cooking time for this canning recipe.
Preheat the oven to 400 F.
Wash and cut all the tomatoes in half and place them in a large roasting pan. Chop the onion and bell pepper and mix them in with the tomatoes.
Place the roasting pan in the oven and roast for an hour. Halfway through cooking, stir the tomatoes around so that the tomatoes on top don’t end up burned.
When the tomatoes go into the oven, put the cider vinegar in a small pot with all the spices (mustard seeds through cinnamon). You will strain them out later. Bring to a boil then lower heat to a low simmer. After a half an hour, remove the cinnamon stick or it becomes overpowering.
When the tomatoes are soft and pulpy, take them out of the oven and puree them in batches in a food processor.
Separate a piece of paper towel into its two individual layers. Lightly moisten one layer of the paper towel and place it over a small fine mesh sieve. Place the sieve over a bowl. Pour the vinegar mixture over the paper towel to strain out the spices. Discard the spices and paper towel. Set the spiced vinegar aside.
Put the tomato puree in a fine mesh sieve set over a very large heat proof bowl. You’ll also need to do this in batches. Push it through the sieve using a strong whisk, using a stirring motion.The whisk will push the puree through the sieve while it scrapes the bottom of the sieve allowing you to get the pulp through faster. Discard the seeds and skin left behind in the sieve. Scrape the pulp stuck to the underside of the sieve into the bowl.
When the tomatoes are all strained through the sieve, pour the pulp into a large heavy bottomed pot. I use a 5 quart cast iron enamel pot. Pour the spiced vinegar into the pot with the tomatoes. Stir in the brown sugar and salt as well. Bring the mixture to a boil over a medium high heat.
While that starts to boil, bring a canning pot full of water, with a rack on the bottom, to the boil. Wash 6 half pint (250 ml) jars and new lids. Put the clean jars in the canning pot to sterilize. Boil them for 10 minutes and then turn off the heat to keep the jars hot and ready for the ketchup.
Keep stirring the ketchup often to prevent scorching on the bottom.
When the ketchup is less watery (after about a half hour) and is starting to splatter, place a spatter guard on top of the pot or prepare to clean up a lot of ketchup splatters from your stove, floor and counter. Also, turn the heat down to medium.
Continue to boil the ketchup over a medium heat, stirring often as it cooks down until it is very thick.
When your ketchup is almost to your desired thickness, put the lids of the canning jars in a small pot with water and heat it gently on the stove for 5 minutes. Put the lid on it to prevent ketchup splatters from getting in the pot. Once the water is hot, turn the heat off and let the lids sit in the hot water.
To test to see if the ketchup is thick enough, take a spoonful and put it on a plate. If it stays in a mound and hardly any liquid spreads out on the plate then it is done. If a watery pool forms around the ketchup then keep boiling it down. You may need to boil the ketchup for upwards of an hour and a half to get the consistency of a nice thick ketchup.
When the ketchup is the consistency you want, take the jars out of the hot water and place them on a heat proof surface, such as a large cutting board. Fill the jars with the ketchup, leaving ½ inch head space at the top of the jar.
Wipe off the rims of the jars and place the hot lids on and add the rings. Tighten the rings (but not too tight) and place the jars in the boiling water of the canning pot and boil the jars for 10 minutes. Ensure that the water is boiling the entire time.
When the time is up, remove the jars from the water and place on a rack or board. Leave the jars for 24 hours and if they seal then they can be stored in a cool dry place. If they do not seal (the lid pops when you press down on it) then refrigerate them and use within a couple of weeks.
No Comments
Leave a Comment!
You must be logged in to post a comment.