No Reviews
You must be logged in to post a review.

A delicious twist on a breakfast classic.
Because we are using rapid rise yeast, we will begin by adding the yeast to half of the flour and set aside. Rapid rise yeast is added to dry ingredients first, and then the wet ingredients are added later. But for now, if you are using active dry yeast, this step is the same. In a small saucepan, put milk, 1/3 cup butter, granulated sugar and salt on medium heat, allowing butter to almost melt and the temperature to reach about 120 to 130ºF. If you can, use a thermometer, because if it’s too hot, it will not allow the yeast to do its magic. If you don’t have a thermometer, a good rule of thumb is to never let it boil or form small bubble around the side of the saucepan. The butter should not be totally melted, but almost, and the liquid should be cool enough to dip your finger in quickly without burning it. Stir occasionally so the sugar will dissolve. It is better to have the liquid on the cooler side than on the hotter side.
Once warmed to desired temperature, add the liquid mixture to the flour and yeast and mix, along with the eggs and almond extract, on medium speed for thirty seconds. Stop and scrape the sides of the bowl, and then mix on high speed for three more minutes. Add in the rest of the flour a little at a time until it’s fully incorporated. If you are using a KitchenAid, make sure to use the hook attachment for this step. If not, then use a wooden spoon and do it by hand. Once incorporated, place the dough on a floured surface and knead for a few minutes, adding any extra flour that you could not incorporate into the mixing step. Form into a ball and let rest for ten minutes.
While it’s resting, mix the brown sugar, cinnamon, and a dash of flour into a small bowl. Heat the remaining butter in the microwave to melt, and set aside. Once the dough has rested for ten minutes, roll out into a rectangular shape (the ends will come to more of a point). The dough should be about 1/4 inch thick. You can make it thinner, it just depends on how thick you want your rolls to be.
Use a pastry brush, or just a spoon, and spread half of the melted butter evenly over the dough, leaving about 1/2 to 1 inch of space on each side. Sprinkle brown sugar mixture evenly over the butter. Use a spoon to make sure it’s evenly dispersed. Now sprinkle half of the coconut flakes evenly over the filling, and then the sea salt on top of that. Roll the dough starting at the bottom point, and rolling towards the top point. It will be full, so try and roll tightly, but be careful not to rip the dough. Once rolled, pinch the ends that do not have any filling in them and use a bread knife to cut them off. Carefully cut the dough into about 1-1/2-inch pieces (again, depends on how thick you want your rolls to be and how many). Place each piece into the baking pan and cover in a warm place for about 40 minutes to an hour to let them rise. Mine didn’t look that giant, but they still worked.
While you are waiting, preheat the oven to 375ºF. Once heated, place the remaining coconut flakes on a cookie sheet and bake for about 5 minutes, watching closely so that the coconut gets toasted and not burned. Remove from the oven. Continue to let the dough rise. I leave the oven on and have the rolls on the stove so that the heat allows them to rise faster.
For the frosting, place powdered sugar into a mixing bowl, and add a small portion of the milk. Mix on low, scraping the sides of the bowl, and add the rest of the milk in small doses, watching the texture of the icing. Some people like the icing thick, others thin, so add more or less milk accordingly. Add almond or coconut extract to taste.
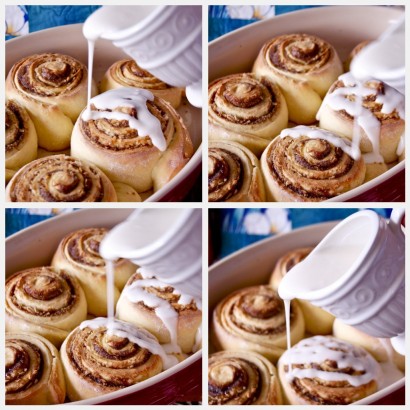
Once rolls have risen, place in the oven for 25–30 minutes or until golden brown. Remove and let cool slightly, then pour the frosting over the rolls. Serve warm, and add the toasted coconut on top.
Enjoy!
Note: If using active dry yeast, place the dough ball into a greased bowl, cover and let double in size, about 1-1 1/2 hours. Punch down the dough, then follow the steps above like the rest of the recipe.
One Comment
Leave a Comment
You must be logged in to post a comment.
Carol on 5.17.2011
Beautiful…….those photos have me craving cinnamon rolls…YUM!
I love making bread and I know I’m gonna love making these…thanks so much for sharing your recipe,
Carol