
No Reviews
You must be logged in to post a review.
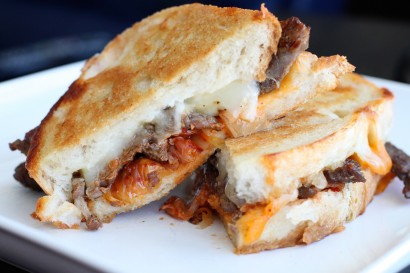
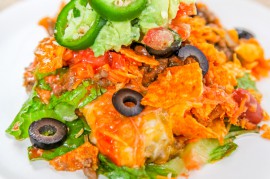
A quick twist on a grilled cheese sandwich by adding a Korean marinated beef along with kimchi and two types of cheese. This was very delicious.
Start by marinating your beef. Take the onion, garlic, and ginger and place into a food processor, and process into a paste. You want everything to be very fine.
To a small mixing bowl, add the soy sauce, sugar, sesame oil, black pepper, and chili flakes. Whisk to mix in all of the sugar. Add in the garlic paste mixture and stir.
Add in your flank steak, and mix thoroughly to get all of the beef marinated. Cover, and place in the refrigerator for at least one hour, or up to four hours.
Keep in mind the beef makes a lot, so you can either freeze what you will not use, or cook it up in batches, and make something like Korean lettuce wraps.
Add the oil to a skillet and bring that to a medium high heat. Add the strips of marinated beef to the skillet and cook a few minutes on each side. The beef will caramelize a bit from the sugar in the marinade, and well, that is just delicious in my book. After a few minutes, flip the beef over, and cook another few minutes. The beef will not take long at all as you thinly sliced it. You could also cook these on a grill as well, your call. Once the beef is cooked, set it on a plate.
I used about ten slices for my sandwich. When you are ready to make the grilled cheese, spread the butter to cover each slice of bread.
Heat a skillet on medium low heat. Add a slice of bread, butter side down onto the skillet. Add three slices of havarti cheese, starting a bit from the edge, and overlapping to the other edge.
Add the cooked Korean beef. Top the beef with the kim chi, layering from edge to edge, and top the kimchi with the cheddar cheese slices, covering from edge to edge. Top with the remaining slice of bread, butter side up.
Cook the grilled cheese slowly as you want to warm everything through, making sure you get the cheese nice and melted, the beef and kimchi warmed, as well as not burning the bread.
So after a few minutes, gently lift the bread and check for the toasting level. Once it is golden brown, flip it over, and cook the other side for a few minutes.
Once that side is golden brown, I flipped it over one more time and added my bacon/sandwich press to the top, just to add a bit of pressure and guarantee some great cheese ooziness. Is ooziness even a word?
OK, now you are ready to dig in. Get ready because when you first bite in you think you are getting an awesome, thick style grilled cheese, but then that beef hits you. That sesame, ginger and garlic style beef that is just awesome and here comes that pickled cabbage that just opens all doors to flavor town. Your curiosity will definitely have you continuing to eat this Korean style grilled cheese. I hope you enjoy!
Prep: Cook:
Serves: 4 Level: Easy
Prep: Cook:
Serves: 4 Level: Easy

Prep: Cook:
Serves: 4 Level: Easy

Prep: Cook:
Serves: 12 Level: Easy
Prep: Cook:
Serves: 8 Level: Easy


No Comments
Leave a Comment!
You must be logged in to post a comment.