


No Reviews
You must be logged in to post a review.
Follow these easy step-by-step instructions (with photos, if you click on the related blog link) to make delicious homemade pasta.
Note: This recipe uses a pasta maker/machine.
Place flour on a flat, clean and dry surface and make a well in the center to allow for the eggs. Drop the eggs into the well and add the salt to the eggs. Carefully mix the eggs together using a fork, trying not to disturb the outer well of flour. Gently and slowly start to incorporate the flour into the eggs, bit by bit. Once most of the flour is incorporated, use your fingers to fully incorporate the flour, eggs and salt.
Using your hands, gather the flour mixture together. If the mixture feels too dry and doesn’t want to form, add about 1 Tablespoon of water (more if necessary) to assist it. If the mixture is too moist, add a bit of flour. Form the dough into a ball.
Knead the dough, by pushing down and away from you with the palm of your hand , remembering to turn the dough 90 degrees with each push. Each time you rotate the dough, push down and away again, continuing to fold the dough over on itself. Continue this process until the dough is smooth, about 5-7 minutes.
Once the dough is smooth, divide the dough into 3 equal portions and form each portion into a ball. Cover the 3 balls with a towel or bowl and allow to rest for 15 minutes.
Taking one ball, flatten with the palm of your hand until it is about 1/2-inch thick (you can use a rolling pin if you’d like). Make sure the flattened ball is no wider than the opening on your pasta machine (mine is 6 inches). With the machine on its widest setting, usually a “7,” turn the handle while feeding one end of the dough into the opening. Gently cradle and hold the flattened dough as it is released from the other side of the pasta machine. Don’t pull the dough, just allow it to come out as you turn the handle.
After the dough has passed through all the way, turn the slot to the next smallest setting (a “6,” for example) and pass the dough through again, following the same technique as before. Continue this process, reducing by one slot size each time, until you have your desired thickness, usually a “1″ (for linguine and angel hair) or “2″ (for spaghetti or fettuccine). The dough will keep getting longer and longer as it gets pressed thinner and thinner. Take care to hold the dough as it gets longer and longer so it doesn’t tear.
After you’ve reached your desired thickness of dough, it’s time to cut the pasta. Cut the long rolled dough into 2 or 3 pieces each (cutting across the width, not the length) so the pasta will come out with your desired length. This will make it easier to maneuver and will not leave you with mile-long pasta noodles.
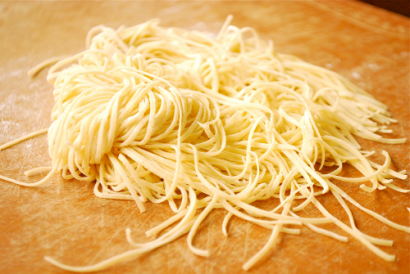
Attach the preferred pasta blade, whether it’s linguine, fettuccine, spaghetti, etc., to the pasta maker and move the handle so it now controls the blade. Feed the dough into the cutting blades. Use your non-turning hand to receive the cut pasta in one bunch. Immediately after cutting the dough, lightly dust with flour and toss the noodles to keep them from sticking and place them on a towel, cutting board or plate. The pasta can be used right away or stored for about one week or even hung out to dry and stored for longer.
When you are ready to make your pasta dish… Add the noodles to a pot of boiling salted water. They will cook very quickly, so start checking them after about 1 minute. Keep cooking until they reach your desired texture.
Add your favorite sauce and you’re set!
Enjoy!
Prep: Cook:
Serves: 4 Level: Easy
Prep: Cook:
Serves: 4 Level: Easy

Prep: Cook:
Serves: 4 Level: Easy

Prep: Cook:
Serves: 12 Level: Easy
Prep: Cook:
Serves: 8 Level: Easy


No Comments
Leave a Comment!
You must be logged in to post a comment.