
No Reviews
You must be logged in to post a review.
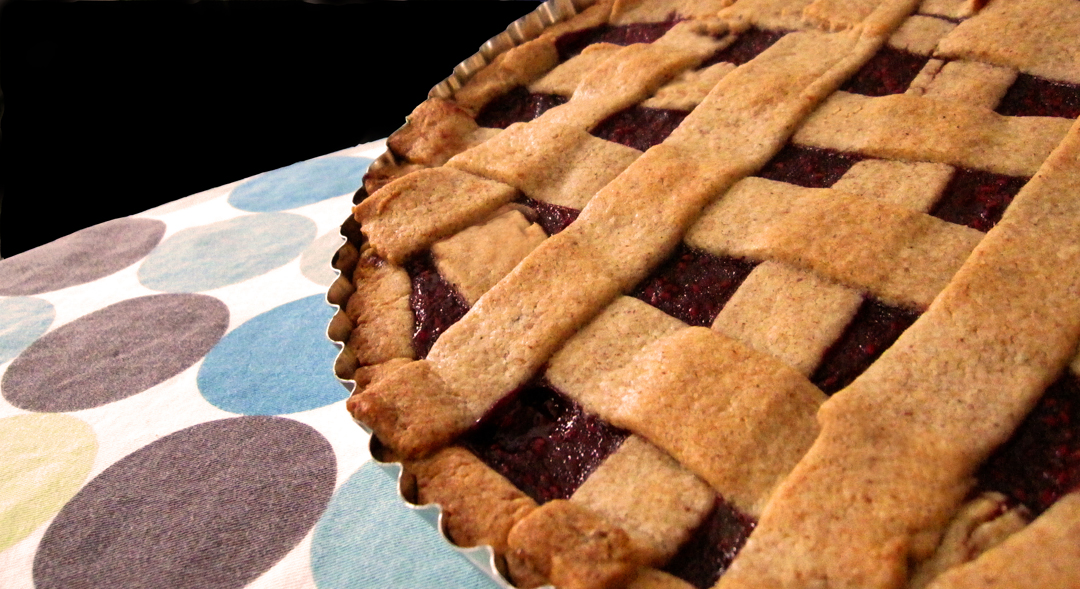
Considered one of the oldest known tarts, a Linzertorte is a charming, buttery flavored raspberry dessert. With a rich nut and flour crust, it is also excellent with coffee or tea.
While there are a lot of steps to this tart, the results are certainly worth it. You probably could make this without a food processor, but I wouldn’t want to try it! I used an 11 inch tart pan with a removable bottom, but you can also use a springform pan.
MAKE CRUST:
1. Preheat oven to 350 degrees F.
2. Spread almonds and hazelnuts on a cookie sheet and toast in oven. It should take 6 to 8 minutes, and they should be lightly browned and fragrant.
3. Cool the nuts to room temperature.
4. In a food processor, pulse the nuts, sugar and salt until they are very finely ground and mixed.
5. Add the lemon zest and pulse to combine.
6. Add flour, cinnamon and allspice; pulse to combine.
7. Scatter 12 tablespoons of butter over the dry ingredients in the food processor. Pulse to combine, stopping when the mixture looks like a coarse meal.
8. Whisk together egg and vanilla extract.
9. Turn food processor to “on” and slowly pour the egg mixture into the feeding tube. Let the machine run until a dough ball forms from all the ingredients.
FORM THE CRUST:
1. Take dough out of the food processor and pat until it’s all cohesive. I usually have to dig little bits from the corners of the food processor and push them into the main ball.
2. Divide dough into 2 pieces, one slightly larger than the other. (For those with a kitchen scale, 15 oz. and 13 oz.)
3. Flatten each piece into a disk shape.
(At this point, you can double wrap the disks in plastic wrap and refrigerate for about 2 days. If you do, let it warm up before you finally use it.)
4. Cut a parchment round to fit the bottom of the tart pan. Spray the bottom and sides of your pan with cooking spray.
5. Take the bottom out of pan and place parchment round on it. Spray parchment with cooking spray.
6. Place smaller dough disk on the center of the parchment-lined tart pan bottom.
7. Use an intermediary (parchment paper, plastic wrap) on top of dough and roll out until it is almost to the edges of the bottom of the pan.
8. Drop the bottom into the fluted ring and remove the intermediary.
9. Using your fingers, press the dough edges flush with the fluted ring.
10. Poke holes in dough and place tart pan on a cookie sheet.
11. Bake bottom crust for 15 minutes, or until edges just begin to brown.
12. Let cool to room temperature again.
13. While tart bottom is cooling, pinch off a golf-ball-sized piece of dough from the larger circle.
14. Carefully roll this into a rope. It will probably not want to stick together as the dough is fragile. Do the best you can.
15. When tart bottom is cool, place rope inside tart pan against the fluted sides. Repeat as necessary until the dough comes almost to the top of the tart pan. We are going to put a lattice crust on top, however, so eyeball it as best you can.
16. Using your fingers (or a measuring cup), gently press the rope(s) together and up the sides.
17. Put tart pan aside on its cookie sheet again.
18. Roll out the remaining dough into a 12-inch circle (or however large you need). Use an intermediary (I use parchment paper) and you’ll definitely need a “bottom” piece under the dough.
19. Using a knife or pizza cuter, trim outside edges so that the circle is neat on the outside.
20. Cut strips that are a half to three quarters of an inch. You’ll need ten, but this dough is fragile so having more is helpful.
21. Take bottom parchment paper and place on another cookie sheet. Put cookie sheet in the freezer for 15 to 20 minutes. We want the strips “firm” but not frozen.
FOR FILLING:
You can either make your own raspberry preserves or use a jarred version. I prefer to make my own from frozen raspberries. If you use a jarred version, use 1 1/4 cups of high quality raspberry preserves.
1. Take 8 ounces (2 cups) of frozen raspberries and place in a pot on stove top.
2. Pour in 1/4 cup of sugar.
3. Sprinkle a few drops of lemon juice.
4. Let the whole thing come to a boil, stirring occasionally. You want a fair amount of liquid to boil off, but you don’t want anything to burn. It should take about 15 minutes.
5. Let raspberries cool to room temperature.
ASSEMBLING TART:
1. Pour raspberry filling into prepared tart pan.
2. Filling should be even, but not overflow the edges of the crust.
3. Take hardened strips of dough from freezer and assemble in a lattice crust. If dough warms too much, put it back in the freezer to firm up again. The dough has a tendency to break on me, and I usually just work through it. Please note that you will find it hard to move strips after you’ve laid them down. The raspberry preserves are quite sticky.
4. Brush lattice strips with cream. (You can skip this step. I often do.)
Put cookie sheet with tart on it in the oven and bake until golden brown and filling is bubbly, about 50 minutes.
Let cool to room temperature to serve (usually 2 hours). Good eaten alone, or with whipped cream.
Prep: Cook:
Serves: 6 Level: Easy
Prep: Cook:
Serves: 12 Level: Intermediate
Prep: Cook:
Serves: 16 Level: Easy
Prep: Cook:
Serves: 24 Level: Intermediate

Prep: Cook:
Serves: 12 Level: Easy


No Comments
Leave a Comment!
You must be logged in to post a comment.