
One Review
You must be logged in to post a review.
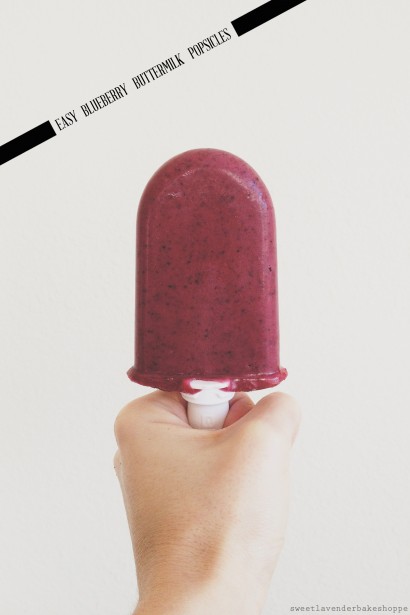
Four simple, easy to find ingredients. All wholesome and natural. How do you go wrong? No white sugar, no processing and all healthy ingredients. I mean, come on.
Note: I used my Zoku Quick Pop Maker for these popsicles, but feel free to use your favorite popsicle maker! The instructions will be the same except for the freezing time. Follow your manufacturer’s directions after step 4. If using a Zoku Quick Pop Maker, you’ll get 6-8 popsicles.
1. Make sure your Zoku Quick Pop maker base has thoroughly frozen. I leave mine in my freezer indefinitely. Then it’s ready whenever I need to use it to make popsicles! I do the same with my ice cream maker base!
2. In a food processor (or powerful blender) add your bag of frozen blueberries and 1/4 cup concord grape juice. Process until mixture stops twirling around. When it starts twirling around this means you need to add more liquid. Continue until all of the juice is added.
3. While processor is on, slowly pour in your buttermilk. Continue adding until your mixture freely spins around and turns into a puree. You are looking for the consistency of baby food (or a nice smoothie). You might not need to add your whole cup of buttermilk if your berries were full of juice OR if the bag had defrosted some before you began. You might need to add more than a cup if the mixture was too frozen. Either is totally OK. Add as much as you need to acquire smoothie consistency.
4. Scrape down the sides of the bowl and add your 1/8-1/4 cup of honey. Because my berries were on the tarter side, I needed the full 1/4 cup. Process again until thoroughly combined. Taste. Mixture should be just barely overly sweet. Because it will be consumed frozen, it’ll lose a tiny bit of its sweetness. Add more honey if need be; do so to your liking.
5. Pour mixture into an easy pourable container. I used my Pyrex 4 cup measuring cup with lip for easy pouring. Remove popsicle base out of freezer, place sticks in and carefully pour blueberry mixture into slots. For the Zoku Quick Pop Maker, pour until you reach the “fill line”. Set timer for 6-8 minutes. Place remaining blueberry mixture in fridge.
6. After 6 minutes, check popsicles. You should see your popsicle is set completely. If not, continue to let them sit in the base until firm. Then carefully remove them as per your manufacturer’s instructions, wrap in plastic wrap, and place into freezer. For Zoku Maker, use the “Super Tool” to twist popsicles out of base, wrap in plastic wrap, and place in freezer.
7. Continue again with more of the blueberry mixture and more popsicle sticks, until you’ve used it all. Remember that for each new batch of popsicles being made, increase your freezing time in the base. As base sits out on counter it will lose it’s freezing strength. For second batch set your timer for 8-9 minutes, for the third batch set it for 9-10 minutes, etc.
Now you’ve got a nice batch of homemade, good for you, honestly made, healthy popsicles for a yummy dessert or anytime snack!
Prep: Cook:
Serves: 6 Level: Easy
Prep: Cook:
Serves: 12 Level: Intermediate
Prep: Cook:
Serves: 16 Level: Easy
Prep: Cook:
Serves: 24 Level: Intermediate

Prep: Cook:
Serves: 12 Level: Easy


No Comments
Leave a Comment!
You must be logged in to post a comment.