The Pioneer Woman Tasty Kitchen
Profile Photo

Homemade Pita Bread + Spinach Salad

5.00 Mitt(s) 1 Rating(s)1 vote, average: 5.00 out of 51 vote, average: 5.00 out of 51 vote, average: 5.00 out of 51 vote, average: 5.00 out of 51 vote, average: 5.00 out of 5

Prep:

Cook:

Level: Easy

System:

16
x

Print Options

Page size Letter 3x5 4x6
Text Size Small Medium Large
Content Include description
Include prep time, etc.
Show image

Description

An easy homemade pita bread recipe with a spinach salad filler.

Ingredients

  • FOR THE PITA BREAD:
  • 1-¾ cup Lukewarm Water
  • 2-¼ teaspoons Yeast
  • 1-½ teaspoon Salt
  • 1 Tablespoon Sugar
  • 3 cups To 5 Cups Flour
  • _____
  • FOR THE SALAD:
  • 1 bunch Fresh Spinach
  • 1 whole Carrot, Peeled
  • 1 whole Radish, Peeled
  • 1 whole Cucumber
  • 1 whole Medium Tomato
  • 1 whole Hard Boiled Egg (optional)
  • 2 Tablespoons Caesar Dressing (or Dressing Of Your Choice)

Preparation

For the Pita

Dissolve the yeast in lukewarm water (you need to make sure the water isn’t too hot, as this will kill the yeast, or too cold, which will not activate the yeast) in a medium size bowl. Add the salt and sugar. Let it sit in a warm place for about five minutes. Add 1 cup of flour and beat vigorously with a whisk for 2 – 3 minutes to help develop the gluten.

Add 3 cups of flour (or more if needed) until a thick dough is formed. Flour your hands and knead the dough. Flour a flat surface and remove the dough from the bowl and continue kneading for about eight minutes, folding and turning the dough so that all parts are kneaded evenly, adding more flour whenever the dough becomes too sticky to handle.

Form the dough into a ball and place in a greased dish to rise. Cover and set for one hour in a warm place.

After the dough has risen, remove it from the bowl and turn out onto a floured surface. Divide the dough into balls approximately the size of billiards balls and roll out into thin rounds.

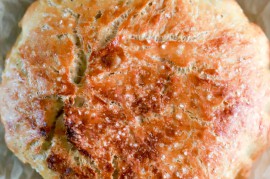
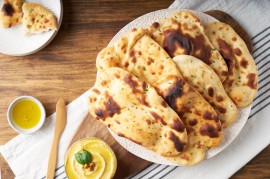
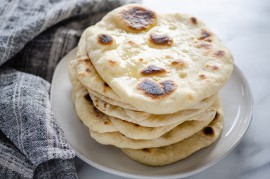
Fry each round on a dry griddle or pan on medium-low heat until puffed up and brown. Flip the pita when a large bubble has filled the center of the pita and the bottom is lightly browned. Fry briefly on the other side only until it browns.

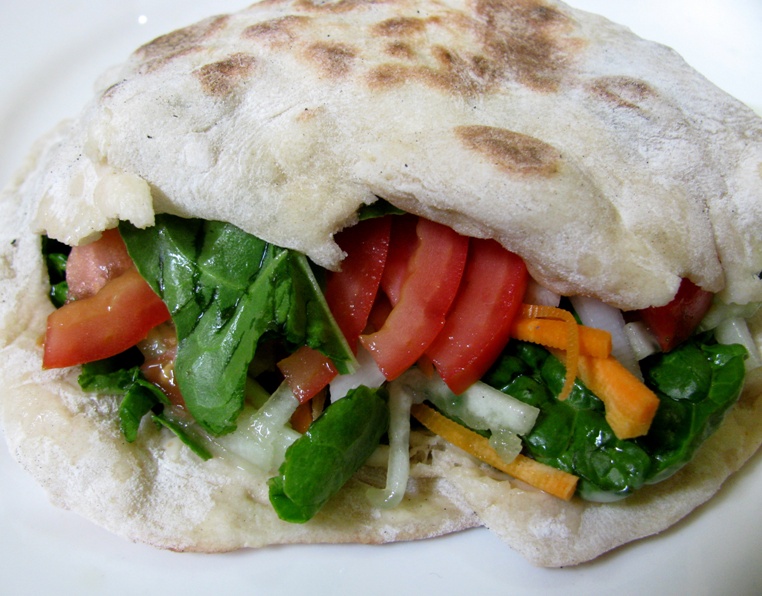
To open, use a fork or a knife to lightly pierce the pita and open the natural cavity inside.

For the Salad

Wash and rinse the spinach to make sure all grit and dirt is removed. I julienned my veggies, because I like the matchstick shape when stuffing pitas and making veggie sandwiches, but you can cut up the veggies any way you please. The hard boiled egg should be sliced. Once your veggies are ready, spread a layer of dressing on the inside of the pita and begin layering the veggies and egg inside.

Enjoy!

2 Comments

You must be logged in to post a comment.

Profile photo of cherylovesfood

cherylovesfood on 4.16.2012

okay I may be raving, in a positive sense, but these are amazing! I made these for the third time and I had them all rolled out ready to cook but had to put my daughter down for her nap. Long story short I had stacked and it was at least 40 minutes before I got back to them. They had all melded into one large thick pita… I cut it up again and rerolled them all, cooked them and they were still soft and tasty!!! I couldn’t believe it! I’ve been telling everyone I know about this recipe!

Profile photo of shakinhomemakin

shakinhomemakin on 6.16.2010

I just made these today with my boyfriend and they are fantastic! Highly recommended.

One Review

You must be logged in to post a review.

Profile photo of cherylovesfood

cherylovesfood on 3.18.2012

I have tried a few pita recipes and this is my new favourite! The dough is so easy to work with and the texture and flavour of the end product is great! I need to tweak my cooking of them, I found flipping them a couple of times instead of just once made a more evenly cooked, fluffier pita and it’s difficult to cook on the stovetop as you have to keep adjusting the temperature as the pan heats up but I still like that better than a 500F oven. Thanks for a wonderful pita!

Related Recipes

Easiest No-Knead Bread in a Dutch Oven
Profile Photo by Lindsay @ My Therapist Cooks in Breads
Mark Bittman’s no-knead bread is the easiest, most foolproof path to...
5.00 Mitt(s) 1 Rating(s)1 vote, average: 5.00 out of 51 vote, average: 5.00 out of 51 vote, average: 5.00 out of 51 vote, average: 5.00 out of 51 vote, average: 5.00 out of 5

Prep: Cook:

Serves: 6 Level: Easy


No Yeast Naan
Profile Photo by Liz Voltz in Breads
Quick and easy Naan flat bread made without yeast. Comes together...
0.00 Mitt(s) 0 Rating(s)0 votes, average: 0.00 out of 50 votes, average: 0.00 out of 50 votes, average: 0.00 out of 50 votes, average: 0.00 out of 50 votes, average: 0.00 out of 5

Prep: Cook:

Serves: 6 Level: Easy


Sourdough Banana Muffins
Profile Photo by PW Food & Friends in Breads
Use up your excess sourdough discard/starter in these yummy banana muffins! From...
0.00 Mitt(s) 0 Rating(s)0 votes, average: 0.00 out of 50 votes, average: 0.00 out of 50 votes, average: 0.00 out of 50 votes, average: 0.00 out of 50 votes, average: 0.00 out of 5

Prep: Cook:

Serves: 12 Level: Easy


Coconut Blueberry Wholemeal Muffins
Profile Photo by Cheryl Whyte in Breads
Sometimes you just need something a little sweet, right!? Well, I’ve...
0.00 Mitt(s) 0 Rating(s)0 votes, average: 0.00 out of 50 votes, average: 0.00 out of 50 votes, average: 0.00 out of 50 votes, average: 0.00 out of 50 votes, average: 0.00 out of 5

Prep: Cook:

Serves: 12 Level: Easy


Sourdough Naan
Profile Photo by PW Food & Friends in Breads
Naturally leavened Indian flatbread cooked in a cast iron skillet! From Erica...
0.00 Mitt(s) 0 Rating(s)0 votes, average: 0.00 out of 50 votes, average: 0.00 out of 50 votes, average: 0.00 out of 50 votes, average: 0.00 out of 50 votes, average: 0.00 out of 5

Prep: Cook:

Serves: 12 Level: Intermediate