One Review
You must be logged in to post a review.
Marjolein on 1.13.2014

These were delicious!! I do think i rolled them out a little to flat, but it took nothing away from the flavour.
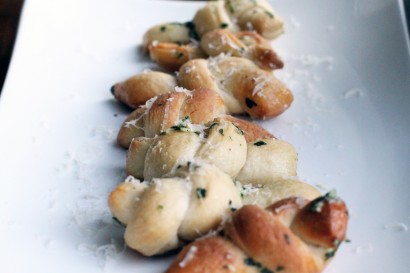
Forget the classic garlic bread, and go with these soft, buttery garlic rolls known as garlic knots.
Start by adding your water, yeast, sugar, and honey into a large mixing bowl. Set it aside and let this become frothy for about 10 minutes. Take in the smell. It’s wonderful.
Once your yeast has activated, add in the salt, olive oil and flour. Mix everything together until it forms into a dough ball. You don’t want it sticky, and you don’t want it dry. So add additional flour if it’s too sticky, or add a bit of additional water if it’s too dry.
Take the dough out of the bowl and knead it for a couple of minutes, before shaping it into a ball and transferring to another large bowl. Drizzle olive oil over the dough to lightly coat. Cover the bowl with a kitchen towel and set in a warm place to let it rise. The rising process will take a couple of hours, but I like to let mine rise throughout the day as we most often make the pizzas for dinner.
About 3 hours into the rising process, take the towel off and make a fist, and punch it right in the center of the dough. This is called punching down the dough. Cover and let the dough rise another hour or so. Punch it down again before rolling out the dough.
Next, add the butter, salt, and garlic to a sauce pan, and on low temperature, begin melting the butter. Once it’s melted, set the pan aside off of the heat.
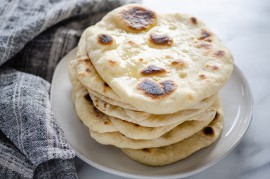
Next, take some flour and shower your working surface with the flour. You will begin rolling out the dough until it’s about 1/4 inch to 1/2 inch thick and about 15 inches across both sides.
Take a pizza cutter and cut the dough in half, width wise. Next, cut in the opposite direction and slice the sections of dough into about one inch slices (see the related blog link for pictures).
Preheat your oven to 375 F.
Lightly oil a baking sheet with the olive oil, or use parchment paper if you have that. Take a slice of the dough, and make a knot out of it as pictured above. Set the knot onto the baking sheet, and repeat until finished. I made about 24 knots out of this recipe.
Lightly brush some of the garlic butter onto each knot. Then place the pan in the preheated oven for about 12 minutes, or until the knots are a light, golden brown.
Add the remaining garlic butter to a large enough bowl to hold all of the knots, then toss in the chopped parsley. Give that a stir.
When the knots are cooked, add them into the bowl containing the butter and parsley, and give them a good toss, or three, allowing the remaining garlic butter and parsley to coat the rolls. Shower the rolls with the Parmesan cheese, and toss again. Take a smell, you deserve it. Actually, take one, eat it and enjoy. You’ll want another one. And another.
I simply served the bowl at the table. If you wanted to, you could present them on a nice platter. They will most likely disappear extremely fast—they are pretty amazing. Are you a fan of garlic knots or garlic bread?
Prep: Cook:
Serves: 6 Level: Easy
Prep: Cook:
Serves: 6 Level: Easy

Prep: Cook:
Serves: 12 Level: Easy
Prep: Cook:
Serves: 12 Level: Easy
Prep: Cook:
Serves: 12 Level: Intermediate


No Comments
Leave a Comment!
You must be logged in to post a comment.