
No Reviews
You must be logged in to post a review.
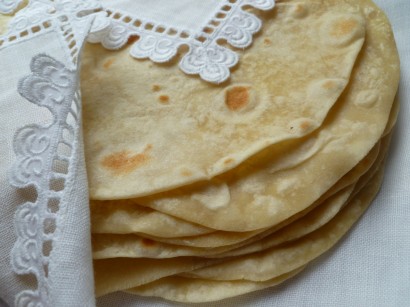
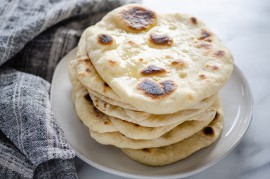
If you do not live near a small local tortilla factory which produces flour tortillas every bit as good as homemade ones, you may want to produce your own. “Homemade” suggests much time and labor, but these tortillas require neither. With the help of a good processor, the dough is ready in minutes. After a little practice, rolling out and baking the tortillas is equally unproblematic. Making them is a relaxing enterprise.
You will also need:
1. A food processor (useful, but not essential)
2. A stove-top grill with a flat-surface griddle side or a heavy, flat-bottomed pan
3. A cotton towel on which to arrange the unbaked tortilla rounds and another for stacking the baked rounds
4. A rolling pin and pastry board
For the tortilla dough:
1. Put the flour, salt and butter in the processor and blend it using the processor’s sharp blade. (Alternatively, rub the butter into the flour and salt by hand.)
2. When the mixture becomes fine and is well-combined, slowly add warm water by pouring it through the tube while the processor is still on. (Alternatively, stir the water into the mixture.)
3. Continue to mix in the processor until the dough pulls away from the sides and forms a ball. (Or form the ball by hand.)
4. Turn the dough out on a pastry board sprinkled with a little flour and knead it into a flexible ball. The dough is not very sticky and is easy to handle.
5. If you do not want to make the tortillas right away, chill the dough, wrapped in waxed paper. The dough also may be used at once, even without chilling.
To form and bake the tortillas (the steps are described using a griddle, but are essentially the same using a heavy-bottomed pan):
1. Form the dough into a log. Cut the log into 8 pieces of roughly equal size. Then roll the pieces into balls.
2. Heat the stovetop grill (smooth, griddle-side up) over medium heat while you roll out the balls. Roll each ball out into a circle between 6 and 7 inches in diameter. When it becomes difficult to roll the round out any larger without losing the circular shape, the round is large enough. Each tortilla is stretched by hand to make it thinner right before baking on the griddle.
3. Roll out and place all the tortillas on a cotton towel before beginning to bake them. The unbaked rounds may overlap on the towel, but shouldn’t be stacked since this may cause them to stick together.
4. The griddle should be very hot. Leave the burners’ temperature at medium heat as you bake the tortillas over them. Rub a little vegetable oil on the griddle once, before you begin, with a brush or paper towel—only once or even not at all. (Griddles vary and tortillas bake better on some of them with a preliminary and very thin swipe of oil across the griddle surface.)
5. Take up a tortilla in both hands and stretch it out gently in all directions with your fingers. Place it on the griddle. In about 30 seconds, bubbles will appear on the surface of the tortilla.
6. Once the bubbles appear, flip the round over. As tortillas bake, they whiten and lose their yellowish tinge. Press down on the tortilla with a spatula, especially on any uncooked spots, to hasten the baking. The tortilla will appear to inflate a bit.
7. Turn it once more and look for raw-looking edges or spots. If there are any, press them out briefly and transfer the tortilla to a cotton towel. The finished tortillas should still be flexible and soft. Cover them lightly in a towel to keep them warm and prevent them from drying out, or becoming damp from the trapped heat.
Prep: Cook:
Serves: 6 Level: Easy
Prep: Cook:
Serves: 6 Level: Easy

Prep: Cook:
Serves: 12 Level: Easy
Prep: Cook:
Serves: 12 Level: Easy
Prep: Cook:
Serves: 12 Level: Intermediate


No Comments
Leave a Comment!
You must be logged in to post a comment.