The Pioneer Woman Tasty Kitchen
Profile photo of Erica Lea

Pollo en Salsa al Horno (Roasted Chicken in Sauce)

Posted by in Step-by-Step Recipes

Tasty Kitchen Blog: Pollo en Salsa al Horno (Roasted Chicken in Sauce). Guest post by Erica Kastner of Buttered Side Up, recipe submitted by TK member Tammy of San Pasqual's Kitchen.

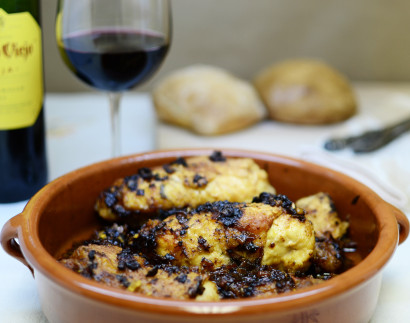
I like to think of this dish as fancy fried chicken. It looks (and sounds) like it took some major slaving in the kitchen to achieve, when in reality it’s super simple.

Today’s recipe for Pollo en Salsa al Horno (Roasted Chicken in Sauce), brought to us by Tammy (aka San Pasqual’s Kitchen here on Tasty Kitchen), was one of firsts for me. I can’t remember having cooked traditional Spanish food before. What a lovely introduction! This was also my first time cooking with saffron. I am so glad that I did. The flavor is subtle but adds a beautiful touch of distinction.

Here are the step-by-step instructions so you can see just how easy it is to make:


Tasty Kitchen Blog: Pollo en Salsa al Horno (Roasted Chicken in Sauce). Guest post by Erica Kastner of Buttered Side Up, recipe submitted by TK member Tammy of San Pasqual's Kitchen.

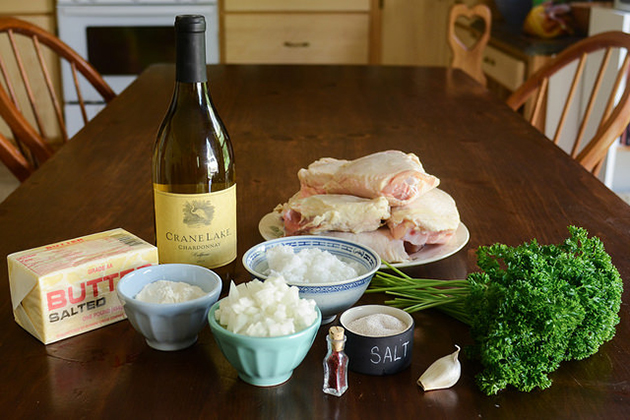
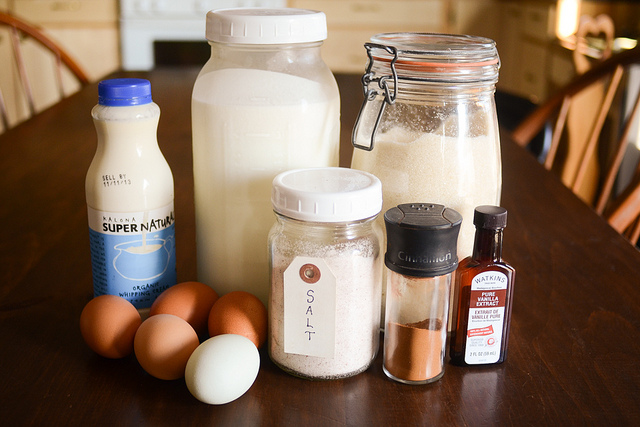
These are all the ingredients that you’ll need: Chicken (I used thighs), wine, butter, flour onion, oil (I used coconut oil), saffron, salt, garlic and parsley.


Tasty Kitchen Blog: Pollo en Salsa al Horno (Roasted Chicken in Sauce). Guest post by Erica Kastner of Buttered Side Up, recipe submitted by TK member Tammy of San Pasqual's Kitchen.

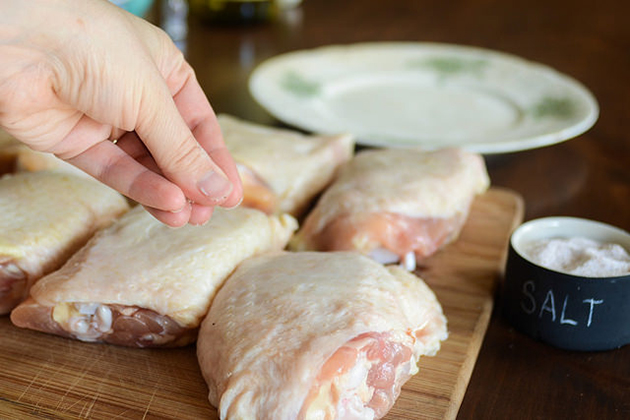
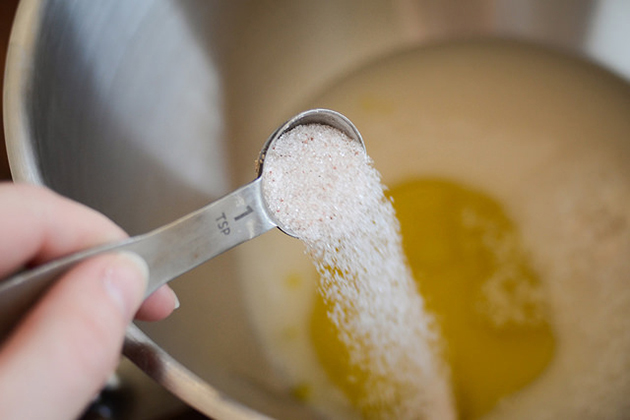
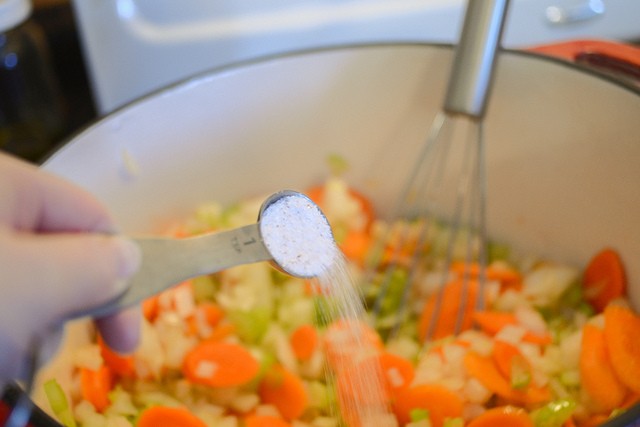
First of all you’ll want to season your chicken with salt. Nobody wants to eat bland chicken.


Tasty Kitchen Blog: Pollo en Salsa al Horno (Roasted Chicken in Sauce). Guest post by Erica Kastner of Buttered Side Up, recipe submitted by TK member Tammy of San Pasqual's Kitchen.

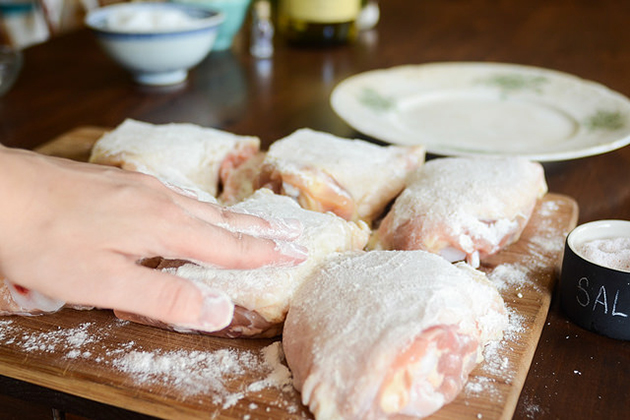
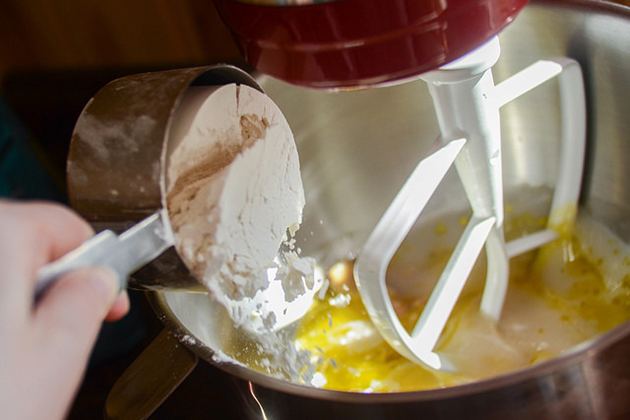
Nest, coat it with the flour.


Tasty Kitchen Blog: Pollo en Salsa al Horno (Roasted Chicken in Sauce). Guest post by Erica Kastner of Buttered Side Up, recipe submitted by TK member Tammy of San Pasqual's Kitchen.

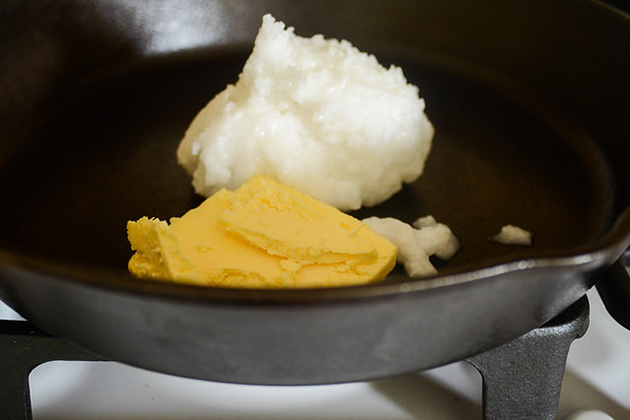
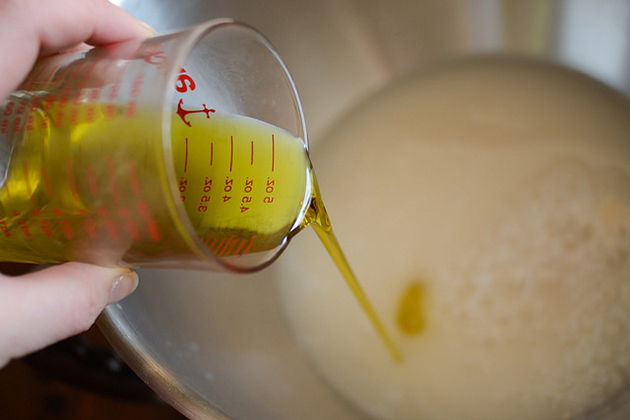
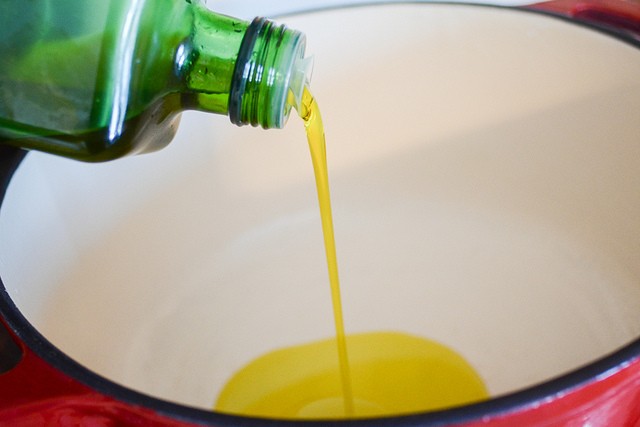
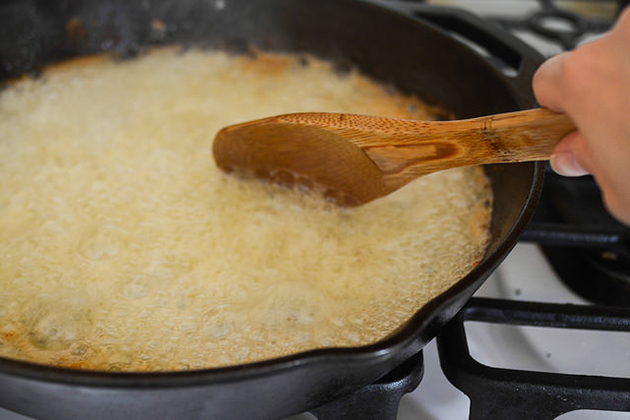
Heat your butter and oil in a large skillet.


Tasty Kitchen Blog: Pollo en Salsa al Horno (Roasted Chicken in Sauce). Guest post by Erica Kastner of Buttered Side Up, recipe submitted by TK member Tammy of San Pasqual's Kitchen.

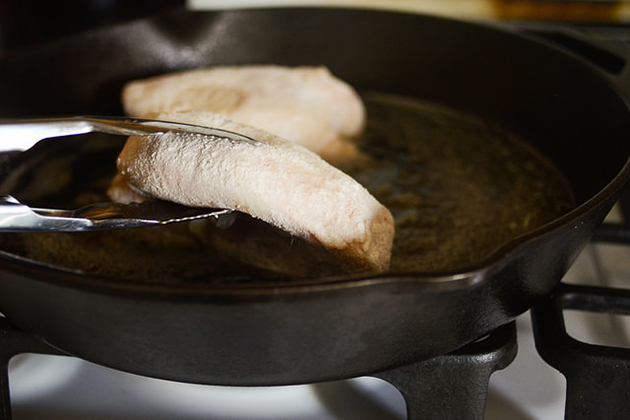
Once your oil is hot, add the chicken. Careful! It’s gonna sizzle.


Tasty Kitchen Blog: Pollo en Salsa al Horno (Roasted Chicken in Sauce). Guest post by Erica Kastner of Buttered Side Up, recipe submitted by TK member Tammy of San Pasqual's Kitchen.

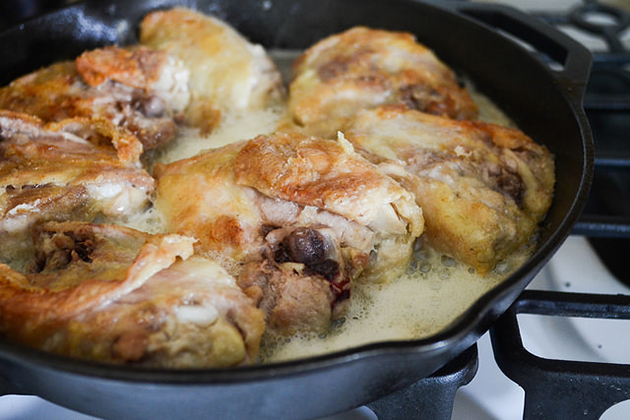
Cook until the chicken is nice and crispy and browned.


Tasty Kitchen Blog: Pollo en Salsa al Horno (Roasted Chicken in Sauce). Guest post by Erica Kastner of Buttered Side Up, recipe submitted by TK member Tammy of San Pasqual's Kitchen.

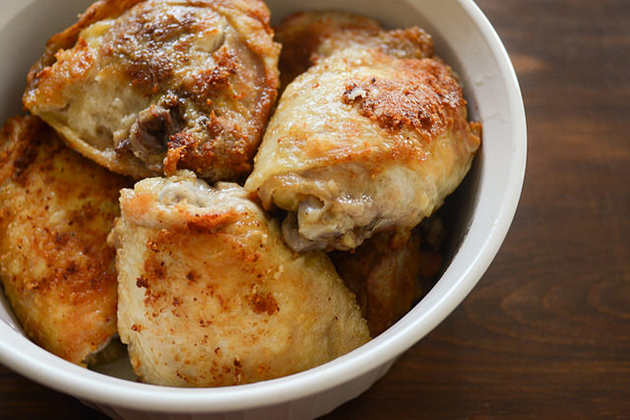
Transfer the chicken to a baking dish and preheat your oven to 350ºF.


Tasty Kitchen Blog: Pollo en Salsa al Horno (Roasted Chicken in Sauce). Guest post by Erica Kastner of Buttered Side Up, recipe submitted by TK member Tammy of San Pasqual's Kitchen.

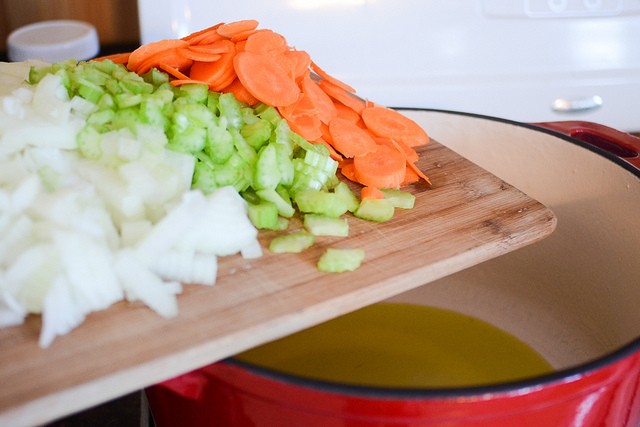
Add the onion to the now-empty skillet of oil.


Tasty Kitchen Blog: Pollo en Salsa al Horno (Roasted Chicken in Sauce). Guest post by Erica Kastner of Buttered Side Up, recipe submitted by TK member Tammy of San Pasqual's Kitchen.

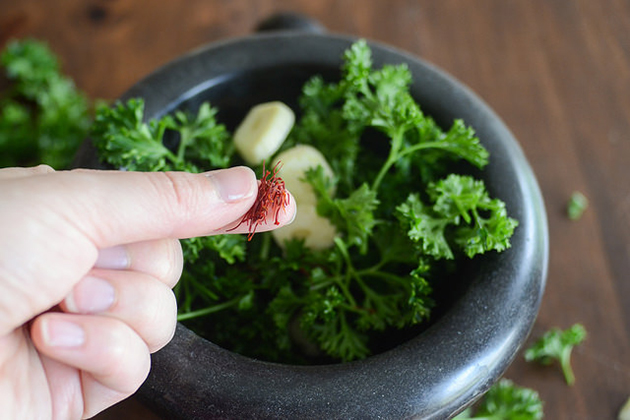
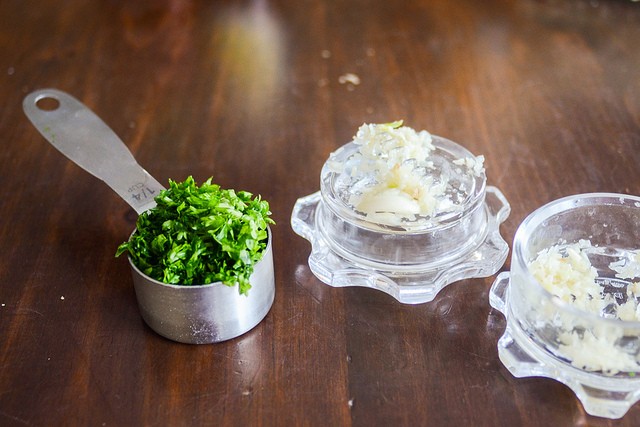
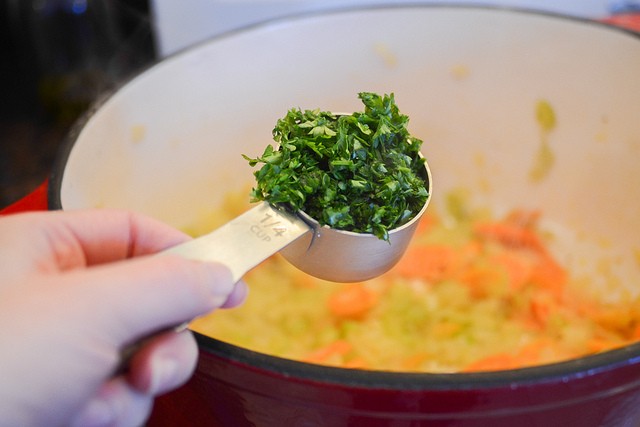
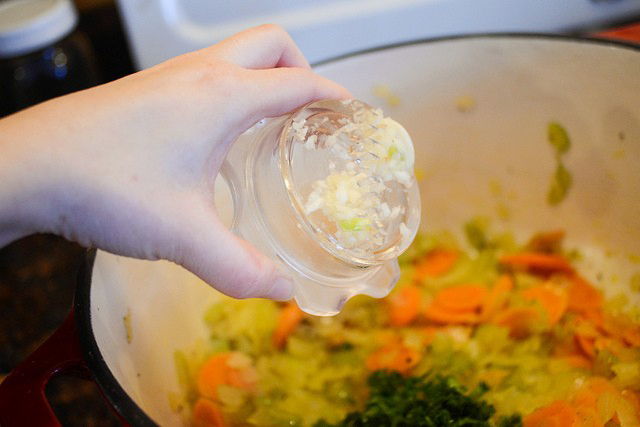
Meanwhile, as the onion is cooking, combine the parsley, garlic and saffron in a mortar.


Tasty Kitchen Blog: Pollo en Salsa al Horno (Roasted Chicken in Sauce). Guest post by Erica Kastner of Buttered Side Up, recipe submitted by TK member Tammy of San Pasqual's Kitchen.

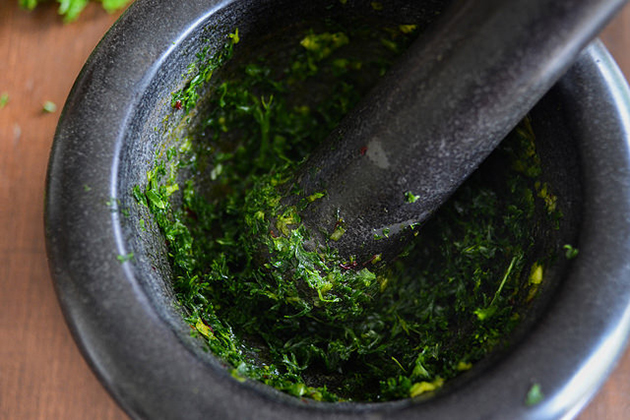
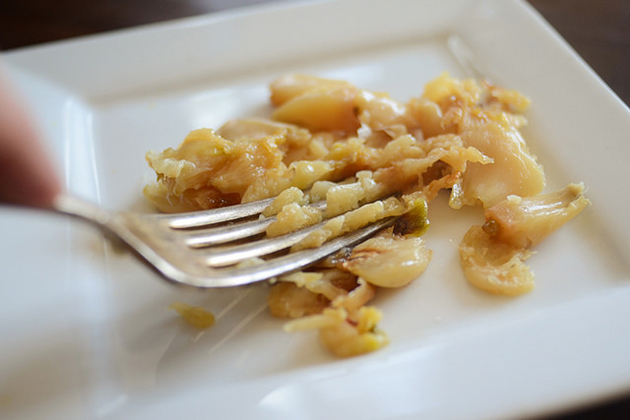
Crush them all together.


Tasty Kitchen Blog: Pollo en Salsa al Horno (Roasted Chicken in Sauce). Guest post by Erica Kastner of Buttered Side Up, recipe submitted by TK member Tammy of San Pasqual's Kitchen.

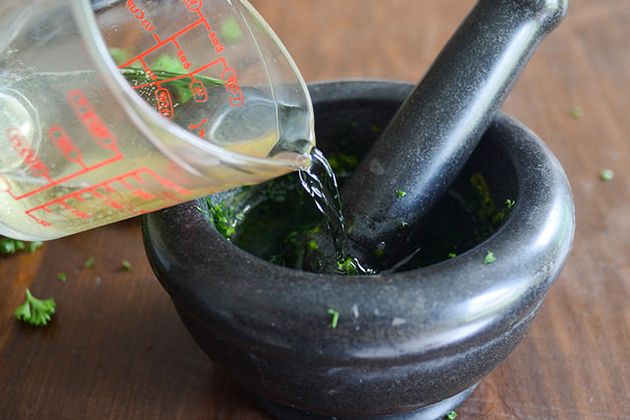
Add the white wine and give it a stir.


Tasty Kitchen Blog: Pollo en Salsa al Horno (Roasted Chicken in Sauce). Guest post by Erica Kastner of Buttered Side Up, recipe submitted by TK member Tammy of San Pasqual's Kitchen.

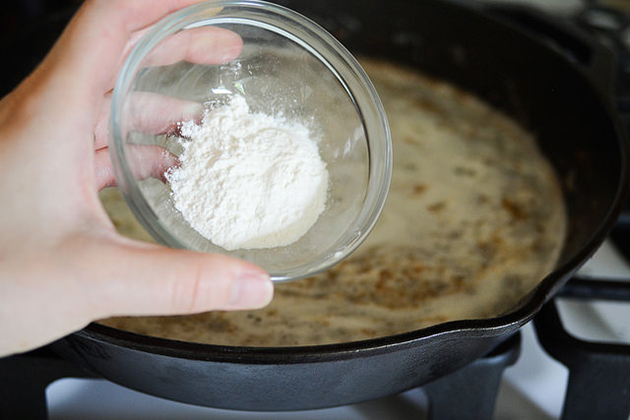
Once the onions are nice and tender, stir in the flour and cook, stirring constantly, for another 2 minutes. Nobody wants to eat raw flour.


Tasty Kitchen Blog: Pollo en Salsa al Horno (Roasted Chicken in Sauce). Guest post by Erica Kastner of Buttered Side Up, recipe submitted by TK member Tammy of San Pasqual's Kitchen.

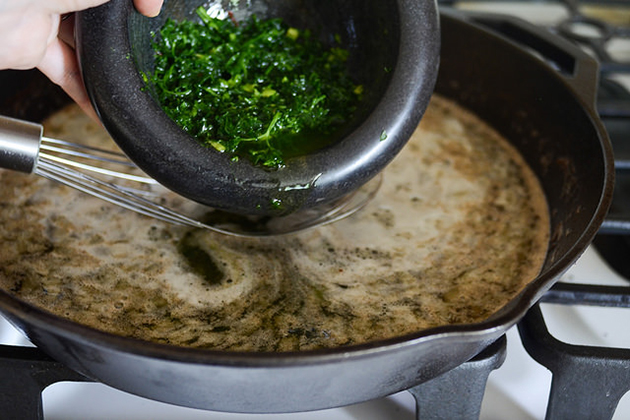
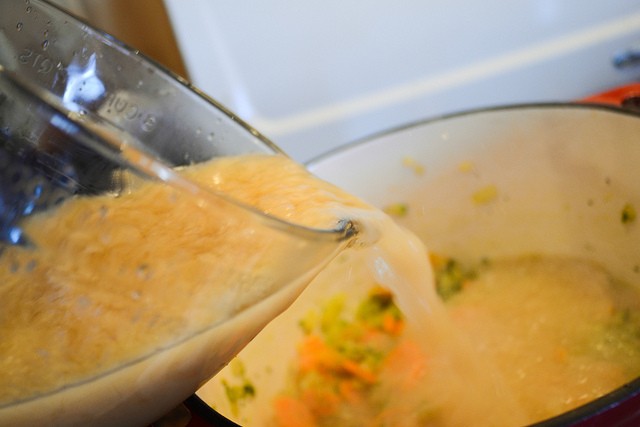
Add the wine mixture to the skillet and bring it all to a boil.


Tasty Kitchen Blog: Pollo en Salsa al Horno (Roasted Chicken in Sauce). Guest post by Erica Kastner of Buttered Side Up, recipe submitted by TK member Tammy of San Pasqual's Kitchen.

Pour the sauce over the chicken in the pan. I switched to a larger pan so that the sauce would more evenly cover the chicken.


Tasty Kitchen Blog: Pollo en Salsa al Horno (Roasted Chicken in Sauce). Guest post by Erica Kastner of Buttered Side Up, recipe submitted by TK member Tammy of San Pasqual's Kitchen.

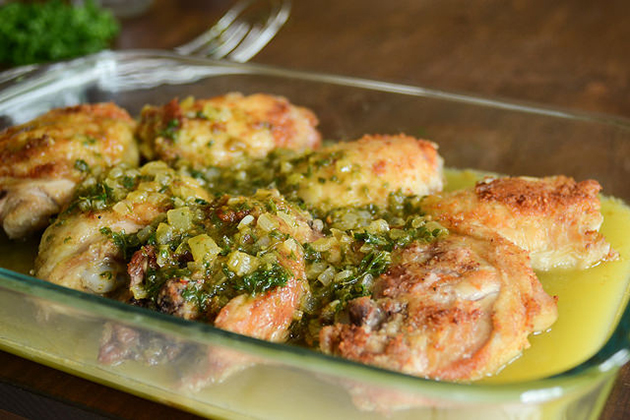
Bake in the preheated oven for about 35-45 minutes, or until the chicken is cooked through.


Tasty Kitchen Blog: Pollo en Salsa al Horno (Roasted Chicken in Sauce). Guest post by Erica Kastner of Buttered Side Up, recipe submitted by TK member Tammy of San Pasqual's Kitchen.

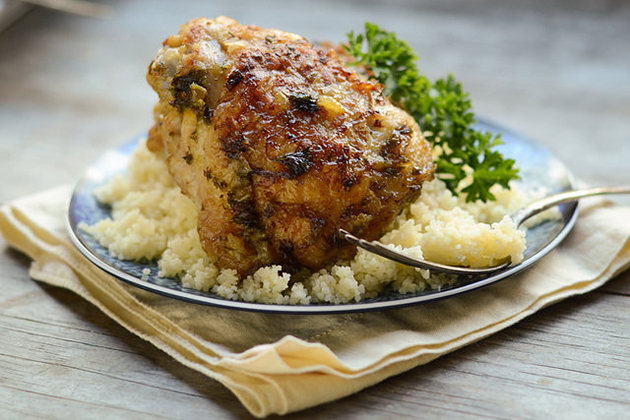
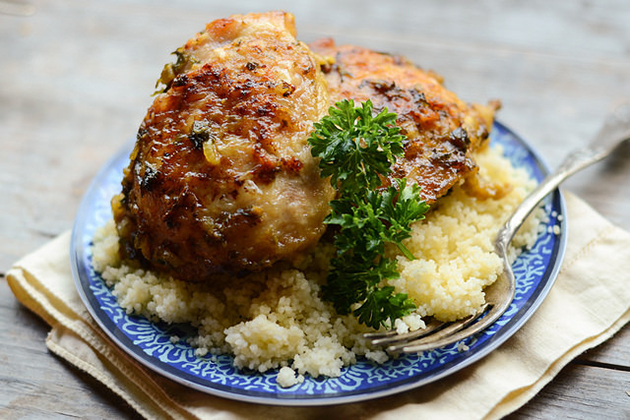
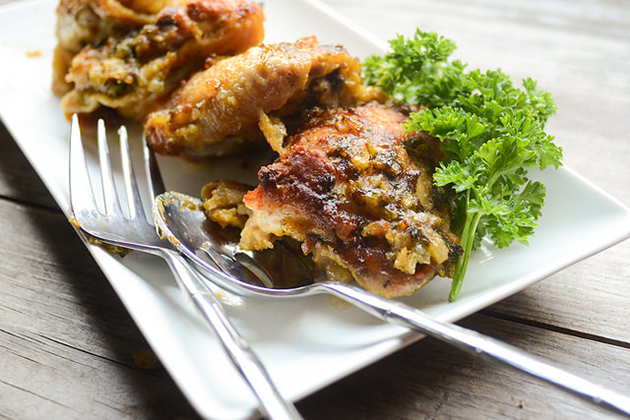
Make sure you serve with lots of the flavorful sauce! I cooked up some couscous as an accompaniment (I know it’s not traditionally Spanish, but it sure was delicious and perfect for soaking up the sauce).

Note: I used virgin coconut oil to fry the chicken. I would recommend using expeller pressed coconut oil or some other less flavorful oil so that the saffron will shine through more clearly.


Tasty Kitchen Blog: Pollo en Salsa al Horno (Roasted Chicken in Sauce). Guest post by Erica Kastner of Buttered Side Up, recipe submitted by TK member Tammy of San Pasqual's Kitchen.

Thank you so much to Tammy for sharing this recipe with us. Stop by her blog, San Pasqual’s Kitchen, for more international recipes. Her Arrosto All’arancia (Roasted Pork with Orange Sauce) looks heavenly.


Printable Recipe

Pollo en Salsa al Horno (Roasted Chicken in Sauce)

See post on San Pasqual's Kitchen’s site!
0.00 Mitt(s) 0 Rating(s)0 votes, average: 0.00 out of 50 votes, average: 0.00 out of 50 votes, average: 0.00 out of 50 votes, average: 0.00 out of 50 votes, average: 0.00 out of 5

Prep Time:

Cook Time:

Difficulty: Intermediate

Servings: 4

4
x

Print Options

Page size Letter 3x5 4x6
Text Size Small Medium Large
Content Include description
Include prep time, etc.
Show image

Description

A remarkably tender chicken roasted in a saffron wine sauce. A Spanish wonder.

Ingredients

  • ⅓ cups All-purpose Flour, Divided
  • 4 pounds Chicken Parts
  • Salt
  • 1 cup Sunflower Oil
  • 2-½ Tablespoons Butter
  • 1  Small Onion
  • 1 clove Garlic, Peeled
  • 2  Sprigs Fresh Parsley
  • 1 pinch Saffron Threads
  • ¾ cups White Wine

Preparation Instructions

Reserve 1 tablespoon of the flour.

Season the chicken pieces with salt and coat them with the remaining flour.

Heat the oil with the butter in a skillet. Add the pieces of chicken and cook over medium heat until browned. Transfer to an ovenproof casserole.

Preheat oven to 350º.

Add the onion to the skillet and cook over low heat, stirring occasionally for about 10 minutes. While the onion is cooking, crush the garlic, parsley and saffron in a mortar and mix in the wine.

Stir the reserved flour into the onions and stir continuously for 2 minutes. Add in the wine mixture and bring to a boil, stirring continuously, then pour over the chicken.

Put the casserole in the oven and cook for 35 to 45 minutes until chicken is cooked through and tender.

¡Que aproveche! Enjoy!


_______________________________________

Erica Kastner has always been one of our most cherished members of the Tasty Kitchen community. She shares her wonderful recipes and amazing food photography on her blog, Buttered Side Up, and she also writes about crafts and posts more of her beautiful photography in her personal blog, Simple Days. There really isn’t much that this amazing young wife and mother can’t do, and we’re thrilled she does some of it here.


Profile photo of Erica Lea

Roasted Garlic and Olive Focaccia

Posted by in Baking

Tasty Kitchen Blog: Roasted Garlic and Olive Focaccia. Guest post by Erica Kastner of Buttered Side Up, recipe submitted by TK member Sommer of A Spicy Perspective.

Is it weird that I get excited at the thought of this focaccia (please say it isn’t)? This Roasted Garlic and Olive Focaccia, brought to us by Sommer, is one that I’ll definitely be making again.

The beautifully light crumb is surrounded by a rich, almost buttery olive oil-soaked crust. And the tartness added by the Kalamata olives is brilliant. The roasted garlic is by no means overwhelming—it simply imparts a mellow hint of the flavor.

If you don’t care for extra virgin olive oil, this focaccia is definitely not for you. Because, let me tell you right now, there’s a LOT of olive oil in it. Excuse an evil chuckle.


Tasty Kitchen Blog: Roasted Garlic and Olive Focaccia. Guest post by Erica Kastner of Buttered Side Up, recipe submitted by TK member Sommer of A Spicy Perspective.

The amazing ingredients: honey (I used natural sugar), yeast, olive oil, salt, roasted garlic, flour, pitted Kalamata olives, and coarse salt and pepper to taste.


Tasty Kitchen Blog: Roasted Garlic and Olive Focaccia. Guest post by Erica Kastner of Buttered Side Up, recipe submitted by TK member Sommer of A Spicy Perspective.

First, we want to activate the yeast. Add a couple teaspoons of your favorite sweetener to 1/4 cup of hot water. Swirl it around to dissolve.


Tasty Kitchen Blog: Roasted Garlic and Olive Focaccia. Guest post by Erica Kastner of Buttered Side Up, recipe submitted by TK member Sommer of A Spicy Perspective.

Add 2 teaspoons of active dry yeast and stir to combine.


Tasty Kitchen Blog: Roasted Garlic and Olive Focaccia. Guest post by Erica Kastner of Buttered Side Up, recipe submitted by TK member Sommer of A Spicy Perspective.

Let the yeast activate. This should take about 10 minutes.


Tasty Kitchen Blog: Roasted Garlic and Olive Focaccia. Guest post by Erica Kastner of Buttered Side Up, recipe submitted by TK member Sommer of A Spicy Perspective.

Pour the yeast mixture into the bowl of a stand mixer. Add 1 1/2 cups of cold water …


Tasty Kitchen Blog: Roasted Garlic and Olive Focaccia. Guest post by Erica Kastner of Buttered Side Up, recipe submitted by TK member Sommer of A Spicy Perspective.

3 tablespoons of extra virgin olive oil …


Tasty Kitchen Blog: Roasted Garlic and Olive Focaccia. Guest post by Erica Kastner of Buttered Side Up, recipe submitted by TK member Sommer of A Spicy Perspective.

… and 1 1/2 teaspoons of salt.


Tasty Kitchen Blog: Roasted Garlic and Olive Focaccia. Guest post by Erica Kastner of Buttered Side Up, recipe submitted by TK member Sommer of A Spicy Perspective.

Mash up the roasted garlic with a fork and add it to the mixing bowl.


Tasty Kitchen Blog: Roasted Garlic and Olive Focaccia. Guest post by Erica Kastner of Buttered Side Up, recipe submitted by TK member Sommer of A Spicy Perspective.

Turn your mixer on low and gradually add the flour. I like to use the paddle attachment to initially mix everything together.


Tasty Kitchen Blog: Roasted Garlic and Olive Focaccia. Guest post by Erica Kastner of Buttered Side Up, recipe submitted by TK member Sommer of A Spicy Perspective.

Switch to the dough hook and knead the dough for about 10 minutes. It will be quite sticky. Oil the sides of the bowl and cover with plastic wrap.


Tasty Kitchen Blog: Roasted Garlic and Olive Focaccia. Guest post by Erica Kastner of Buttered Side Up, recipe submitted by TK member Sommer of A Spicy Perspective.

Let the dough rise until quite puffy, about 1 1/2 to 2 hours. Make sure to oil your hand before punching the dough down, or you’ll get a sticky mess like I did. You can also just stick the bowl back on the mixer base and turn the machine on for a bit.


Tasty Kitchen Blog: Roasted Garlic and Olive Focaccia. Guest post by Erica Kastner of Buttered Side Up, recipe submitted by TK member Sommer of A Spicy Perspective.

Pour a GENEROUS amount of olive oil into the bottom of a pan. I used a 9×13-inch pan. If you prefer a thinner focaccia, you can use a larger pan.


Tasty Kitchen Blog: Roasted Garlic and Olive Focaccia. Guest post by Erica Kastner of Buttered Side Up, recipe submitted by TK member Sommer of A Spicy Perspective.

Plop the dough into the pan. At this point you’ll be thinking, “Wow, I used WAY too much olive oil.” Nope. You didn’t.

Push the dough out to the edges of the pan. Use your fingers to poke holes all the way through the dough.


Tasty Kitchen Blog: Roasted Garlic and Olive Focaccia. Guest post by Erica Kastner of Buttered Side Up, recipe submitted by TK member Sommer of A Spicy Perspective.

Push the olives deep into the holes.


Tasty Kitchen Blog: Roasted Garlic and Olive Focaccia. Guest post by Erica Kastner of Buttered Side Up, recipe submitted by TK member Sommer of A Spicy Perspective.

Sprinkle with coarse sea salt and freshly ground pepper.


Tasty Kitchen Blog: Roasted Garlic and Olive Focaccia. Guest post by Erica Kastner of Buttered Side Up, recipe submitted by TK member Sommer of A Spicy Perspective.

Cover and let the dough get puffy again, about another hour. In the last 20 minutes of raising time, preheat your oven to 400 degrees F (205 degrees C).


Tasty Kitchen Blog: Roasted Garlic and Olive Focaccia. Guest post by Erica Kastner of Buttered Side Up, recipe submitted by TK member Sommer of A Spicy Perspective.

Bake the focaccia until nice and golden on top, about 35-45 minutes. If you decided to use a larger, more shallow pan, you should check the bread at the 30 minute mark.

Turn the dough out onto a wire rack to cool, or just let it cool in the pan. Slice and enjoy. Make sure to spread with butter. It’s the best.


Tasty Kitchen Blog: Roasted Garlic and Olive Focaccia. Guest post by Erica Kastner of Buttered Side Up, recipe submitted by TK member Sommer of A Spicy Perspective.

Notes:

1. The focaccia was quite thick baked in the 9×13-inch pan. It was still lovely, just a bit different from what I am used to. I’ll probably bake it in a larger pan next time.
2. My husband didn’t care for the olives, but I adored them. If you’re not a Kalamata olive fan, you can always substitute your favorite olives, or just leave them out!
3. I think this would be lovely as a sandwich bread. I’m envisioning a chicken pesto panini …
4. Make sure you have a head of roasted garlic on hand before you start this recipe!

Thanks so much to Sommer to sharing her recipe with us. Make sure to stop by her blog, A Spicy Perspective, to discover more of her delicious recipes.


Printable Recipe

Roasted Garlic and Olive Focaccia

See post on aspicyperspective’s site!
0.00 Mitt(s) 0 Rating(s)0 votes, average: 0.00 out of 50 votes, average: 0.00 out of 50 votes, average: 0.00 out of 50 votes, average: 0.00 out of 50 votes, average: 0.00 out of 5

Prep Time:

Cook Time:

Difficulty: Easy

Servings: 12

12
x

Print Options

Page size Letter 3x5 4x6
Text Size Small Medium Large
Content Include description
Include prep time, etc.
Show image

Description

Easy to make and oh so delicious!

Ingredients

  • ¼ cups Hot Water
  • 2 teaspoons Honey
  • 1 package Dry Active Yeast (2 Tsp Packet Size)
  • 1-½ cup Cold Water
  • 3 Tablespoons Olive Oil + Extra For Bowl And Dish
  • 1-½ teaspoon Sea Salt
  • 2 Tablespoons Roasted Garlic, Smashed
  • 4 cups All-purpose Flour
  • ⅔ cups Pitted Kalamata Olives
  • Salt And Pepper

Preparation Instructions

Pour the hot water and honey into the bowl of your electric mixer. Swirl the bowl around until the honey has dissolved and the water is just luke-warm. Add one package of dry active yeast and swirl around. Allow the yeast to foam for 10 minutes or so. Then add the cold water, 3 tablespoons oil, salt, and smashed roasted garlic. Using the bread hook attachment, turn the mixer on low and slowly add the flour. “Knead” on low for about 10 minutes.

Pull the dough away from the sides and rub the bowl down with oil. Cover the bowl with plastic wrap and allow the dough to rise for 1 ½ to 2 hours. Remove the plastic wrap and turn the mixer back on for 30 seconds.

Thoroughly oil a 9×13 or 11×15 rimmed baking dish. Press to dough to the edges, don’t be afraid to let your fingers puncture the dough—this will created the bumpy, rustic texture of traditional focaccia bread.

Once the dough is spread out, poke deep cavities in the dough and place an olive in each hole. Push the olives down far, otherwise they might pop out when the dough rises. Drizzle the top with more olive oil and sprinkle with sea salt and pepper. Cover the dough with a clean damp towel. Allow the dough to rise again for at least 1 hour.

Preheat the oven to 400ºF. Bake for 35-45 minutes, until the top is golden-brown. (If you used a 11×15 dish, it might be more like 30-35 minutes.)

You can leave the focaccia in the baking dish or turn it out for easy cutting.


_______________________________________

Erica Kastner has always been one of our most cherished members of the Tasty Kitchen community. She shares her wonderful recipes and amazing food photography on her blog, Buttered Side Up, and she also writes about crafts and posts more of her beautiful photography in her personal blog, Simple Days. There really isn’t much that this amazing young wife and mother can’t do, and we’re thrilled she does some of it here.

Profile photo of Erica Lea

Cinnamon Ice Cream

Posted by in Step-by-Step Recipes

Tasty Kitchen Blog: Cinnamon Ice Cream. Guest post by Erica Kastner of Buttered Side Up, recipe submitted by TK member Amy of Gastronome Tart.

This Cinnamon Ice Cream (brought to us by Amy here on Tasty Kitchen) is easily one of the smoothest I’ve ever made. 

Most of the time I don’t bother with making a custard base for my homemade ice creams. I generally lack the patience to wait for it to cool completely before churning. The results of non-cooked ice cream are quite good but if you want to take your ice cream to the next level of smooth creaminess, I highly recommend taking the time to cook up a custard.

Here’s how to make this slightly spicy ice cream:


Tasty Kitchen Blog: Cinnamon Ice Cream. Guest post by Erica Kastner of Buttered Side Up, recipe submitted by TK member Amy of Gastronome Tart.

First, gather all of your ingredients: milk, cream, salt, eggs (just the yolks), sugar (I used evaporated cane juice), pure vanilla, and (of course) cinnamon.


Tasty Kitchen Blog: Cinnamon Ice Cream. Guest post by Erica Kastner of Buttered Side Up, recipe submitted by TK member Amy of Gastronome Tart.

Separate the whites and yolks of your eggs. Set the whites aside.


Tasty Kitchen Blog: Cinnamon Ice Cream. Guest post by Erica Kastner of Buttered Side Up, recipe submitted by TK member Amy of Gastronome Tart.

Pour the sugar into the yolks.


Tasty Kitchen Blog: Cinnamon Ice Cream. Guest post by Erica Kastner of Buttered Side Up, recipe submitted by TK member Amy of Gastronome Tart.

Whisk together until well combined.


Tasty Kitchen Blog: Cinnamon Ice Cream. Guest post by Erica Kastner of Buttered Side Up, recipe submitted by TK member Amy of Gastronome Tart.

Bring the milk, cream, and salt to a simmer.


Tasty Kitchen Blog: Cinnamon Ice Cream. Guest post by Erica Kastner of Buttered Side Up, recipe submitted by TK member Amy of Gastronome Tart.

SLOWLY pour half of the hot milk mixture into the egg mixture while whisking constantly. 


Tasty Kitchen Blog: Cinnamon Ice Cream. Guest post by Erica Kastner of Buttered Side Up, recipe submitted by TK member Amy of Gastronome Tart.

Pour this mixture back into the pot.


Tasty Kitchen Blog: Cinnamon Ice Cream. Guest post by Erica Kastner of Buttered Side Up, recipe submitted by TK member Amy of Gastronome Tart.

Bring the mixture back up to a simmer, stirring constantly, until thickened. You can tell when the custard is done when it coats the back of a wooden spoon, like so. I think I cooked mine a little too long, but that’s okay.


Tasty Kitchen Blog: Cinnamon Ice Cream. Guest post by Erica Kastner of Buttered Side Up, recipe submitted by TK member Amy of Gastronome Tart.

Pour the custard through a fine-mesh sieve into a heat-proof bowl. This ensures that there’s no lumpies in the finished ice cream.


Tasty Kitchen Blog: Cinnamon Ice Cream. Guest post by Erica Kastner of Buttered Side Up, recipe submitted by TK member Amy of Gastronome Tart.

Add 2 teaspoons of ground cinnamon (I know it doesn’t seem like a lot, but cinnamon really packs in the flavor) …


Tasty Kitchen Blog: Cinnamon Ice Cream. Guest post by Erica Kastner of Buttered Side Up, recipe submitted by TK member Amy of Gastronome Tart.

… and 1 teaspoon of pure vanilla extract.


Tasty Kitchen Blog: Cinnamon Ice Cream. Guest post by Erica Kastner of Buttered Side Up, recipe submitted by TK member Amy of Gastronome Tart.

Whisk it all together until well combined. Press plastic wrap onto the surface of the custard and refrigerate until completely cold, at the very least 4 hours or (even better) overnight.


Tasty Kitchen Blog: Cinnamon Ice Cream. Guest post by Erica Kastner of Buttered Side Up, recipe submitted by TK member Amy of Gastronome Tart.

Once your custard is nice and chilled, it’s time to churn!


Tasty Kitchen Blog: Cinnamon Ice Cream. Guest post by Erica Kastner of Buttered Side Up, recipe submitted by TK member Amy of Gastronome Tart.

Churn according to the instructions that came with your ice cream maker. Scrape into a freezer-safe bowl and let harden in the freezer.


Tasty Kitchen Blog: Cinnamon Ice Cream. Guest post by Erica Kastner of Buttered Side Up, recipe submitted by TK member Amy of Gastronome Tart.

This ice cream is wonderful all on its own but I think it would be amazing with a warm bowl of cobbler or some toasty pecans sprinkled on top.


Tasty Kitchen Blog: Cinnamon Ice Cream. Guest post by Erica Kastner of Buttered Side Up, recipe submitted by TK member Amy of Gastronome Tart.

Note: I’m pretty sure I cooked my custard longer than recommended. This made for a very smooth, thick ice cream. I’m not complaining! 

Thank you so much, Amy, for sharing this recipe with us. Visit her blog, Gastronome Tart, for more recipes like this!


Printable Recipe

Cinnamon Ice Cream

See post on GastronomeTart’s site!
5.00 Mitt(s) 2 Rating(s)2 votes, average: 5.00 out of 52 votes, average: 5.00 out of 52 votes, average: 5.00 out of 52 votes, average: 5.00 out of 52 votes, average: 5.00 out of 5

Prep Time:

Cook Time:

Difficulty: Easy

Servings: 4

4
x

Print Options

Page size Letter 3x5 4x6
Text Size Small Medium Large
Content Include description
Include prep time, etc.
Show image

Description

The perfect topping for all those apple and pumpkin desserts this fall. In this picture it is the perfect topping for this caramel apple crisp!

Ingredients

  • 1 cup Milk
  • 2 cups Heavy Cream
  • 1 pinch Salt
  • 5 whole Egg Yolks
  • ¾ cups Sugar
  • 1 teaspoon Vanilla
  • 2 teaspoons Ground Cinnamon

Preparation Instructions

1. In a saucepan, heat the milk, cream and salt to a simmer.

2. Meanwhile, mix the egg yolks with the sugar and once the milk mixture is brought to a simmer, pour half of the milk mixture into the egg yolks and whisk the yolks the entire time.

3. Add the yolk and half of the milk mixture back into the saucepan. Bring to a simmer again and cook, stirring constantly until the custard has thickened, about 6-8 minutes.

4. Strain mixture through a fine sieve and then add the vanilla and cinnamon. Stir and then refrigerate the covered mixture for about 4 hours or preferably overnight.

5. Process the custard in your ice cream maker according to manufacturer’s directions. Makes one quart.


_______________________________________

Erica Kastner has always been one of our most cherished members of the Tasty Kitchen community. She shares her wonderful recipes and amazing food photography on her blog, Buttered Side Up, and she also writes about crafts and posts more of her beautiful photography in her personal blog, Simple Days. There really isn’t much that this amazing young wife and mother can’t do, and we’re thrilled she does some of it here.


Profile photo of Erica Lea

Ramen Noodle Soup

Posted by in Step-by-Step Recipes

Tasty Kitchen Blog: Ramen Noodle Soup. Guest post by Erica Kastner of Buttered Side Up, recipe submitted by TK member Justine Sulia of Cooking and Beer.

When we were kids, we loved packaged ramen. Mom would try to make it herself, but we weren’t fooled: Nothing could live up to the MSG-laden packets. 

Fast forward a few years and my taste in food has changed a bit. Don’t get me wrong, I still enjoy an occasional pre-packaged ramen for a guilty snack. But it hurts me to know how many icky ingredients I’m consuming.

Then one day my sisters made traditional ramen from scratch. It opened my eyes to the idea that perhaps the humble ramen could be a delicious meal. 

To my surprise, I was able to make a soup that was as good (or better!) than the little processed version I remembered from my childhood. If you put in a little extra effort, you’ll be surprised at the complexity of the flavors of this Ramen Noodle Soup from Tasty Kitchen member Justine. With the eggs and sausage for protein it’s definitely a filling, satisfying supper.


Tasty Kitchen Blog: Ramen Noodle Soup. Guest post by Erica Kastner of Buttered Side Up, recipe submitted by TK member Justine Sulia of Cooking and Beer.

Here’s everything you’ll need to make the ramen: olive oil, onion, carrots, celery, garlic, parsley, salt and pepper, beef broth (I made mine from scratch), Sriracha (or any hot sauce you prefer), soy sauce, eggs, Italian sausage links (I made my own), ramen (or another Asian-style noodle), eggs, and green onions.


Tasty Kitchen Blog: Ramen Noodle Soup. Guest post by Erica Kastner of Buttered Side Up, recipe submitted by TK member Justine Sulia of Cooking and Beer.

Begin by chopping up your onions, celery and carrots.


Tasty Kitchen Blog: Ramen Noodle Soup. Guest post by Erica Kastner of Buttered Side Up, recipe submitted by TK member Justine Sulia of Cooking and Beer.

Heat the olive oil in a Dutch oven (or a big soup pot) over medium heat.


Tasty Kitchen Blog: Ramen Noodle Soup. Guest post by Erica Kastner of Buttered Side Up, recipe submitted by TK member Justine Sulia of Cooking and Beer.

Once the oil is hot, add your veggies.


Tasty Kitchen Blog: Ramen Noodle Soup. Guest post by Erica Kastner of Buttered Side Up, recipe submitted by TK member Justine Sulia of Cooking and Beer.

Give it a good stir.


Tasty Kitchen Blog: Ramen Noodle Soup. Guest post by Erica Kastner of Buttered Side Up, recipe submitted by TK member Justine Sulia of Cooking and Beer.

Add the salt …


Tasty Kitchen Blog: Ramen Noodle Soup. Guest post by Erica Kastner of Buttered Side Up, recipe submitted by TK member Justine Sulia of Cooking and Beer.

And pepper. Cook, stirring every once in a while, until everything is nice and tender.


Tasty Kitchen Blog: Ramen Noodle Soup. Guest post by Erica Kastner of Buttered Side Up, recipe submitted by TK member Justine Sulia of Cooking and Beer.

Meanwhile, cook your sausages until no longer pink.


Tasty Kitchen Blog: Ramen Noodle Soup. Guest post by Erica Kastner of Buttered Side Up, recipe submitted by TK member Justine Sulia of Cooking and Beer.

Chop up the parsley and garlic.


Tasty Kitchen Blog: Ramen Noodle Soup. Guest post by Erica Kastner of Buttered Side Up, recipe submitted by TK member Justine Sulia of Cooking and Beer.

Once the veggies in the pot are soft, add the parsley …


Tasty Kitchen Blog: Ramen Noodle Soup. Guest post by Erica Kastner of Buttered Side Up, recipe submitted by TK member Justine Sulia of Cooking and Beer.

And the garlic. Cook for a couple more minutes. 


Tasty Kitchen Blog: Ramen Noodle Soup. Guest post by Erica Kastner of Buttered Side Up, recipe submitted by TK member Justine Sulia of Cooking and Beer.

Add the beef broth, water (I just used more broth in place of the water) …


Tasty Kitchen Blog: Ramen Noodle Soup. Guest post by Erica Kastner of Buttered Side Up, recipe submitted by TK member Justine Sulia of Cooking and Beer.

And soy sauce. Stir and bring to a boil. Lower the heat so the soup is just simmering and simmer for 20 minutes.


Tasty Kitchen Blog: Ramen Noodle Soup. Guest post by Erica Kastner of Buttered Side Up, recipe submitted by TK member Justine Sulia of Cooking and Beer.

Add the Sriracha …


Tasty Kitchen Blog: Ramen Noodle Soup. Guest post by Erica Kastner of Buttered Side Up, recipe submitted by TK member Justine Sulia of Cooking and Beer.

Cooked sausages …


Tasty Kitchen Blog: Ramen Noodle Soup. Guest post by Erica Kastner of Buttered Side Up, recipe submitted by TK member Justine Sulia of Cooking and Beer.

And noodles. Boil until the noodles are cooked to your preferred softness. Taste and adjust the seasonings if necessary. Boil up some eggs to your preferred doneness (I like mine soft boiled, or about 7 minutes).


Tasty Kitchen Blog: Ramen Noodle Soup. Guest post by Erica Kastner of Buttered Side Up, recipe submitted by TK member Justine Sulia of Cooking and Beer.

Serve up a big bowl with lots of sausage and an egg and green onions for garnish. Chopsticks optional (don’t make fun of my chopstick skills, or lack thereof).

Note: My sister and I thought this was the bomb-diggity, but our husbands thought it was too spicy. If you don’t like your ramen with any heat, you may want to scale back on or leave out the hot sauce.


Tasty Kitchen Blog: Ramen Noodle Soup. Guest post by Erica Kastner of Buttered Side Up, recipe submitted by TK member Justine Sulia of Cooking and Beer.

Thank you so much to Justine for sharing this awesome soup with us. Make sure to stop by her blog Cooking & Beer for more recipes. Her Asian Wings look particularly yummy.


Printable Recipe

Ramen Noodle Soup

See post on Justine Sulia (Cooking and Beer)’s site!
5.00 Mitt(s) 3 Rating(s)3 votes, average: 5.00 out of 53 votes, average: 5.00 out of 53 votes, average: 5.00 out of 53 votes, average: 5.00 out of 53 votes, average: 5.00 out of 5

Prep Time:

Cook Time:

Difficulty: Easy

Servings: 6

6
x

Print Options

Page size Letter 3x5 4x6
Text Size Small Medium Large
Content Include description
Include prep time, etc.
Show image

Description

This soup brings the subtle flavors of Asian cuisine and wholesome warmth into one great recipe!

Ingredients

  • 3 Tablespoons Olive Oil
  • 1 whole Large Onion, Diced
  • 3 whole Medium-sized Carrots, Diced
  • 2 stalks Celery, Diced
  • 1 teaspoon Salt + More As Needed
  • 1 teaspoon Pepper + More As Needed
  • 3 cloves Garlic, Minced
  • ¼ cups Fresh Parsley, Chopped + More For Garnish
  • 4 cups Low Sodium Beef Broth
  • 1 cup Water
  • 3 Tablespoons Soy Sauce
  • 2 teaspoons Sriracha
  • ½ pounds Asian-style Noodles Or Ramen
  • 3 whole Italian Sausage Links, Fully Cooked And Sliced
  • 4 whole Hard Boiled Eggs For Garnish
  • ¼ cups Green Onions, Chopped For Garnish

Preparation Instructions

In a 5-quart Dutch oven, heat the oil over medium heat. Add the onion, carrots and celery. Season with salt and pepper and cook until tender, about 8 minutes. Add the garlic and the parsley and cook for another 2 minutes or until you begin to smell the garlic. Now, add the beef broth, water and soy sauce. Stir to combine. Bring to a boil then lower the heat to simmer and cook for 20 minutes.

Add the Sriracha, noodles, and sausage and continue to simmer until the noodles are al dente, about 6-7 minutes (or according to package instructions for al dente). Adjust the seasoning by adding more salt, pepper and/or Sriracha.

Serve hot and garnish with hard-boiled eggs, green onions and parsley. Enjoy!


_______________________________________

Newly-married Erica Kastner shares her wonderful recipes and amazing food photography on her blog, Buttered Side Up. She also writes about crafts and posts more of her beautiful photography in her personal blog, Simple Days. There really isn’t much that this amazing young wife and mother can’t do, and we’re thrilled she does some of it here.


Profile photo of Erica Lea

Pumpkin Cinnamon Roll Scones

Posted by in Baking, Step-by-Step Recipes

There's nothing cozier than a steamy cup of tea accompanied by a pumpkin scone filled with warm, cinnamony goodness and a maple glaze.

Profile photo of Erica Lea

Blackberry Cobbler Bars

Posted by in Baking, Step-by-Step Recipes

  Raise your hand if you love cobblers! Warm fruit surrounded by a cake or cookie-like topping accompanied by good-quality ice cream. I’ll have that any night of the week. Or for breakfast. Or lunch. Or a snack. Yeah, I’m a bit obsessed. These Blackberry Cobbler Bars, brought to us by TK member Amber, is a […]

Profile photo of Erica Lea

Frozen Thai Iced Coffee

Posted by in Step-by-Step Recipes

  Let’s all take a moment of silence and respect for whoever first invented iced coffee. It’s about the best summertime treat (root beer floats are a close second). In fact, it’s one of my favorite drinks any time of the year. Today’s recipe—Frozen Thai Iced Coffee—-is brought to us by Stephanie, adapted from King Arthur…

Profile photo of Erica Lea

French Onion Soup Grilled Cheese Sandwiches

Posted by in Step-by-Step Recipes

  Oh boy. I’m bonkers excited about these sandwiches, ya’ll. When I first saw Joy post them I thought: That needs to happen in my kitchen. I mean, two whole onions reduced to caramely goodness and paired with melty cheese? Count me in. Then, when Erika mentioned that Laurie had shared the recipe here on Tasty Kitchen, I knew I had to make if…