As soon as apples hit the market in the autumn, our minds turn to apple pie and turnovers, preferably accompanied by large spoonfuls of vanilla ice cream. However, if you’re running short on time, or are inexplicably freaked out by pie dough (like me), you may be tempted to whip up a dessert that incorporates all of the flavors of apple pie, without the fuss.
That’s where this ingenious recipe from Tasty Kitchen member Alaska from Scratch comes in. Instead of rolling out pie dough, just cut open a package of egg roll wrappers, which can be found in most supermarkets. The apple pie filling is classic and simple: apples, sugar, lemon and spices. Bundle up the filling in the egg roll wrappers and bake. Half an hour later, you’ll be digging into these crispy treats.
Now, let’s get cooking.
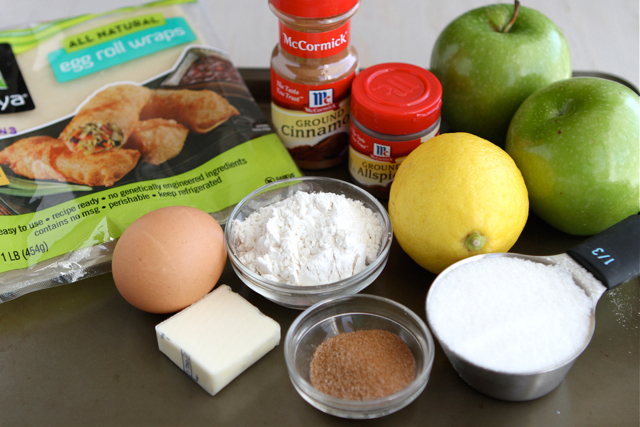
Here’s what you’ll need for the Apple Pie Egg Rolls: a couple of apples, a lemon, sugar, flour, cinnamon, allspice, salt, egg roll wrappers, an egg and a little sugar and cinnamon.
Preheat the oven to 375ºF. Line a large baking sheet with parchment paper and lightly spray the parchment with non-stick spray.
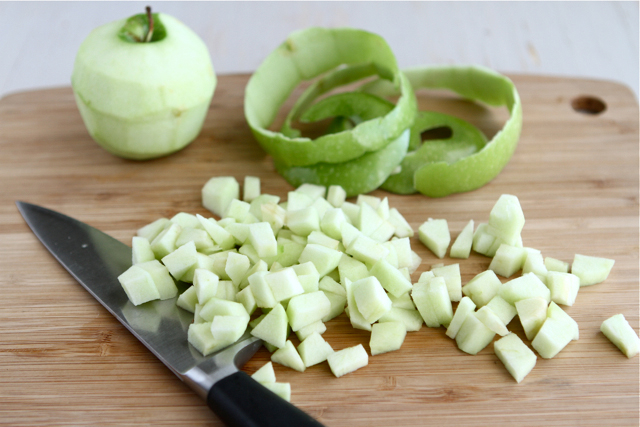
Peel, core and dice the apples.
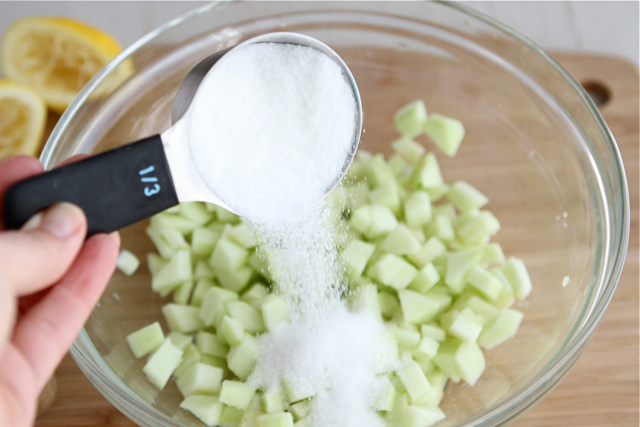
In a bowl, stir together the apples, lemon and sugar.
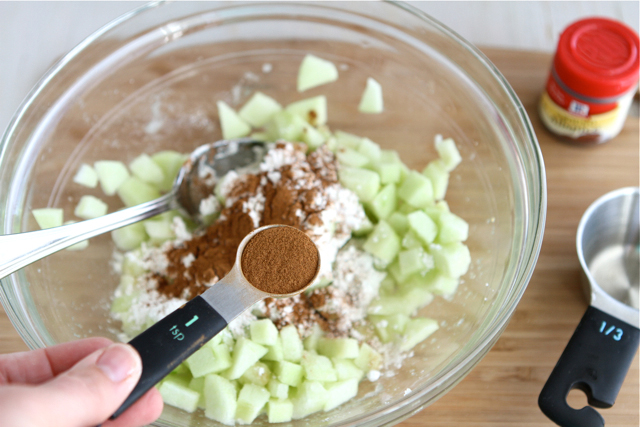
Add the flour, spices and salt.
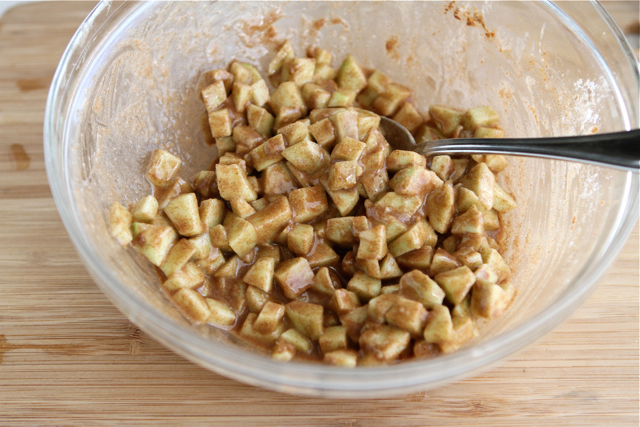
Mix it all up and try not to sneak a few pieces. I’ll bet you can’t resist. I know I couldn’t.
Beat the egg in a small bowl.
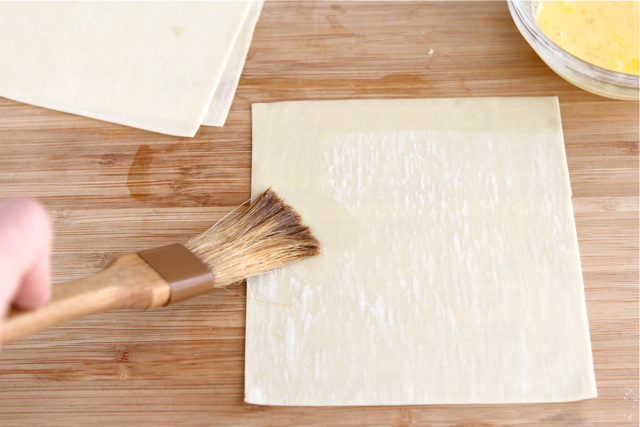
Lay one egg roll wrapper on a cutting board, and brush the egg wash around each edge.
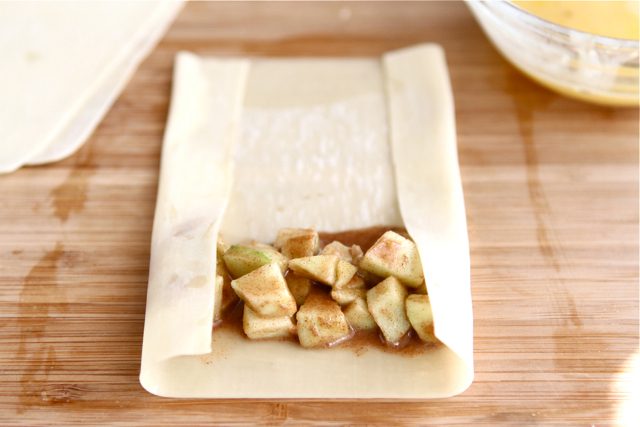
Scoop about 2 tablespoons of apple filling towards one edge of the wrapper, leaving a border. Fold in the sides and roll up the egg roll tightly.
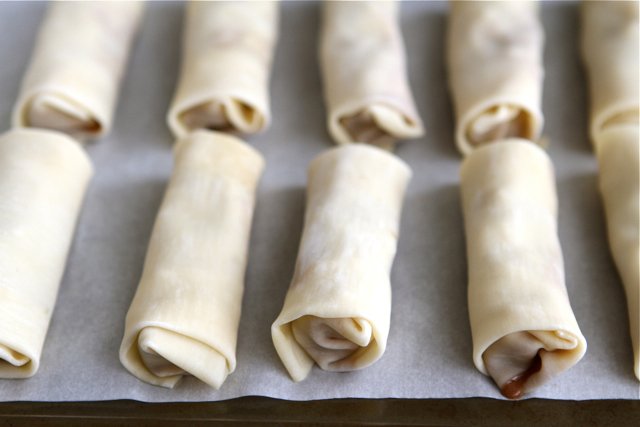
Place it on the parchment-lined baking sheet. Repeat with the remaining wrappers and apple mixture.

Bake until parts of the wrappers are golden brown, 15 to 20 minutes. Remove from the oven and brush each egg roll with melted butter, then sprinkle each with cinnamon sugar. Return to the oven for 5 more minutes.

Serve hot with vanilla ice cream or sweetened freshly whipped cream.
Thanks so much to Maya for this recipe. Be sure to check out Maya’s blog, Alaska From Scratch to read her story about moving her family from California to Alaska, and to eyeball some of her wonderful recipes. (Espresso Chocolate Chip Cinnamon Rolls, anyone?)
Printable Recipe


Print Options
Description
Soothe that apple pie craving with these fun, easy and delicious Baked Apple Pie Egg Rolls. You can find helpful step-by-step rolling photos in the blog post, too.
Ingredients
- 2 whole Apples, Peeled, Cored And Diced (I Used Granny Smiths)
- 1 whole Lemon, Juiced
- ⅓ cups Sugar
- 4 Tablespoons Flour
- 2 teaspoons Cinnamon
- ¼ teaspoons Allspice
- ⅛ teaspoons Salt
- 1 whole Egg, Beaten
- 10 To 12 Egg Roll Wrappers
- 1 Tablespoon Butter, Melted
- 2 teaspoons Cinnamon Sugar, For Dusting
Preparation Instructions
Preheat oven to 375 F. Line a large baking sheet with parchment paper and lightly spray the parchment with non-stick spray.
In a bowl, stir together the apples, lemon and sugar. Add the flour, spices and salt.
Beat your egg in a small bowl.
Beginning with one egg roll wrapper, lay it out on a work surface (I used a cutting board) and brush egg wash around each edge. Scoop about 2 tablespoons of apple filling towards one edge of the wrapper (leave a little border). Fold in the sides and roll up the egg roll tightly. Place it on the parchment-lined baking sheet. Repeat until all the filling has been used.
Bake for 20 minutes. Remove from oven and brush each egg roll with melted butter, then sprinkle each with cinnamon sugar. Return to the oven for 5 more minutes.
Serve hot with vanilla ice cream or sweetened freshly whipped cream.
Adapted from Spoon Fork Bacon via Chef-in-Training.
_______________________________________
Dara Michalski is a doll and a sweetheart who clearly knows her way around the kitchen. She blogs at Cookin’ Canuck, where she shares her flavor-packed recipes and fun, engaging writing. The photography’s pretty incredible, too.