The Pioneer Woman Tasty Kitchen
Profile photo of A Cozy Kitchen

Whole Wheat Honey Oatmeal Bread

Posted by in Baking, Step-by-Step Recipes

Tasty Kitchen Blog: Whole Wheat Honey Oatmeal Bread. Guest post by Adrianna Adarme of A Cozy Kitchen, recipe submitted by TK member Stephanie of Girl Versus Dough.

 
There’s simply nothing like fresh homemade bread. Despite knowing the powers of “homemade,” I usually leave bread as a grocery-store purchase but when I came across this Whole Wheat Honey Oatmeal Bread recipe by TK member Stephanie (a she recipe adapted from White On Rice Couple), I was enamored with the combination of oats, honey and whole wheat flour. When this loaf came out of the oven, I immediately made a commitment to myself to bake more bread. This bread yields a loaf that is slightly sweet in flavor, hearty in texture and utterly delicious when eaten warm. 


Tasty Kitchen Blog: Whole Wheat Honey Oatmeal Bread. Guest post by Adrianna Adarme of A Cozy Kitchen, recipe submitted by TK member Stephanie of Girl Versus Dough.

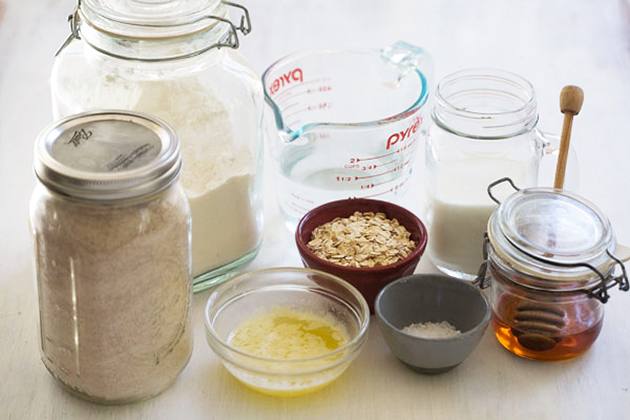
To get started, you’ll need: water, honey, whole wheat flour, all-purpose flour, oats, butter and salt. 

You can make the dough in a stand-up mixer if you have one, but if you don’t, you can make this whole loaf by hand. This dough is actually very easy to knead by hand. It won’t leave you sweating like other doughs. 


Tasty Kitchen Blog: Whole Wheat Honey Oatmeal Bread. Guest post by Adrianna Adarme of A Cozy Kitchen, recipe submitted by TK member Stephanie of Girl Versus Dough.

Combine the water and milk in a microwave-safe bowl and nuke it for 30 to 40 seconds, until the mixture is warm. Then pour in the honey.


Tasty Kitchen Blog: Whole Wheat Honey Oatmeal Bread. Guest post by Adrianna Adarme of A Cozy Kitchen, recipe submitted by TK member Stephanie of Girl Versus Dough.

Sprinkle the dry active yeast atop the milk mixture and allow it to get nice and foamy, about 10 minutes. 


Tasty Kitchen Blog: Whole Wheat Honey Oatmeal Bread. Guest post by Adrianna Adarme of A Cozy Kitchen, recipe submitted by TK member Stephanie of Girl Versus Dough.

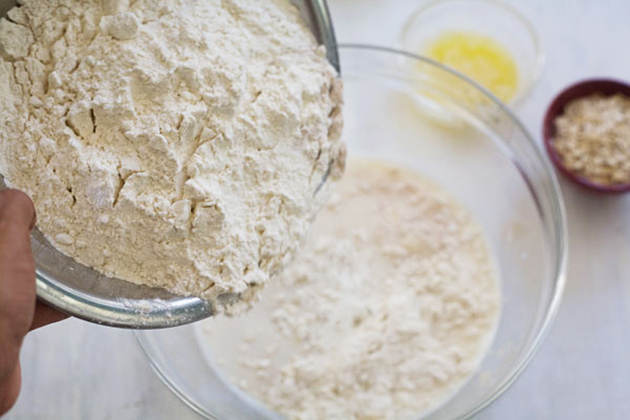
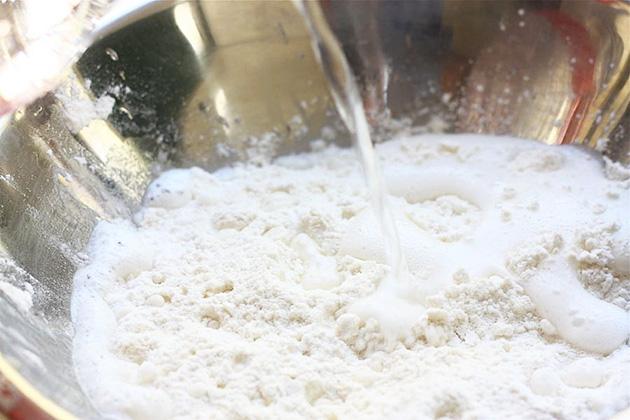
Add the whole wheat flour and all-purpose flour. 


Tasty Kitchen Blog: Whole Wheat Honey Oatmeal Bread. Guest post by Adrianna Adarme of A Cozy Kitchen, recipe submitted by TK member Stephanie of Girl Versus Dough.

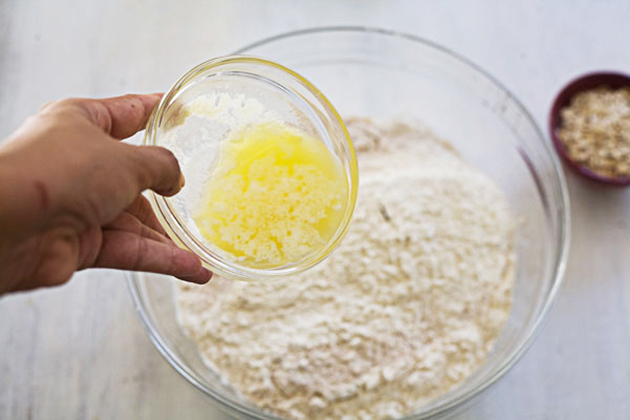
Pour in the melted butter and oats. 


Tasty Kitchen Blog: Whole Wheat Honey Oatmeal Bread. Guest post by Adrianna Adarme of A Cozy Kitchen, recipe submitted by TK member Stephanie of Girl Versus Dough.

Mix all of the ingredients together until the dough forms. 


Tasty Kitchen Blog: Whole Wheat Honey Oatmeal Bread. Guest post by Adrianna Adarme of A Cozy Kitchen, recipe submitted by TK member Stephanie of Girl Versus Dough.

If you’re using a stand-up mixer, you can knead the dough using the dough hook for 10 to 15 minutes. If you’re using your hands, you can simply knead the dough on a heavily floured surface for 15 minutes until the dough transform from sticky to nice and smooth. 


Tasty Kitchen Blog: Whole Wheat Honey Oatmeal Bread. Guest post by Adrianna Adarme of A Cozy Kitchen, recipe submitted by TK member Stephanie of Girl Versus Dough.

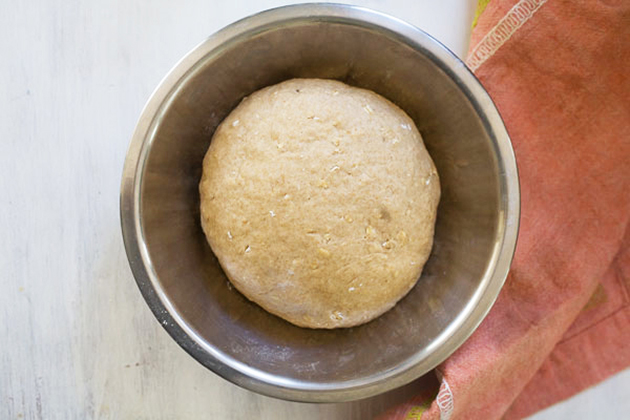
When you’re done kneading, transfer it to a clean bowl and cover it with a tea towel to rise for 1 hour or until the dough has doubled in size. 


Tasty Kitchen Blog: Whole Wheat Honey Oatmeal Bread. Guest post by Adrianna Adarme of A Cozy Kitchen, recipe submitted by TK member Stephanie of Girl Versus Dough.

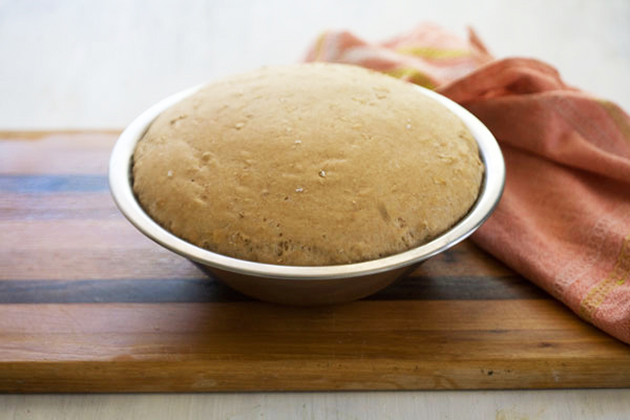
After the dough is done with its first rise, this is how it’ll look. 


Tasty Kitchen Blog: Whole Wheat Honey Oatmeal Bread. Guest post by Adrianna Adarme of A Cozy Kitchen, recipe submitted by TK member Stephanie of Girl Versus Dough.

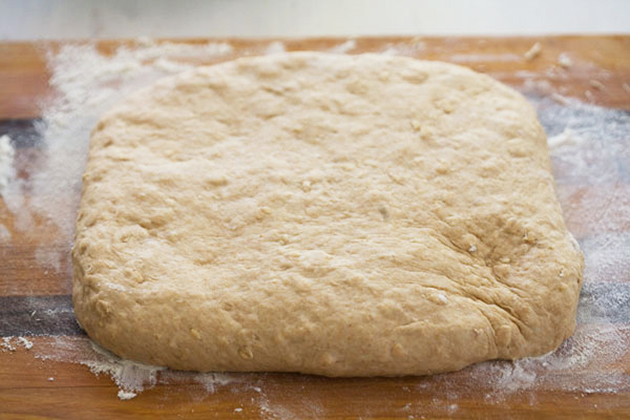
Punch it down and transfer it to a lightly floured surface. Shape it into an 8-by-8-inch square. 
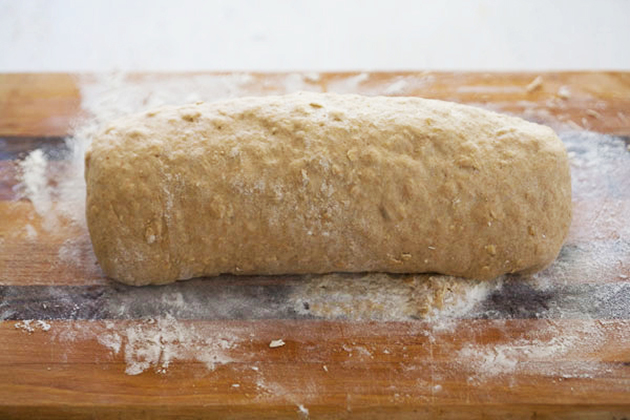


Tasty Kitchen Blog: Whole Wheat Honey Oatmeal Bread. Guest post by Adrianna Adarme of A Cozy Kitchen, recipe submitted by TK member Stephanie of Girl Versus Dough.

Roll up the dough …


Tasty Kitchen Blog: Whole Wheat Honey Oatmeal Bread. Guest post by Adrianna Adarme of A Cozy Kitchen, recipe submitted by TK member Stephanie of Girl Versus Dough.

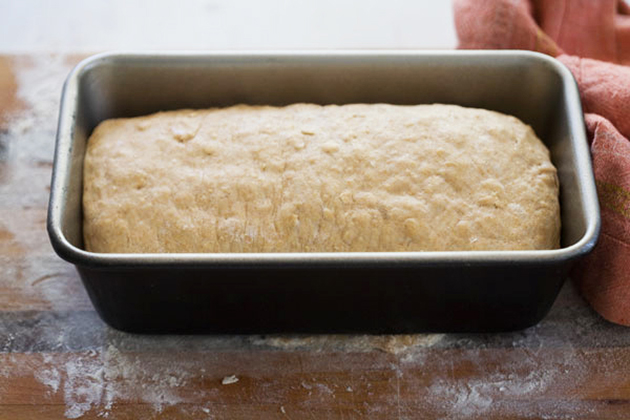
And then transfer it to a 9-by-5-inch loaf pan, seam-side down. Cover the loaf again with a tea towel and let it rise for 30 minutes, or until the dough reaches the edges of the pan. 


Tasty Kitchen Blog: Whole Wheat Honey Oatmeal Bread. Guest post by Adrianna Adarme of A Cozy Kitchen, recipe submitted by TK member Stephanie of Girl Versus Dough.

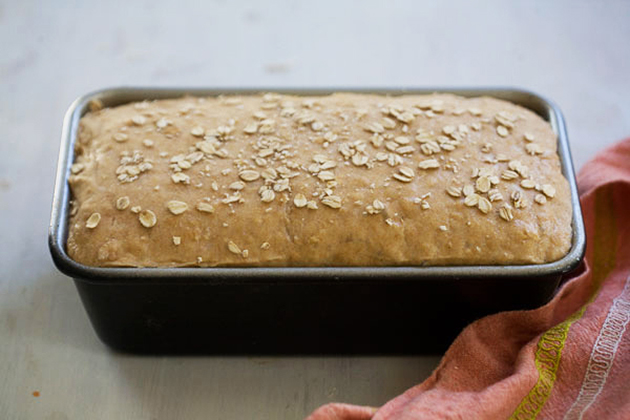
Preheat the oven to 400ºF. Sprinkle the oats on top of the loaf and transfer it to the oven to bake for about 45 minutes. You’ll know when the bread is done when the loaf’s top is dark brown and the bread sounds hollow when tapped on the bottom. 


Tasty Kitchen Blog: Whole Wheat Honey Oatmeal Bread. Guest post by Adrianna Adarme of A Cozy Kitchen, recipe submitted by TK member Stephanie of Girl Versus Dough.

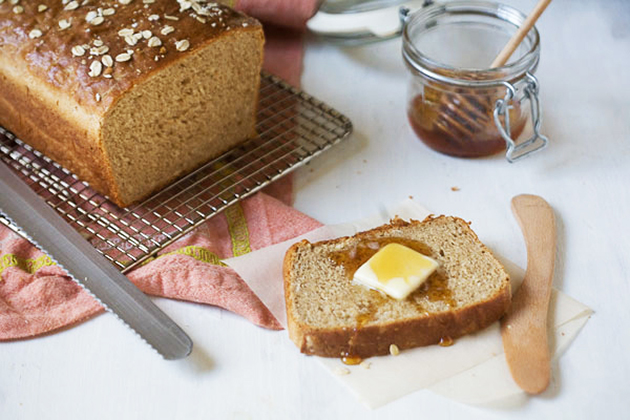
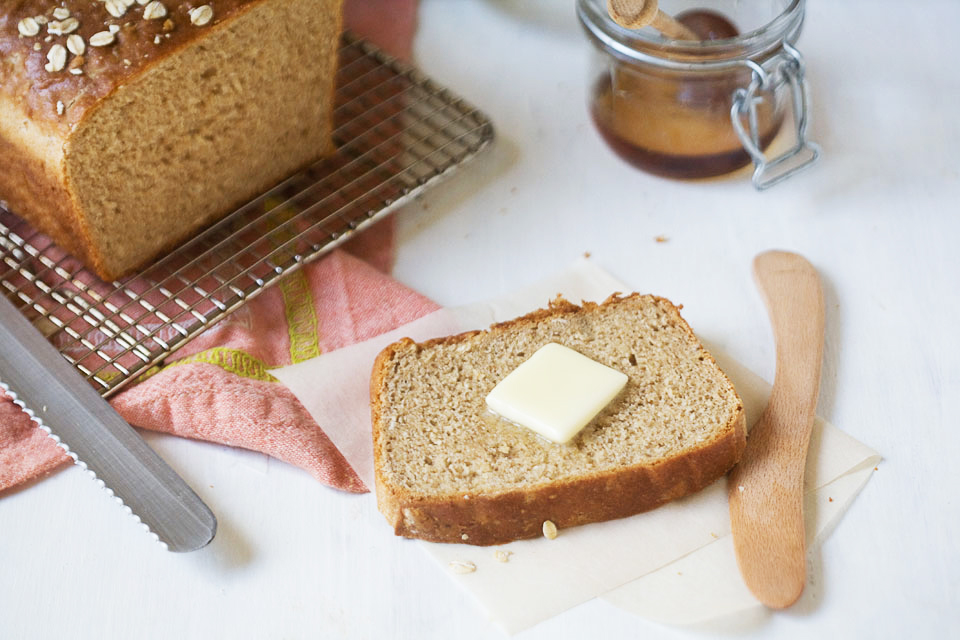
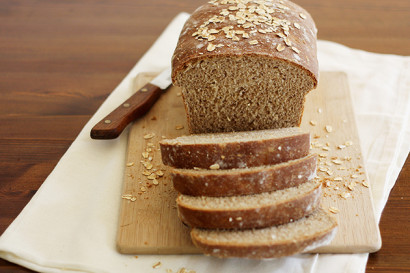
Allow the loaf to cool to room temperature and then slice it up!

This bread is a beauty when it comes out of the oven. It’s ideal for everything from your weekday sandwiches to a snack with a cup of coffee. I personally enjoyed a slice with a smear of salted butter and a drizzle of honey. It was perfection. 

Thanks for sharing the recipe, Stephanie! Go check out her blog, Girl Versus Dough, for more of her recipes.


Printable Recipe

Whole Wheat Honey Oatmeal Bread

See post on Stephanie | Girl Versus Dough’s site!
5.00 Mitt(s) 6 Rating(s)6 votes, average: 5.00 out of 56 votes, average: 5.00 out of 56 votes, average: 5.00 out of 56 votes, average: 5.00 out of 56 votes, average: 5.00 out of 5

Prep Time:

Cook Time:

Difficulty: Easy

Servings: 8

8
x

Print Options

Page size Letter 3x5 4x6
Text Size Small Medium Large
Content Include description
Include prep time, etc.
Show image

Description

Whole wheat sandwich bread made with oats and honey and a whole lot of yum.

Ingredients

  • 1 cup Water
  • 1 cup Milk
  • 2-¼ teaspoons Active Dry Yeast
  • 2 Tablespoons Honey
  • 2-½ cups Whole Wheat Flour
  • 2 cups Bread Or All-Purpose Flour
  • 1 cup Rolled Oats, Plus More For Topping Loaf
  • 4 Tablespoons Unsalted Butter, Melted And Cooled Slightly
  • 1 Tablespoon Salt

Preparation Instructions

Pour water and milk into a microwave-safe bowl; heat 30 to 45 seconds until warm (about 115ºF). Pour into the bowl of a stand mixer.

Add yeast and honey. Let sit 10 minutes until yeast is foamy.

Stir in flours, oats, butter and salt. Using a dough hook, knead on medium speed 6 minutes until dough is smooth, elastic and only slightly sticky (alternatively, knead by hand 10 to 15 minutes on a lightly floured surface until smooth, elastic and only slightly sticky). Keep dough in bowl and cover with a tea towel. Let rise 1 hour until doubled.

When dough is doubled, punch down and transfer to a lightly floured surface. Press into an 8-by-8-inch square, then tuck in sides slightly and roll up into a log. Transfer to a lightly greased 9-by-5-inch loaf pan, seam-side down. Cover with a tea towel and let rise 30 to 40 minutes until dough reaches the edges of the pan (but not doubled).

Heat oven to 400ºF (375ºF if loaf pan is dark or nonstick). Sprinkle oats on top of risen loaf. Bake 40 to 50 minutes, rotating halfway through baking, until loaf is deep brown on top and sounds hollow when tapped on the bottom. Remove from loaf pan and transfer to a cooling rack to cool completely.

Adapted from White On Rice Couple.


_______________________________________

Adrianna is the lovely lady behind the scrumptious blog A Cozy Kitchen. It’s filled with all kinds of mouthwatering recipes and gorgeous photography. Whether you’re in the mood for something vegetarian or meaty, fancy or pure comfort, light or decadent, there’s sure to be something there for everyone.


Profile photo of A Cozy Kitchen

Breakfast Taco Cups

Posted by in Step-by-Step Recipes

Tasty Kitchen Blog: Breakfast Taco Cups. Guest post by Adrianna of A Cozy Kitchen, recipe submitted by TK member Beverly of Bev Cooks.

 
Breakfast, hands down, is my favorite meal. I can’t think of a better day than one that starts with a stack of pancakes, and I’ve been known to put an egg on any dish to make it more “breakfast-y.” When I came across this Breakfast Taco Cups recipe from Bev Weidner, I knew it would be a winner. Who wouldn’t want a taco for breakfast?! And its “cup” form makes it super cute for serving at a party or brunch. As someone who is a texture enthusiast, my favorite element of these Breakfast Taco Cups is the crunch factor. 


Tasty Kitchen Blog: Breakfast Taco Cups. Guest post by Adrianna of A Cozy Kitchen, recipe submitted by TK member Beverly of Bev Cooks.

To get started, you’ll need: corn tortillas, spinach or kale, eggs, salt, cheddar cheese, cherry tomatoes, red onion, red bell pepper, bacon and avocado. 

Coat the ramekins with cooking spray or rub them with olive oil. 

To make the corn tortillas a bit more pliable, nuke them for 15 seconds or so. Mine kept tearing when I tried to layer them in the ramekins, so I simply cut a small slit out of the center and made them into cone-shapes. It worked like a charm. 


Tasty Kitchen Blog: Breakfast Taco Cups. Guest post by Adrianna of A Cozy Kitchen, recipe submitted by TK member Beverly of Bev Cooks.

Start by placing a few leaves of spinach into each tortilla cup. 


Tasty Kitchen Blog: Breakfast Taco Cups. Guest post by Adrianna of A Cozy Kitchen, recipe submitted by TK member Beverly of Bev Cooks.

Next, crack an egg into each cup and top with a dash of salt.


Tasty Kitchen Blog: Breakfast Taco Cups. Guest post by Adrianna of A Cozy Kitchen, recipe submitted by TK member Beverly of Bev Cooks.

Top each egg with a handful of cheese, four tomato halves, a few slices of red onion, red bell pepper and a sprinkling of bacon bits. 


Tasty Kitchen Blog: Breakfast Taco Cups. Guest post by Adrianna of A Cozy Kitchen, recipe submitted by TK member Beverly of Bev Cooks.

Place another handful of cheese atop the cups and transfer them to a baking sheet to bake for 20 to 25 minutes. 


Tasty Kitchen Blog: Breakfast Taco Cups. Guest post by Adrianna of A Cozy Kitchen, recipe submitted by TK member Beverly of Bev Cooks.

When they come out of the oven, the tortillas will be crispy, the egg runny and the cheese all melty. 

These make a perfect breakfast for a breakfast gathering. Or you could take my lead and eat two in one sitting. You’ll enjoy them, trust me. 

Thanks, Bev, for the great recipe! Visit her blog Bev Cooks and you’ll see why she’s easily one of my favorites.


Printable Recipe

Breakfast Taco Cups

See post on Bev Weidner’s site!
0.00 Mitt(s) 0 Rating(s)0 votes, average: 0.00 out of 50 votes, average: 0.00 out of 50 votes, average: 0.00 out of 50 votes, average: 0.00 out of 50 votes, average: 0.00 out of 5

Prep Time:

Cook Time:

Difficulty: Easy

Servings: 6

6
x

Print Options

Page size Letter 3x5 4x6
Text Size Small Medium Large
Content Include description
Include prep time, etc.
Show image

Description

Now you can have your taco and eat it too. Or something.

Ingredients

  • 6 whole Taco-sized Corn Tortillas
  • 2 cups Chopped Kale (or Any Other Green You Have On Hand)
  • 6 whole Eggs
  • 1 pinch Coarse Salt
  • ½ cups Shredded Cheddar Cheese
  • 12 whole Cherry Tomatoes, Halved
  • ⅓ cups Thinly Sliced Red Onion
  • ⅓ cups Diced Red Bell Pepper
  • 3 slices Bacon Cooked Crisp And Crumbled
  • ½ cups Diced Avocado
  • ½ cups Salsa
  • ½ cups Cilantro Leaves, For Garnish

Preparation Instructions

Preheat the oven to 375 F.

Stack the tortillas on top of each other on a plate and give them a quick zip in the microwave, for 15 seconds. This warms them so they’re more pliable and easy to maneuver.

Lightly coat 6 individual serving size ramekins with cooking spray. Place a tortilla inside each ramekin, kind of folding it in. Layer a few kale leaves in the bottom of the tortillas, then crack an egg in each cup. Sprinkle a teeny teeny bit of salt on each egg. Then layer with cheese, 4 tomato halves, sliced onion, red bell pepper, and bacon. And more cheese. Put ramekins on a baking tray.

Slide tray in the oven for 25 to 30 minutes, or until the egg whites are set and the yolks are nearly done. Go a little longer if you want them hard cooked. Mine weren’t soft by any means, but not totally done, which I love.

Garnish with avocado, cilantro leaves and a little drizzle of salsa. You could even add sour cream if you want!

Go crazy.


_______________________________________

Adrianna is the lovely lady behind the scrumptious blog A Cozy Kitchen. It’s filled with all kinds of mouthwatering recipes and gorgeous photography. Whether you’re in the mood for something vegetarian or meaty, fancy or pure comfort, light or decadent, there’s sure to be something there for everyone.


Profile photo of A Cozy Kitchen

Asparagus Quiche with a Spaghetti Squash Crust

Posted by in Step-by-Step Recipes

Tasty Kitchen Blog: Asparagus Quiche with a Spaghetti Squash Crust. Guest post by Adrianna Adarme of A Cozy Kitchen, recipe submitted by Tk member Claire of Just Blither Blather.

 
Is there anything more perfect and pretty for a Sunday brunch than quiche? Probably not. But let’s be honest, if you’re going for easy, making a quiche ain’t it. On most Sunday mornings—when I’m still trying to wake up—pastry dough isn’t something I want to deal with. So when I saw this recipe from Claire, I was definitely intrigued. This quiche’s crust isn’t made with a traditional pastry dough; instead it’s made using roasted spaghetti squash, making it not only a bit more fuss-free, but also healthier.

Let’s get started!


Tasty Kitchen Blog: Asparagus Quiche with a Spaghetti Squash Crust. Guest post by Adrianna Adarme of A Cozy Kitchen, recipe submitted by Tk member Claire of Just Blither Blather.

You want to start the quiche process already having roasted the spaghetti squash. Roasting squash is easy enough: Preheat your oven to 400ºF, line a baking sheet with foil or parchment paper, slice the squash in half, place it face down and put it the oven for about 20 minutes.


Tasty Kitchen Blog: Asparagus Quiche with a Spaghetti Squash Crust. Guest post by Adrianna Adarme of A Cozy Kitchen, recipe submitted by Tk member Claire of Just Blither Blather.

When it’s done, it’ll be very tender. Start with scooping out the seeds, and then scrape the squash with a fork.

Transfer the spaghetti squash to a bowl and set it aside.


Tasty Kitchen Blog: Asparagus Quiche with a Spaghetti Squash Crust. Guest post by Adrianna Adarme of A Cozy Kitchen, recipe submitted by Tk member Claire of Just Blither Blather.

In a medium pan, add a bit of olive oil, the diced onion and sauté for a few minutes. Top the onion with the minced garlic.


Tasty Kitchen Blog: Asparagus Quiche with a Spaghetti Squash Crust. Guest post by Adrianna Adarme of A Cozy Kitchen, recipe submitted by Tk member Claire of Just Blither Blather.

Next, trim and cut the asparagus into 1-inch pieces. 


Tasty Kitchen Blog: Asparagus Quiche with a Spaghetti Squash Crust. Guest post by Adrianna Adarme of A Cozy Kitchen, recipe submitted by Tk member Claire of Just Blither Blather.

Add the asparagus to the pan and cook until slightly tender.


Tasty Kitchen Blog: Asparagus Quiche with a Spaghetti Squash Crust. Guest post by Adrianna Adarme of A Cozy Kitchen, recipe submitted by Tk member Claire of Just Blither Blather.

While the asparagus is cooking, crack the eggs in a bowl, add the milk and Swiss cheese.


Tasty Kitchen Blog: Asparagus Quiche with a Spaghetti Squash Crust. Guest post by Adrianna Adarme of A Cozy Kitchen, recipe submitted by Tk member Claire of Just Blither Blather.

Next, add some salt and pepper and whisk the ingredients together.


Tasty Kitchen Blog: Asparagus Quiche with a Spaghetti Squash Crust. Guest post by Adrianna Adarme of A Cozy Kitchen, recipe submitted by Tk member Claire of Just Blither Blather.

When the asparagus/onion mixture is cooked and you have the egg mixture ready to go, it’s time to get the quiche ready for the oven.

Press the spaghetti squash into the pie dish, lining it evenly all along the bottom and the sides.


Tasty Kitchen Blog: Asparagus Quiche with a Spaghetti Squash Crust. Guest post by Adrianna Adarme of A Cozy Kitchen, recipe submitted by Tk member Claire of Just Blither Blather.

Pour the egg mixture into the pie dish.


Tasty Kitchen Blog: Asparagus Quiche with a Spaghetti Squash Crust. Guest post by Adrianna Adarme of A Cozy Kitchen, recipe submitted by Tk member Claire of Just Blither Blather.

And then top it all off with the sautéed asparagus and onion mixture.


Tasty Kitchen Blog: Asparagus Quiche with a Spaghetti Squash Crust. Guest post by Adrianna Adarme of A Cozy Kitchen, recipe submitted by Tk member Claire of Just Blither Blather.

Transfer it to the oven and bake until it’s golden and delicious.


Tasty Kitchen Blog: Asparagus Quiche with a Spaghetti Squash Crust. Guest post by Adrianna Adarme of A Cozy Kitchen, recipe submitted by Tk member Claire of Just Blither Blather.

Spaghetti squash is definitely in season right now, but as we go through fall, I can see it working beautifully with different types of squashes, like acorn or kabocha. Thanks again to Claire for this beautiful and simple recipe. I’m going to enjoy this recipe for many brunches to come! Visit her blog Just Blither Blather for more recipes from this talented and engaging young blogger.


Printable Recipe

Asparagus Quiche with a Spaghetti Squash Crust

4.00 Mitt(s) 4 Rating(s)4 votes, average: 4.00 out of 54 votes, average: 4.00 out of 54 votes, average: 4.00 out of 54 votes, average: 4.00 out of 54 votes, average: 4.00 out of 5

Prep Time:

Cook Time:

Difficulty: Easy

Servings: 6

6
x

Print Options

Page size Letter 3x5 4x6
Text Size Small Medium Large
Content Include description
Include prep time, etc.
Show image

Description

A quiche perfect for supper in spring!

Ingredients

  • 13 ounces, weight Asparagus
  • ½  Small Yellow Onion
  • 2 cloves Garlic
  • 1 teaspoon Olive Oil
  • 5  Eggs
  • 1 cup Milk
  • 1 cup Swiss Cheese
  • ½ teaspoons Salt
  • ¼ teaspoons Pepper
  • 3 cups Cooked Spaghetti Squash (1 Small Squash)

Preparation Instructions

Preheat oven to 400ºF.

Cut off the woody ends of the asparagus. Chop the onion, mince the garlic, and cut the asparagus spears into 1-inch pieces. Heat the olive oil in a pan over medium heat, and saute onion and garlic for several minutes, until the onion is soft. Add the asparagus and continue to saute until the asparagus has turned bright green and is soft but not limp.

Whisk together the eggs, milk, cheese, salt, and pepper.

Grease a pie pan. Press the cooked spaghetti squash to the sides and bottom of the pan, forming an even crust. Pour the egg mixture into the pan. Add the asparagus, onion, and garlic on top of the egg mixture; be sure it sinks in.

Bake for 40 minutes until quiche is firm. Enjoy!


_______________________________________

Adrianna is the lovely lady behind the scrumptious blog A Cozy Kitchen. It’s filled with all kinds of mouthwatering recipes and gorgeous photography. Whether you’re in the mood for something vegetarian or meaty, fancy or pure comfort, light or decadent, there’s sure to be something there for everyone.


Profile photo of A Cozy Kitchen

Lemon Ricotta Stuffed Zucchini Blossoms

Posted by in Step-by-Step Recipes

Tasty Kitchen Blog: Lemon Ricotta Stuffed Zucchini Blossoms. Guest post by Adrianna Adarme of A Cozy Kitchen, recipe submitted by TK member Jill of Miss Delish.

 
The markets are overflowing with summer squash and zucchini right now. With their arrival, you’ll also find their pretty and delicate flower: the squash blossom. I love them on everything from pizzas to inside quesadillas with melty cheese. But my favorite way to consume them, hands down, is fried. While I’ve had them prepared this way at numerous restaurants, for some reason it has never dawned on me to simply do this myself. That was until I stumbled upon Miss Delish’s recipe for Lemon Ricotta Stuffed Zucchini Blossoms.


Tasty Kitchen Blog: Lemon Ricotta Stuffed Zucchini Blossoms. Guest post by Adrianna Adarme of A Cozy Kitchen, recipe submitted by TK member Jill of Miss Delish.

Let’s get started!

Stuffing squash blossoms with cheeses like ricotta or goat cheese is pretty common. This recipe is definitely more special because there are two types of cheeses, loads of lemon flavor and fresh basil.


Tasty Kitchen Blog: Lemon Ricotta Stuffed Zucchini Blossoms. Guest post by Adrianna Adarme of A Cozy Kitchen, recipe submitted by TK member Jill of Miss Delish.

To start, you’re going to finely grate the Parmesan-Reggiano, mince up some basil, zest a whole lemon …


Tasty Kitchen Blog: Lemon Ricotta Stuffed Zucchini Blossoms. Guest post by Adrianna Adarme of A Cozy Kitchen, recipe submitted by TK member Jill of Miss Delish.

And squeeze its juices into a bowl of ricotta. Salt and pepper to taste and it all together.


Tasty Kitchen Blog: Lemon Ricotta Stuffed Zucchini Blossoms. Guest post by Adrianna Adarme of A Cozy Kitchen, recipe submitted by TK member Jill of Miss Delish.

Whenever I cook with squash blossoms I like to remove their stamens or pistils. If you open up the flower, you’ll find them on the inside base of the flower. After their removal, transfer the blossoms to a colander, rinse them with water, and gently pat them dry with a paper towel.


Tasty Kitchen Blog: Lemon Ricotta Stuffed Zucchini Blossoms. Guest post by Adrianna Adarme of A Cozy Kitchen, recipe submitted by TK member Jill of Miss Delish.

Begin to stuff the blossoms with the ricotta mixture. I used about a 1/2 teaspoon per squash blossom. If your blossoms are bigger, you might be need a full teaspoon. Just be sure to not overstuff them. They should be able to close at the top all on their own.

Once the blossoms are stuffed and ready to go, you want to heat up your oil. While the oil is heating up, it’s batter time!


Tasty Kitchen Blog: Lemon Ricotta Stuffed Zucchini Blossoms. Guest post by Adrianna Adarme of A Cozy Kitchen, recipe submitted by TK member Jill of Miss Delish.

The dry ingredients go in a bowl, along with the soda water. A quick mix and the batter is ready. 


Tasty Kitchen Blog: Lemon Ricotta Stuffed Zucchini Blossoms. Guest post by Adrianna Adarme of A Cozy Kitchen, recipe submitted by TK member Jill of Miss Delish.

Dip, swirl and allow any excess batter to run off of the squash blossoms. A thin coat of batter is all you need.

Gently transfer to the hot oil and fry about 2-3 minutes on each side. And that’s it! 


Tasty Kitchen Blog: Lemon Ricotta Stuffed Zucchini Blossoms. Guest post by Adrianna Adarme of A Cozy Kitchen, recipe submitted by TK member Jill of Miss Delish.

These squash blossoms have a lovely zing in the ricotta due to the lemon zest and lemon juice, but I still love serving them with a few wedges of lemon. Oh, and don’t forget good sea salt. I’m a particular fan of big flakes of Maldon sea salt, but really any salt will do just fine.


Tasty Kitchen Blog: Lemon Ricotta Stuffed Zucchini Blossoms. Guest post by Adrianna Adarme of A Cozy Kitchen, recipe submitted by TK member Jill of Miss Delish.

When you cut into these cute things, you’ll be met with gooey, warm ricotta that has so much flavor. Simply lovely. Though they’re fried, they’re still light and perfect for the warm weather.

Thanks so much, Jill, for this recipe. It’s really lovely. I’m sure you’ll love it as much as I did. Go check out her blog Miss Delish for more yumminess and some beauty tips, too!


Printable Recipe

Lemon Ricotta Stuffed Zucchini Blossoms

See post on missdelish’s site!
0.00 Mitt(s) 0 Rating(s)0 votes, average: 0.00 out of 50 votes, average: 0.00 out of 50 votes, average: 0.00 out of 50 votes, average: 0.00 out of 50 votes, average: 0.00 out of 5

Prep Time:

Cook Time:

Difficulty: Intermediate

Servings: 4

4
x

Print Options

Page size Letter 3x5 4x6
Text Size Small Medium Large
Content Include description
Include prep time, etc.
Show image

Description

Fresh zucchini blossoms stuffed with a lemony ricotta filling, lightly battered and fried until crisp.

Ingredients

  • 1 cup Ricotta Cheese
  • ¼ cups Parmesan Cheese
  • 1 whole Lemon, Juiced And Zested
  • ¼ cups Chopped Basil
  • Salt And Pepper, to taste
  • 12 whole Medium Zucchini Blossoms
  • 1-½ cup Flour
  • 1 Tablespoon Baking Powder
  • 1-½ cup Soda Water
  • Vegetable Oil, For Frying
  • More Lemon Slices For Serving

Preparation Instructions

In a bowl mix together the ricotta cheese, Parmesan, lemon zest and juice, and basil and then season with salt and pepper to taste.

Fill each of the zucchini blossoms with the ricotta mixture and make sure to squeeze the petals around the filling to secure it in place. Set aside.

In another bowl mix together the flour and baking powder, then carefully whisk in the soda water. Set aside.

In a heavy bottom pot or pan, heat about 2 inches of oil over medium high heat until shimmering. Dip the flowers in the flour mixture and turn them to coat completely. Fry in batches for 2 minutes per side until golden and crispy. Remove to a plate lined with paper towel and immediately season generously with salt.

Wait a minute to pop one of these in your mouth, don’t be like me and scorch off all of your taste buds because you are impatient.

Serve with lemon slices to spritz over top. Enjoy!!


_______________________________________

Adrianna is the lovely lady behind the scrumptious blog A Cozy Kitchen. It’s filled with all kinds of mouthwatering recipes and gorgeous photography. Whether you’re in the mood for something vegetarian or meaty, fancy or pure comfort, light or decadent, there’s sure to be something there for everyone.


Profile photo of A Cozy Kitchen

Cornmeal Buttermilk Cake

Posted by in Baking, Step-by-Step Recipes

  I love baking cakes for friends’ birthdays. I mean, what’s not to like; it’s a celebration of being given one more year, there’s presents, smiles all around, and cake, of course! Today I present you with a cake I made for no celebration at all—simply the celebration of a random Thursday. I encourage you […]

Profile photo of A Cozy Kitchen

Meyer Lemon Ricotta Cookies

Posted by in Step-by-Step Recipes

  When I saw this recipe from TK member The Church Cook, I thought I was buying into a lemon-flavored shortbread cookie experience. Oh no, my friends–these Meyer Lemon Ricotta Cookies were better than a typical shortbread cookie—times four hundred thousand. These cookies are soft and pillowy; they walk the the line—perfectly—between tart…

Profile photo of A Cozy Kitchen

Jalapeno Bacon Stuffed Mushrooms

Posted by in Step-by-Step Recipes

  The holiday season is upon us, my friends. Parties, gatherings and festivities galore! I love a good party, and I love a potluck party even more. Stuffed mushrooms are one of my favorite dishes to bring to gatherings. They’re easy to assemble, their bite size shape makes them perfect for guests to eat as […]

Profile photo of A Cozy Kitchen

Broccoli Cheddar Soup

Posted by in Step-by-Step Recipes

  Broccoli cheddar soup will forever make me think of those cold college nights when my friends and I would head to Panera to eat copious amounts of soup in bread bowls. It was one of those college activities we did since Panera was super inexpensive, pretty delicious and one of the only restaurants open […]