The Pioneer Woman Tasty Kitchen
Profile photo of missamy

Oatmeal Chocolate Chip Banana Pancakes (Gluten-Free and Vegan!)

Posted by in Step-by-Step Recipes

Tasty Kitchen Blog: Oatmeal Chocolate Chip Banana Pancakes. Guest post by Amy Johnson of She Wears Many Hats, recipe submitted by TK member Monique of Ambitious Kitchen.

 
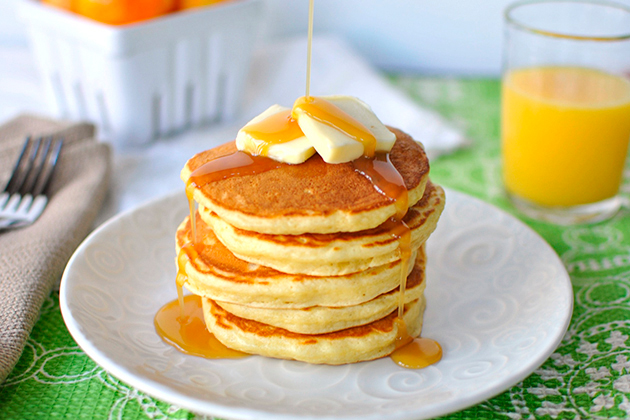
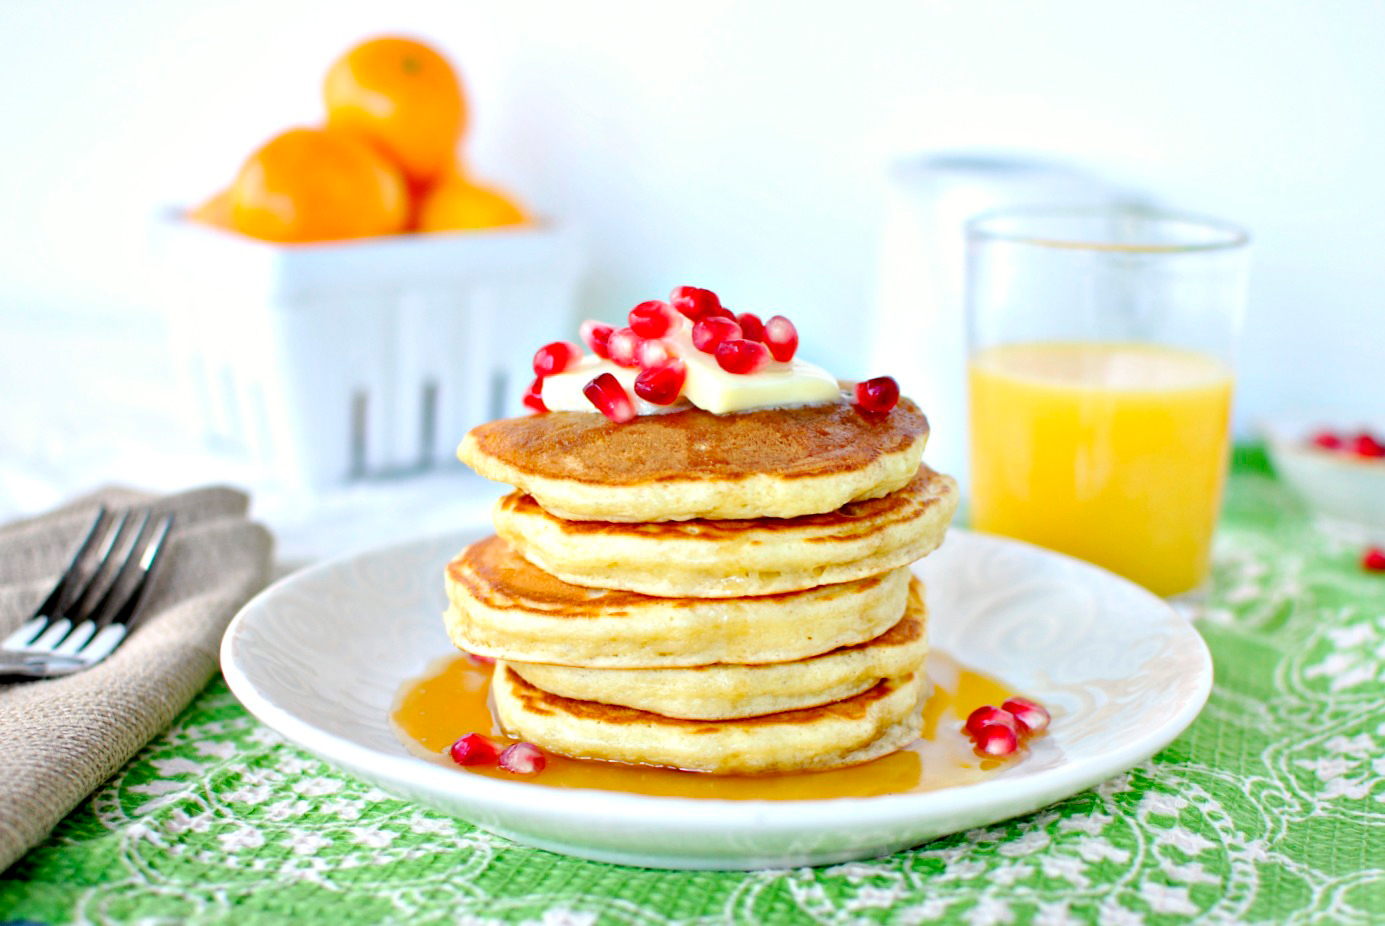
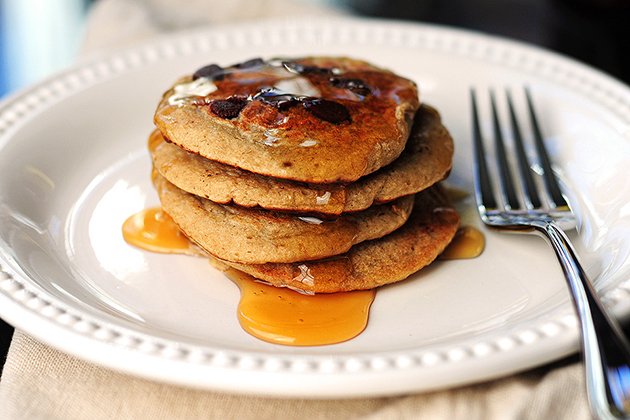
Looking for a healthy change of pace in your breakfast routine? These Oatmeal Chocolate Chip Banana Pancakes submitted by Monique of Ambitious Kitchen are just the ticket. Packed with healthy oats, and bananas, and sprinkled with a few chocolate chips, they are sure to set your day on the right track.

I was curious how they would work with no flour involved, but the batter blended into a smooth consistency. The texture is more dense and moist than a flour-based pancake, but we found them hearty and filling, and full of flavor. After a few bites, I began thinking of different tasty combinations using the banana/oatmeal batter base. Warm spices would add a nice touch, as well as chopped walnuts or pecans. Or what about a coconut-and-lime combination? That sounds like the perfect tropical twist to accompany the banana. I think this recipe lends itself well to experimenting, and is certainly a great option for all of those eating gluten-free (make sure you use gluten-free oats!) or vegan.

Let me show you how easy they are.


Tasty Kitchen Blog: Oatmeal Chocolate Chip Banana Pancakes. Guest post by Amy Johnson of She Wears Many Hats, recipe submitted by TK member Monique of Ambitious Kitchen.

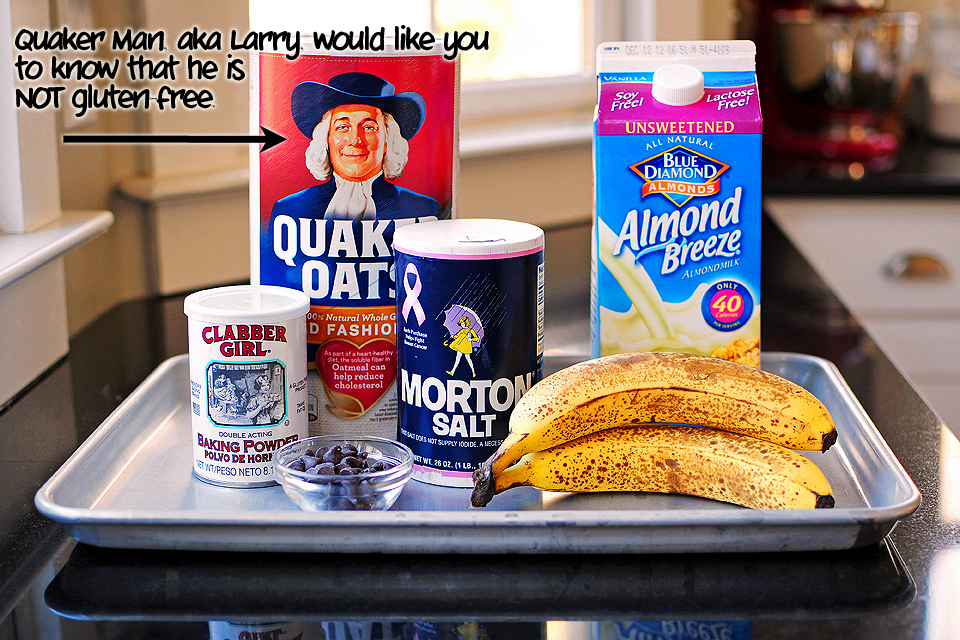
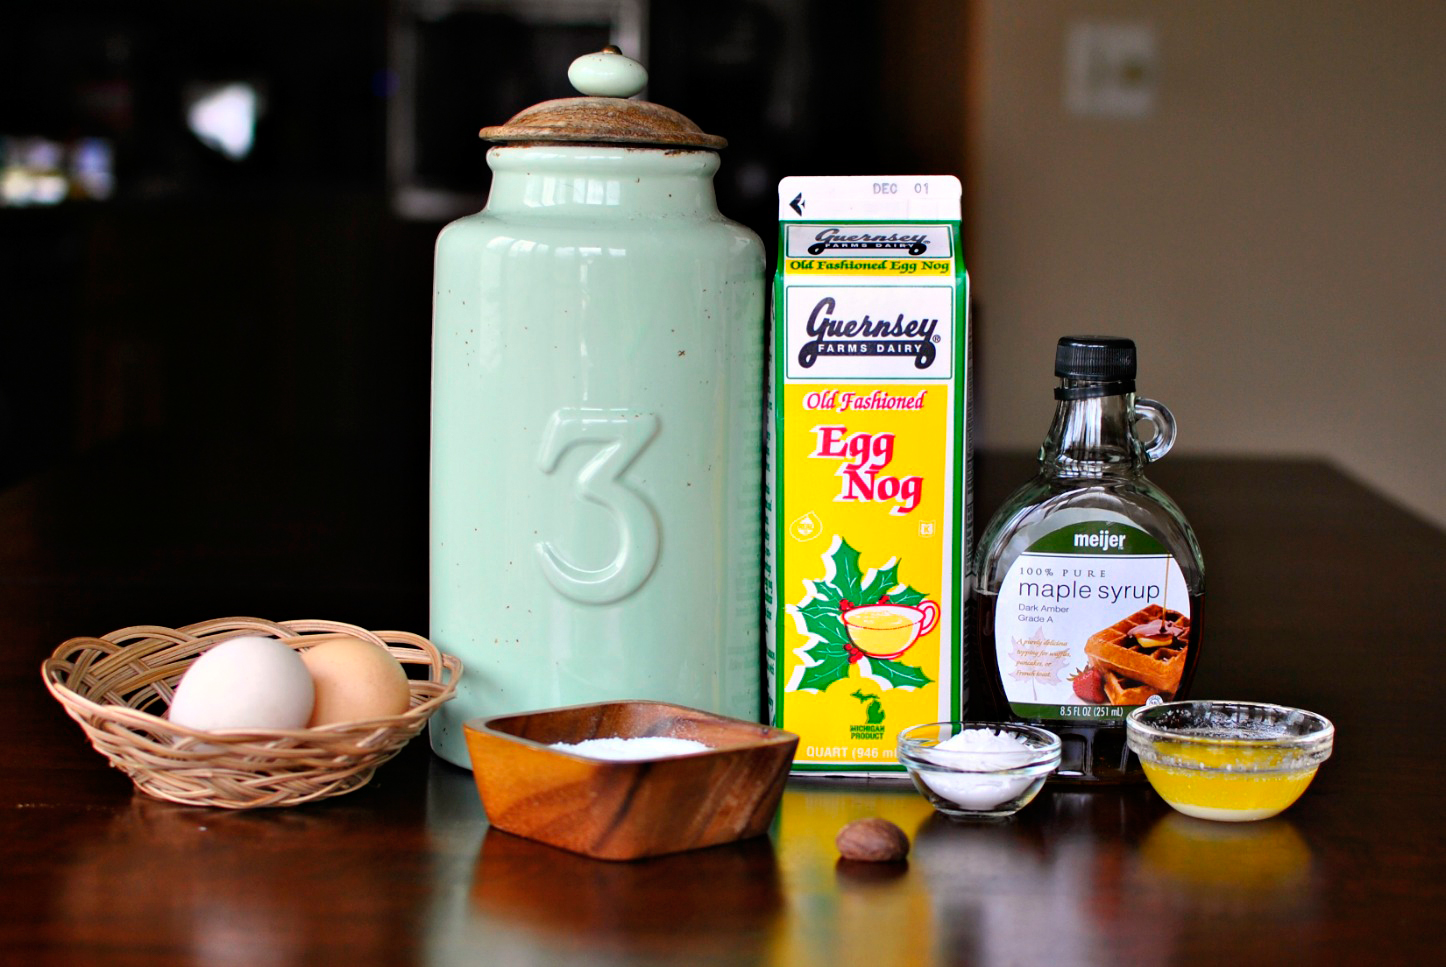
You’ll need a blender, and a short list of ingredients: ripe bananas, unsweetened vanilla almond milk, old-fashioned rolled oats, baking powder, salt, and chocolate chips. Of course, don’t forget your favorite pancake toppings. Monique suggests peanut butter! She sounds like a smart lady.

An important note!

If you are preparing this for those who need to avoid gluten: Please make sure you use oats that are certified gluten-free oats! Monique does mention that in the recipe, but in case you missed it there and missed it a few paragraphs above, ya can’t be too careful. The oats in the photo are not gluten-free. Over and oat out.


Tasty Kitchen Blog: Oatmeal Chocolate Chip Banana Pancakes. Guest post by Amy Johnson of She Wears Many Hats, recipe submitted by TK member Monique of Ambitious Kitchen.

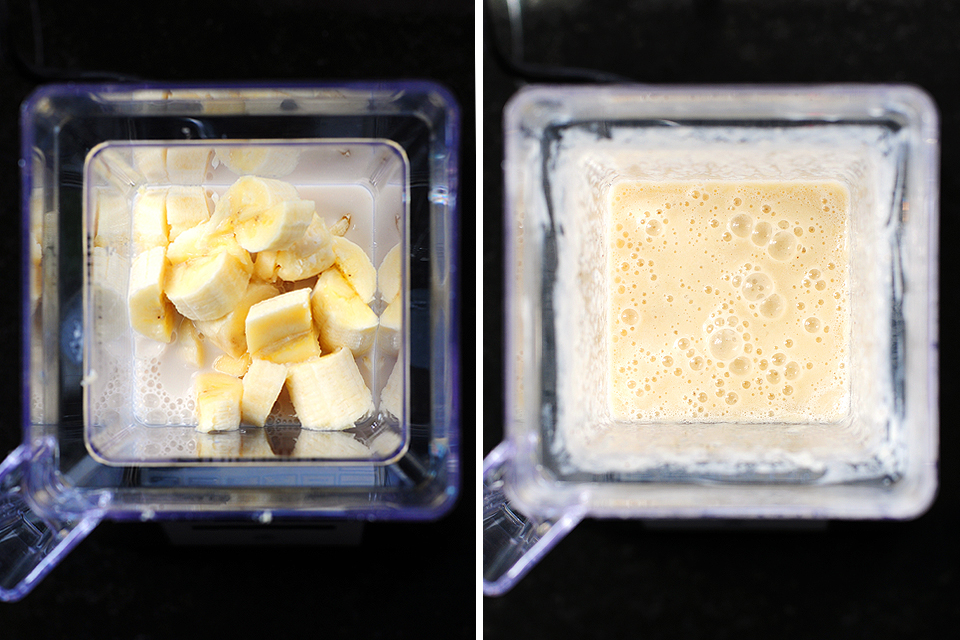
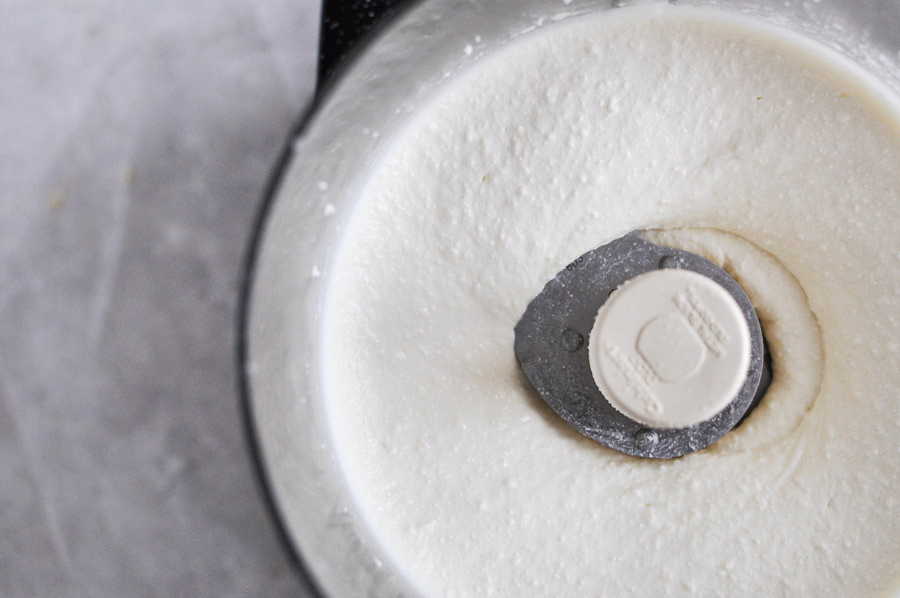
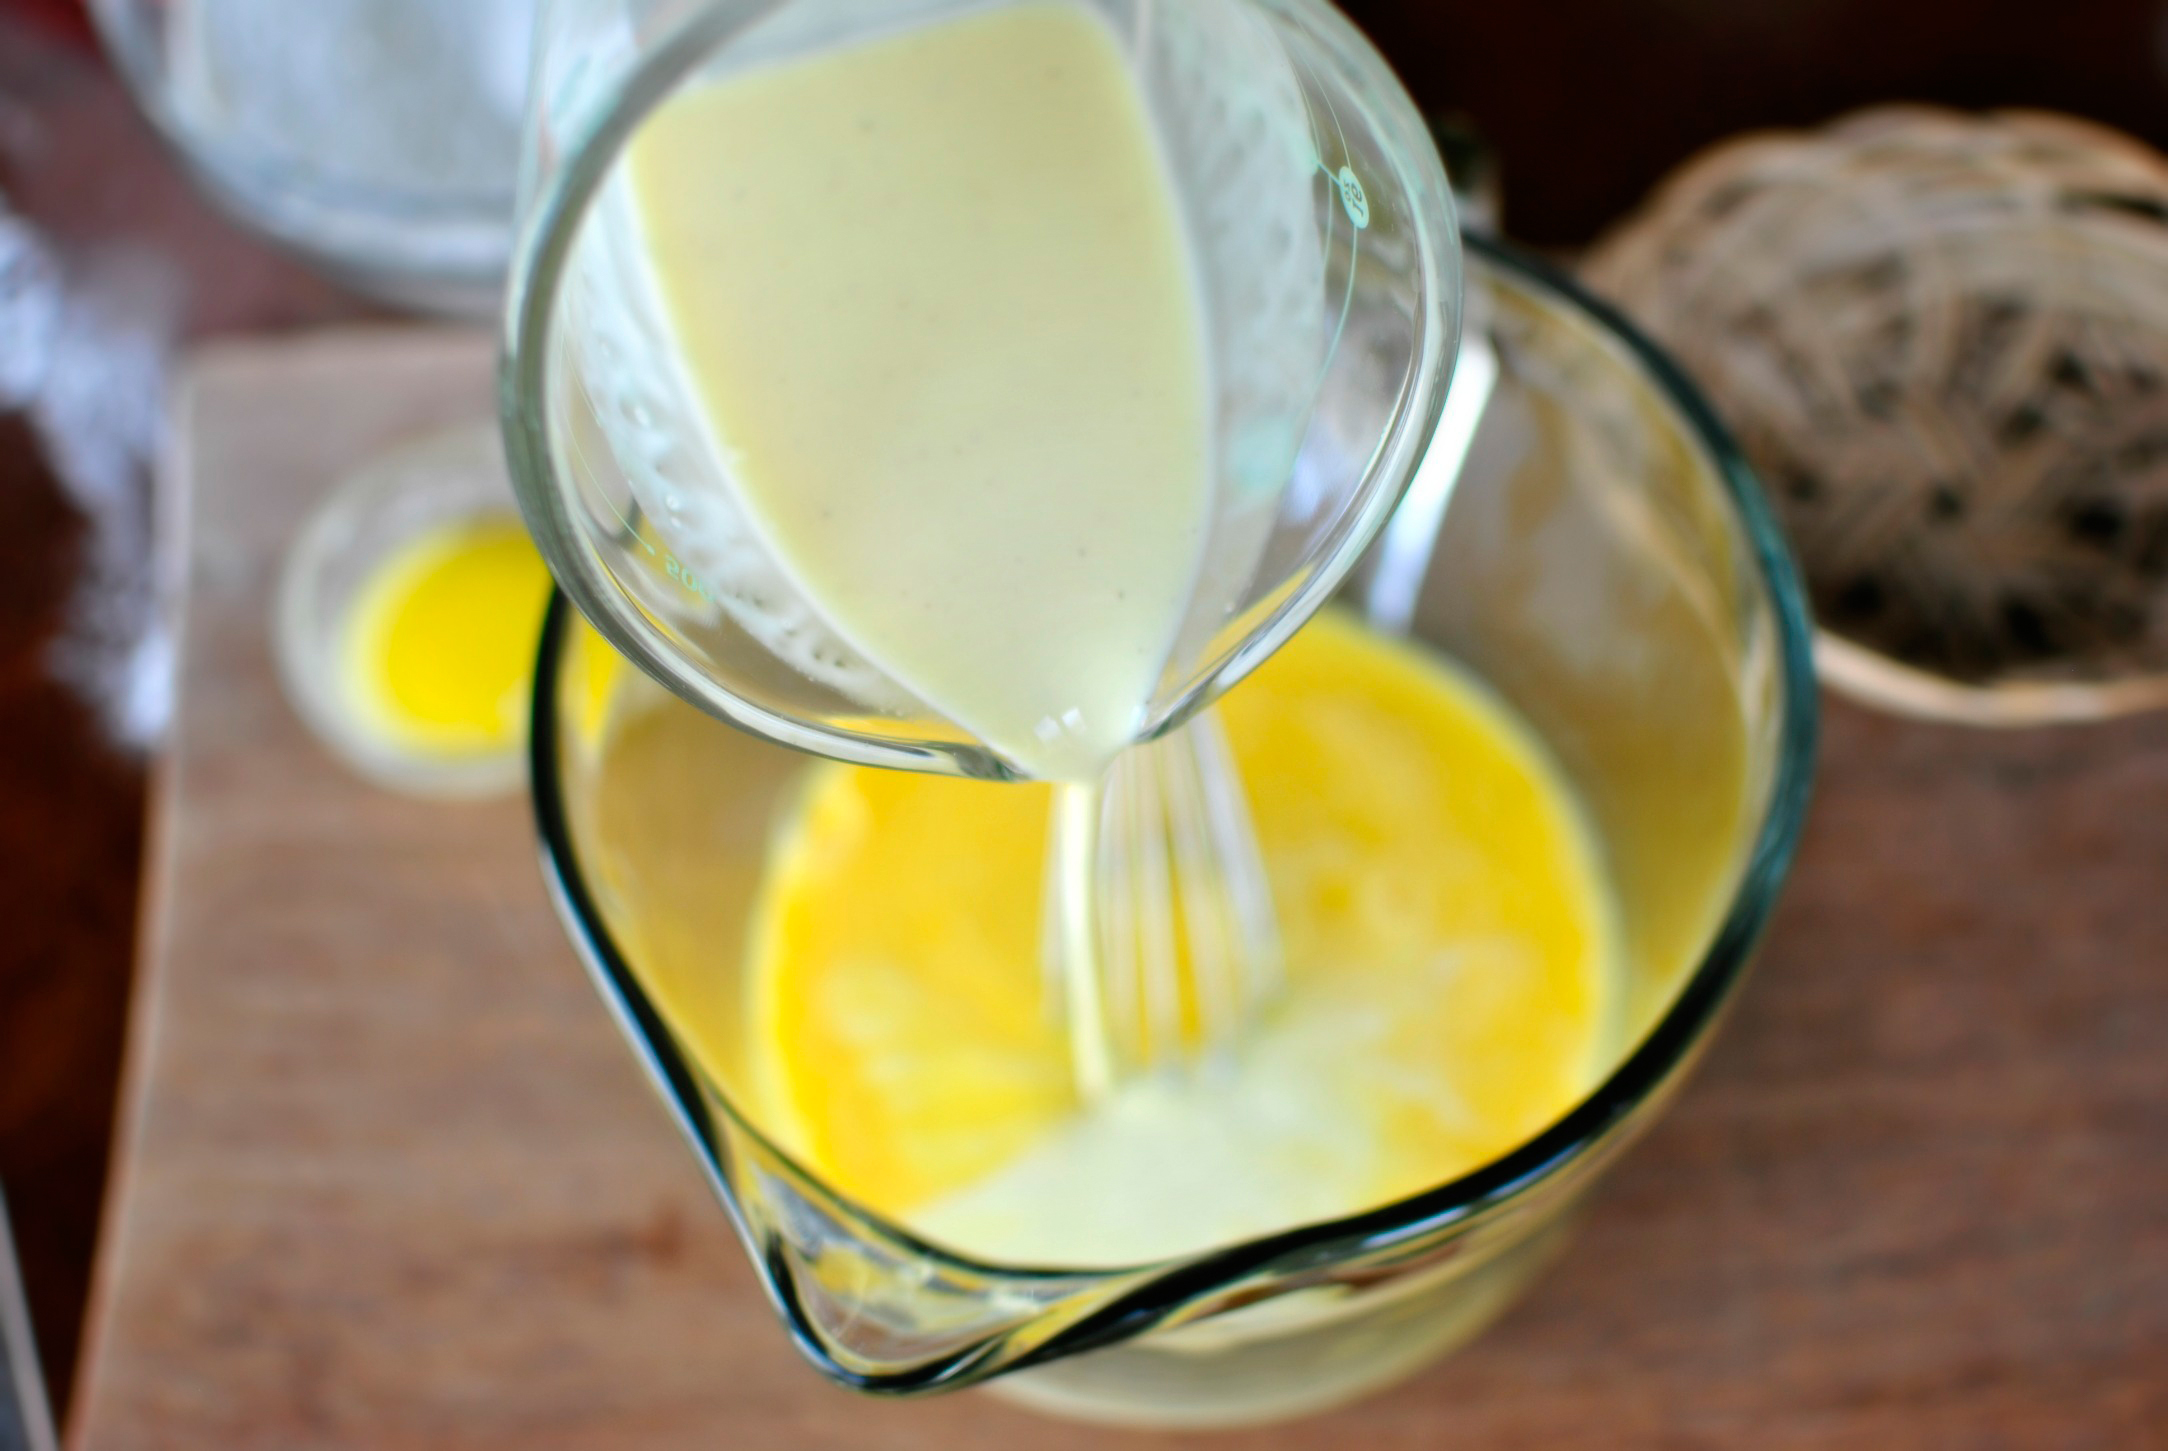
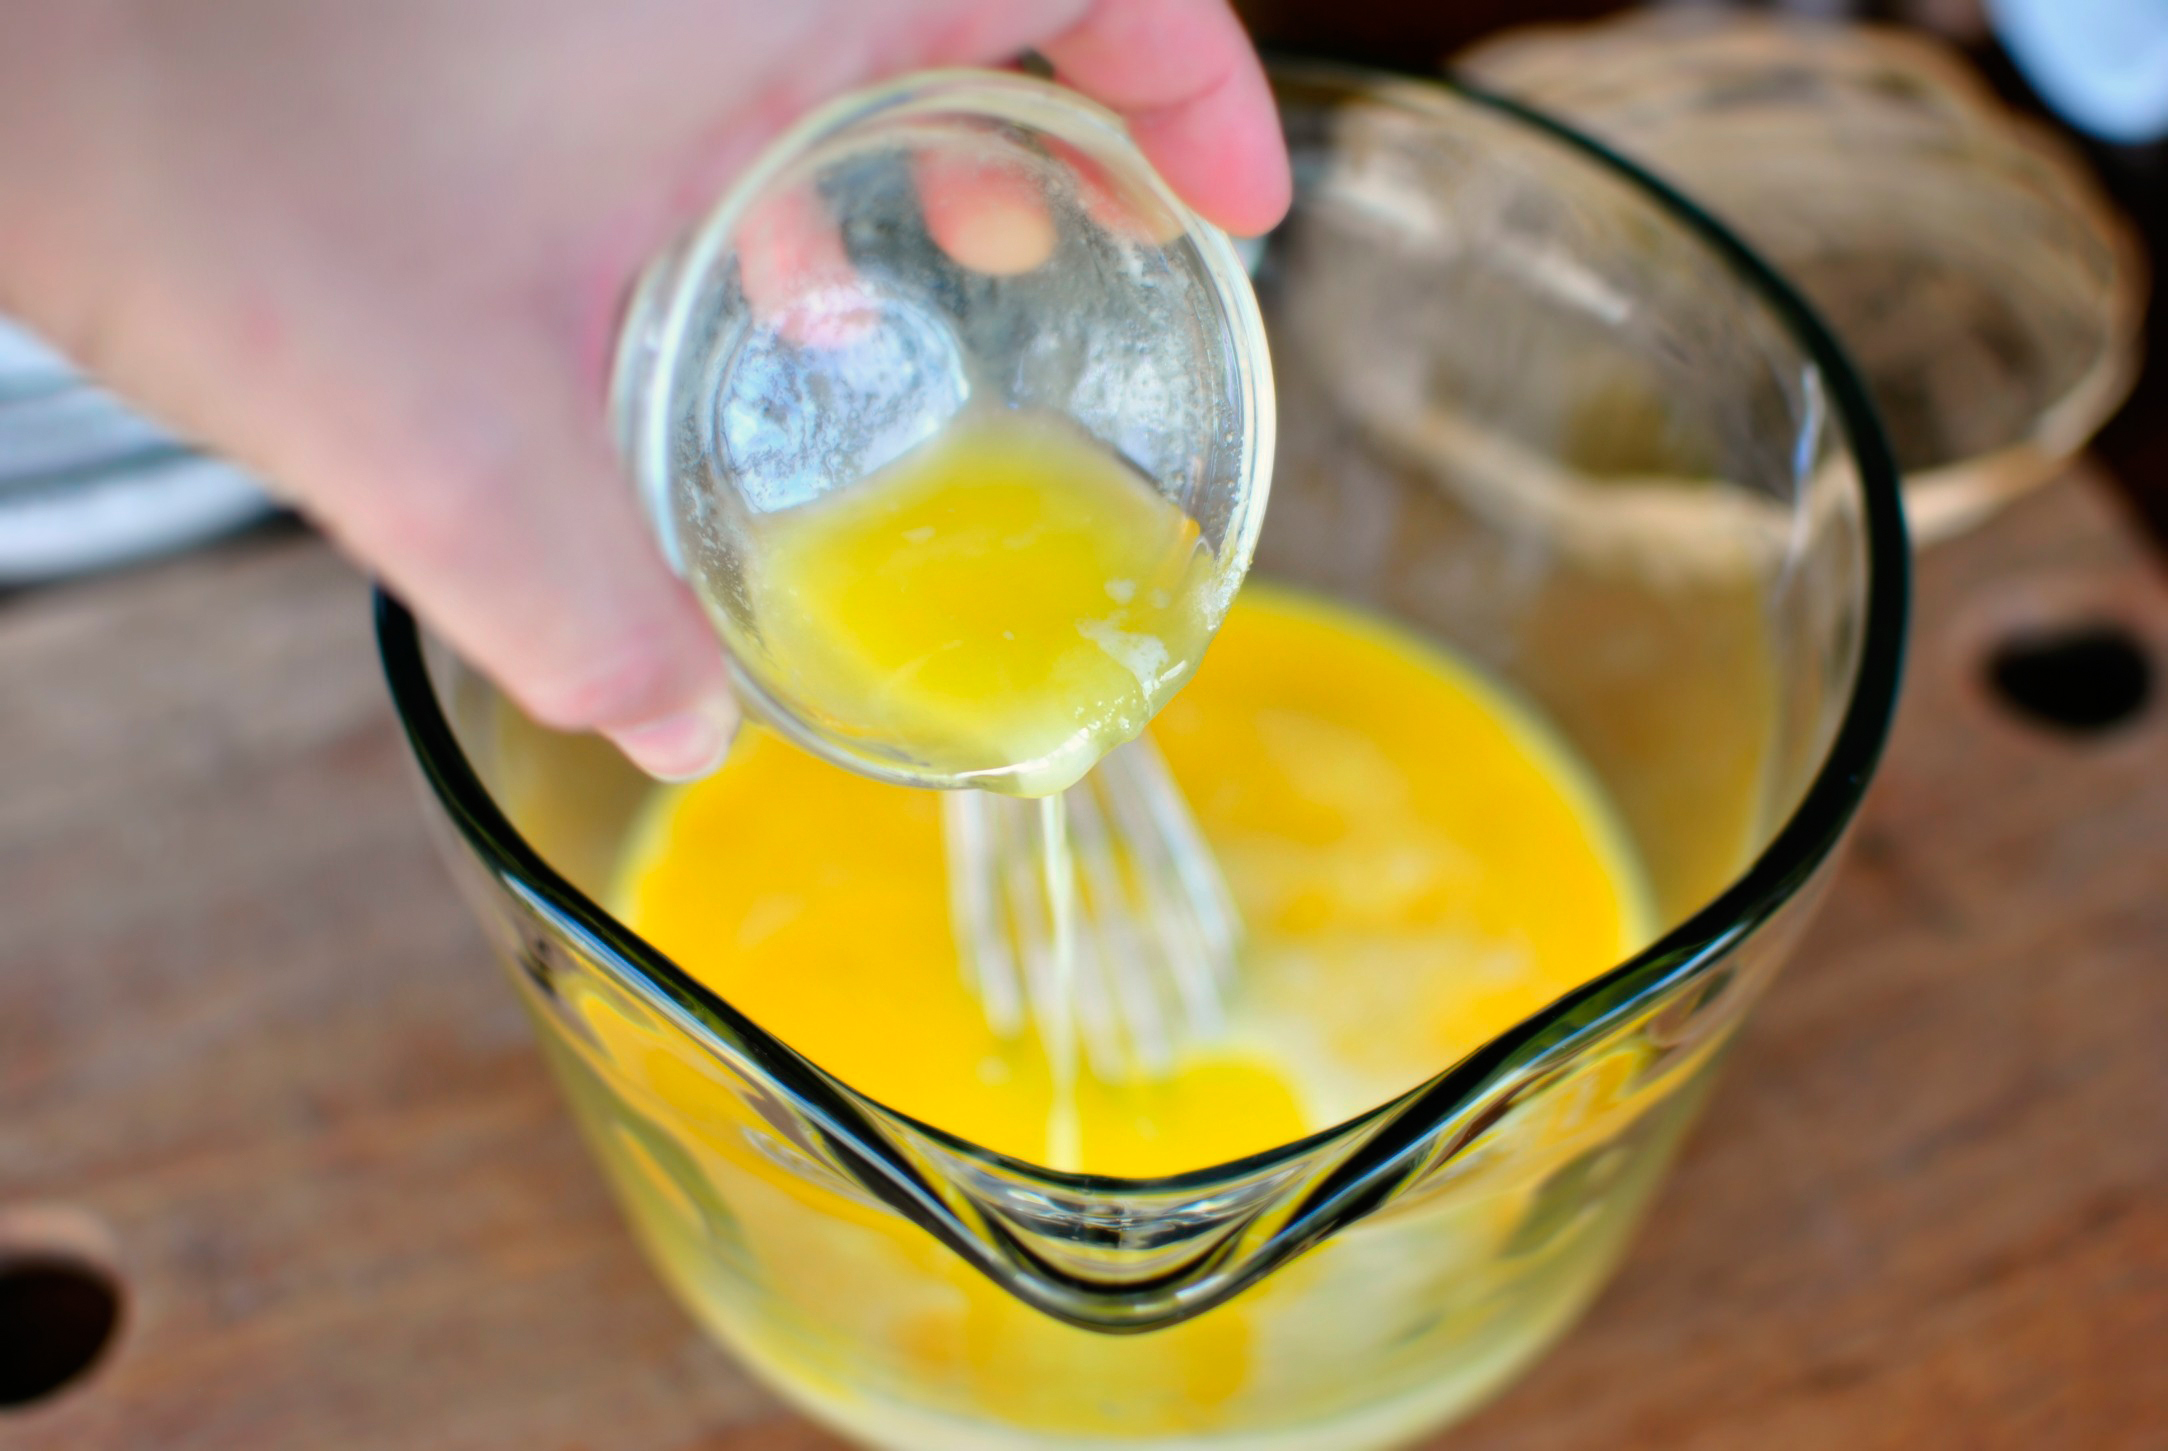
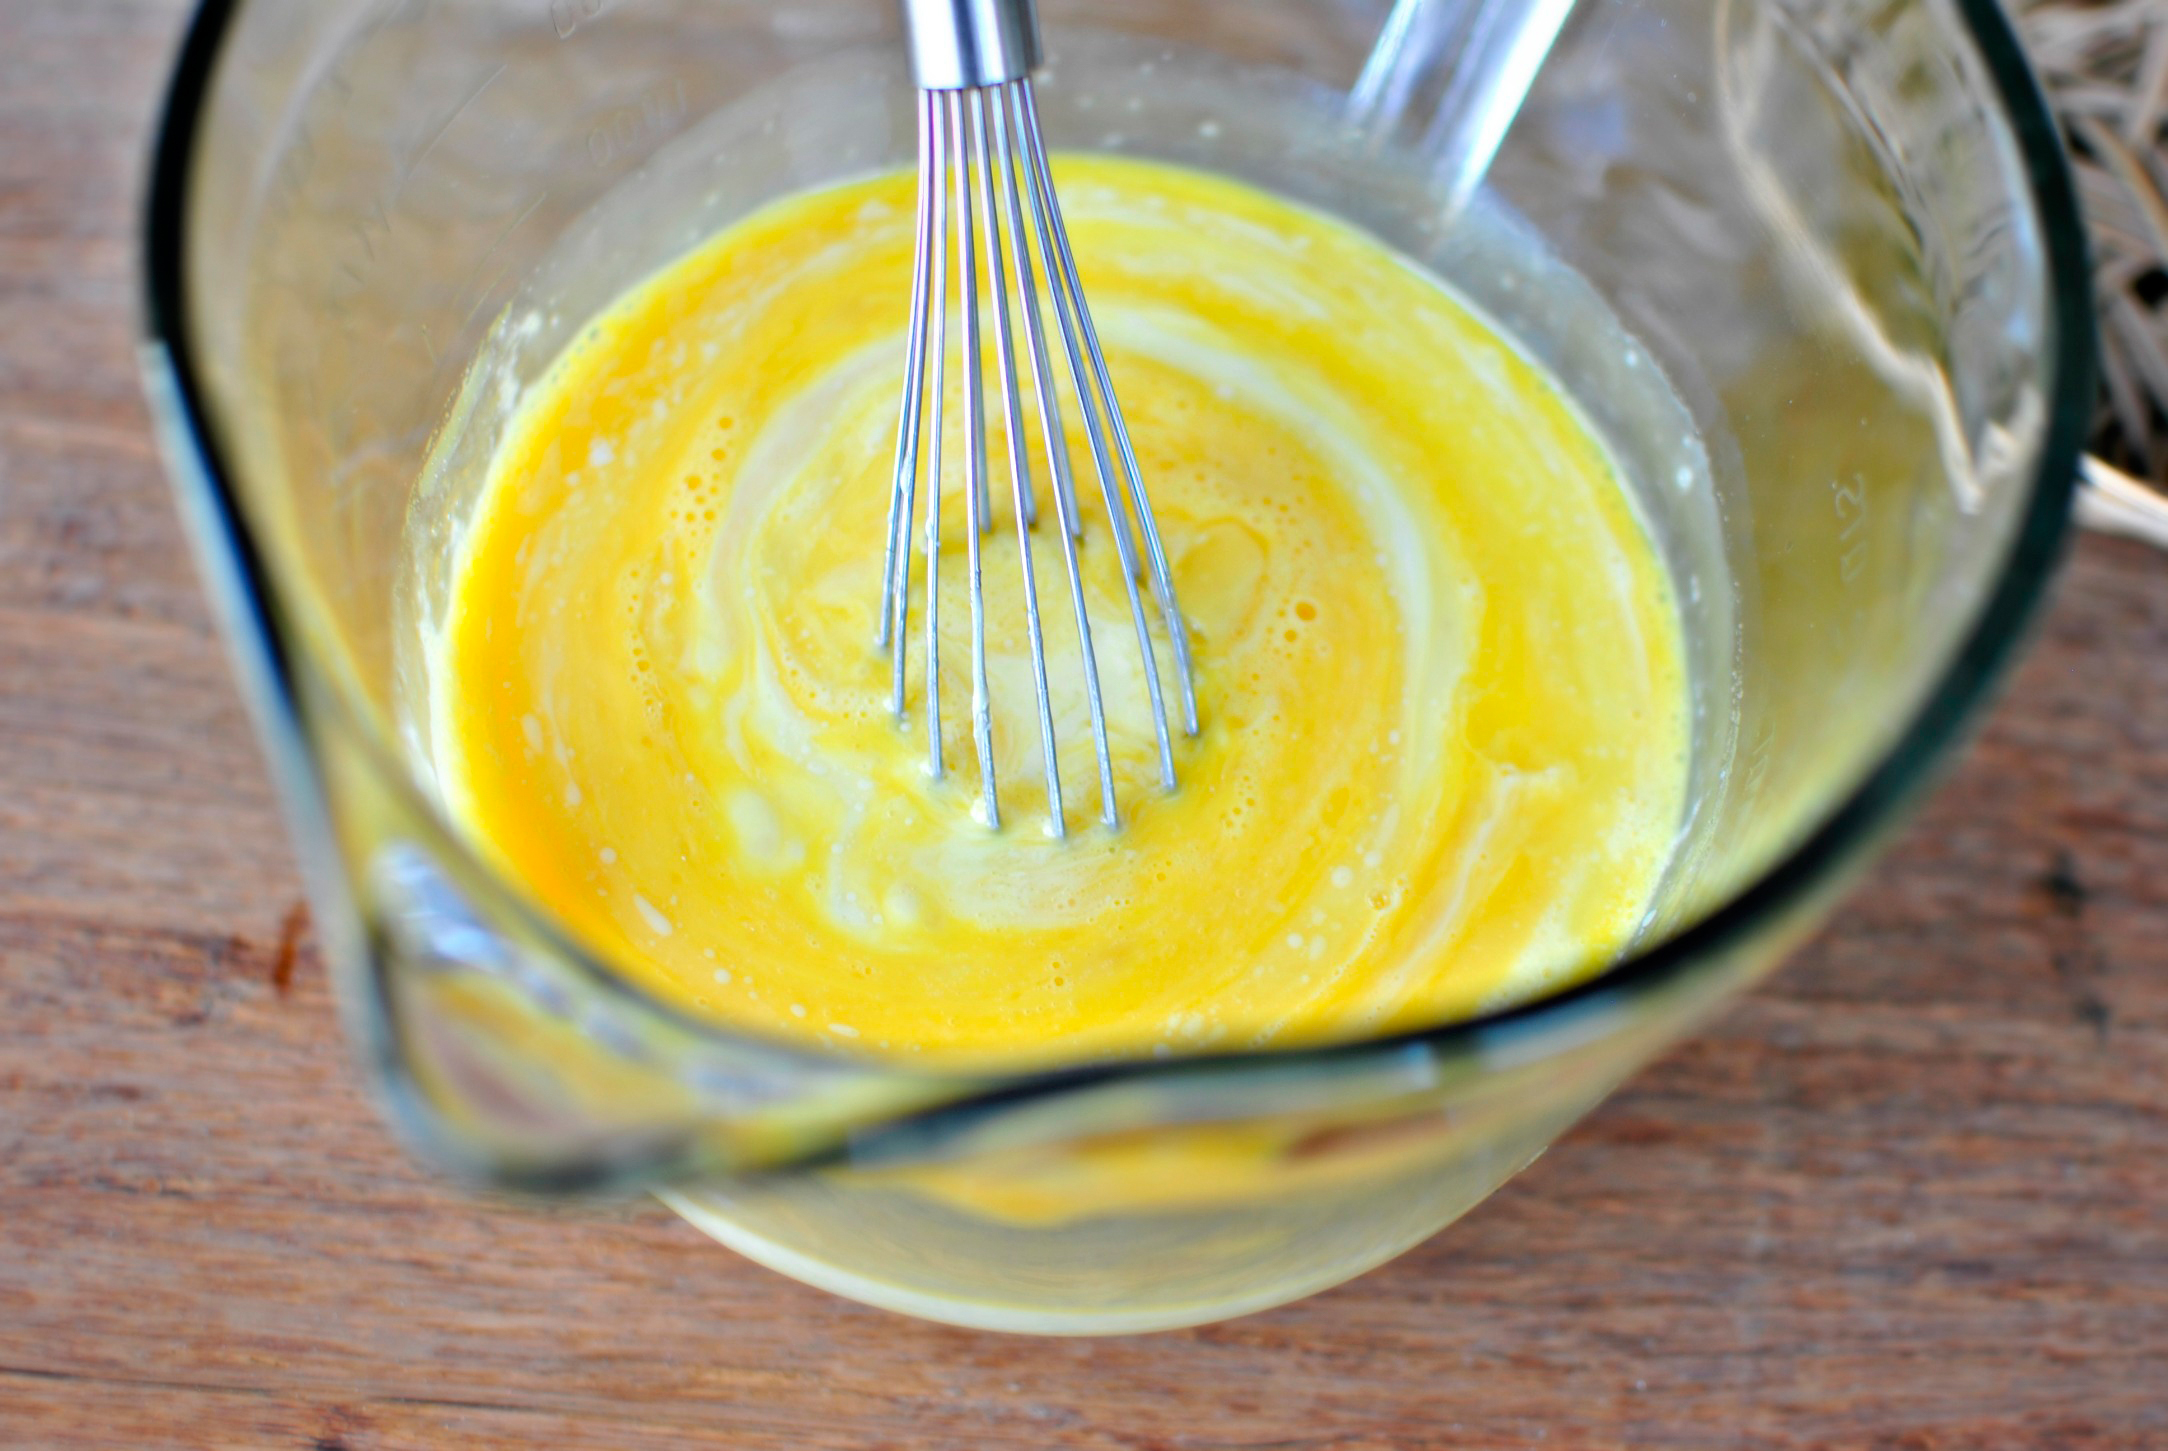
Begin by adding the banana and vanilla milk to a blender, and blend until smooth.


Tasty Kitchen Blog: Oatmeal Chocolate Chip Banana Pancakes. Guest post by Amy Johnson of She Wears Many Hats, recipe submitted by TK member Monique of Ambitious Kitchen.

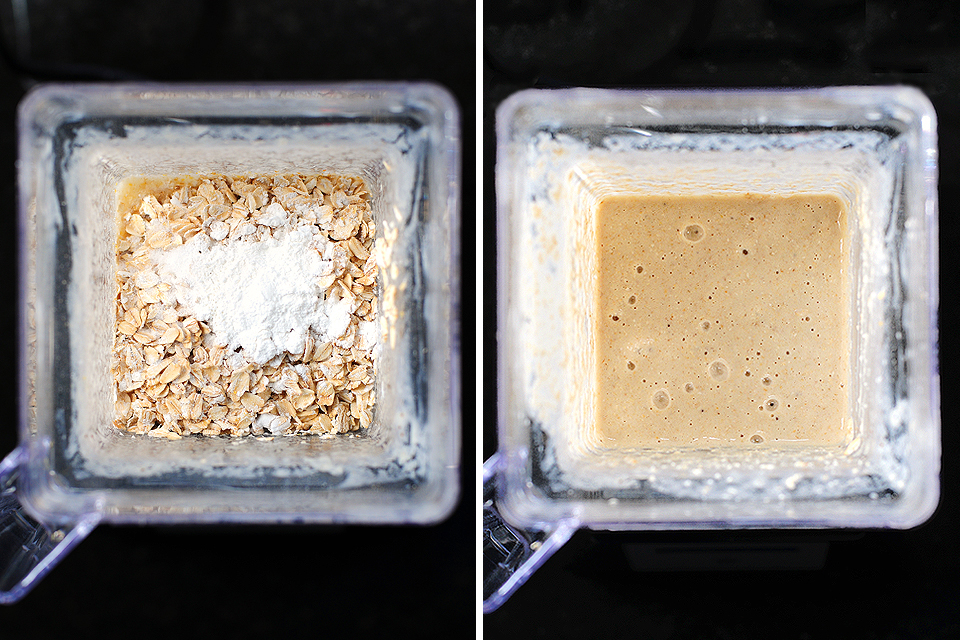
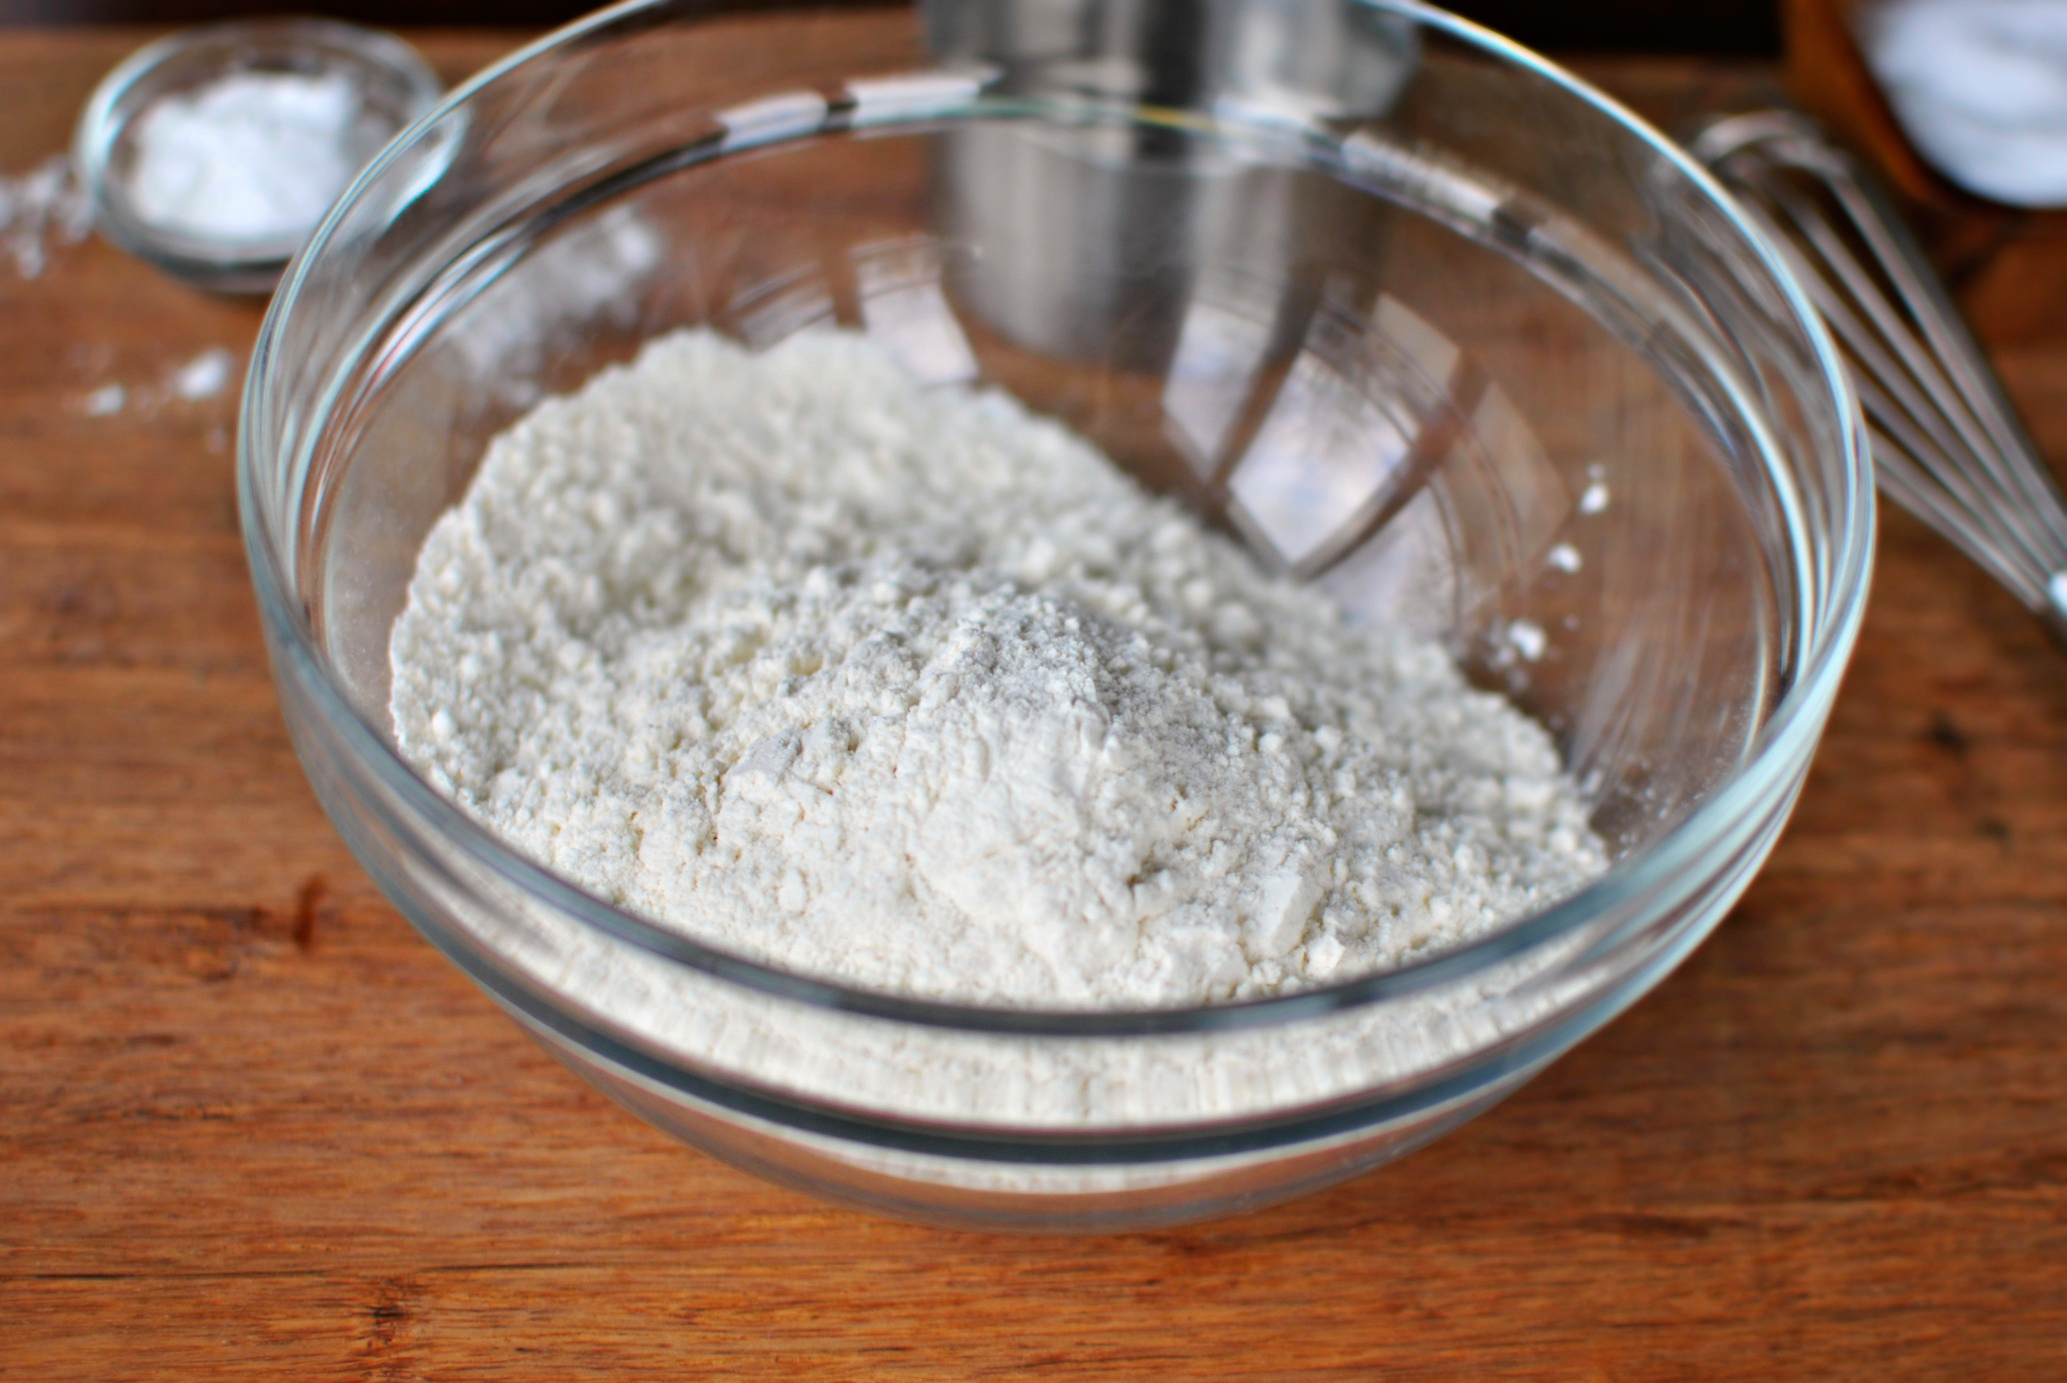
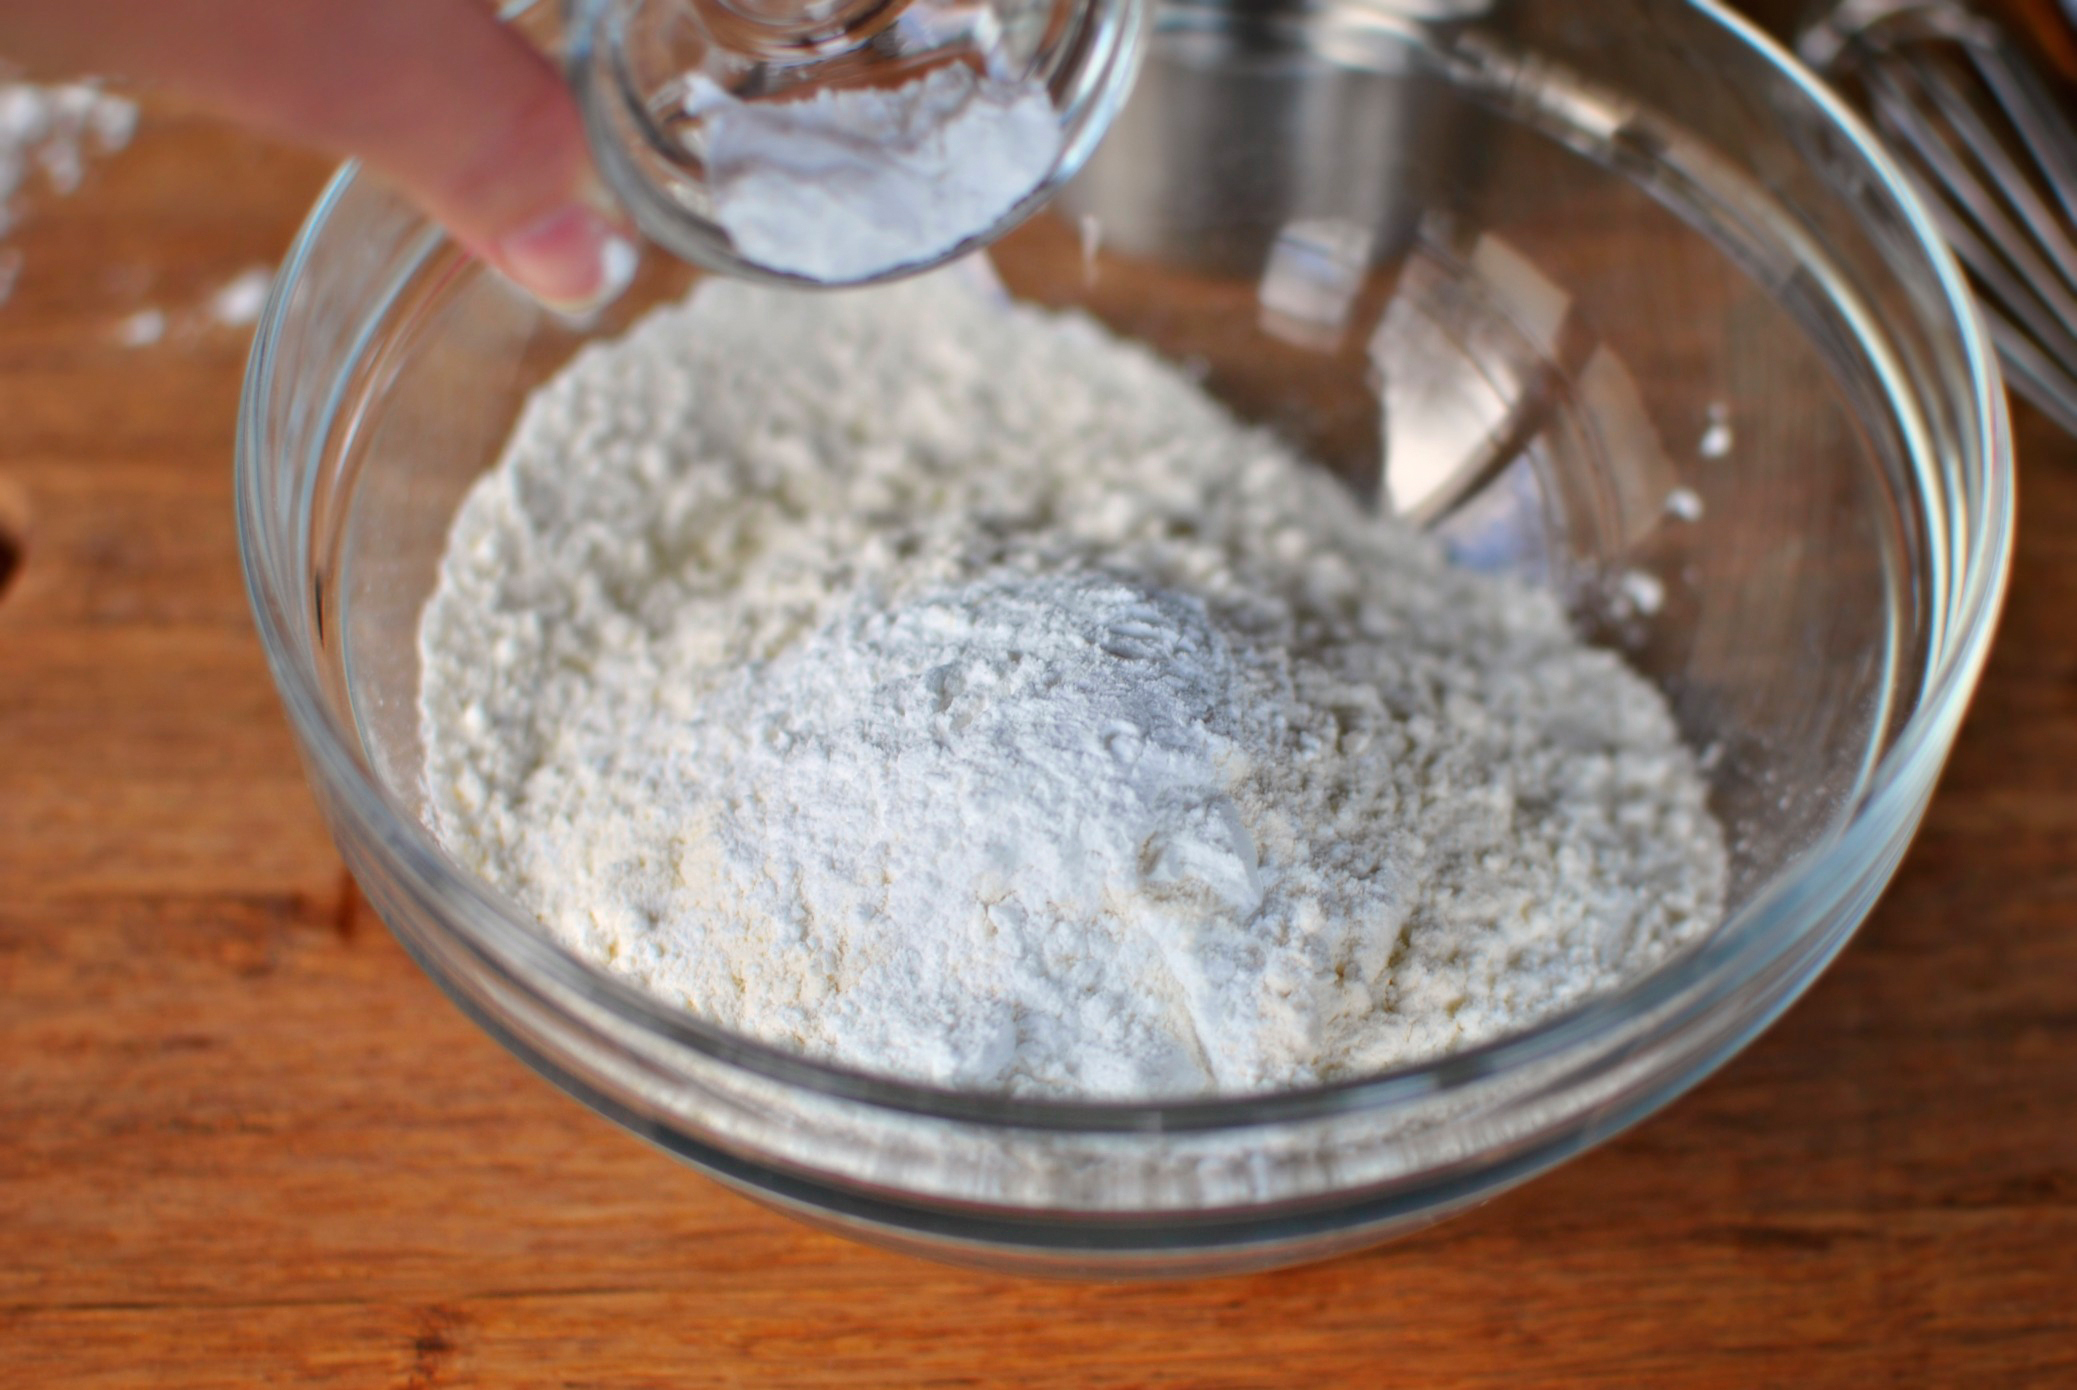
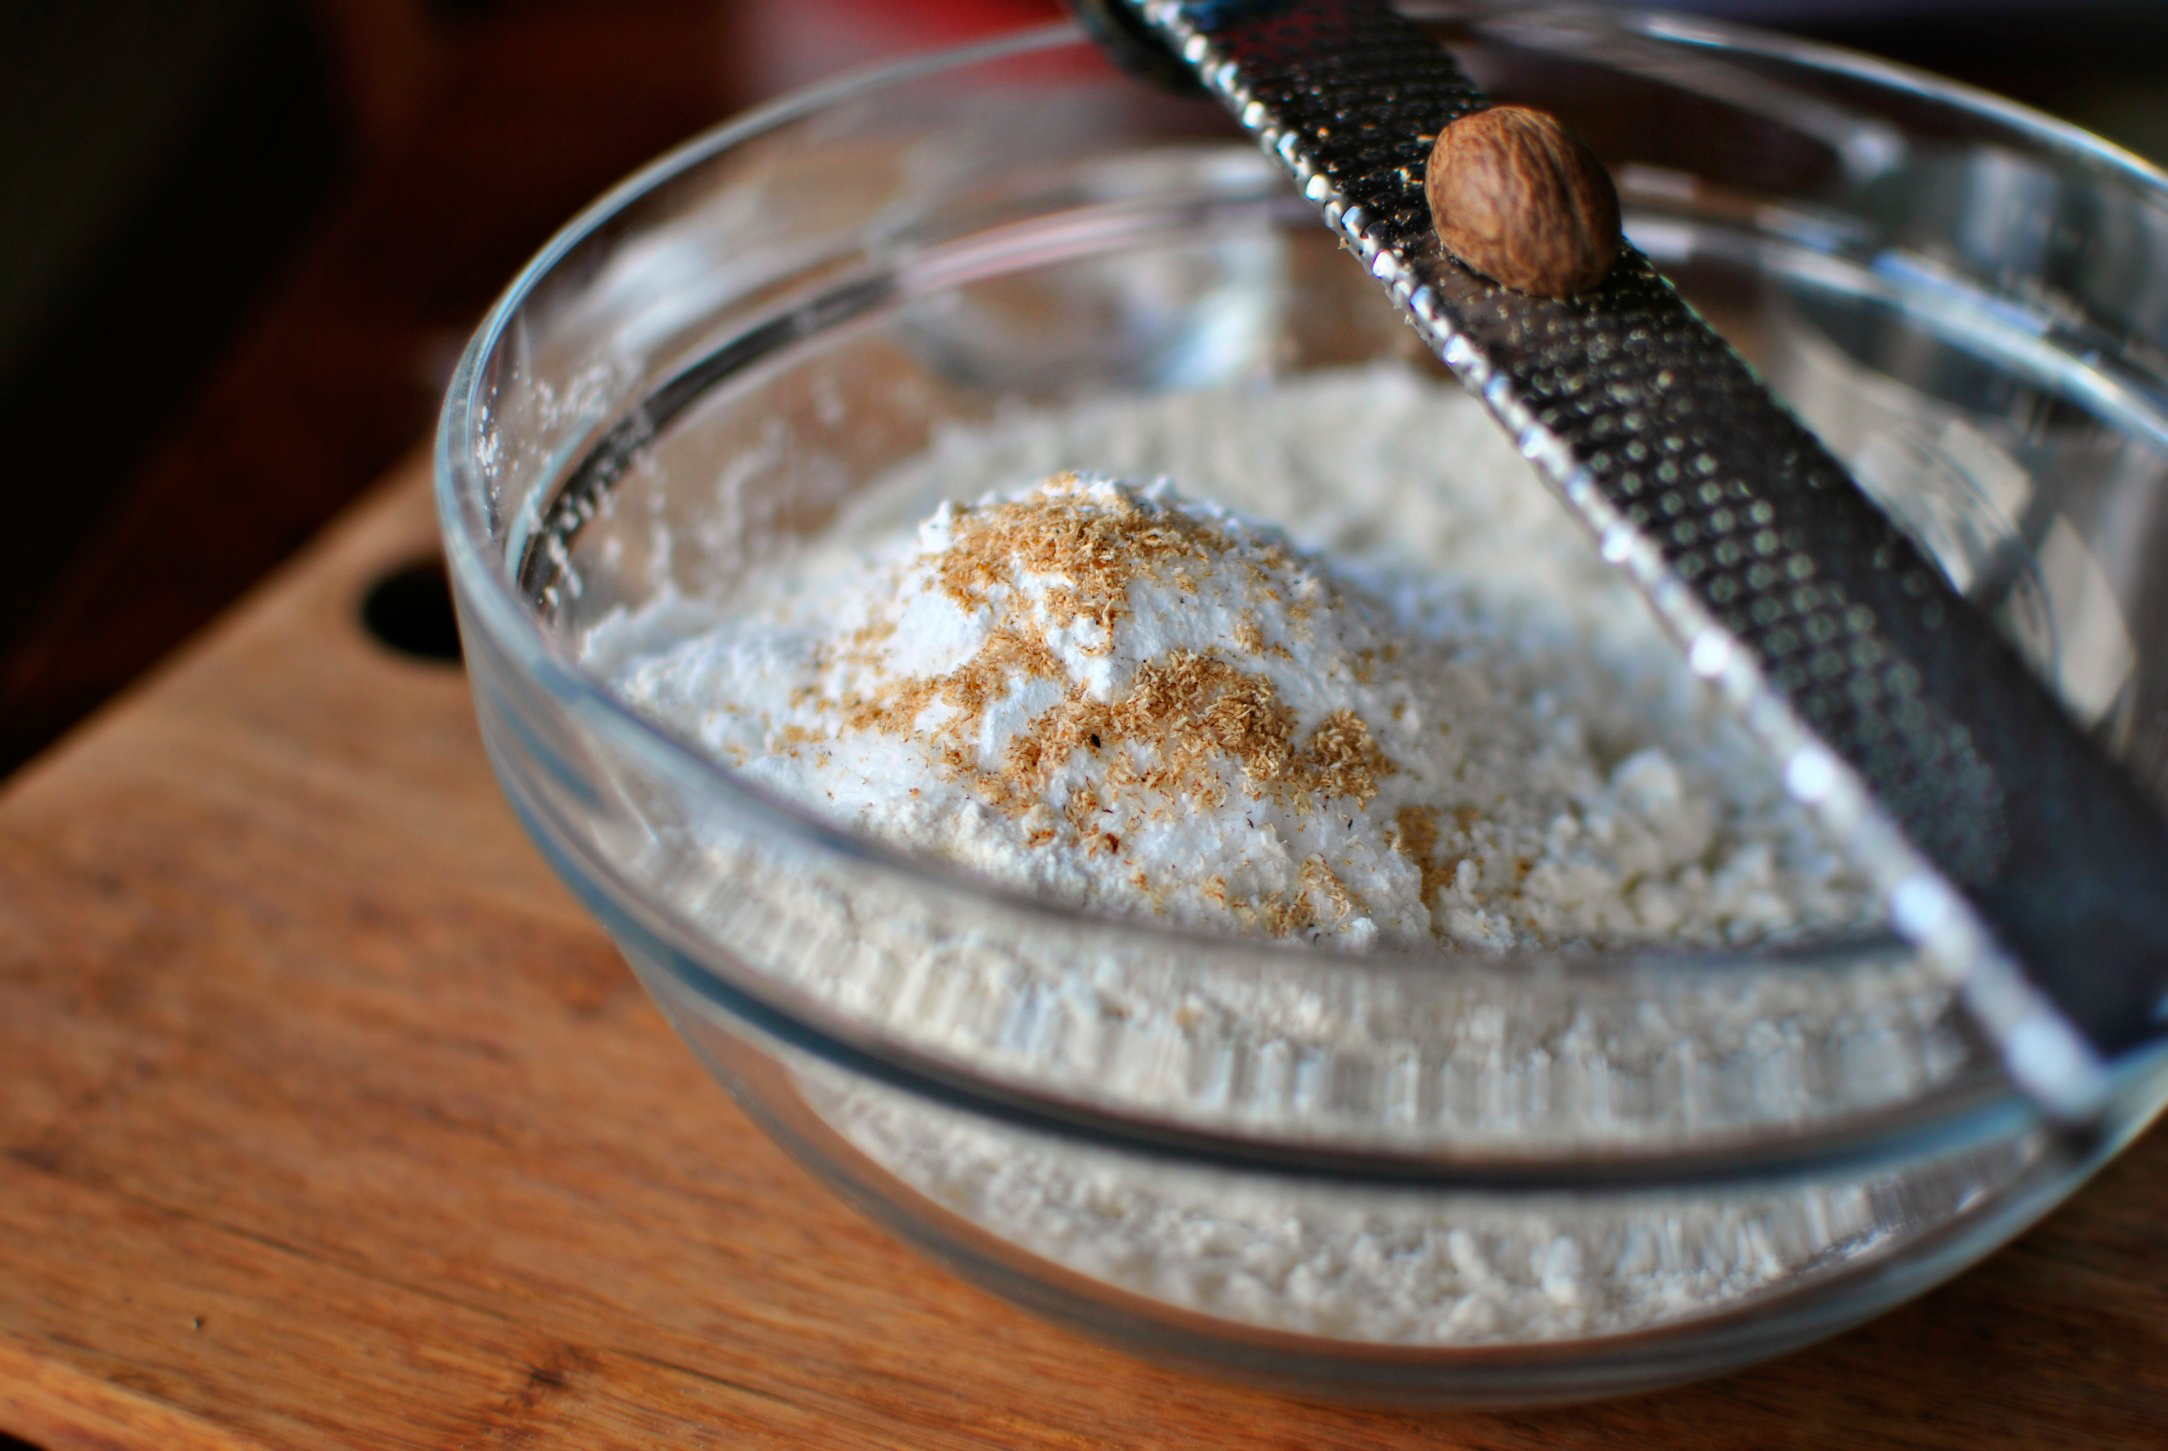
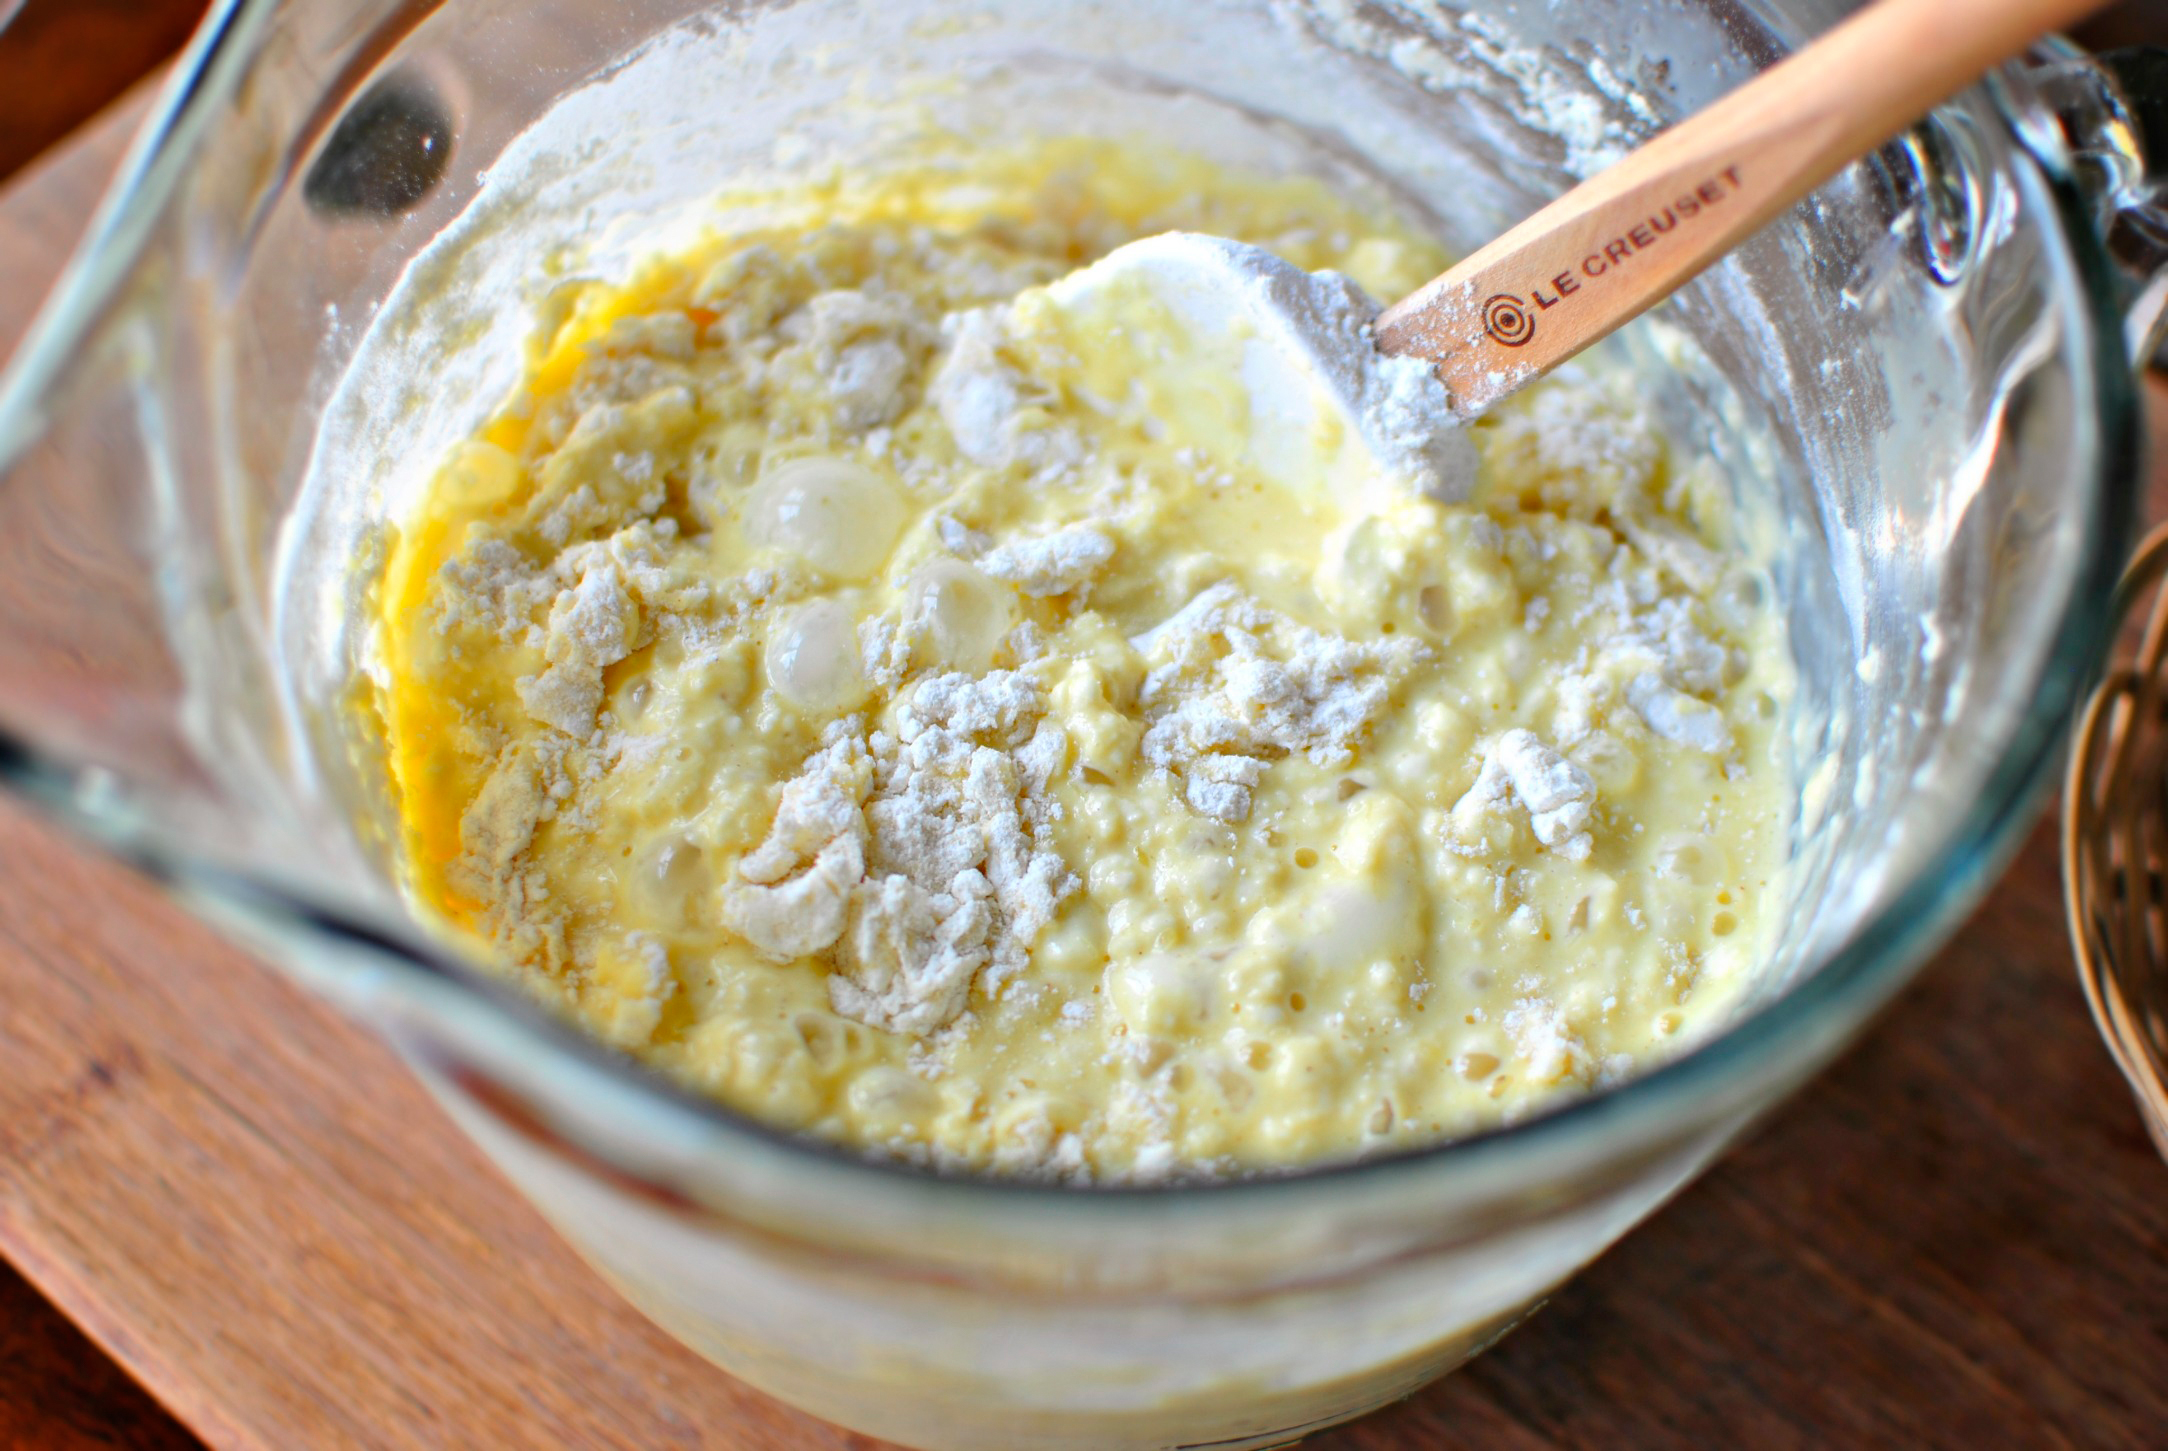
Next, in go the oats, baking powder, and salt. If you want to add any spices (cinnamon would be mighty nice), now would be the time to do it.

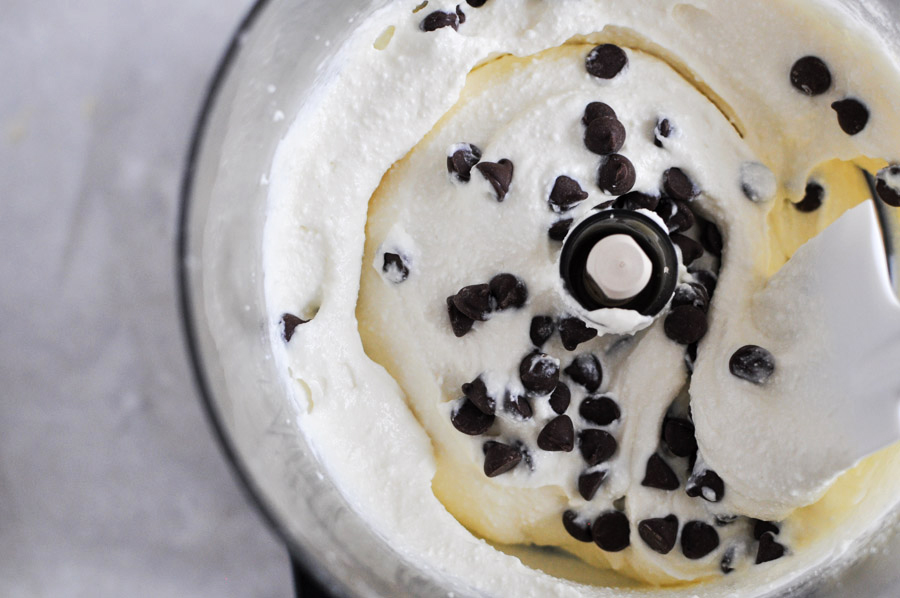
Blend until combined, then let sit for a few minutes until the batter thickens up. If it gets too thick, add a bit more almond milk, a little at a time.


Tasty Kitchen Blog: Oatmeal Chocolate Chip Banana Pancakes. Guest post by Amy Johnson of She Wears Many Hats, recipe submitted by TK member Monique of Ambitious Kitchen.

While you wait for the batter to thicken up, using cooking spray, olive oil, or butter, lightly coat your preferred pancake cooking surface, and heat over medium. A nonstick skillet or griddle is always nice.

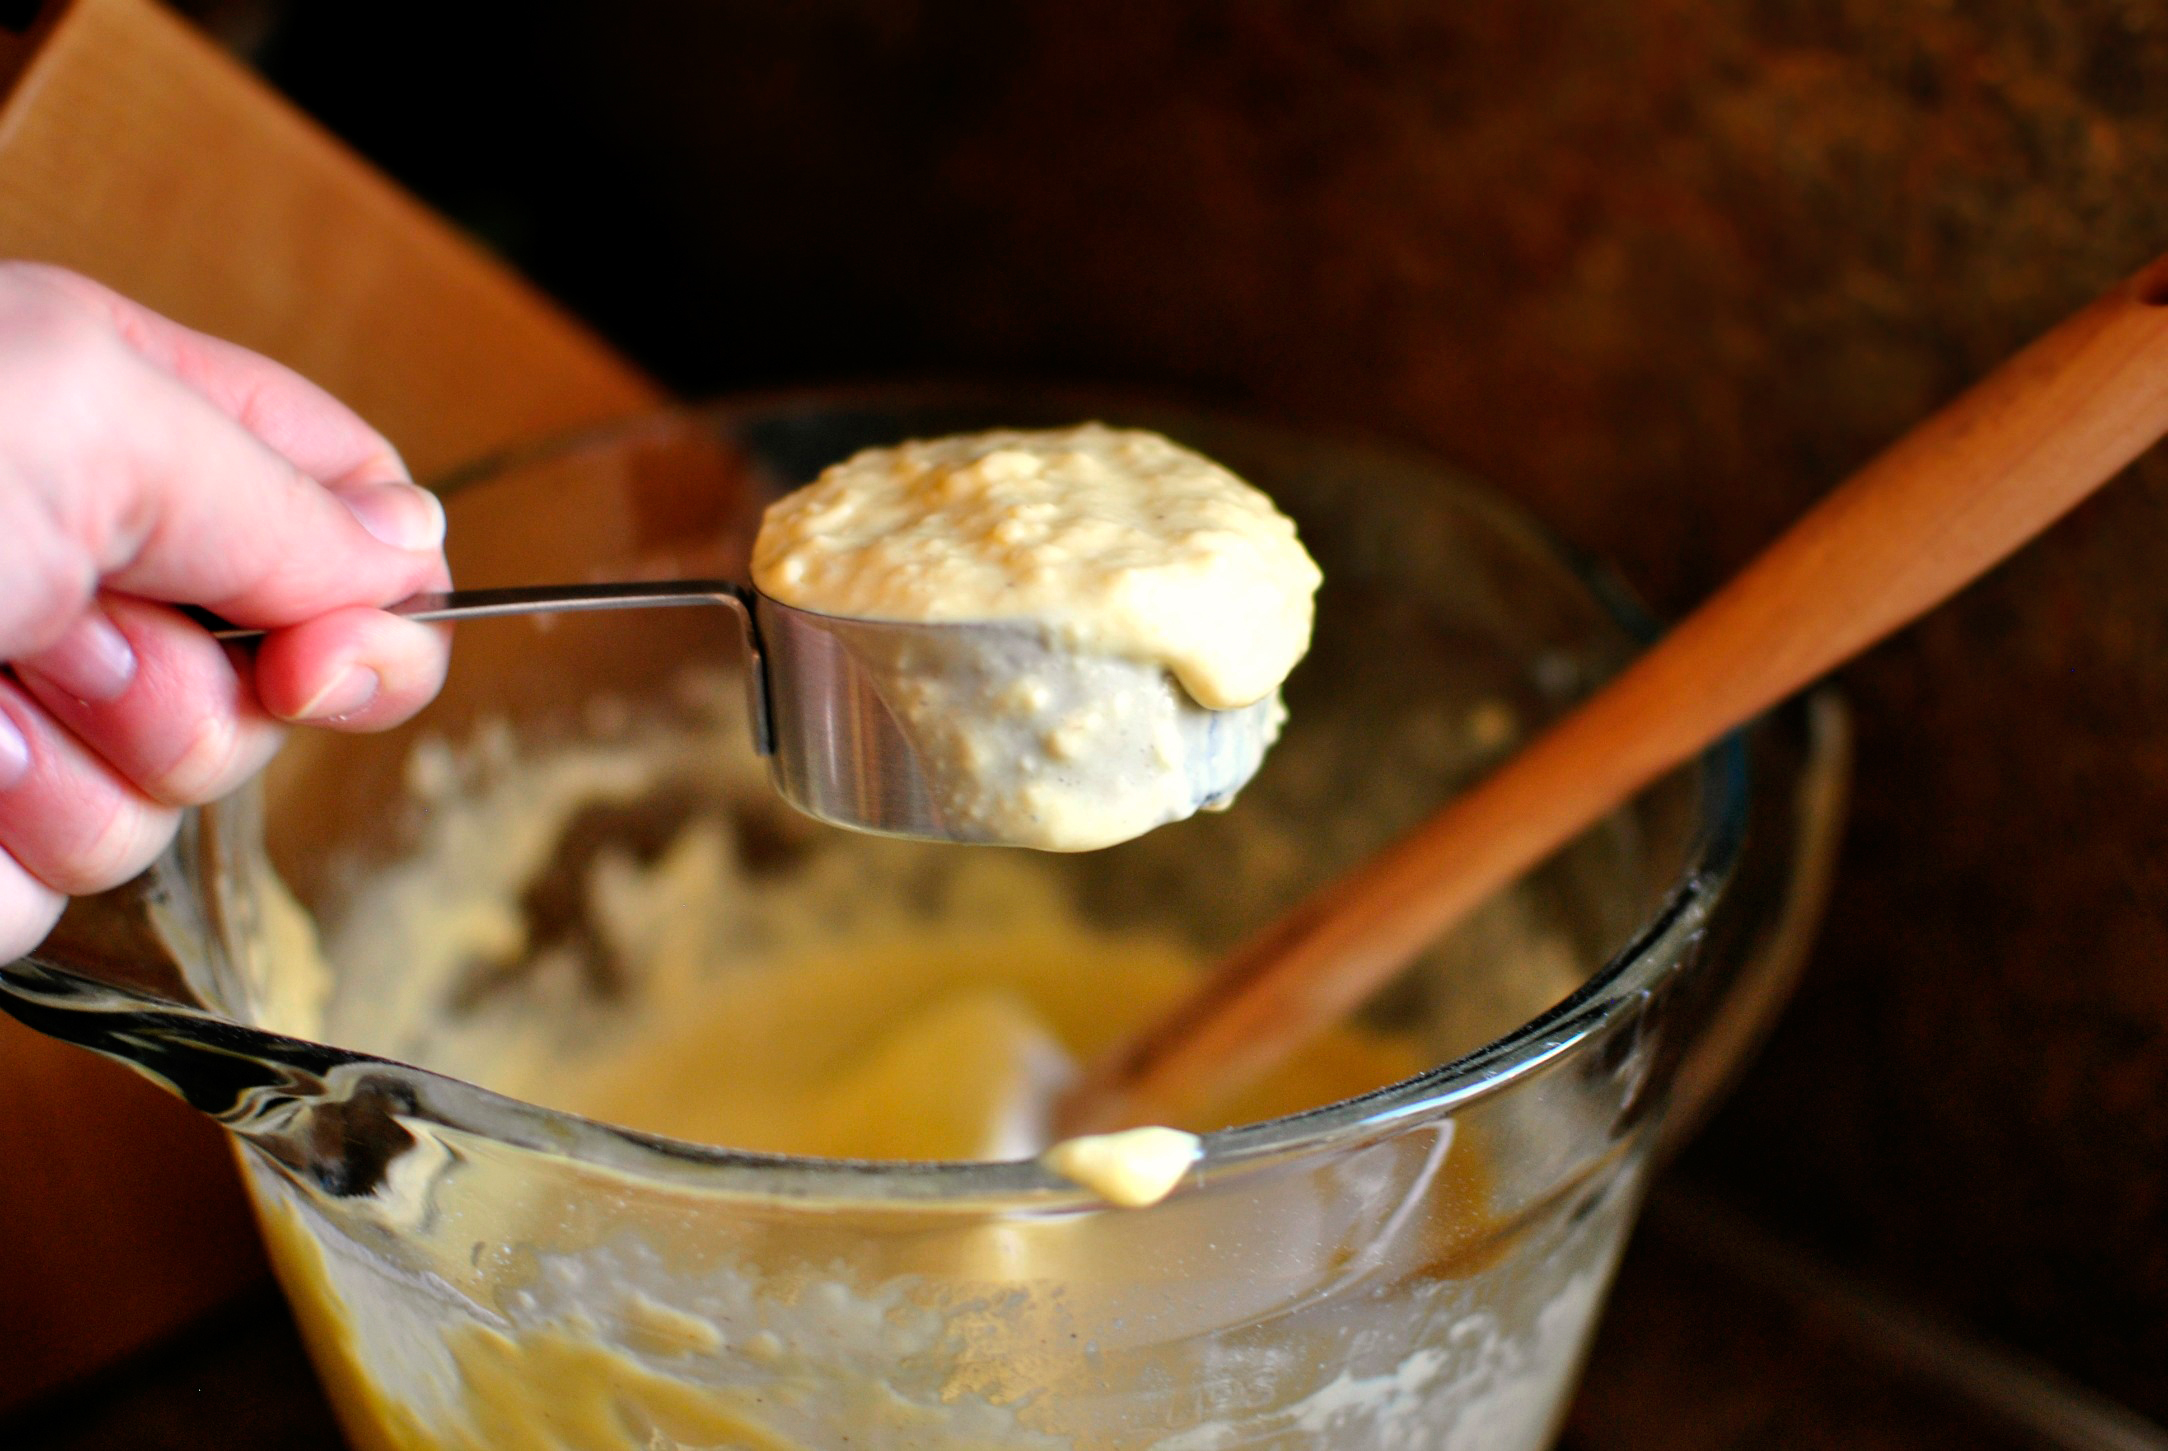
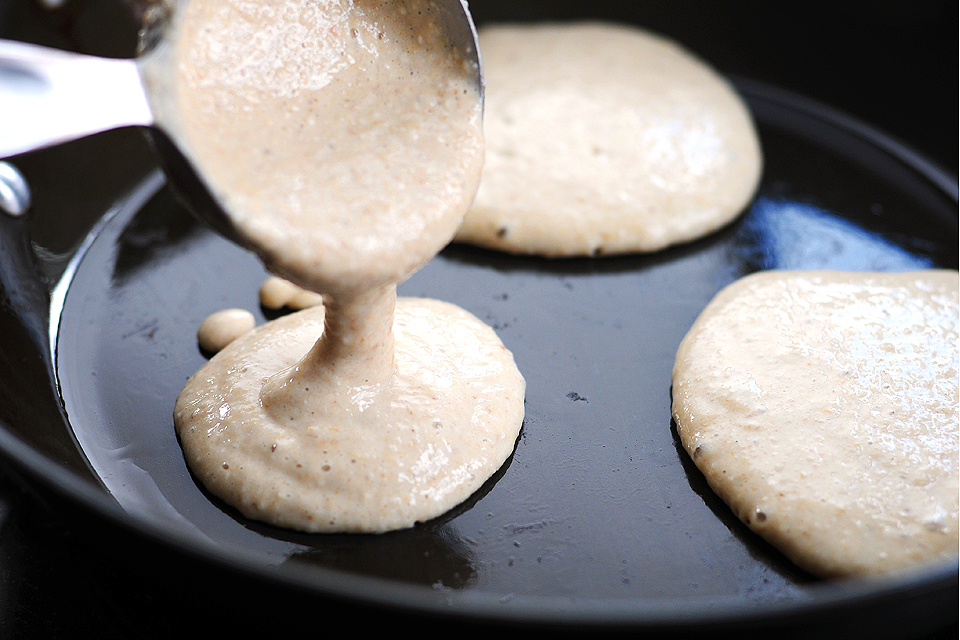
Once skillet is ready, drop batter by 1/4 cupfuls onto surface. Gently spread with a spoon if needed.


Tasty Kitchen Blog: Oatmeal Chocolate Chip Banana Pancakes. Guest post by Amy Johnson of She Wears Many Hats, recipe submitted by TK member Monique of Ambitious Kitchen.

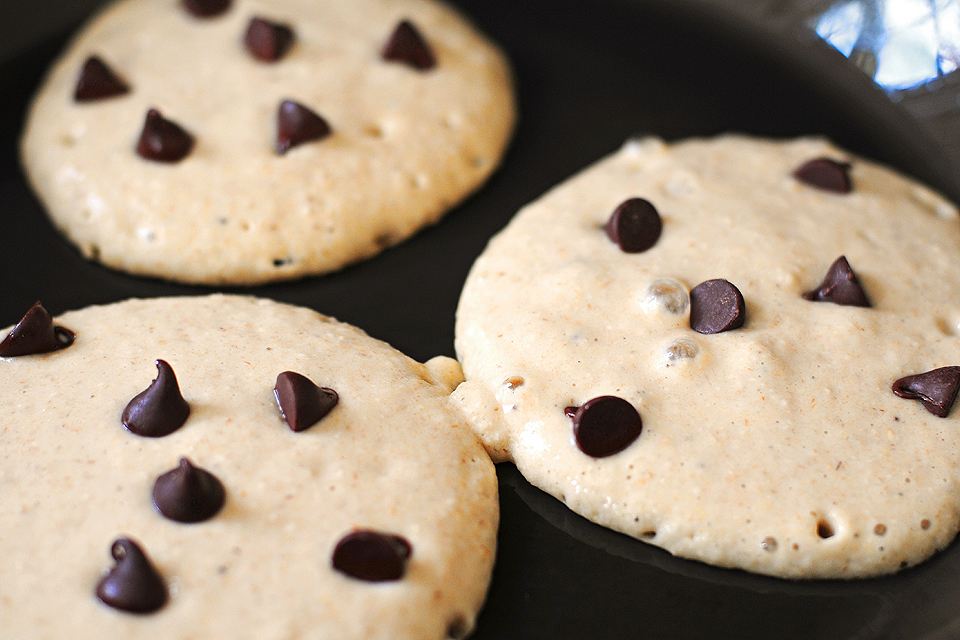
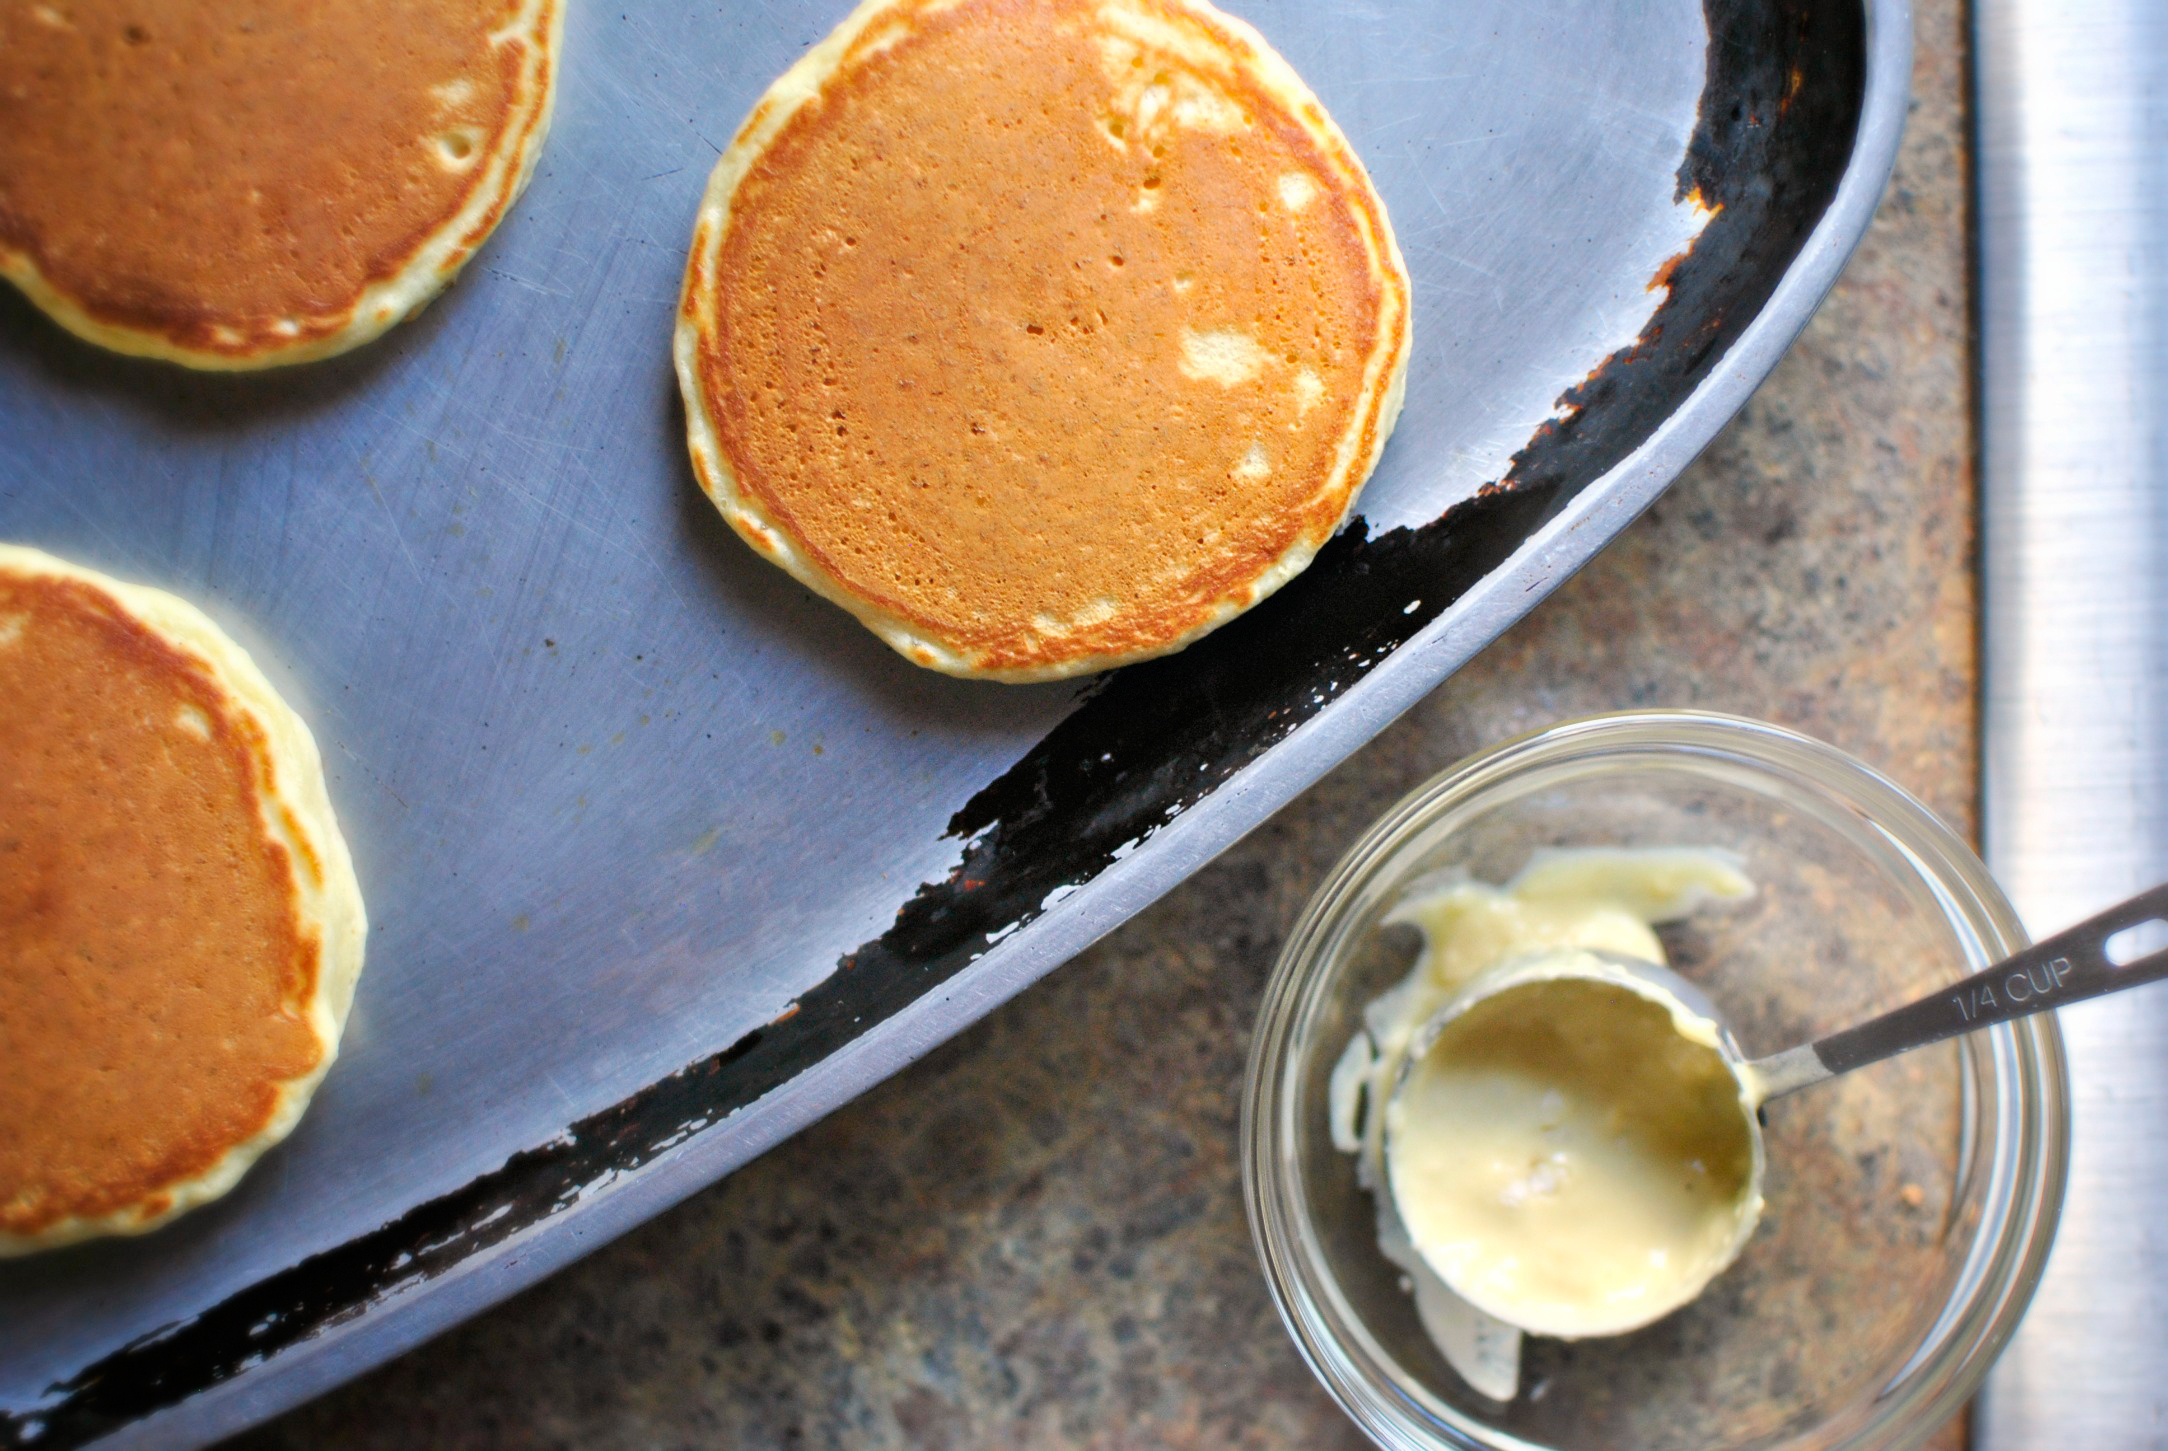
Sprinkle some chocolate chips on each pancake. Watch for bubbles to appear (about 2 minutes), then flip pancakes.


Tasty Kitchen Blog: Oatmeal Chocolate Chip Banana Pancakes. Guest post by Amy Johnson of She Wears Many Hats, recipe submitted by TK member Monique of Ambitious Kitchen.

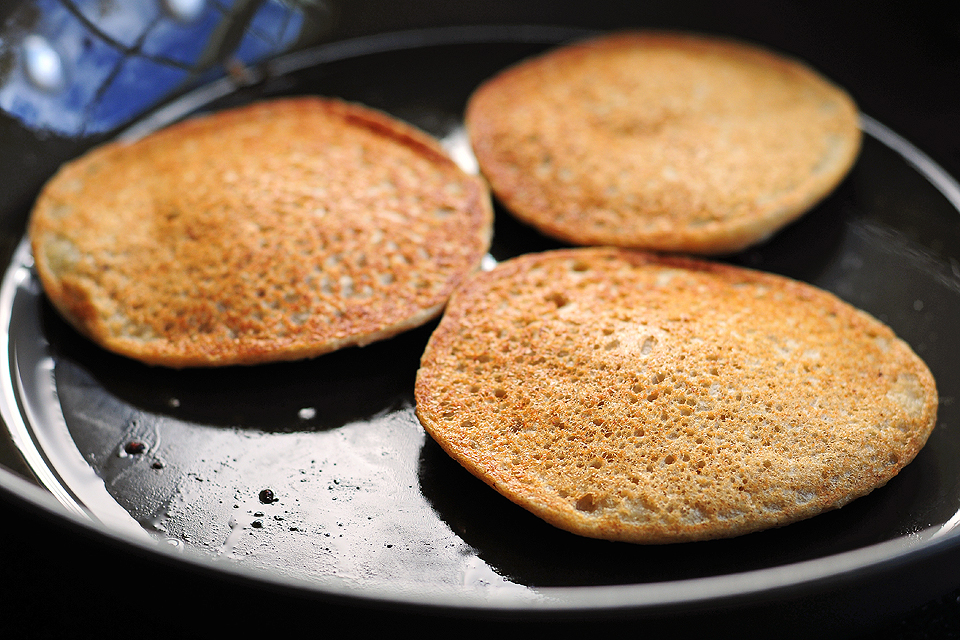
Cook until golden brown (about another 2 minutes). Repeat until all batter is used, adding more cooking spray, oil, or butter as needed.


Tasty Kitchen Blog: Oatmeal Chocolate Chip Banana Pancakes. Guest post by Amy Johnson of She Wears Many Hats, recipe submitted by TK member Monique of Ambitious Kitchen.

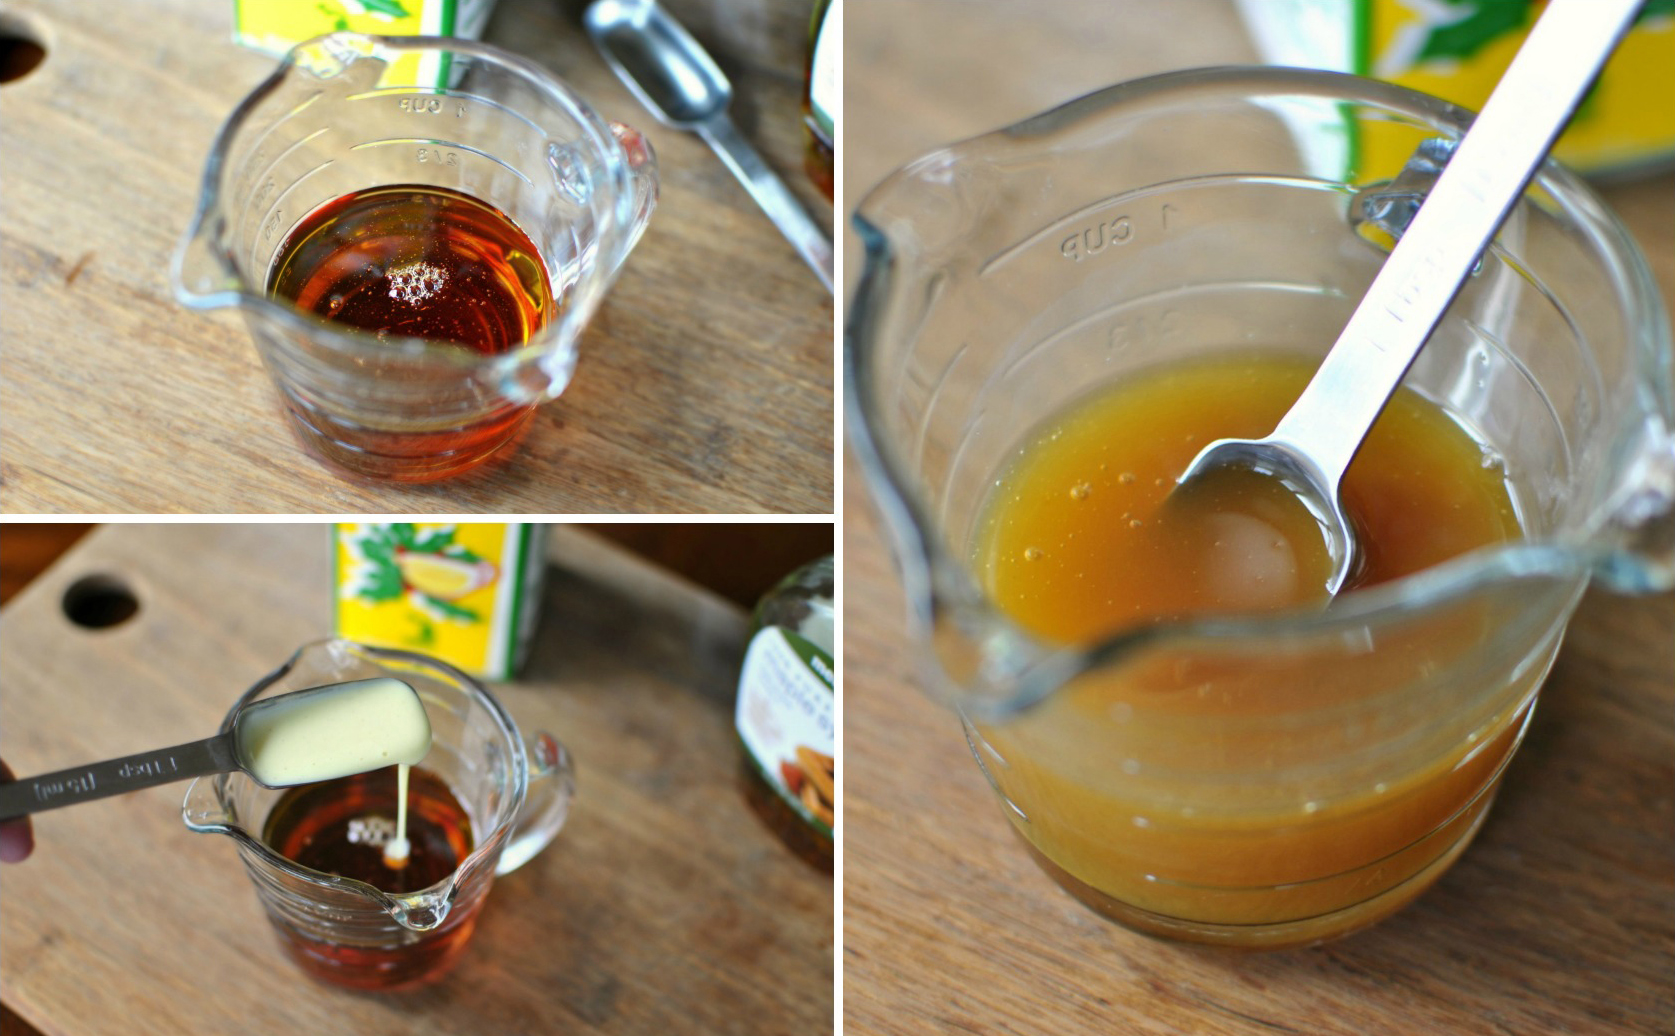
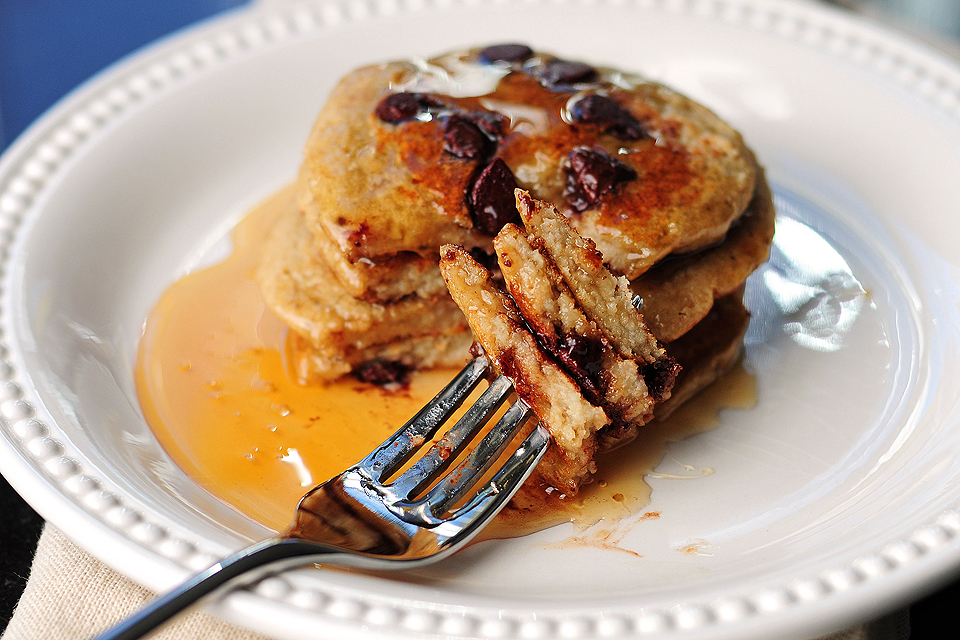
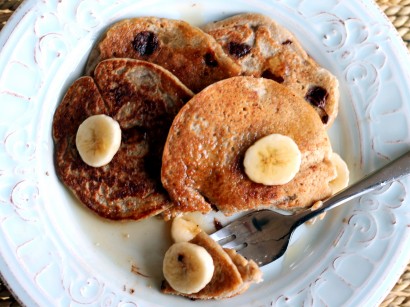
Top with your favorite pancake partner, and dig in. We added a major drizzling of honey to ours, which was lovely, but I’m thinking of trying peanut butter the next time around.


Tasty Kitchen Blog: Oatmeal Chocolate Chip Banana Pancakes. Guest post by Amy Johnson of She Wears Many Hats, recipe submitted by TK member Monique of Ambitious Kitchen.

Thanks Monique for sharing this new option for enjoying pancakes. Visit her blog, Ambitious Kitchen, for more of her recipes. She describes herself as someone passionate about pancakes, and I can definitely see why. I know I have many gluten-free friends that will be happy to try this recipe, too.


Printable Recipe

Oatmeal Chocolate Chip Banana Pancakes

See post on Monique of Ambitious Kitchen’s site!
5.00 Mitt(s) 1 Rating(s)1 vote, average: 5.00 out of 51 vote, average: 5.00 out of 51 vote, average: 5.00 out of 51 vote, average: 5.00 out of 51 vote, average: 5.00 out of 5

Prep Time:

Cook Time:

Difficulty: Easy

Servings: 3

3
x

Print Options

Page size Letter 3x5 4x6
Text Size Small Medium Large
Content Include description
Include prep time, etc.
Show image

Description

Easy, delicious banana pancakes that are made in a blender with only 6 ingredients total! Plus they just happen to be vegan and gluten-free!

Ingredients

  • 2  Medium Ripe Bananas, Cut Into Chunks
  • ¾ cups Unsweetened Vanilla Almond Milk
  • 1 cup Old-fashioned Rolled Oats (gluten-free If Desired)
  • 1-½ teaspoon Baking Powder
  • ¼ teaspoons Salt
  • 2 Tablespoons (Heaping) Chocolate Chips, Vegan If You Prefer

Preparation Instructions

In a blender, add chunks of banana and almond milk. Puree for 30 seconds or until thoroughly blended and smooth. Next add oats, baking powder, and salt into the blender; blend again until batter is well-combined, about 1 minute. Set aside to thicken up. After a few minutes, check the consistency of the pancake batter; it should be somewhat thick. If it appears too thick, add a tablespoon or two of almond milk and blend again.

Lightly coat a large nonstick skillet or griddle with vegan cooking spray or olive oil and heat over medium. Drop batter by 1/4 cupfuls onto skillet and gently spread out a bit with a spoon. Place 5-6 chocolate chips on top of each pancake and cook until bubbles appear on top, about 2 minutes. Gently flip cakes and cook until golden brown on underside, 2 minutes. Wipe skillet clean and repeat with more oil or cooking spray.

Top with peanut butter, maple syrup, fruit, or chocolate chips.


_______________________________________

Amy Johnson is a blogger who writes about food, travel, the home (both inside and out), and various observations and random musings about anything and everything. Visit her blog She Wears Many Hats for a dose of deliciousness, practicality, hilarity, or just plain fun. She lives in South Carolina with her husband and two children.


Profile photo of HowSweetEats

Cannoli Tart

Posted by in Baking, Step-by-Step Recipes

Tasty Kitchen Blog: Cannoli Tart. Guest post by Jessica Merchant of How Sweet It Is, recipe submitted by TK member The Seaside Baker.

 
Oh my goodness. You know when you have one of those desserts that completely knocks your socks off? This is it. And it’s simple, too. It’s like the new Holy Grail of treats!

It’s not very often that I get to bake with ricotta because my husband swears that he dislikes it. Even though—of course—he’s eaten it in multiple dishes and I’ve watched him enjoy a full meal where ricotta is involved, but whatever. I can occasionally slip in a tablespoon or so here and there without him noticing, but an entire dessert made from the stuff? This would be tricky.

However, tricky as it was, it actually worked. After seeing this Cannoli Tart from The Seaside Baker, I knew I had to make it immediately. And immediately I did—like nearly one day later. Not only did it pass my sweet tooth test with flying colors, the ricotta-hater loved it too. You know what that means. You must must must try it!


Tasty Kitchen Blog: Cannoli Tart. Guest post by Jessica Merchant of How Sweet It Is, recipe submitted by TK member The Seaside Baker.

For the crust and the tart filling, all you need is some amaretto, ricotta cheese, eggs, cold butter, flour, sugar, cinnamon, salt and chocolate chips. Oh, you also need a little milk. About one tablespoon. This is, like, the easiest dessert ever!


Tasty Kitchen Blog: Cannoli Tart. Guest post by Jessica Merchant of How Sweet It Is, recipe submitted by TK member The Seaside Baker.

Begin by making the crust. First, give the flour, sugar, salt and cinnamon a good whirl in your food processor.


Tasty Kitchen Blog: Cannoli Tart. Guest post by Jessica Merchant of How Sweet It Is, recipe submitted by TK member The Seaside Baker.

Then add the cold butter and pulse until it forms little crumbs. Can you see the slight difference here from the picture above? There are some pea-sized, flour-coated butter chunks! Yum.


Tasty Kitchen Blog: Cannoli Tart. Guest post by Jessica Merchant of How Sweet It Is, recipe submitted by TK member The Seaside Baker.

Add the egg and milk, then process until the dough comes together …


Tasty Kitchen Blog: Cannoli Tart. Guest post by Jessica Merchant of How Sweet It Is, recipe submitted by TK member The Seaside Baker.

… and forms a ball like so. Pretty cool, huh? If there are a few crumbs left, just press them into the dough ball with your hands.


Tasty Kitchen Blog: Cannoli Tart. Guest post by Jessica Merchant of How Sweet It Is, recipe submitted by TK member The Seaside Baker.

Next, place the dough ball between two sheets of parchment paper. I actually used wax paper because I never seem to have parchment when I need it. Also, stop laughing at my mess of a rolling pin. It lost its arms. I keep meaning to buy a new one but then … I forget.


Tasty Kitchen Blog: Cannoli Tart. Guest post by Jessica Merchant of How Sweet It Is, recipe submitted by TK member The Seaside Baker.

Use the rolling pin (or something similar, like say, a bottle of wine?) to roll the dough out to fit your tart pan or pie plate. Gently lift it up and place it over the pan.


Tasty Kitchen Blog: Cannoli Tart. Guest post by Jessica Merchant of How Sweet It Is, recipe submitted by TK member The Seaside Baker.

Press the dough into the pan or plate with your fingers. Clearly, pie-like dough is not one of my strengths. I have many pie crust issues. But this just proves that it doesn’t have to be perfect. Just get it in there, then refrigerate while you make the filling.


Tasty Kitchen Blog: Cannoli Tart. Guest post by Jessica Merchant of How Sweet It Is, recipe submitted by TK member The Seaside Baker.

For the filling, I simply gave my food processor a quick wipe down since it was already out. All you have to do is add the ricotta, sugar, egg and amaretto and blend until just combined. So creamy.


Tasty Kitchen Blog: Cannoli Tart. Guest post by Jessica Merchant of How Sweet It Is, recipe submitted by TK member The Seaside Baker.

Then fold in the chocolate chips.


Tasty Kitchen Blog: Cannoli Tart. Guest post by Jessica Merchant of How Sweet It Is, recipe submitted by TK member The Seaside Baker.

Pour the filling in the tart pan …


Tasty Kitchen Blog: Cannoli Tart. Guest post by Jessica Merchant of How Sweet It Is, recipe submitted by TK member The Seaside Baker.

… then spread it out evenly and bake for about 35 minutes.

Once you remove the tart, you want it to cool completely. You can place it in the fridge. Trust me, I was skeptical too, but it is totally worth it. I served the tart chilled and holy cow, it was incredible.


Tasty Kitchen Blog: Cannoli Tart. Guest post by Jessica Merchant of How Sweet It Is, recipe submitted by TK member The Seaside Baker.

After chilling and right before serving, add a drizzle of chocolate and a shake of powdered sugar.


Tasty Kitchen Blog: Cannoli Tart. Guest post by Jessica Merchant of How Sweet It Is, recipe submitted by TK member The Seaside Baker.

Can you even handle this?

To say this tart far exceeded my expectations would be an understatement. It was out of this world. It isn’t super sweet either, which makes me think it is highly versatile for even those (crazy folks?) who don’t love sweet dishes. You gotta try it.

Thanks so much to The Seaside Baker for the recipe. Be sure to check out her blog for even more tempting and delicious dishes.


Printable Recipe

Cannoli Tart

See post on theseasidebaker’s site!
5.00 Mitt(s) 1 Rating(s)1 vote, average: 5.00 out of 51 vote, average: 5.00 out of 51 vote, average: 5.00 out of 51 vote, average: 5.00 out of 51 vote, average: 5.00 out of 5

Prep Time:

Cook Time:

Difficulty: Easy

Servings: 6

6
x

Print Options

Page size Letter 3x5 4x6
Text Size Small Medium Large
Content Include description
Include prep time, etc.
Show image

Description

A delicious creamy cannoli in tart form.

Ingredients

  • FOR THE CRUST:
  • 2 cups Sifted Flour
  • ½ cups Plus 1 Tablespoon Sugar
  • ½ teaspoons Salt
  • 1 teaspoon Cinnamon
  • ⅓ cups Cold Butter
  • 1 whole Egg
  • 1 Tablespoon Milk
  • FOR THE FILLING:
  • 2-¼ cups Ricotta
  • 1 whole Egg
  • 2 teaspoons Sugar
  • 2 teaspoons Amaretto
  • ½ cups Chocolate Chips Or Chunks

Preparation Instructions

For the crust:
If using a food processor, add flour, sugar, salt and cinnamon and pulse a few times. Add butter, and pulse until butter and flour have formed pea-sized crumbles. Add egg and milk and pulse until a large ball is formed.

If mixing by hand, in a bowl combine flour, sugar, salt and cinnamon. Whisk a few times to mix up. Cut in butter until the mixture forms pea-sized crumbles. With your hands, mix in egg and milk and knead into a ball.

Place the dough ball in between 2 pieces of parchment paper. Roll dough out large enough to fit a deep dish pie pan or deep dish tart pan. Grease pan with butter or nonstick cooking spray. Gently place the dough into pan. Refrigerate while you make your filling and your oven is preheating.

For the filling:
In a food processor or mixer, blend ricotta, egg, sugar, and amaretto until just combined. Stir in chocolate chips. Pour into crust.

Bake at 350ºF for around 25-35 minutes, or until your crust has slightly browned and the filling has puffed a bit. Serve cold or at room temp sprinkled with powdered sugar or drizzled with chocolate.


_______________________________________

Jessica Merchant is a personal trainer turned food writer and blogger. Her blog, How Sweet Eats, is where she proclaims her love for all things sweet, all things bacon, and everything else in between. She works her magic in her Pittsburgh kitchen, which she shares with her husband of 2 years.


Profile photo of Amber {Sprinkled With Flour}

Artichoke and Jalapeño Ranch Dip

Posted by in Step-by-Step Recipes

Tasty Kitchen Blog: Artichoke and Jalapeño Ranch Dip. Guest post by Amber Potter of Sprinkled with Flour, recipe submitted by TK member Jen of Peanut Butter & Peppers.

 
I don’t know about you, but this is the time of year that all the delicious holiday recipes start to creep up on me. They tend to creep in places I’d rather not be crept up on, if you know what I mean. Parties, get-togethers, and food gifts … you know how it goes. It’s easy to get lost in all the deliciousness and forget the consequences of all those tasty bites.

But all those tasty bites are so hard to resist, right?

When I came across this recipe of Jen’s for Artichoke and Jalapeño Ranch Dip, I was hooked right away. But when I saw that it was actually a healthy dip, my guilt-ridden thighs did a happy jiggle.

Yes, my thighs jiggle. Sigh.

This dip is so tasty and full of flavor. With Greek yogurt, ranch seasoning, chunky artichokes, and jalapeños, you’ll never notice the missing calories. 


Tasty Kitchen Blog: Artichoke and Jalapeño Ranch Dip. Guest post by Amber Potter of Sprinkled with Flour, recipe submitted by TK member Jen of Peanut Butter & Peppers.

You’ll need: Greek yogurt, mayonnaise, cream cheese, ranch seasoning, canned artichokes, pickled jalapeños, and Parmesan cheese.


Tasty Kitchen Blog: Artichoke and Jalapeño Ranch Dip. Guest post by Amber Potter of Sprinkled with Flour, recipe submitted by TK member Jen of Peanut Butter & Peppers.

Preheat oven to 350ºF. Spray an oven safe baking dish with cooking spray. In a bowl, mix together yogurt, mayonnaise, cream cheese and ranch seasoning.


Tasty Kitchen Blog: Artichoke and Jalapeño Ranch Dip. Guest post by Amber Potter of Sprinkled with Flour, recipe submitted by TK member Jen of Peanut Butter & Peppers.

Mix everything until well combined.


Tasty Kitchen Blog: Artichoke and Jalapeño Ranch Dip. Guest post by Amber Potter of Sprinkled with Flour, recipe submitted by TK member Jen of Peanut Butter & Peppers.

Now roughly chop your artichokes.


Tasty Kitchen Blog: Artichoke and Jalapeño Ranch Dip. Guest post by Amber Potter of Sprinkled with Flour, recipe submitted by TK member Jen of Peanut Butter & Peppers.

Stir in the artichokes, jalapeños, and jalapeño juice. You can add more juice depending on how spicy you want your dip.


Tasty Kitchen Blog: Artichoke and Jalapeño Ranch Dip. Guest post by Amber Potter of Sprinkled with Flour, recipe submitted by TK member Jen of Peanut Butter & Peppers.

Pour the mixture into your baking dish, and sprinkle the Parmesan cheese over the top.


Tasty Kitchen Blog: Artichoke and Jalapeño Ranch Dip. Guest post by Amber Potter of Sprinkled with Flour, recipe submitted by TK member Jen of Peanut Butter & Peppers.

Bake for 30 minutes until the cheese is bubbly.


Tasty Kitchen Blog: Artichoke and Jalapeño Ranch Dip. Guest post by Amber Potter of Sprinkled with Flour, recipe submitted by TK member Jen of Peanut Butter & Peppers.

Now dive in with a nice, crunchy chip. Yum!


Tasty Kitchen Blog: Artichoke and Jalapeño Ranch Dip. Guest post by Amber Potter of Sprinkled with Flour, recipe submitted by TK member Jen of Peanut Butter & Peppers.

I’m so glad Jen shared her delicious recipe with us. This will be a great snack addition to any party spread. It would be just as delicious slathered on a chicken wrap, or grilled up in a toasty sandwich. There are so many possibilities! Head on over and visit Jen’s blog, Peanut Butter & Peppers, where she shares her weight loss story and lots of fabulous looking healthy recipes.


Printable Recipe

Artichoke and Jalapeno Ranch Dip

See post on Jen @ Peanut Butter and Peppers’s site!
5.00 Mitt(s) 1 Rating(s)1 vote, average: 5.00 out of 51 vote, average: 5.00 out of 51 vote, average: 5.00 out of 51 vote, average: 5.00 out of 51 vote, average: 5.00 out of 5

Prep Time:

Cook Time:

Difficulty: Easy

Servings: 6

6
x

Print Options

Page size Letter 3x5 4x6
Text Size Small Medium Large
Content Include description
Include prep time, etc.
Show image

Description

A hot, creamy, cheesy, spicy dip made with artichokes, jalapenos, cream cheese and ranch seasoning.

Ingredients

  • 1 cup Greek Yogurt, Plain
  • ½ cups Mayonnaise, Reduced Fat
  • 4 ounces, weight Cream Cheese, Fat Free, Room Temperature
  • 2 Tablespoons Ranch Seasoning (I Used Hidden Valley)
  • 14 ounces, weight Canned Artichokes, Drained, Roughly Chopped
  • ½ cups Jalapenos, Pickled, Drained, Sliced
  • 2 Tablespoons Jalapeno Juice From The Jar (to Taste)
  • 2 teaspoons Reduced Fat Parmesan Cheese

Preparation Instructions

Preheat oven to 350ºF. Spray an oven safe baking dish with cooking spray.

In a bowl, mix together yogurt, mayonnaise, cream cheese and ranch seasoning, until incorporated. Stir in artichokes and jalapenos. Add juice from jalapenos, to taste, adding more for a spicy dip. Sprinkle top with Parmesan cheese.

Place in oven and bake for 30 minutes until cheese is bubbly.


_______________________________________

Amber is a stay at home mom who lives in the heart of the Missouri Ozarks. It’s a long way from where she grew up, in Wales (yes, way over in the U.K.). The recipes in her blog Sprinkled with Flour include her original creations as well as her family recipes. Go check them out!


Profile photo of Laurie - Simply Scratch

Eggnog Pancakes

Posted by in Step-by-Step Recipes

Tasty Kitchen Blog: Eggnog Pancakes. Guest post by Laurie McNamara of Simply Scratch, recipe submitted by TK member Kita of Pass the Sushi.

 
Right about now is when we all start to see neighbors hanging Christmas Lights outside, long checkout lines at Target, and grocery stores stocking up on cartons of eggnog. As many of you know, eggnog is a thick, rich and delicious drink that’s commonly (but not always) spiked with bourbon, rum or brandy and then garnished with a little sprinkle of grated nutmeg on top. A classic beverage that has always been just a beverage—until it was made into pancakes.

What made me fall head first in love with TK member Kita’s recipe for Eggnog Pancakes was that not only did she spike her pancakes with eggnog, but she also spiked the maple syrup with eggnog! So if you’re planning to make Erica’s Homemade Eggnog from the previous post, you might want to whip up enough to make these amazing holiday breakfast treats. These pancakes have all the characteristics of the classic drink, resulting in light and fluffy pancakes that are simply amazing.


Tasty Kitchen Blog: Eggnog Pancakes. Guest post by Laurie McNamara of Simply Scratch, recipe submitted by TK member Kita of Pass the Sushi.

To make these fantastically light and fluffy pancakes you’ll need: flour, salt, baking powder, nutmeg, eggs, eggnog, melted butter and syrup.


Tasty Kitchen Blog: Eggnog Pancakes. Guest post by Laurie McNamara of Simply Scratch, recipe submitted by TK member Kita of Pass the Sushi.

Start by adding 2 cups of all purpose flour into a medium bowl.


Tasty Kitchen Blog: Eggnog Pancakes. Guest post by Laurie McNamara of Simply Scratch, recipe submitted by TK member Kita of Pass the Sushi.

Measure and add in the 4 teaspoons of baking powder. This helps the pancakes achieve their fluffiness.


Tasty Kitchen Blog: Eggnog Pancakes. Guest post by Laurie McNamara of Simply Scratch, recipe submitted by TK member Kita of Pass the Sushi.

Add in the half teaspoon of salt.


Tasty Kitchen Blog: Eggnog Pancakes. Guest post by Laurie McNamara of Simply Scratch, recipe submitted by TK member Kita of Pass the Sushi.

Then lastly, grate in 1/4 teaspoon of fresh nutmeg.


Tasty Kitchen Blog: Eggnog Pancakes. Guest post by Laurie McNamara of Simply Scratch, recipe submitted by TK member Kita of Pass the Sushi.

Give all that a good stir or whisk before scooting it off to the side.


Tasty Kitchen Blog: Eggnog Pancakes. Guest post by Laurie McNamara of Simply Scratch, recipe submitted by TK member Kita of Pass the Sushi.

In a large bowl, crack two large eggs.


Tasty Kitchen Blog: Eggnog Pancakes. Guest post by Laurie McNamara of Simply Scratch, recipe submitted by TK member Kita of Pass the Sushi.

Then with a wire whisk, beat them up a bit.


Tasty Kitchen Blog: Eggnog Pancakes. Guest post by Laurie McNamara of Simply Scratch, recipe submitted by TK member Kita of Pass the Sushi.

Now measure out a cup and a half of eggnog.


Tasty Kitchen Blog: Eggnog Pancakes. Guest post by Laurie McNamara of Simply Scratch, recipe submitted by TK member Kita of Pass the Sushi.

Pour the eggnog into the bowl with the beaten eggs. Hmmm. I wonder what would happen if you in fact did spike these with bourbon?


Tasty Kitchen Blog: Eggnog Pancakes. Guest post by Laurie McNamara of Simply Scratch, recipe submitted by TK member Kita of Pass the Sushi.

Add in the two tablespoons of melted butter.


Tasty Kitchen Blog: Eggnog Pancakes. Guest post by Laurie McNamara of Simply Scratch, recipe submitted by TK member Kita of Pass the Sushi.

Whisk those ingredients until combined.


Tasty Kitchen Blog: Eggnog Pancakes. Guest post by Laurie McNamara of Simply Scratch, recipe submitted by TK member Kita of Pass the Sushi.

Add in the dry ingredients and fold them in until there are no longer any large clumps. Be careful not to over-mix.


Tasty Kitchen Blog: Eggnog Pancakes. Guest post by Laurie McNamara of Simply Scratch, recipe submitted by TK member Kita of Pass the Sushi.

Meanwhile, preheat your griddle or large skillet. My griddle has a special setting just for pancakes which is 375ºF, so adjust your stove or griddle accordingly. I also lightly greased my griddle so the pancakes wouldn’t stick.


Tasty Kitchen Blog: Eggnog Pancakes. Guest post by Laurie McNamara of Simply Scratch, recipe submitted by TK member Kita of Pass the Sushi.

While my griddle was preheating, I made Kita’s syrup. It’s super simple, just a half cup of real maple syrup and two tablespoons of eggnog. Yup, I can’t even begin to tell you how delicious this is.


Tasty Kitchen Blog: Eggnog Pancakes. Guest post by Laurie McNamara of Simply Scratch, recipe submitted by TK member Kita of Pass the Sushi.

Now that the griddle is preheated, you’ll want to measure out 1/4 cup of the pancake batter.


Tasty Kitchen Blog: Eggnog Pancakes. Guest post by Laurie McNamara of Simply Scratch, recipe submitted by TK member Kita of Pass the Sushi.

And slowly pour it onto the griddle, spacing each pancake an inch apart.


Tasty Kitchen Blog: Eggnog Pancakes. Guest post by Laurie McNamara of Simply Scratch, recipe submitted by TK member Kita of Pass the Sushi.

Once the bottoms are golden and the air bubbles in the center pop and no longer re-fill, it’s time to flip. Once they are cooked, I keep the pancakes warm on a rimmed baking sheet in a 200ºF oven. This will keep them all nice and toasty while you make the remainder of the pancakes.


Tasty Kitchen Blog: Eggnog Pancakes. Guest post by Laurie McNamara of Simply Scratch, recipe submitted by TK member Kita of Pass the Sushi.

Now all that’s left to do is stack, top with butter and drizzle on that amazing syrup!


Tasty Kitchen Blog: Eggnog Pancakes. Guest post by Laurie McNamara of Simply Scratch, recipe submitted by TK member Kita of Pass the Sushi.

I added a little pomegranate seeds on mine for color and tartness, but that’s totally optional.


Tasty Kitchen Blog: Eggnog Pancakes. Guest post by Laurie McNamara of Simply Scratch, recipe submitted by TK member Kita of Pass the Sushi.

These pancakes are not only light and fluffy but they taste wonderfully of eggnog, which will get you all excited for the upcoming holidays. I promise you these eggnog pancakes are amazing. They’re as fool-proof as they are scrumptious and will definitely make for an excellent satisfying breakfast.

A huge ‘thank you’ to Kita for sharing this delicious pancake recipe with us. For more of Kita’s wonderful and inventive recipes and her beautiful photography, check out her blog Pass the Sushi. You can also find them right here in her Tasty Kitchen recipe box.


Tasty Kitchen Blog: Eggnog Pancakes. Guest post by Laurie McNamara of Simply Scratch, recipe submitted by TK member Kita of Pass the Sushi.


Printable Recipe

Eggnog Pancakes

See post on passthesushi’s site!
5.00 Mitt(s) 2 Rating(s)2 votes, average: 5.00 out of 52 votes, average: 5.00 out of 52 votes, average: 5.00 out of 52 votes, average: 5.00 out of 52 votes, average: 5.00 out of 5

Prep Time:

Cook Time:

Difficulty: Easy

Servings: 2

2
x

Print Options

Page size Letter 3x5 4x6
Text Size Small Medium Large
Content Include description
Include prep time, etc.
Show image

Description

Eggnog pancakes to make any morning feel like the holidays.

Ingredients

  • 2 cups Flour
  • 4 teaspoons Baking Powder
  • ½ teaspoons Salt
  • ¼ teaspoons Freshly Grated Nutmeg
  • 2 whole Eggs
  • 1-½ cup Eggnog, Plus 2 Tablespoons, Divided
  • 2 Tablespoons Butter, Melted, Plus More Butter To Serve
  • ½ cups Syrup

Preparation Instructions

Preheat a griddle to medium-high heat or get a skillet and start warming it over medium-high heat.

In a medium bowl combine the flour, baking powder, salt and nutmeg. Set aside.

In another bowl, beat eggs, 1 1/2 cups eggnog and butter. Fold in the dry ingredients just until moistened and no large lumps remain. Don’t overmix the batter.

Spray your pre-heated griddle or skillet with cooking spray. Pour batter by 1/4 cupfuls onto the griddle. Turn over the pancakes when bubbles form on top and they turn light golden brown around the edges and bottom. Flip once and cook until the other side is golden brown, 3-4 minutes.

Whisk syrup and remaining 2 tablespoons eggnog together and pour over hot pancakes along with additional butter.

Adapted from Allrecipes.com.


_______________________________________

Laurie is the force behind Simply Scratch, a blog that documents her efforts to find and create recipes that are made simply from scratch. (We think it’s sweet that her mother-in-law helped her set up her blog and get started.) We love her recipes; they’re not just tried and true, but they look gorgeous as well. Check out her blog and you’ll become a fan too.


Profile photo of Erica Lea

Homemade Eggnog

Posted by in Holidays, Step-by-Step Recipes

To me, eggnog is the iconic Christmas drink. When we were little, around Christmastime, Mom would carefully pour out mini glasses of the thick, wonderfully flavored beverage and cut it with a bit of milk. We savored what little we got from the small carton. Now that I’ve learned to make it at…

Profile photo of Laurie - Simply Scratch

Nutella Pecan Pie

Posted by in Baking, Step-by-Step Recipes

Thanks to Megan for sharing her recipe for Nutella Pecan Pie, because I have officially died and gone to heaven. Get this: Nutella is spread on the bottom of a homemade, pre-baked pie crust before adding in the gooey pecan…

Profile photo of EatLiveRun

Sugar Cookie Butter (Gluten-Free!)

Posted by in Step-by-Step Recipes

This yummy (and surprisingly healthy!) homemade cookie butter combines the two great loves of my life: cookie dough and nut butter. When I found Rachel’s recipe for a spreadable cookie dough that contains no raw eggs, I leapt for joy! As a bonus, it's even gluten-free. This incredibly…

Profile photo of Erica Lea

No-Knead Dinner Rolls

Posted by in Baking, Step-by-Step Recipes

This recipe, brought to us by Terri, is about as low-fuss as yeast bread gets. All you have to do is mix everything in a large bowl, let it rise, form into buns, and bake once they're puffy. Still skeptical about no-knead…