The Pioneer Woman Tasty Kitchen
Profile photo of HowSweetEats

Coffee BBQ Sauce

Posted by in Step-by-Step Recipes

Tasty Kitchen Blog: Coffee BBQ Sauce. Guest post by Jessica Merchant of How Sweet It Is, recipe submitted by Tk member Kay Heritage of The Church Cook.

 
For years, I have been trying desperately to like coffee. Not because I need the caffeine, and not even because my friends drink it, but because I absolutely adore coffee-flavored foods (read: ice cream, cupcakes, frosting, steak rubs) and it drives me mad that I can’t enjoy the beverage. Plus, I do want to look all cool and casual sitting in a coffee shop and sipping something warm and frothy that has a cute little heart design in the foam. And why can’t actual coffee just TASTE like a frappuccino with ice cream and mocha and whipped cream and tons of sugar?

It’s so not fair.

But it completely makes sense that the minute I saw Kay’s recipe for Coffee BBQ Sauce, I was itching to try it. My husband is the king of condiments in our house, and while he seriously uses cups of ketchup on things like burgers and fries, and while I seriously roll my eyes every single time and scream, “Stop! You’re ruining it!”… BBQ sauce is my favorite go-to dip or topping. I just couldn’t resist.


Tasty Kitchen Blog: Coffee BBQ Sauce. Guest post by Jessica Merchant of How Sweet It Is, recipe submitted by Tk member Kay Heritage of The Church Cook.

This sauce is so super simple. To start, you need coffee (so brew a strong pot!), ketchup, your favorite hot sauce, apple cider vinegar, soy sauce, sweet chili sauce, chili powder, cumin, shallots, garlic and brown sugar.


Tasty Kitchen Blog: Coffee BBQ Sauce. Guest post by Jessica Merchant of How Sweet It Is, recipe submitted by Tk member Kay Heritage of The Church Cook.

Measure out your ingredients.


Tasty Kitchen Blog: Coffee BBQ Sauce. Guest post by Jessica Merchant of How Sweet It Is, recipe submitted by Tk member Kay Heritage of The Church Cook.

Chop up your onion and garlic.


Tasty Kitchen Blog: Coffee BBQ Sauce. Guest post by Jessica Merchant of How Sweet It Is, recipe submitted by Tk member Kay Heritage of The Church Cook.

And combine it all in a saucepan.


Tasty Kitchen Blog: Coffee BBQ Sauce. Guest post by Jessica Merchant of How Sweet It Is, recipe submitted by Tk member Kay Heritage of The Church Cook.

Mix it up well …


Tasty Kitchen Blog: Coffee BBQ Sauce. Guest post by Jessica Merchant of How Sweet It Is, recipe submitted by Tk member Kay Heritage of The Church Cook.

And allow it to come to a boil. Then reduce to a simmer to cook for about 40 minutes or so.


Tasty Kitchen Blog: Coffee BBQ Sauce. Guest post by Jessica Merchant of How Sweet It Is, recipe submitted by Tk member Kay Heritage of The Church Cook.

As it cooks, it will bubble and thicken and become just like your favorite BBQ sauce, all tangy and delicious.


Tasty Kitchen Blog: Coffee BBQ Sauce. Guest post by Jessica Merchant of How Sweet It Is, recipe submitted by Tk member Kay Heritage of The Church Cook.

And after a few hours of sitting at room temperature, it’s good to go.


Tasty Kitchen Blog: Coffee BBQ Sauce. Guest post by Jessica Merchant of How Sweet It Is, recipe submitted by Tk member Kay Heritage of The Church Cook.

This sauce has the perfect consistency and a great balance between a little tanginess and a bit of sweetness. You can taste the coffee—but just a hint of it, and in such a delicious, rich way. We’ve been enjoying this on steak and chicken, and I think it’s one of the best homemade BBQ sauces I’ve made. It’s different from a few other staple sauces I’ve whipped up before, and yes, I find it highly appropriate to have all different kinds of BBQ sauce in the fridge at all times.

Thanks so much Kay for the recipe! Check out her blog The Church Cook, where she serves up incredible dishes every week.


Printable Recipe

Coffee BBQ Sauce

See post on The Church Cook (Kay Heritage)’s site!
0.00 Mitt(s) 0 Rating(s)0 votes, average: 0.00 out of 50 votes, average: 0.00 out of 50 votes, average: 0.00 out of 50 votes, average: 0.00 out of 50 votes, average: 0.00 out of 5

Prep Time:

Cook Time:

Difficulty: Easy

Servings: 6

6
x

Print Options

Page size Letter 3x5 4x6
Text Size Small Medium Large
Content Include description
Include prep time, etc.
Show image

Description

Rich, flavorful, coffee BBQ sauce.

Ingredients

  • ½ cups Strong Brewed Coffee
  • 1 cup Ketchup
  • ¾ cups Firmly Packed Brown Sugar
  • ½ cups Apple Cider Vinegar
  • ½ cups Finely Chopped Shallots
  • ½ cups Sweet Red Chili Sauce
  • 2 cloves Garlic, Grated
  • 2 Tablespoons Soy Sauce
  • 2 Tablespoons Ground Cumin
  • 2 Tablespoons Chili Powder
  • 1 teaspoon Sriracha Or Tabasco Sauce

Preparation Instructions

Stir all ingredients in a medium sauce pan. Bring to simmer then reduce the heat to low until flavor melds, about 40 minutes, occasionally stirring the sauce. Cool to room temperature and serve. Will keep for about 2 weeks or more in the refrigerator.

Makes about 2 1/2 cups.


_______________________________________

Jessica Merchant is a personal trainer turned food writer and blogger. Her blog, How Sweet Eats, is where she proclaims her love for all things sweet, all things bacon, and everything else in between. She works her magic in her Pittsburgh kitchen, which she shares with her husband of 2 years.


Profile photo of georgiapellegrini

Best Breakfast Burrito

Posted by in Step-by-Step Recipes

Tasty Kitchen Blog: Best Breakfast Burrito. Guest post by Georgia Pellegrini, recipe submitted by TK member Bev Weidner of Bev Cooks.

 
Since moving to Texas, I’ve fallen in love with the breakfast taco and all of its many possibilities. But these Best Breakfast Burritos by ever-entertaining TK member Bev Weidner caught my eye because of the beautiful mound of spinach on top. That is not something I’ve tried before and I decided it was time. But what is great about these is that they are really your canvas to throw on whatever you love—that’s what makes them delicious.


Tasty Kitchen Blog: Best Breakfast Burrito. Guest post by Georgia Pellegrini, recipe submitted by TK member Bev Weidner of Bev Cooks.

You will need: olive oil, spinach, egg, tortilla, shredded cheese, hot sauce, salt and pepper, and cilantro or other herbs to garnish. (Plus I added a little something extra that you’ll see later, because I couldn’t help it. That’s just how it goes with these.)


Tasty Kitchen Blog: Best Breakfast Burrito. Guest post by Georgia Pellegrini, recipe submitted by TK member Bev Weidner of Bev Cooks.

Sprinkle some cheese on a tortilla and pop it in the microwave for about 10 seconds.


Tasty Kitchen Blog: Best Breakfast Burrito. Guest post by Georgia Pellegrini, recipe submitted by TK member Bev Weidner of Bev Cooks.

Meanwhile, heat the oil in a skillet over medium heat and let the spinach wilt for about 1-2 minutes. Give it a little sprinkle of salt and pepper as you do.


Tasty Kitchen Blog: Best Breakfast Burrito. Guest post by Georgia Pellegrini, recipe submitted by TK member Bev Weidner of Bev Cooks.

Place it in a nice pile onto your warm tortilla.


Tasty Kitchen Blog: Best Breakfast Burrito. Guest post by Georgia Pellegrini, recipe submitted by TK member Bev Weidner of Bev Cooks.

Then, remove the pan from the heat and crack your egg into it.


Tasty Kitchen Blog: Best Breakfast Burrito. Guest post by Georgia Pellegrini, recipe submitted by TK member Bev Weidner of Bev Cooks.

I like this method because if the pan is cool enough, you can scramble it without having to whisk it in a bowl first. No extra dirty dishes!


Tasty Kitchen Blog: Best Breakfast Burrito. Guest post by Georgia Pellegrini, recipe submitted by TK member Bev Weidner of Bev Cooks.

Add the cooked egg to your warm tortilla.


Tasty Kitchen Blog: Best Breakfast Burrito. Guest post by Georgia Pellegrini, recipe submitted by TK member Bev Weidner of Bev Cooks.

Then, because I couldn’t help myself, I added avocado. Because I need to. But you can do what moves you.


Tasty Kitchen Blog: Best Breakfast Burrito. Guest post by Georgia Pellegrini, recipe submitted by TK member Bev Weidner of Bev Cooks.

Sprinkle on your favorite hot sauce!


Tasty Kitchen Blog: Best Breakfast Burrito. Guest post by Georgia Pellegrini, recipe submitted by TK member Bev Weidner of Bev Cooks.

And dig in.


Tasty Kitchen Blog: Best Breakfast Burrito. Guest post by Georgia Pellegrini, recipe submitted by TK member Bev Weidner of Bev Cooks.

I overstuffed it, I know. But that’s what napkins are for.

Thanks so much to Bev for this inspiring breakfast dish! Check out her website Bev Cooks for more tasty treats.


Printable Recipe

Best Breakfast Burrito

See post on Bev Weidner’s site!
5.00 Mitt(s) 1 Rating(s)1 vote, average: 5.00 out of 51 vote, average: 5.00 out of 51 vote, average: 5.00 out of 51 vote, average: 5.00 out of 51 vote, average: 5.00 out of 5

Prep Time:

Cook Time:

Difficulty: Easy

Servings: 1

1
x

Print Options

Page size Letter 3x5 4x6
Text Size Small Medium Large
Content Include description
Include prep time, etc.
Show image

Description

Have 2 minutes in the morning? Make your face AND your belly happy with this one.

Ingredients

  • 1 Tablespoon Extra Virgin Olive Oil
  • 2 cups Baby Spinach
  • 1 whole Egg
  • 1 whole Whole Wheat Tortilla
  • ¼ cups Shredded Aged Cheddar
  • 1 Tablespoon Hot Sauce
  • 1 pinch Coarse Salt And Freshly Ground Pepper
  • 1 Tablespoon Fresh Cilantro For Garnish

Preparation Instructions

Heat oil in a medium skillet over medium-high. Add spinach to wilt, 2 minutes, if that. Remove spinach from the pan.

Add egg to the skillet, season with salt and pepper, mix to combine, put it back on the heat and scramble for maybe a minute.

In the microwave (hahaha!) melt the cheese on the tortilla for 30 seconds.

Top the tortilla with spinach, egg, a dollop of hot sauce and the cilantro garnish.

Freaking YUM.


_______________________________________

There’s so much to say about Georgia, we don’t know where to start. Leaving Wall Street for the French Culinary Institute, followed by a stint at the Gramercy Tavern and La Chassagnette in France, her passion for food and food traditions are evident and inspiring. Visit her site at Georgia Pellegrini, where you’ll find more recipes, photos, learn all about her wonderful books Girl Hunter and Food Heroes, and enjoy her latest adventures.


Profile photo of A Cozy Kitchen

Asparagus Quiche with a Spaghetti Squash Crust

Posted by in Step-by-Step Recipes

Tasty Kitchen Blog: Asparagus Quiche with a Spaghetti Squash Crust. Guest post by Adrianna Adarme of A Cozy Kitchen, recipe submitted by Tk member Claire of Just Blither Blather.

 
Is there anything more perfect and pretty for a Sunday brunch than quiche? Probably not. But let’s be honest, if you’re going for easy, making a quiche ain’t it. On most Sunday mornings—when I’m still trying to wake up—pastry dough isn’t something I want to deal with. So when I saw this recipe from Claire, I was definitely intrigued. This quiche’s crust isn’t made with a traditional pastry dough; instead it’s made using roasted spaghetti squash, making it not only a bit more fuss-free, but also healthier.

Let’s get started!


Tasty Kitchen Blog: Asparagus Quiche with a Spaghetti Squash Crust. Guest post by Adrianna Adarme of A Cozy Kitchen, recipe submitted by Tk member Claire of Just Blither Blather.

You want to start the quiche process already having roasted the spaghetti squash. Roasting squash is easy enough: Preheat your oven to 400ºF, line a baking sheet with foil or parchment paper, slice the squash in half, place it face down and put it the oven for about 20 minutes.


Tasty Kitchen Blog: Asparagus Quiche with a Spaghetti Squash Crust. Guest post by Adrianna Adarme of A Cozy Kitchen, recipe submitted by Tk member Claire of Just Blither Blather.

When it’s done, it’ll be very tender. Start with scooping out the seeds, and then scrape the squash with a fork.

Transfer the spaghetti squash to a bowl and set it aside.


Tasty Kitchen Blog: Asparagus Quiche with a Spaghetti Squash Crust. Guest post by Adrianna Adarme of A Cozy Kitchen, recipe submitted by Tk member Claire of Just Blither Blather.

In a medium pan, add a bit of olive oil, the diced onion and sauté for a few minutes. Top the onion with the minced garlic.


Tasty Kitchen Blog: Asparagus Quiche with a Spaghetti Squash Crust. Guest post by Adrianna Adarme of A Cozy Kitchen, recipe submitted by Tk member Claire of Just Blither Blather.

Next, trim and cut the asparagus into 1-inch pieces. 


Tasty Kitchen Blog: Asparagus Quiche with a Spaghetti Squash Crust. Guest post by Adrianna Adarme of A Cozy Kitchen, recipe submitted by Tk member Claire of Just Blither Blather.

Add the asparagus to the pan and cook until slightly tender.


Tasty Kitchen Blog: Asparagus Quiche with a Spaghetti Squash Crust. Guest post by Adrianna Adarme of A Cozy Kitchen, recipe submitted by Tk member Claire of Just Blither Blather.

While the asparagus is cooking, crack the eggs in a bowl, add the milk and Swiss cheese.


Tasty Kitchen Blog: Asparagus Quiche with a Spaghetti Squash Crust. Guest post by Adrianna Adarme of A Cozy Kitchen, recipe submitted by Tk member Claire of Just Blither Blather.

Next, add some salt and pepper and whisk the ingredients together.


Tasty Kitchen Blog: Asparagus Quiche with a Spaghetti Squash Crust. Guest post by Adrianna Adarme of A Cozy Kitchen, recipe submitted by Tk member Claire of Just Blither Blather.

When the asparagus/onion mixture is cooked and you have the egg mixture ready to go, it’s time to get the quiche ready for the oven.

Press the spaghetti squash into the pie dish, lining it evenly all along the bottom and the sides.


Tasty Kitchen Blog: Asparagus Quiche with a Spaghetti Squash Crust. Guest post by Adrianna Adarme of A Cozy Kitchen, recipe submitted by Tk member Claire of Just Blither Blather.

Pour the egg mixture into the pie dish.


Tasty Kitchen Blog: Asparagus Quiche with a Spaghetti Squash Crust. Guest post by Adrianna Adarme of A Cozy Kitchen, recipe submitted by Tk member Claire of Just Blither Blather.

And then top it all off with the sautéed asparagus and onion mixture.


Tasty Kitchen Blog: Asparagus Quiche with a Spaghetti Squash Crust. Guest post by Adrianna Adarme of A Cozy Kitchen, recipe submitted by Tk member Claire of Just Blither Blather.

Transfer it to the oven and bake until it’s golden and delicious.


Tasty Kitchen Blog: Asparagus Quiche with a Spaghetti Squash Crust. Guest post by Adrianna Adarme of A Cozy Kitchen, recipe submitted by Tk member Claire of Just Blither Blather.

Spaghetti squash is definitely in season right now, but as we go through fall, I can see it working beautifully with different types of squashes, like acorn or kabocha. Thanks again to Claire for this beautiful and simple recipe. I’m going to enjoy this recipe for many brunches to come! Visit her blog Just Blither Blather for more recipes from this talented and engaging young blogger.


Printable Recipe

Asparagus Quiche with a Spaghetti Squash Crust

4.00 Mitt(s) 4 Rating(s)4 votes, average: 4.00 out of 54 votes, average: 4.00 out of 54 votes, average: 4.00 out of 54 votes, average: 4.00 out of 54 votes, average: 4.00 out of 5

Prep Time:

Cook Time:

Difficulty: Easy

Servings: 6

6
x

Print Options

Page size Letter 3x5 4x6
Text Size Small Medium Large
Content Include description
Include prep time, etc.
Show image

Description

A quiche perfect for supper in spring!

Ingredients

  • 13 ounces, weight Asparagus
  • ½  Small Yellow Onion
  • 2 cloves Garlic
  • 1 teaspoon Olive Oil
  • 5  Eggs
  • 1 cup Milk
  • 1 cup Swiss Cheese
  • ½ teaspoons Salt
  • ¼ teaspoons Pepper
  • 3 cups Cooked Spaghetti Squash (1 Small Squash)

Preparation Instructions

Preheat oven to 400ºF.

Cut off the woody ends of the asparagus. Chop the onion, mince the garlic, and cut the asparagus spears into 1-inch pieces. Heat the olive oil in a pan over medium heat, and saute onion and garlic for several minutes, until the onion is soft. Add the asparagus and continue to saute until the asparagus has turned bright green and is soft but not limp.

Whisk together the eggs, milk, cheese, salt, and pepper.

Grease a pie pan. Press the cooked spaghetti squash to the sides and bottom of the pan, forming an even crust. Pour the egg mixture into the pan. Add the asparagus, onion, and garlic on top of the egg mixture; be sure it sinks in.

Bake for 40 minutes until quiche is firm. Enjoy!


_______________________________________

Adrianna is the lovely lady behind the scrumptious blog A Cozy Kitchen. It’s filled with all kinds of mouthwatering recipes and gorgeous photography. Whether you’re in the mood for something vegetarian or meaty, fancy or pure comfort, light or decadent, there’s sure to be something there for everyone.


Profile photo of Natalie | Perry's Plate

Peaches and Cream Crumble Bars

Posted by in Baking, Step-by-Step Recipes

Tasty Kitchen Blog: Peaches and Cream Crumble Bars. Guest post by Natalie Perry of Perry's Plate, recipe submitted by TK member Courtney of Bake, Eat, Repeat.

 
I think I should come clean before I start telling you about this recipe.

Confession: I really don’t like peaches. Like, despise them. I like peaches about as much as Ree likes bananas.

What business did I have making a dessert with peaches? Well, it was all about love, people. The rest of my family loves peaches, and I love my family. I had a few peaches from my last farmers’ market trip that needed to be used ASAP on a day when I needed to make a potluck dessert. It was destiny, I suppose.

This recipe is a combination of a cheesecake and a crumble, and I think you may even substitute a different kind of fruit for the peaches (pears, apples, berries, etc.). Thank you TK member Courtney (who blogs at Bake, Eat, Repeat) for posting these Peaches and Cream Crumble Bars!


Tasty Kitchen Blog: Peaches and Cream Crumble Bars. Guest post by Natalie Perry of Perry's Plate, recipe submitted by TK member Courtney of Bake, Eat, Repeat.

Let’s begin by making a few preparations. Oven at 350ºF? Check. Baking dish lined with foil and greased? Check.


Tasty Kitchen Blog: Peaches and Cream Crumble Bars. Guest post by Natalie Perry of Perry's Plate, recipe submitted by TK member Courtney of Bake, Eat, Repeat.

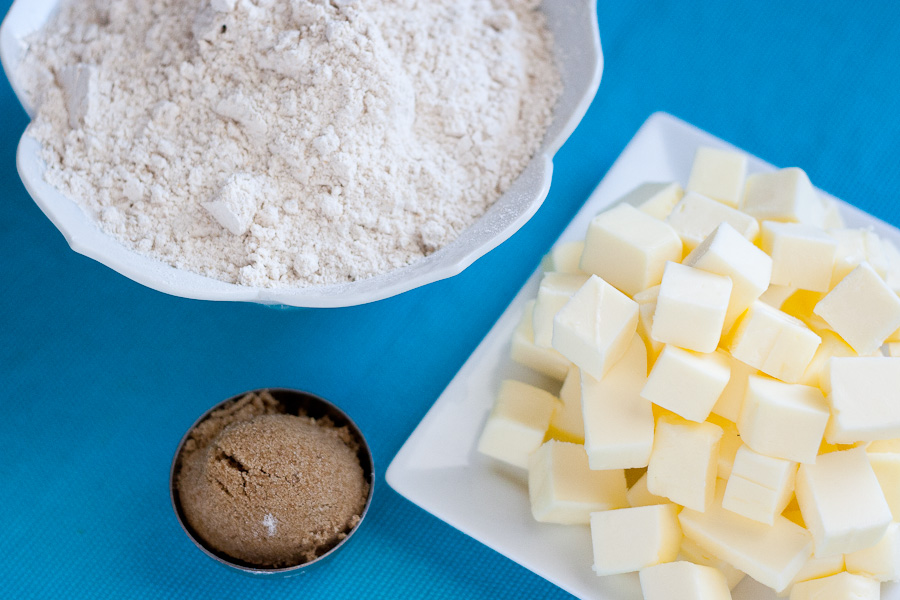
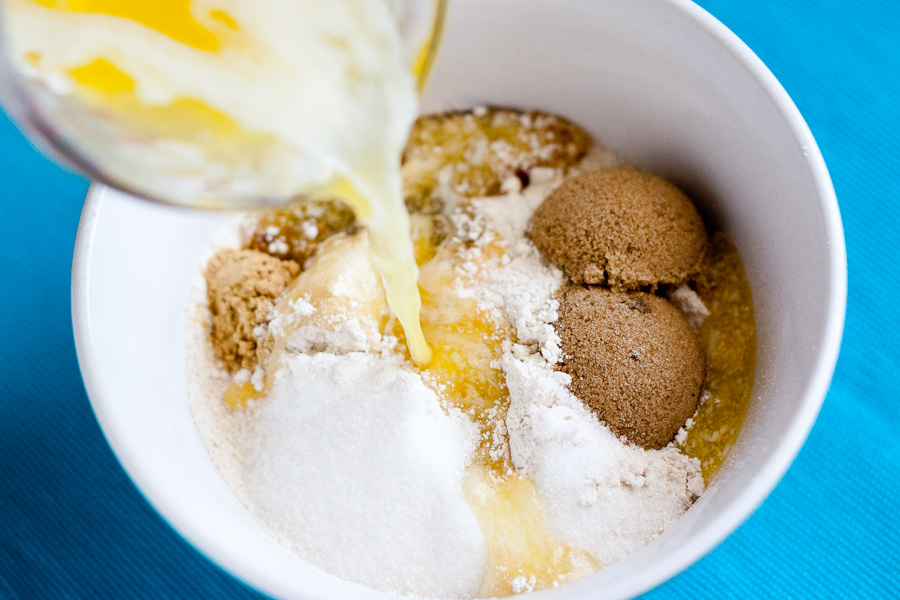
To make the crust you only need three things: flour, brown sugar, and butter. (If you use unsalted butter, you’ll need to add a bit of salt.)


Tasty Kitchen Blog: Peaches and Cream Crumble Bars. Guest post by Natalie Perry of Perry's Plate, recipe submitted by TK member Courtney of Bake, Eat, Repeat.

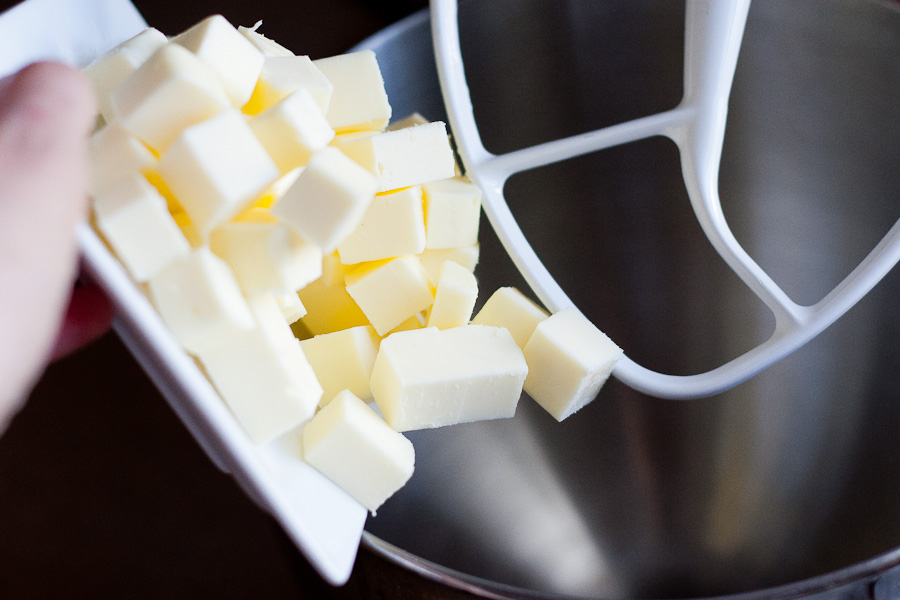
Add the butter to a medium-sized mixing bowl. (Or the work bowl of your best friend—er, I mean stand mixer. Please tell me you named yours, too?)


Tasty Kitchen Blog: Peaches and Cream Crumble Bars. Guest post by Natalie Perry of Perry's Plate, recipe submitted by TK member Courtney of Bake, Eat, Repeat.

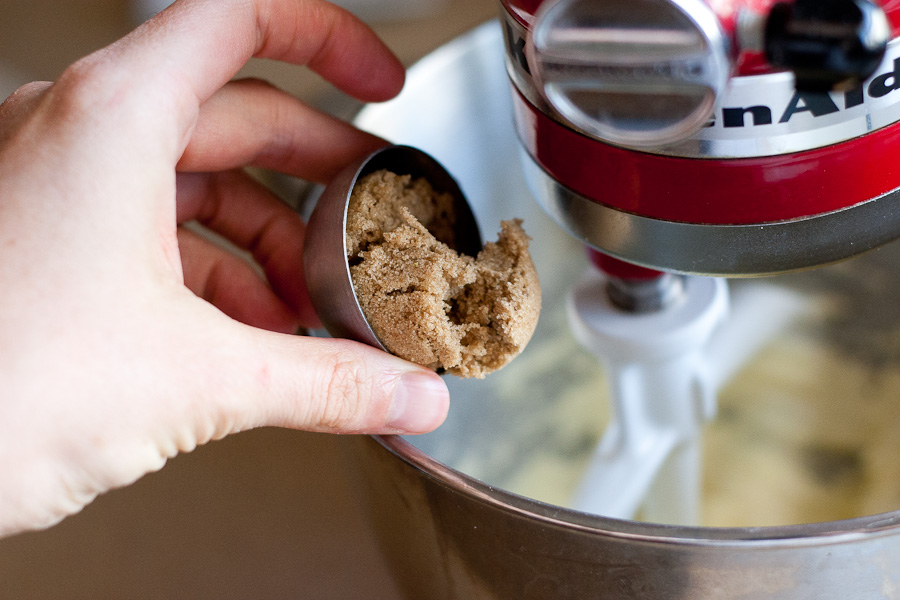
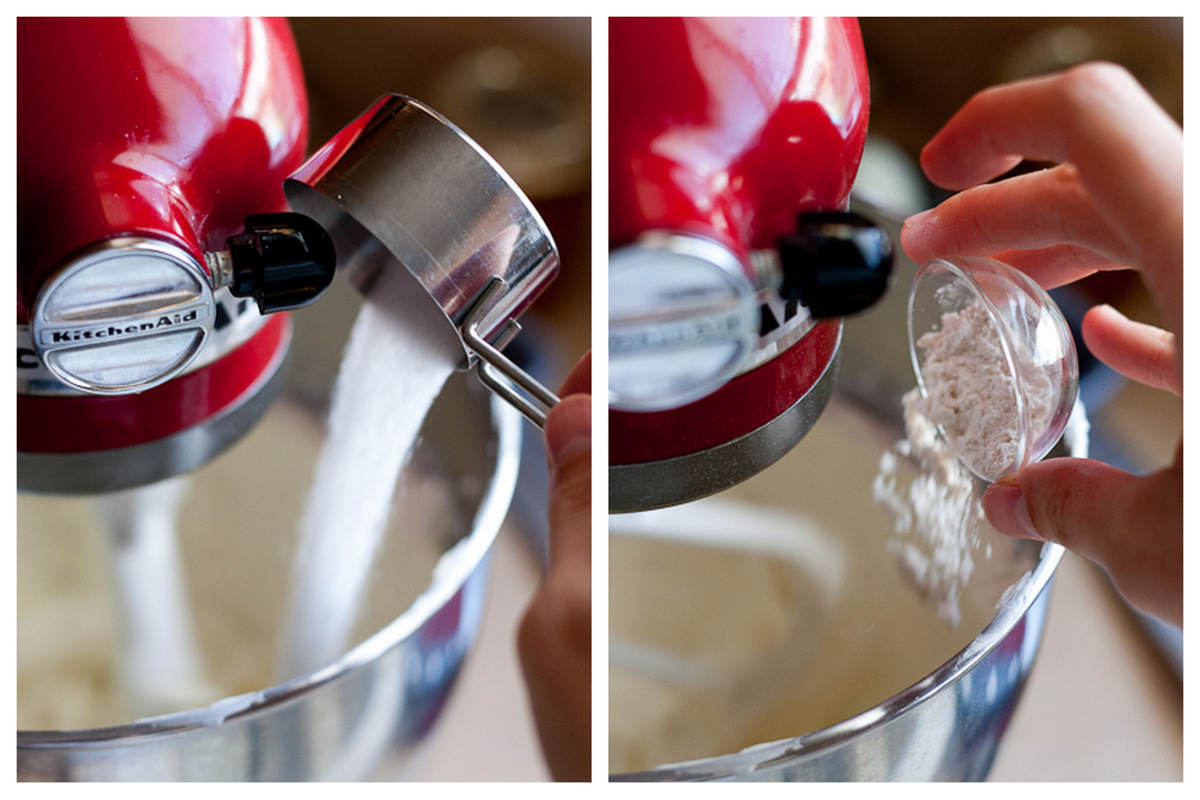
Add the brown sugar, then beat it to soften the butter and incorporate the sugar.
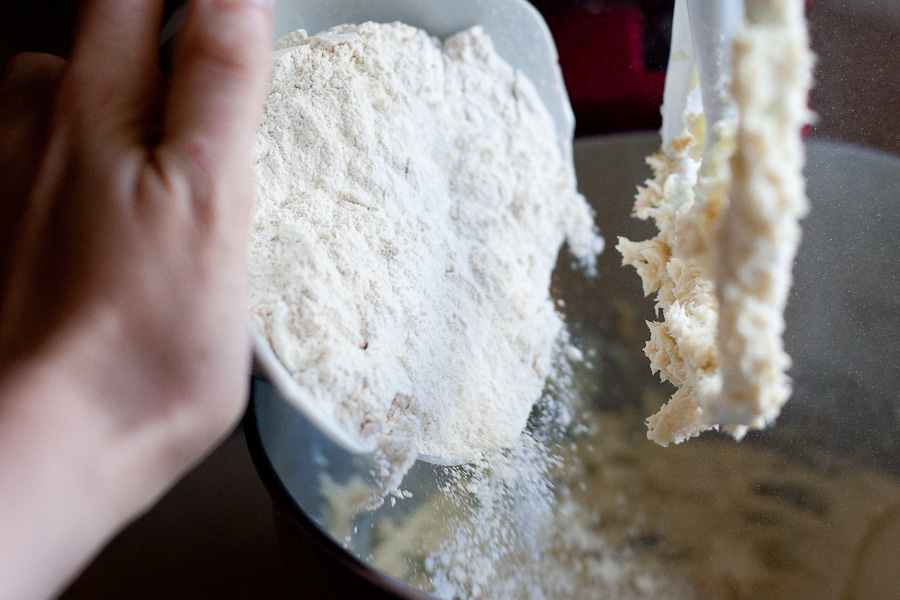


Tasty Kitchen Blog: Peaches and Cream Crumble Bars. Guest post by Natalie Perry of Perry's Plate, recipe submitted by TK member Courtney of Bake, Eat, Repeat.

Add the flour.


Tasty Kitchen Blog: Peaches and Cream Crumble Bars. Guest post by Natalie Perry of Perry's Plate, recipe submitted by TK member Courtney of Bake, Eat, Repeat.

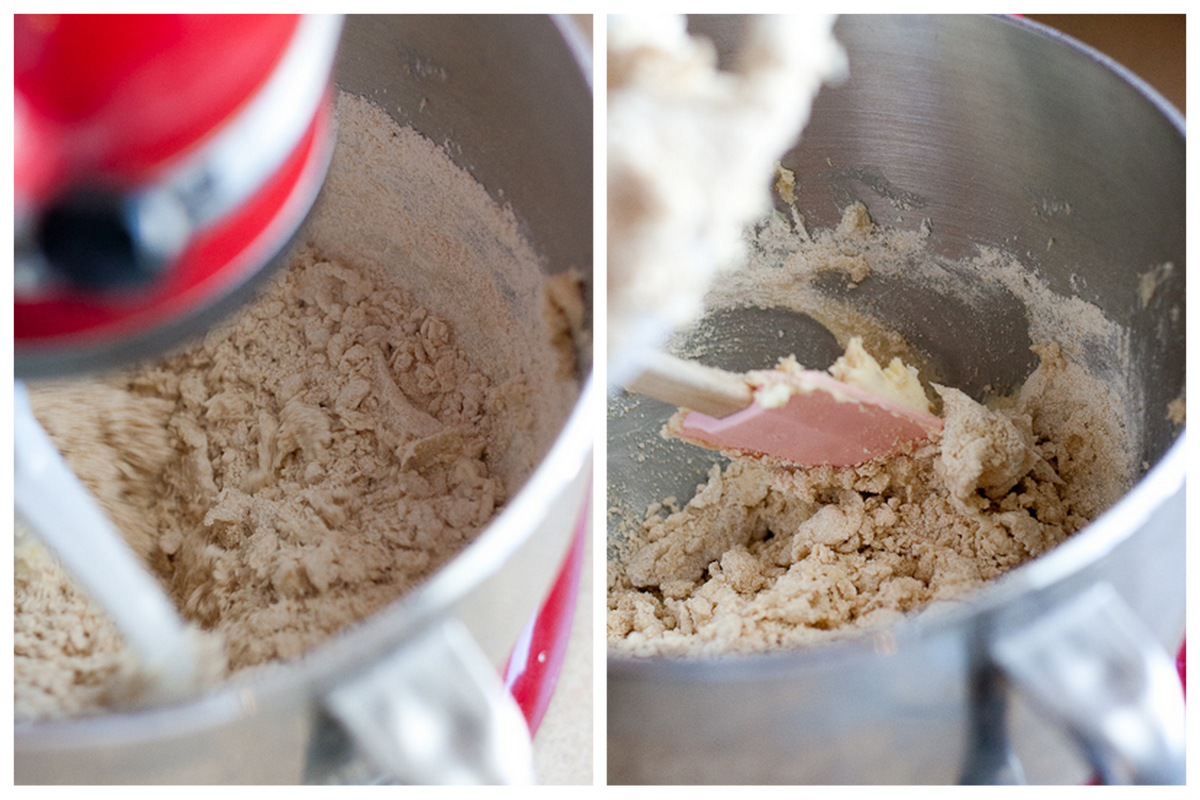
Mix well, scraping down the sides. At first it’ll look really crumbly. Then it will look like …


Tasty Kitchen Blog: Peaches and Cream Crumble Bars. Guest post by Natalie Perry of Perry's Plate, recipe submitted by TK member Courtney of Bake, Eat, Repeat.

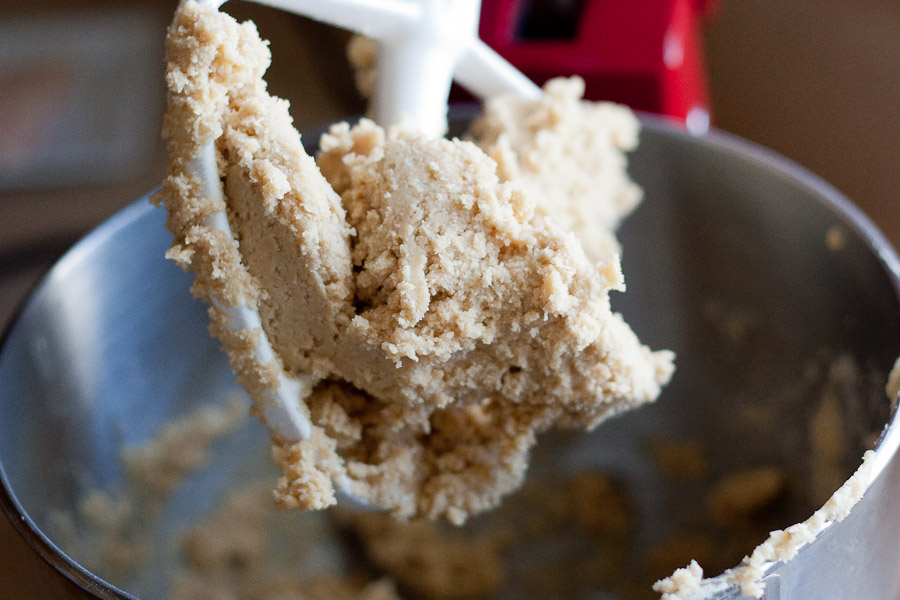
This. A beautiful, somewhat-sticky mass about the consistency of cookie dough.


Tasty Kitchen Blog: Peaches and Cream Crumble Bars. Guest post by Natalie Perry of Perry's Plate, recipe submitted by TK member Courtney of Bake, Eat, Repeat.

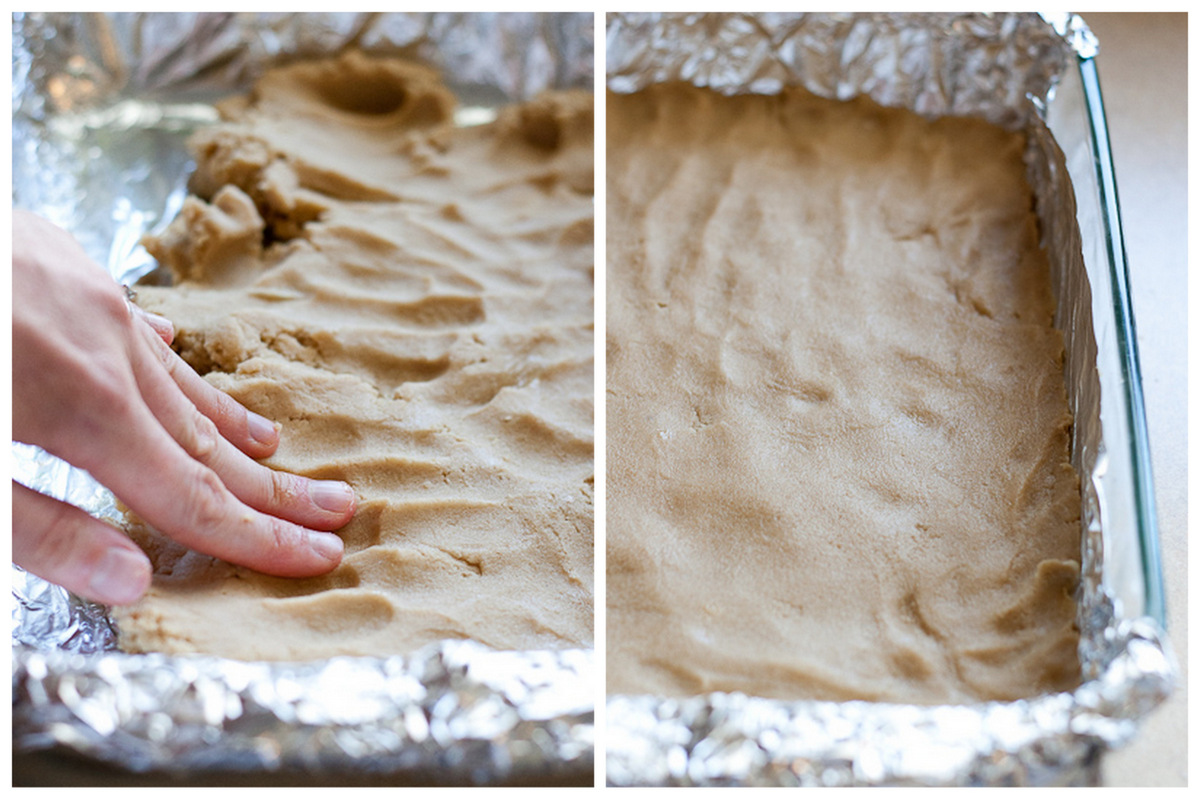
Press the dough evenly into the prepared baking dish and bake it for about 20 minutes. It should begin to turn golden brown on the edges and the middle should be set.


Tasty Kitchen Blog: Peaches and Cream Crumble Bars. Guest post by Natalie Perry of Perry's Plate, recipe submitted by TK member Courtney of Bake, Eat, Repeat.

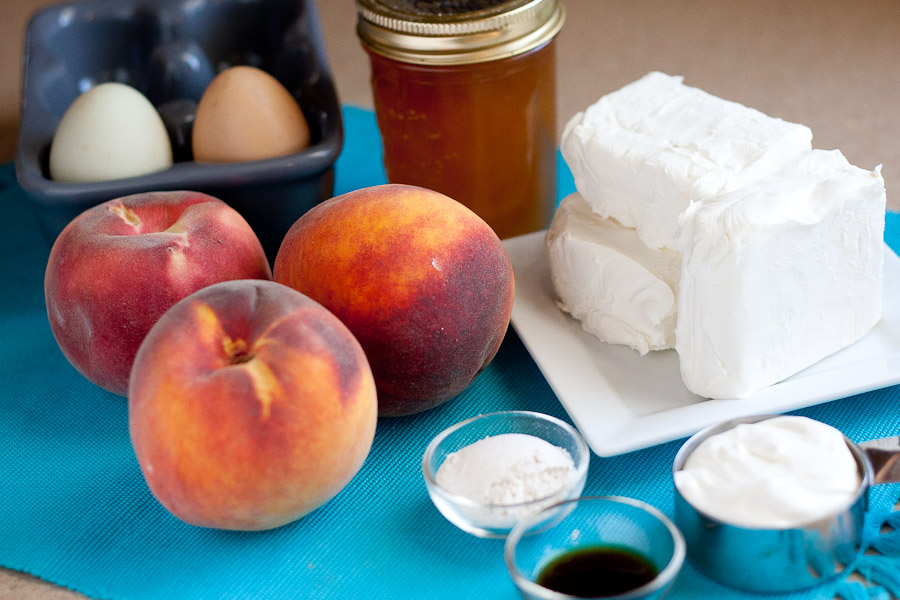
Meanwhile you can start on the other components. First, the filling. You’ll need three ripe peaches, eggs, peach jam (thanks Grandma!), cream cheese, sour cream, flour, and vanilla.

You’ll need some sugar, too. Just pretend it’s in the photo, snuggled in between the sour cream and cream cheese. Yep, right there.


Tasty Kitchen Blog: Peaches and Cream Crumble Bars. Guest post by Natalie Perry of Perry's Plate, recipe submitted by TK member Courtney of Bake, Eat, Repeat.

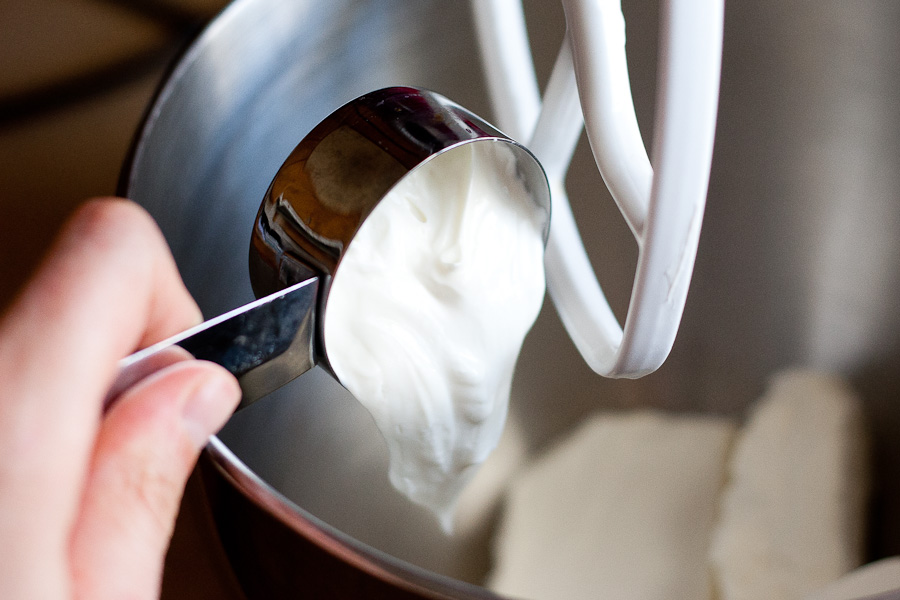
Put the cream cheese and sour cream into a mixing bowl.


Tasty Kitchen Blog: Peaches and Cream Crumble Bars. Guest post by Natalie Perry of Perry's Plate, recipe submitted by TK member Courtney of Bake, Eat, Repeat.

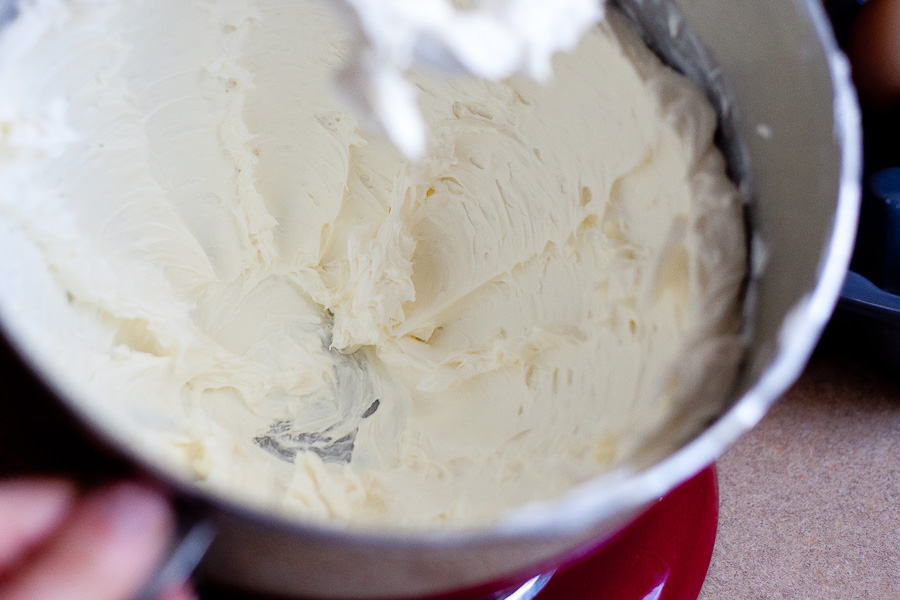
Beat the daylights out of it until you have a relatively lump-free mixture. Be sure to scrape down the sides a few times to get those tricky parts in the bottom.


Tasty Kitchen Blog: Peaches and Cream Crumble Bars. Guest post by Natalie Perry of Perry's Plate, recipe submitted by TK member Courtney of Bake, Eat, Repeat.

Add the sugar and the flour …


Tasty Kitchen Blog: Peaches and Cream Crumble Bars. Guest post by Natalie Perry of Perry's Plate, recipe submitted by TK member Courtney of Bake, Eat, Repeat.

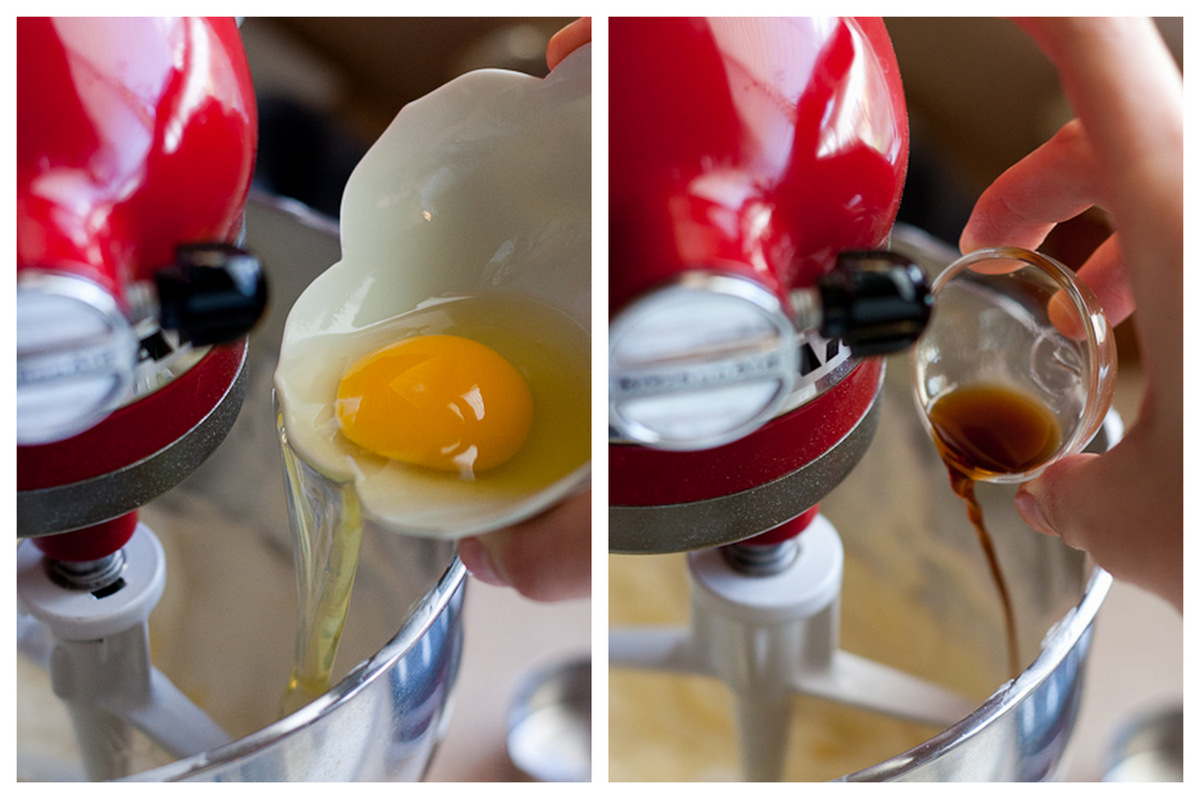
And the eggs and vanilla.


Tasty Kitchen Blog: Peaches and Cream Crumble Bars. Guest post by Natalie Perry of Perry's Plate, recipe submitted by TK member Courtney of Bake, Eat, Repeat.

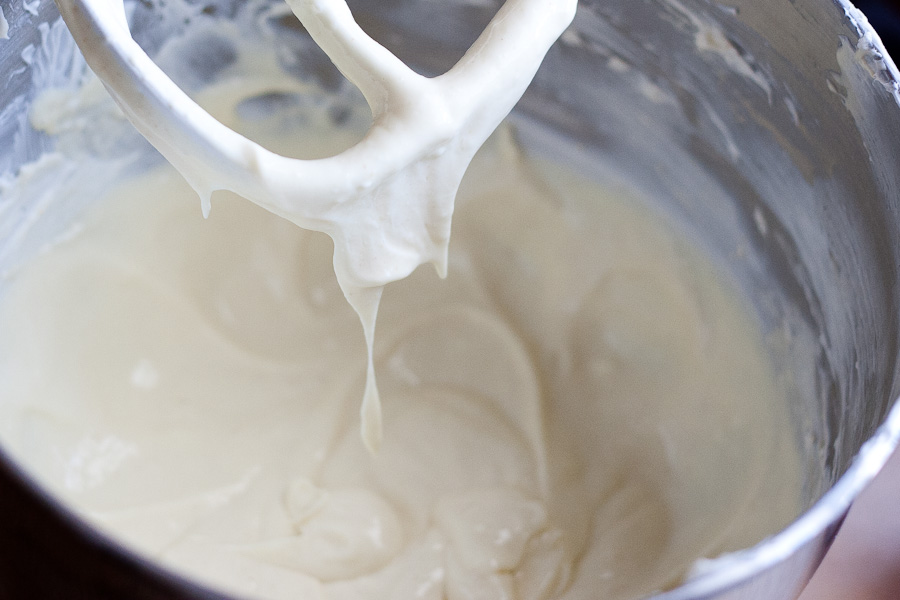
Like before, beat the daylights out of it until you have a silky-smooth batter. (Scrape down the sides again!)


Tasty Kitchen Blog: Peaches and Cream Crumble Bars. Guest post by Natalie Perry of Perry's Plate, recipe submitted by TK member Courtney of Bake, Eat, Repeat.

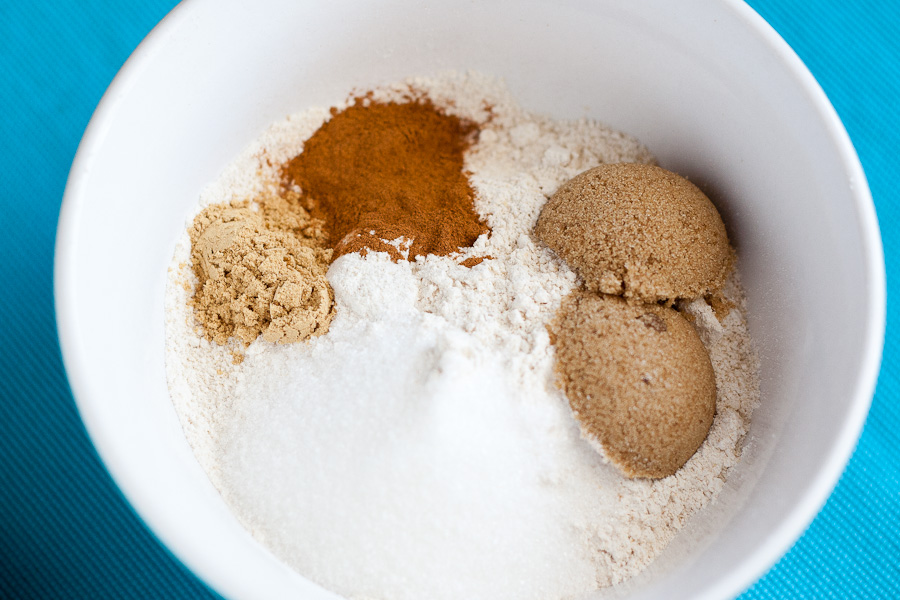
Next, let’s get the topping done. In a small bowl, add the flour, brown sugar, cinnamon, and ginger. (If you use unsalted butter, add 1/4 teaspoon of salt.)


Tasty Kitchen Blog: Peaches and Cream Crumble Bars. Guest post by Natalie Perry of Perry's Plate, recipe submitted by TK member Courtney of Bake, Eat, Repeat.

You’ll need to add a stick of melted butter to this mixture, but you might want to whisk it together first. I didn’t. My daughters (3 and 5) were glued to me asking, “CAN I HELP NOW?” “CAN I TASTE IT?” “CAN I STIR IT UP?” “WHEN ARE YOU GOING TO BE DONE?!” “CAN I HELP NOW?” And somehow I forgot to whisk it. It happens.

I think they have a built-in radar that tells them I’m making a dessert. They usually aren’t glued to me when I make dinner.


Tasty Kitchen Blog: Peaches and Cream Crumble Bars. Guest post by Natalie Perry of Perry's Plate, recipe submitted by TK member Courtney of Bake, Eat, Repeat.

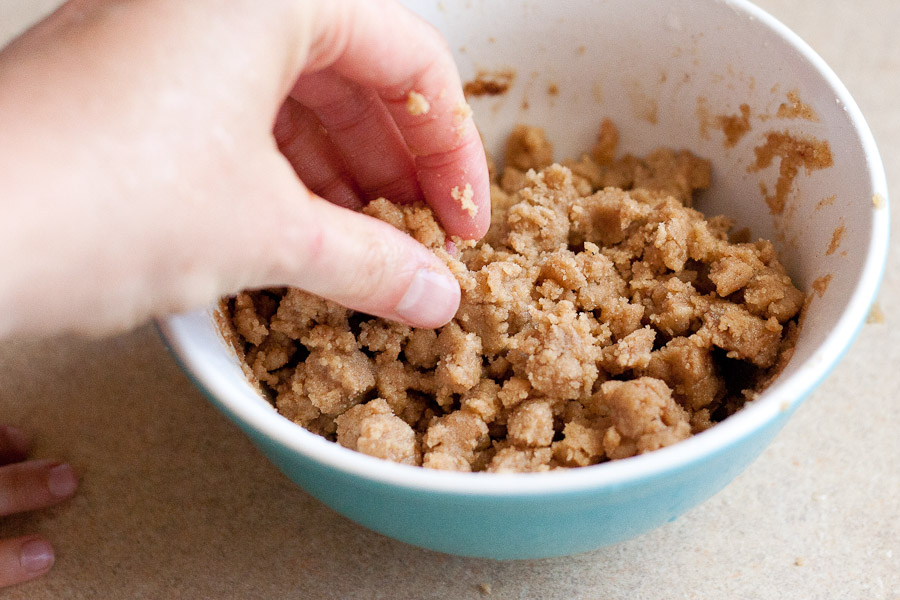
But, see? It all turned out well in the end. The crumble was wetter than I anticipated, but it was easily broken apart with my fingers.


Tasty Kitchen Blog: Peaches and Cream Crumble Bars. Guest post by Natalie Perry of Perry's Plate, recipe submitted by TK member Courtney of Bake, Eat, Repeat.

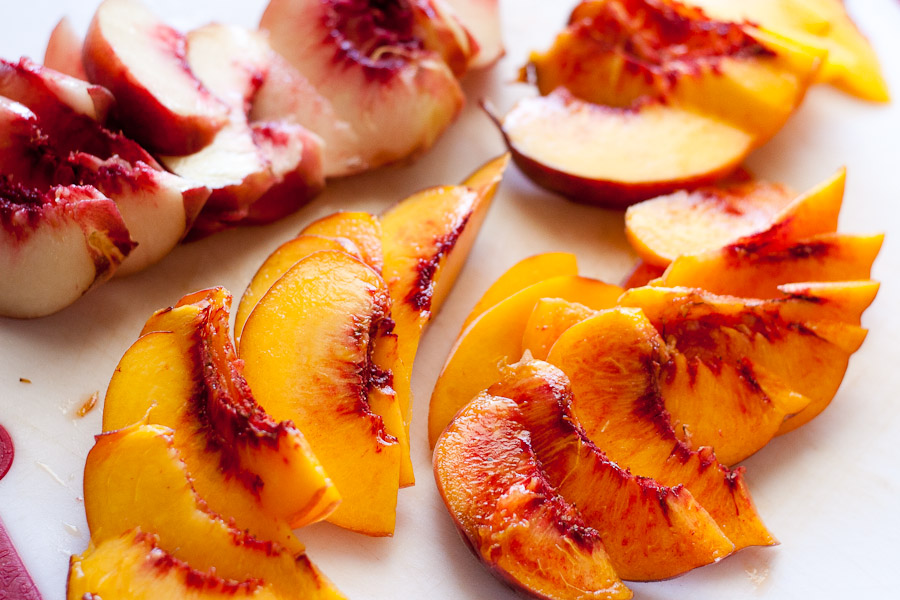
One last thing: Slice up the peaches. Aren’t they pretty?


Tasty Kitchen Blog: Peaches and Cream Crumble Bars. Guest post by Natalie Perry of Perry's Plate, recipe submitted by TK member Courtney of Bake, Eat, Repeat.

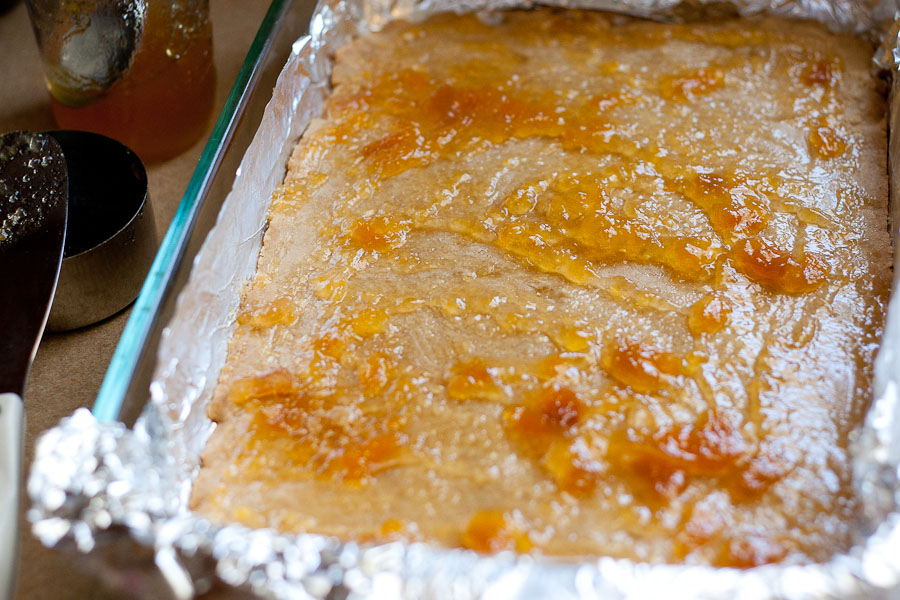
Alright. Assembly time. Grab the baked crust and smear some peach jam over it.


Tasty Kitchen Blog: Peaches and Cream Crumble Bars. Guest post by Natalie Perry of Perry's Plate, recipe submitted by TK member Courtney of Bake, Eat, Repeat.

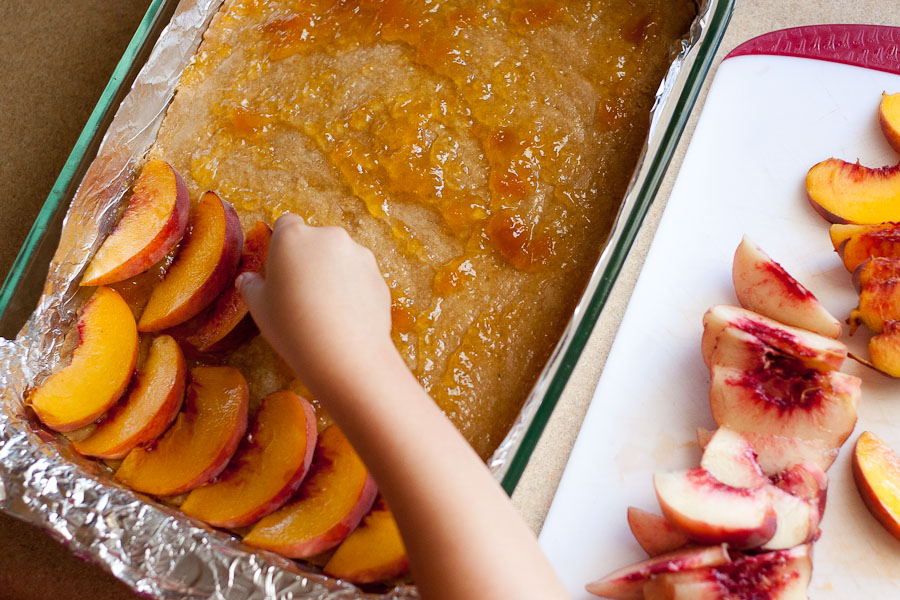
Grab some helpers (or your own two hands) and lay the peaches on top.


Tasty Kitchen Blog: Peaches and Cream Crumble Bars. Guest post by Natalie Perry of Perry's Plate, recipe submitted by TK member Courtney of Bake, Eat, Repeat.

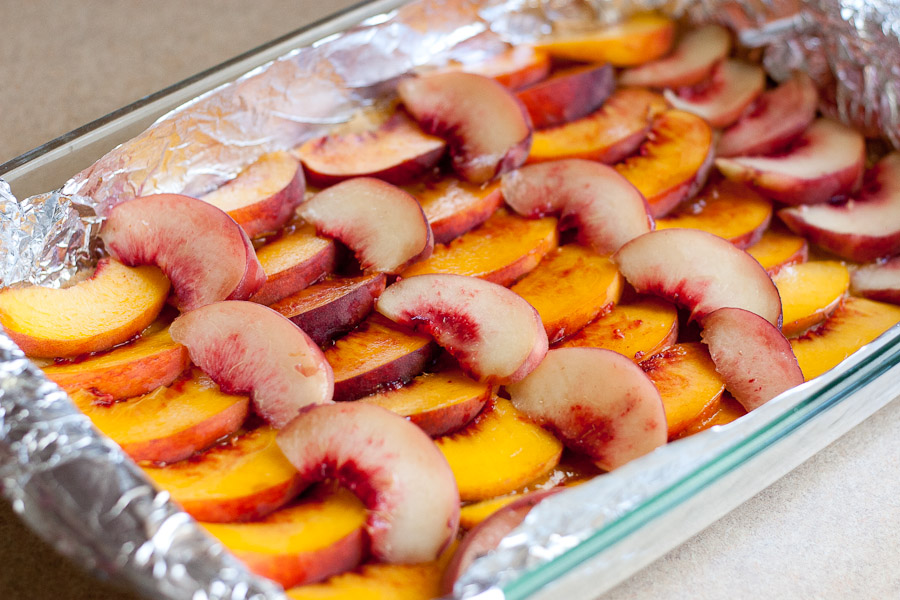
My 5-year-old enjoys lining things up in nice, even rows. (Ahem. She gets that from her mother.) This is how ours turned out. We used two yellow peaches and one white one.


Tasty Kitchen Blog: Peaches and Cream Crumble Bars. Guest post by Natalie Perry of Perry's Plate, recipe submitted by TK member Courtney of Bake, Eat, Repeat.

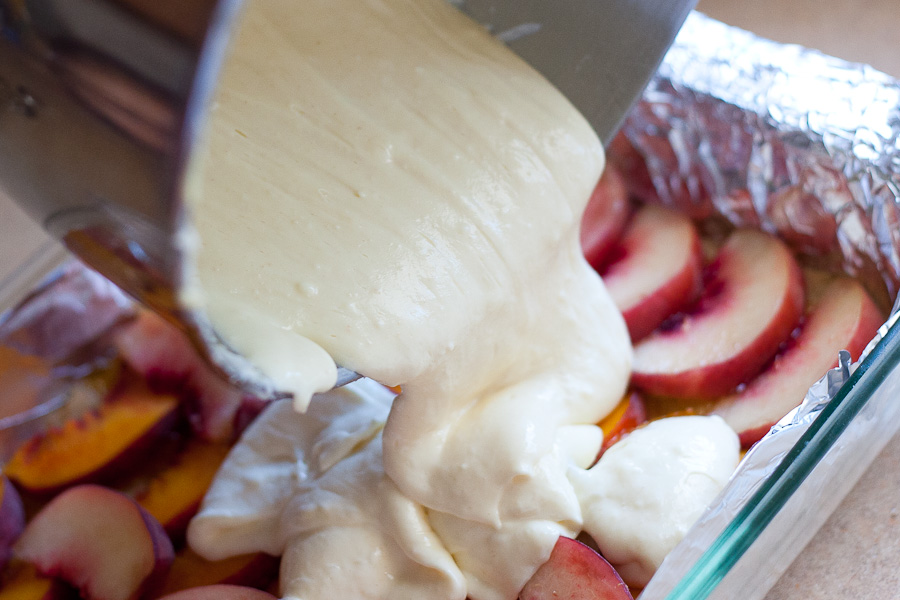
You know that batter you’d like to put your face in? Pour that over the peaches. Then lick that bowl clean. I didn’t make it into the closet in time so I had to share with my minions.


Tasty Kitchen Blog: Peaches and Cream Crumble Bars. Guest post by Natalie Perry of Perry's Plate, recipe submitted by TK member Courtney of Bake, Eat, Repeat.

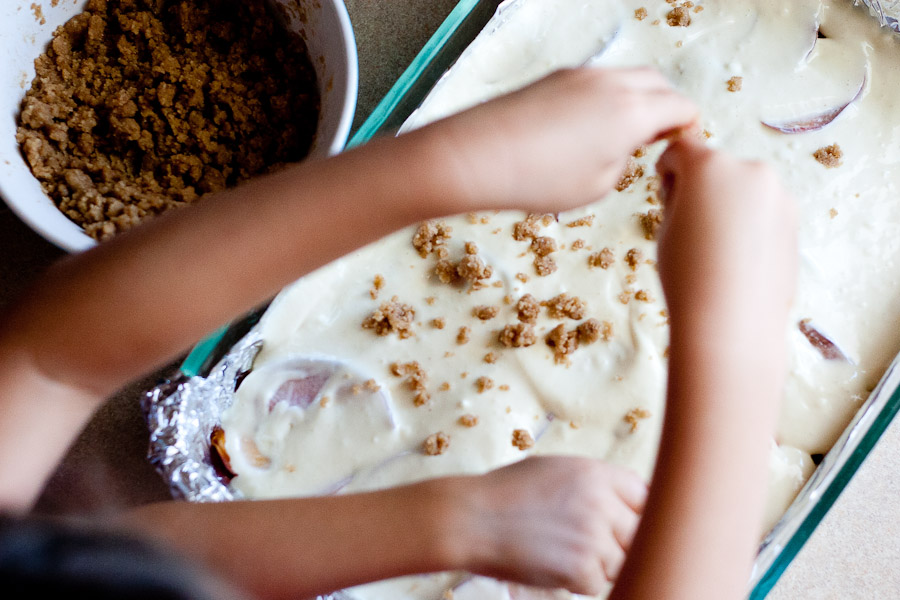
Speaking of minions, they’re awfully good at sprinkling the crumble mixture over the cheesecake batter.


Tasty Kitchen Blog: Peaches and Cream Crumble Bars. Guest post by Natalie Perry of Perry's Plate, recipe submitted by TK member Courtney of Bake, Eat, Repeat.

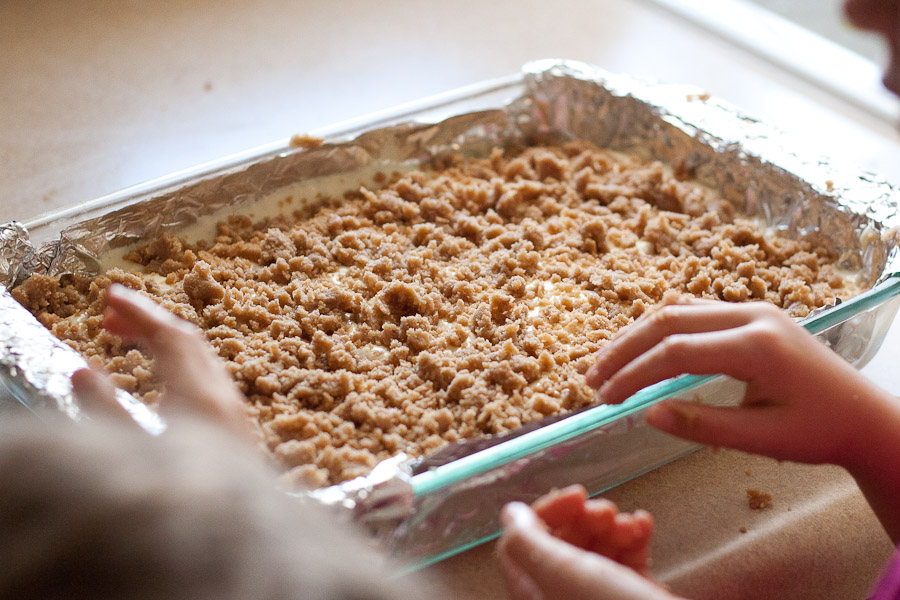
My younger one ate more than she sprinkled, but we had enough to cover the whole thing.

Time to bake! Throw it in the oven for 30-40 minutes or until the middle sets up.


Tasty Kitchen Blog: Peaches and Cream Crumble Bars. Guest post by Natalie Perry of Perry's Plate, recipe submitted by TK member Courtney of Bake, Eat, Repeat.

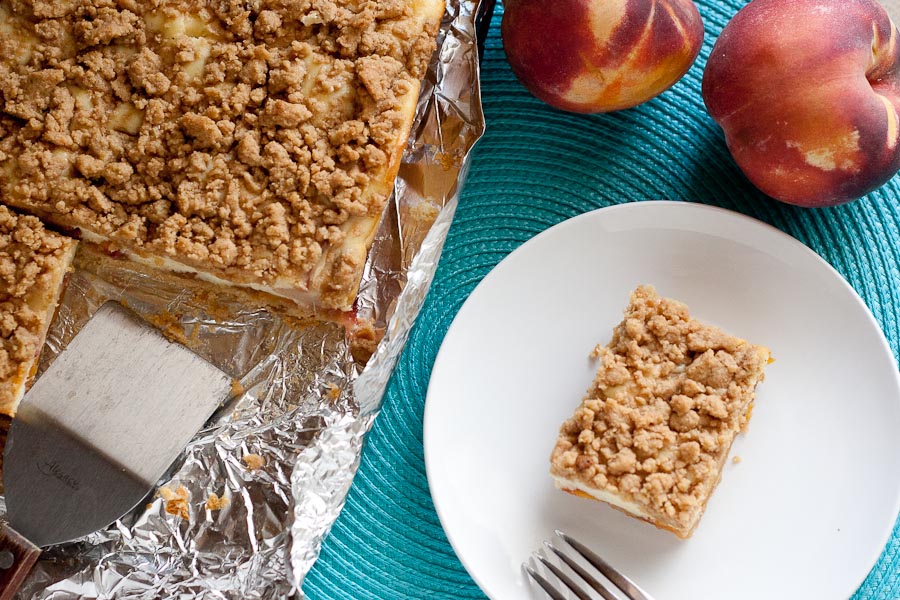
Let it cool for 15-20 minutes before you dig in. I was able to lift the foil and slide the whole thing onto a cutting board.


Tasty Kitchen Blog: Peaches and Cream Crumble Bars. Guest post by Natalie Perry of Perry's Plate, recipe submitted by TK member Courtney of Bake, Eat, Repeat.

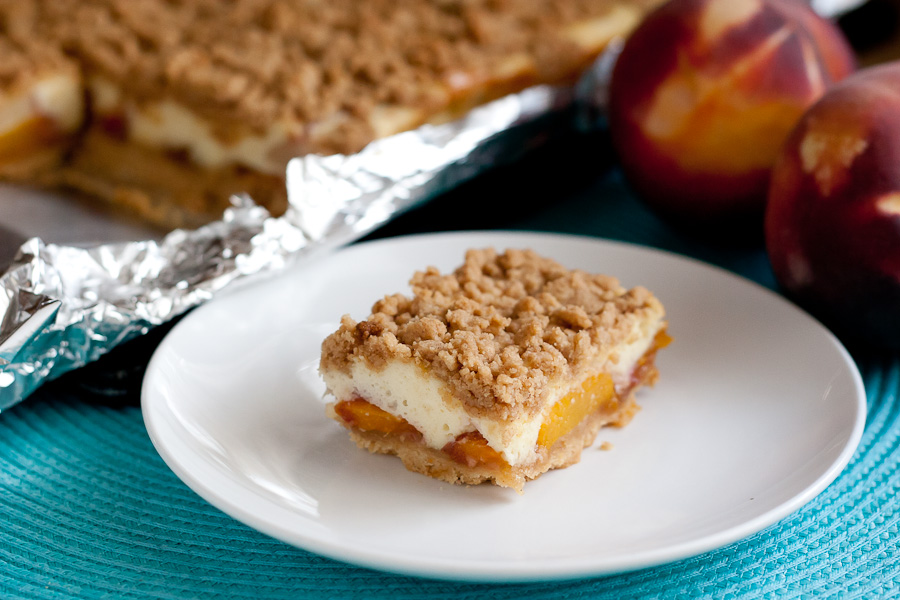
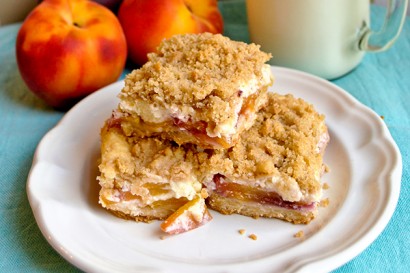
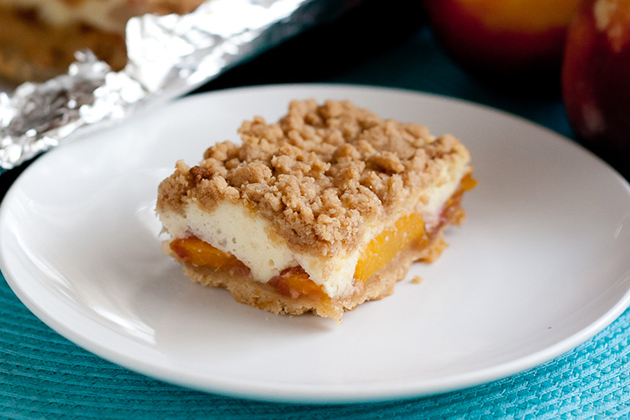
I love how beautiful the layers are in these!


Tasty Kitchen Blog: Peaches and Cream Crumble Bars. Guest post by Natalie Perry of Perry's Plate, recipe submitted by TK member Courtney of Bake, Eat, Repeat.

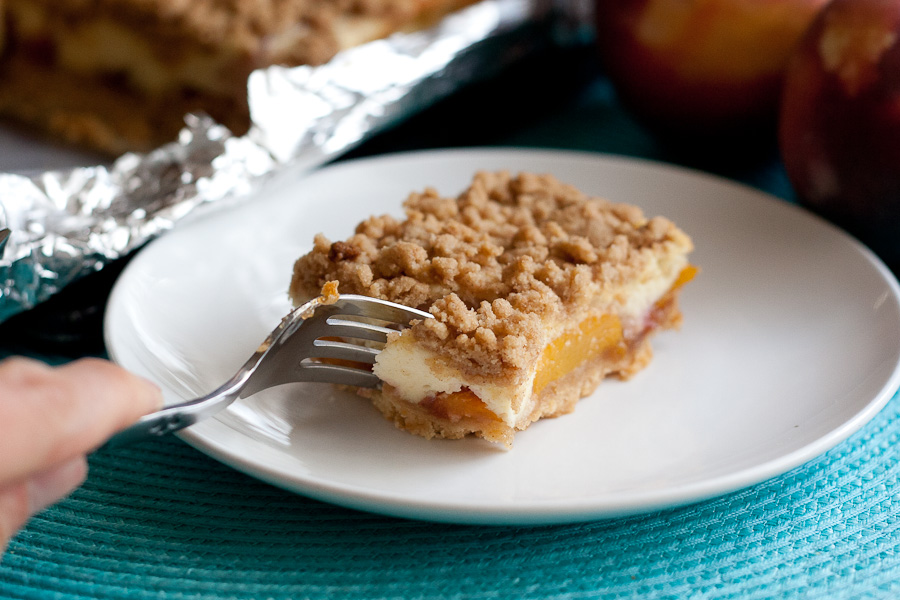
And I even liked how they tasted. Yes, even the peach-hater liked them! Like cheesecake, they get even better when they sit in the fridge and cool for several hours.

Thanks again Courtney! Be sure to check out Courtney’s TK recipe box and her recipes over on her blog, Bake, Eat, Repeat.

Recipe alterations: I replaced all of the flour with whole wheat pastry flour, reduced all of the sugars by half, used salted butter and omitted the added salt, and omitted the step of brushing the crust with melted butter. (I didn’t think that last one was necessary.)


Printable Recipe

Peaches and Cream Crumble Bars

See post on Courtney’s site!
4.75 Mitt(s) 4 Rating(s)4 votes, average: 4.75 out of 54 votes, average: 4.75 out of 54 votes, average: 4.75 out of 54 votes, average: 4.75 out of 54 votes, average: 4.75 out of 5

Prep Time:

Cook Time:

Difficulty: Easy

Servings: 24

24
x

Print Options

Page size Letter 3x5 4x6
Text Size Small Medium Large
Content Include description
Include prep time, etc.
Show image

Description

Sweet juicy peaches paired with tender shortbread, rich custard and spiced crumble. It’s summer in a bar.

Ingredients

  • FOR THE SHORTBREAD:
  • 2 sticks Unsalted Butter, Cut Into Small Chunks
  • ¼ cups Brown Sugar
  • ½ teaspoons Kosher Salt
  • 2 cups Flour
  • FOR THE FILLING:
  • 1 Tablespoon Butter
  • ½ cups Peach Jam
  • 3  Large Peaches, Pitted And Thinly Sliced
  • 12 ounces, weight Cream Cheese, Softened
  • ¼ cups Sour Cream
  • ½ cups Sugar
  • 1 Tablespoon Flour
  • 2  Eggs
  • 1 teaspoon Vanilla
  • FOR THE CRUMB TOPPING:
  • 1 cup Flour
  • ¼ cups Sugar
  • ¼ cups Brown Sugar
  • ½ teaspoons Ginger
  • 1 teaspoon Cinnamon
  • ¼ teaspoons Salt
  • 1 stick Unsalted Butter, melted

Preparation Instructions

1. For the shortbread crust: Preheat the oven to 350 F. Line a 13 x 9 inch baking dish with foil, then grease the foil on all sides. Set the dish aside. In the bowl of an electric mixer, beat the butter until it begins to soften, about 30 seconds. Add sugar and salt and beat on low speed until just combined. Add the flour and beat on low speed until incorporated then increase to high speed and beat until a cohesive dough is formed. Using your fingers, press the dough into the baking dish and bake for 20 minutes or until puffy and golden brown. When it’s done remove it from the oven and start the next step.

2. For the filling: Brush shortbread crust with 1 tablespoon of melted butter. Spread peach jam evenly over the crust, then layer with sliced peaches. To make the cream layer, put the cream cheese and sour cream in a bowl and beat on high speed until smooth. Add sugar and 1 tablespoon flour and beat another 30 seconds. Add eggs and vanilla and beat until smooth and thoroughly combined. Pour cheesecake mixture over peach slices. Set aside.

3. For the topping: In a small bowl, combine flour, sugars, ginger, cinnamon, and salt. Pour melted butter over all of it and use your fingers to mix everything together until coarse crumbles form. Sprinkle over the top of the cheesecake layer. Bake again at 350 F for 30 minutes or until crumbles are golden brown and center is set.


_______________________________________

Be sure to check out Natalie’s own beautiful food blog, Perrys’ Plate, where you can see her growing collection of lovely recipes. There’s always something new to see there. Go visit now!


Profile photo of georgiapellegrini

Strawberry Coconut Macaroons

Posted by in Step-by-Step Recipes

  I don’t have a particularly intense sweet tooth, but I do like a sweet bite once in a while. These Strawberry Coconut Macaroons from TK member Chelsy, which is slightly adapted from Smitten Kitchen, totally hit the spot. It wasn’t too sweet but definitely sweet enough and it was full of strawberry chunks and […]

Profile photo of twopeasandtheirpod

Cucumber Feta Rolls

Posted by in Step-by-Step Recipes

  I love a good Greek salad. It is one of my favorite salads to make and to order when we dine out. When I saw Lotta Maddness’s recipe for Cucumber Feta Rolls on Tasty Kitchen, I immediately thought: Genius! Why didn’t I think of that! The rolls have all of the fabulous flavors of a Greek salad, but […]

Profile photo of georgiapellegrini

Sun-dried Tomato Tuna Melts

Posted by in Step-by-Step Recipes

  Natalie from Perry’s Plate always has such wonderful recipes that spice up my life. Recently, I have been cooking just for myself and this recipe for Sun-dried Tomato Tuna Melts really made my afternoon. It is a wonderful rendition of the classic tuna melt but it is so much more than that. It’s a […]

Profile photo of Erica Lea

Refrigerator Pickles

Posted by in Step-by-Step Recipes

  When it comes to pickles, I’m just a tad finicky. Sorry to all you sweet pickle lovers, but when talking about cucumbers, I like them dilly, salty and sour. Hold the yellow 5 and polysorbate 80. Rebecca’s recipe for Homemade Claussen Knock-Off Pickles seemed perfect to me: natural ingredients and (best of all) no canning […]