The Pioneer Woman Tasty Kitchen
Profile photo of missamy

Flourless Chocolate Brownie with Warm Dark Chocolate Sauce

Posted by in Baking, Step-by-Step Recipes

Tasty Kitchen Blog: Flourless Chocolate Brownie. Guest post and recipe from Amy Johnson of She Wears Many Hats, adapted from Nigella Lawson.

 
I don’t think I’ve ever met a brownie that I didn’t like, but I have to say that I was wondering how this flourless chocolate brownie was going to turn out. Since I found the original recipe in Nigella’s Nigella Express, I was a little more confident to try it out. That girl knows her chocolate.

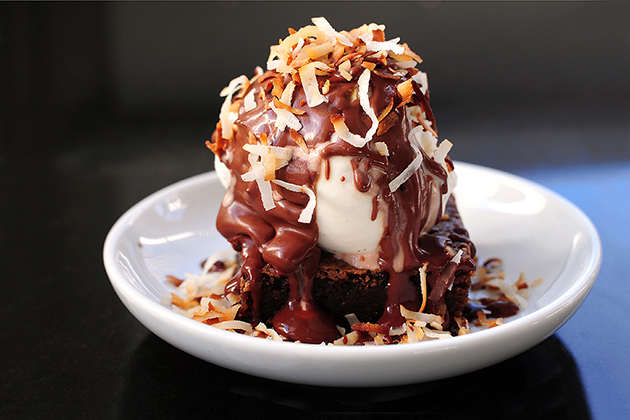
I made a few changes, but followed her basic outline, and was more than pleased. And as if a brownie alone wasn’t enough, accompanying the chocolatey goodness is a scoop of vanilla ice cream, with a warm dark chocolate sauce drizzled over top, all sprinkled with toasted coconut. Ultimate brownie perfection. Yes, this Flourless Chocolate Brownie with Warm Dark Chocolate Sauce is one of those cases where “less” definitely means more.

Ready to see how to make your own ultimate brownie at home?


Tasty Kitchen Blog: Flourless Chocolate Brownie. Guest post and recipe from Amy Johnson of She Wears Many Hats, adapted from Nigella Lawson.

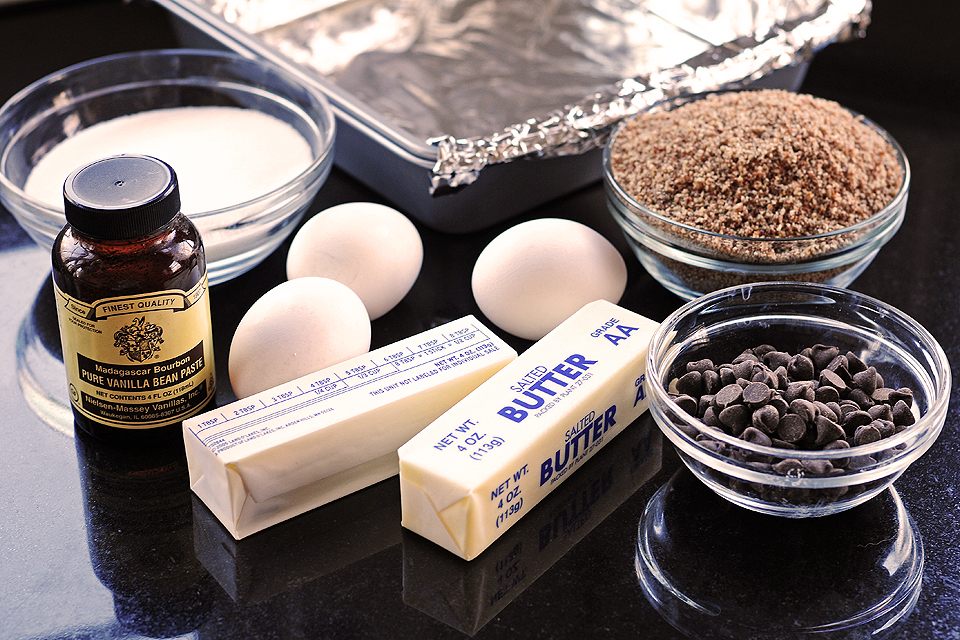
For the brownies, you’ll need: semi-sweet chocolate chips, butter, sugar, vanilla, pecan meal (or almond meal) and eggs. Of course these optional toppings are nice too: vanilla ice cream, toasted coconut, your favorite nut or sprinkles.

To make your life a little easier, go ahead and line a 9×9″ baking pan with aluminum foil. It makes removing and cutting the brownies so much easier later on.


Tasty Kitchen Blog: Flourless Chocolate Brownie. Guest post and recipe from Amy Johnson of She Wears Many Hats, adapted from Nigella Lawson.

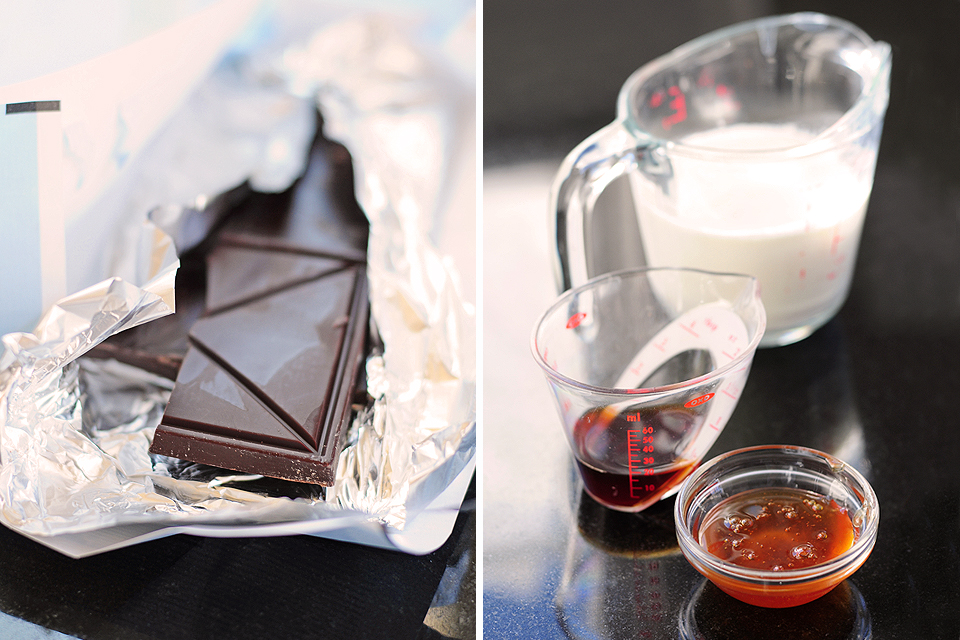
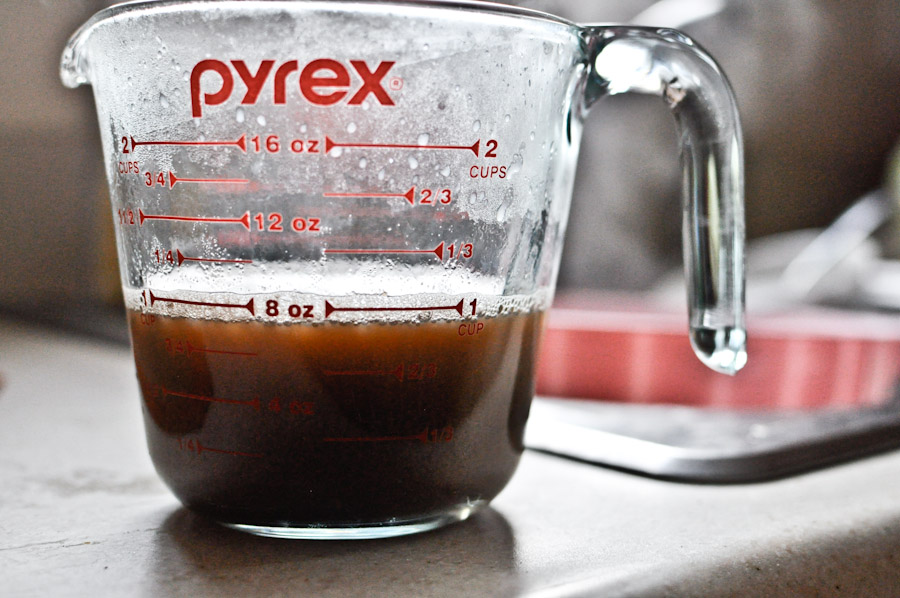
The dark chocolate sauce is simple. It calls for good dark chocolate, heavy cream, strong coffee or espresso, and honey. This sauce is truly a dark chocolate sauce, so if you’re not a dark chocolate fan, just substitute semi-sweet chocolate.


Tasty Kitchen Blog: Flourless Chocolate Brownie. Guest post and recipe from Amy Johnson of She Wears Many Hats, adapted from Nigella Lawson.

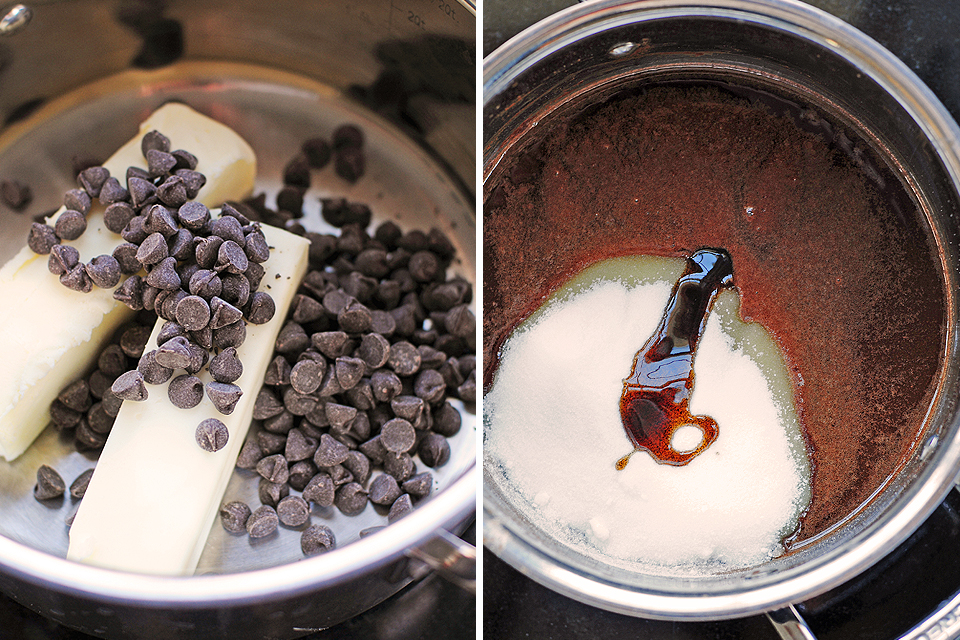
Let’s start making the brownies. Over medium-low heat, gradually melt the chocolate and butter, and stir until smooth. Remove from the heat and add the sugar and vanilla, and combine well.


Tasty Kitchen Blog: Flourless Chocolate Brownie. Guest post and recipe from Amy Johnson of She Wears Many Hats, adapted from Nigella Lawson.

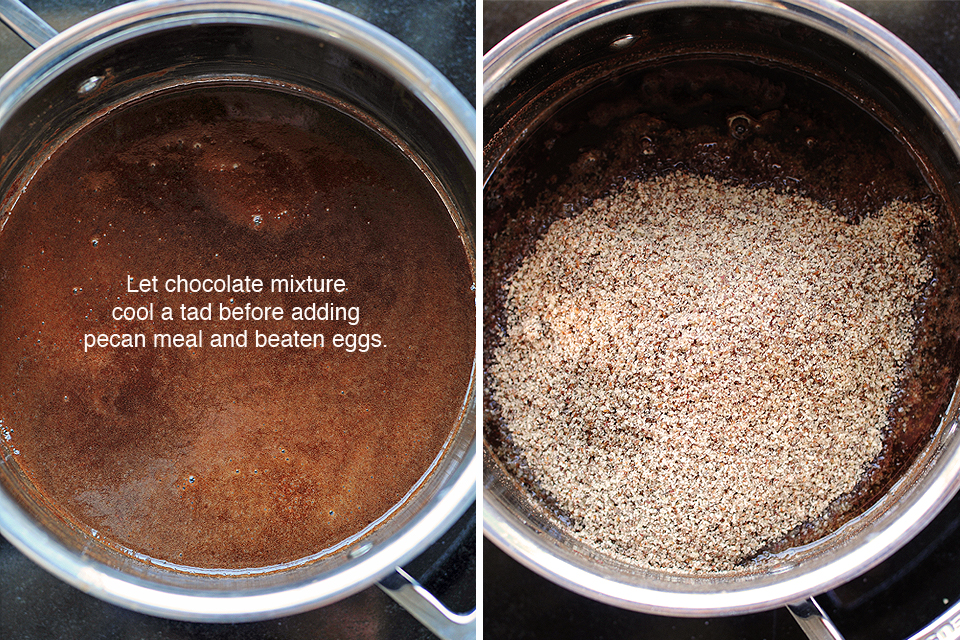
To avoid scrambling the eggs, let the chocolate mixture cool a tad, then add the pecan meal.


Tasty Kitchen Blog: Flourless Chocolate Brownie. Guest post and recipe from Amy Johnson of She Wears Many Hats, adapted from Nigella Lawson.

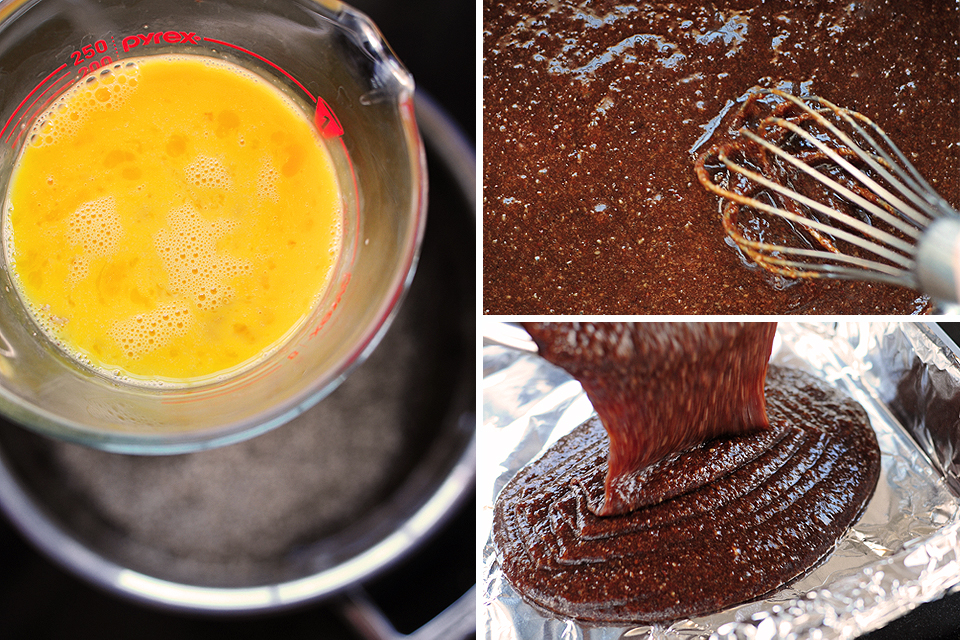
The beaten eggs go in next. Mix well and pour into a lined (or well-greased) 9×9″ baking pan. See the full recipe for baking temperature and times.


Tasty Kitchen Blog: Flourless Chocolate Brownie. Guest post and recipe from Amy Johnson of She Wears Many Hats, adapted from Nigella Lawson.

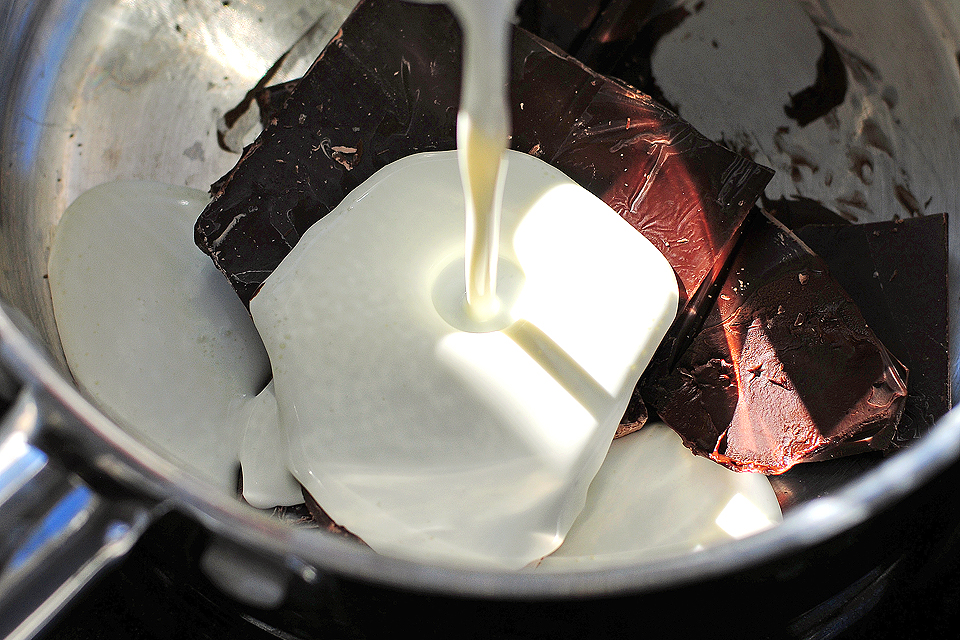
While brownies are baking, prepare the chocolate sauce. Add the dark chocolate and cream to a heavy-bottomed sauce pan.


Tasty Kitchen Blog: Flourless Chocolate Brownie. Guest post and recipe from Amy Johnson of She Wears Many Hats, adapted from Nigella Lawson.

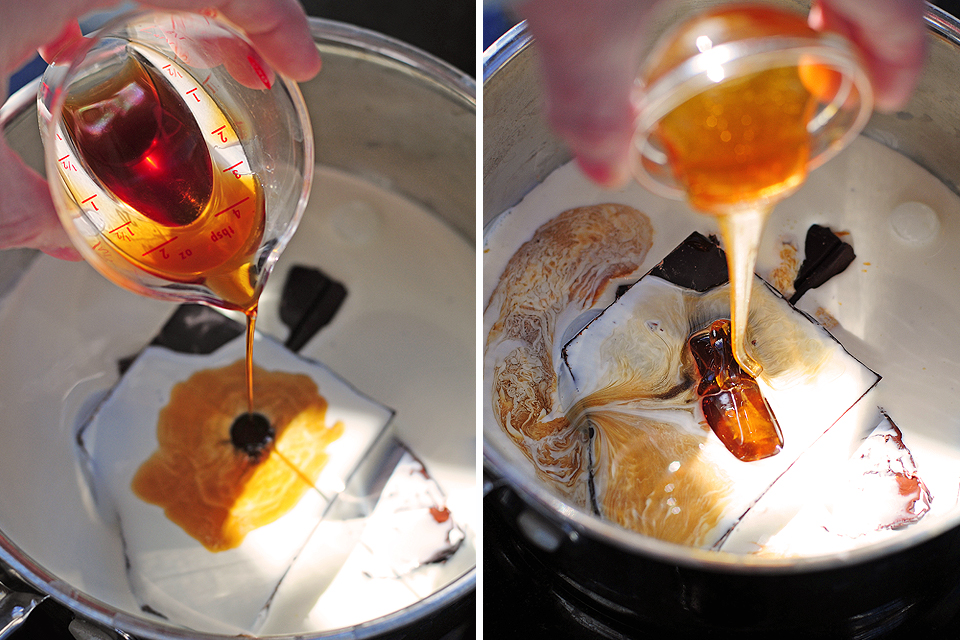
Pour in the coffee and honey, and melt over low heat.


Tasty Kitchen Blog: Flourless Chocolate Brownie. Guest post and recipe from Amy Johnson of She Wears Many Hats, adapted from Nigella Lawson.

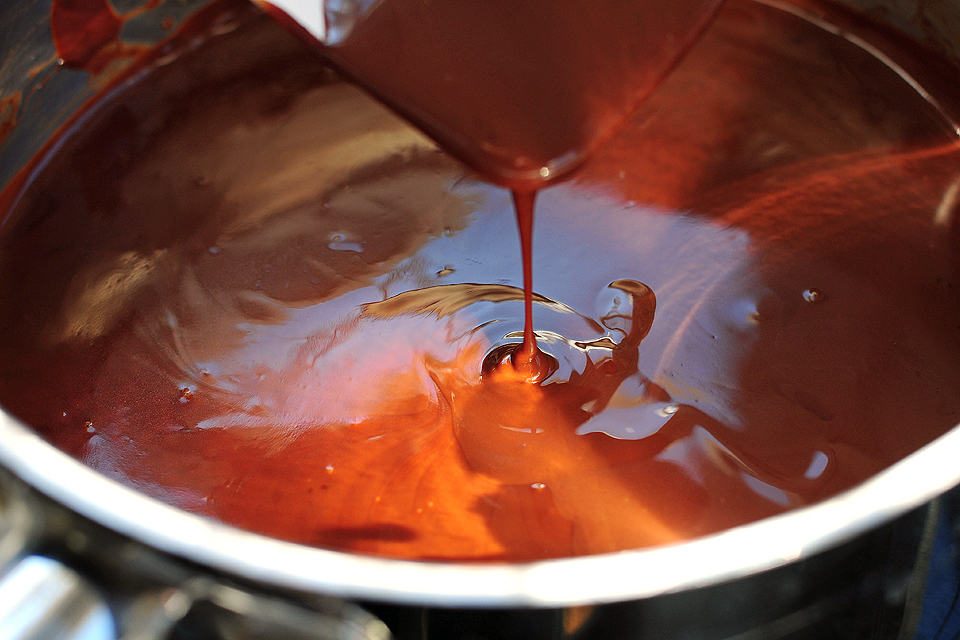
Whisk until smooth and keep warm until ready to serve.


Tasty Kitchen Blog: Flourless Chocolate Brownie. Guest post and recipe from Amy Johnson of She Wears Many Hats, adapted from Nigella Lawson.

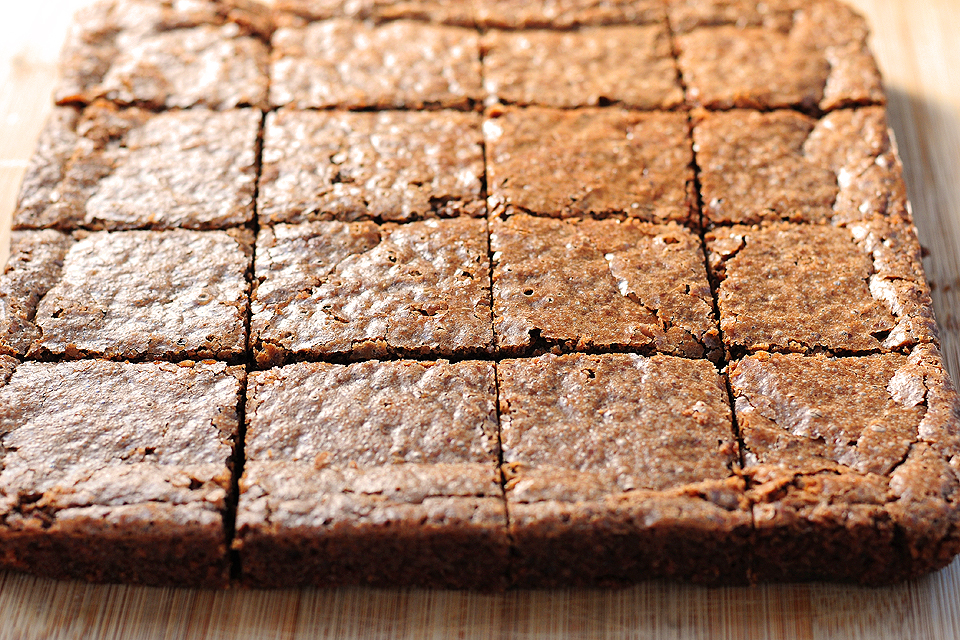
Once brownies are done cooking, let cool for a few minutes in pan, then remove to cut into even pieces.


Tasty Kitchen Blog: Flourless Chocolate Brownie. Guest post and recipe from Amy Johnson of She Wears Many Hats, adapted from Nigella Lawson.

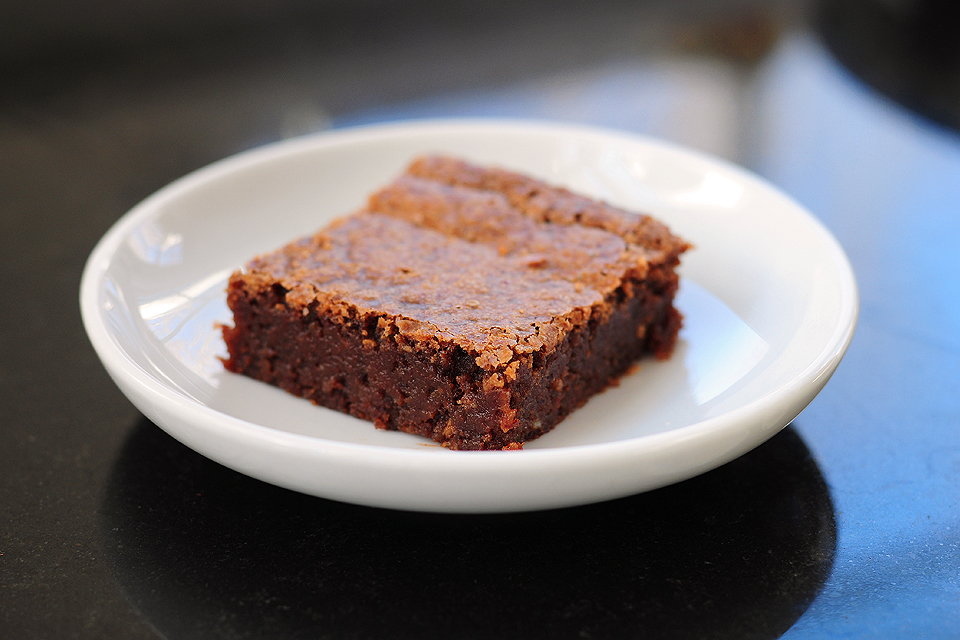
Yum, but doesn’t it look so lonely?

I think so.


Tasty Kitchen Blog: Flourless Chocolate Brownie. Guest post and recipe from Amy Johnson of She Wears Many Hats, adapted from Nigella Lawson.

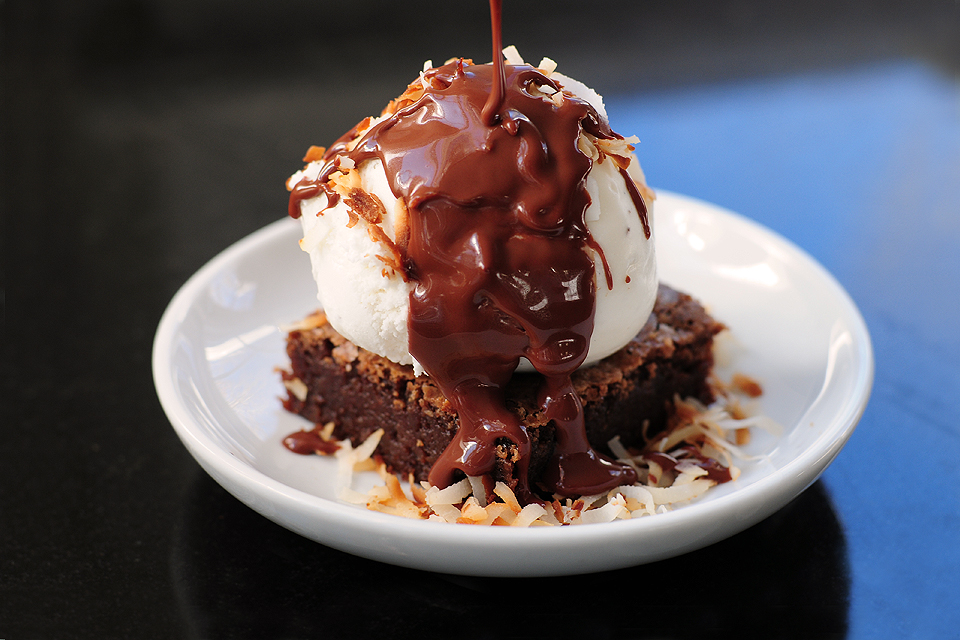
Top with a scoop of ice cream, maybe a sprinkling of toasted coconut, and a drizzling of the Warm Dark Chocolate Sauce.


Tasty Kitchen Blog: Flourless Chocolate Brownie. Guest post and recipe from Amy Johnson of She Wears Many Hats, adapted from Nigella Lawson.

Sprinkle with more toasted coconut or your favorite topping and enjoy!

I’ll be using this recipe over and over again. Oh, I almost forgot, it’s gluten-free too. If you’re not gluten-free yourself, be sure to share this with your gluten-free friends. Eating gluten-free or not, it won’t disappoint.


Printable Recipe

Flourless Chocolate Brownie with Warm Dark Chocolate Sauce

See post on missamy’s site!
5.00 Mitt(s) 1 Rating(s)1 vote, average: 5.00 out of 51 vote, average: 5.00 out of 51 vote, average: 5.00 out of 51 vote, average: 5.00 out of 51 vote, average: 5.00 out of 5

Prep Time:

Cook Time:

Difficulty: Easy

Servings: 16

16
x

Print Options

Page size Letter 3x5 4x6
Text Size Small Medium Large
Content Include description
Include prep time, etc.
Show image

Description

A decadent flourless chocolate brownie made with pecan meal, topped with goodness.

Ingredients

  • FOR THE BROWNIE:
  • 10 ounces, weight Semi-Sweet Chocolate Chips
  • 1 cup Butter (salted)
  • 1 cup Sugar
  • 2 teaspoons Vanilla
  • 1-¾ cup Pecan Meal (almond Meal May Be Substituted)
  • 3 whole Large Eggs, Beaten
  • FOR THE WARM DARK CHOCOLATE SAUCE:
  • 3 ounces, weight Dark Chocolate (I Used 70% Cocoa, But A Semi-sweet Would Be Nice Too, If You're Not A Dark Chocolate Fan.)
  • ½ cups Heavy Cream
  • 1 Tablespoon Strong Coffee
  • 1 Tablespoon Honey
  • FOR THE OPTIONAL TOPPINGS:
  • Toasted Coconut
  • Vanilla Ice Cream

Preparation Instructions

For the brownie:

Preheat oven to 325°F and line a 9×9″ baking pan with aluminum foil, or coat with butter or cooking spray.

In a saucepan over medium-low heat, gradually melt the chocolate with the butter, stirring until smooth. Remove from heat, stir in the sugar and vanilla, and allow mixture to cool a little.

Whisk in the pecan meal and beaten eggs until combined well.

Pour mixture into a baking pan and bake for 25-30 minutes.

Let cool for a few minutes before cutting.

For the warm dark chocolate sauce:

Add all ingredients to a heavy-bottomed saucepan, and heat over low to melt chocolate and warm mixture. Whisk until smooth.

Serve warm. Refrigerate any leftovers; re-warm stovetop or in microwave.

Optional: top with vanilla ice cream, toasted coconut or other favorite toppings.

(Recipe adapted from Nigella Lawson’s Nigella Express.)


_______________________________________

Amy Johnson is a blogger who writes about food, travel, the home (both inside and out), and various observations and random musings about anything and everything. Visit her blog She Wears Many Hats for a dose of deliciousness, practicality, hilarity, or just plain fun. She lives in South Carolina with her husband and two children.


Profile photo of HowSweetEats

Homemade Refried Beans

Posted by in Step-by-Step Recipes

Tasty Kitchen Blog: Homemade Refried Beans. Guest post by Jessica Merchant of How Sweet It Is, recipe submitted by TK member Julie of Table for Two.

 
If I could, I’d gladly eat Mexican food for the rest of my life. I’m pretty sure that I will never, ever, ever get sick of warm and fluffy tortillas, spiced chicken, melted cheese, warm chips dipped in warmer salsa, guacamole bowls the size of my head and ladlefuls of queso. Oh and margaritas! Who could forget margaritas? I’d like one right now, please and thank you.

Growing up, we ate tacos at least one night a week—many times twice with some makeshift leftovers. It wasn’t until I reached my teens that I discovered my love for refried beans, and this is years after my mom would heat a huge pot on the stove for herself that the rest of us wouldn’t touch. I’d ask her how on earth she could eat something that looks like … THAT … and then she’d stare at me like I had four heads.

I’m so glad I was wrong about that.

Obviously, the minute I saw Table for Two’s recipe for said beans, I bookmarked it that day. It fit in perfectly with our weekly Mexican feast (I mean, I can’t help but carry on that tradition) and is so simple that I can barely stand it.


Tasty Kitchen Blog: Homemade Refried Beans. Guest post by Jessica Merchant of How Sweet It Is, recipe submitted by TK member Julie of Table for Two.

Here’s all your need! Pinto beans, salt, pepper, an onion, red pepper flakes, paprika and brown sugar. Oh and tons of water. About 3 quarts to be exact.


Tasty Kitchen Blog: Homemade Refried Beans. Guest post by Jessica Merchant of How Sweet It Is, recipe submitted by TK member Julie of Table for Two.

The first step—soaking the beans overnight—is optional. I know, I know. Sometimes it’s difficult to remember to do such things at night when you really just want to smash your head onto your pillow and watch the four episodes of Friends on Nikelodeon. I get it! If you forget or simply don’t want to soak the beans, no worries. You will just cook them slightly longer and I’ll tell you more about that later. Whether you soak them or not, give them a really great rinse. K?


Tasty Kitchen Blog: Homemade Refried Beans. Guest post by Jessica Merchant of How Sweet It Is, recipe submitted by TK member Julie of Table for Two.

Next, throw your beans in a large pot and add 3 quarts (a little more or less is fine) of water. The key is to have about 3-4 inches of water above the beans. If you are a nerd like me, you might measure it with a ruler. If you are cool and don’t measure, I wish we were friends.


Tasty Kitchen Blog: Homemade Refried Beans. Guest post by Jessica Merchant of How Sweet It Is, recipe submitted by TK member Julie of Table for Two.

Bring the beans to a boil, then reduce to a simmer. If you soaked your beans overnight, you are going to cook them for 1 1/2 hours. If you didn’t soak the beans, you are going to tack another hour on to the cooking time for a total of 2 1/2 hours. I did not cover my pot o’ beans, FYI. I’m sure it would be fine if you did. Just make sure to check them periodically and give them a stir.


Tasty Kitchen Blog: Homemade Refried Beans. Guest post by Jessica Merchant of How Sweet It Is, recipe submitted by TK member Julie of Table for Two.

This part is important! Before draining your beans, reserve 1 cup of liquid and set it aside. And I mean before you drain your beans. Because, uh, someone I know once drained the beans, pouring all the delicious liquid down the sink. I don’t know who would do such a thing.


Tasty Kitchen Blog: Homemade Refried Beans. Guest post by Jessica Merchant of How Sweet It Is, recipe submitted by TK member Julie of Table for Two.

After reserving the liquid, drain the beans, then throw them back in the pot and set them aside for a few minutes.


Tasty Kitchen Blog: Homemade Refried Beans. Guest post by Jessica Merchant of How Sweet It Is, recipe submitted by TK member Julie of Table for Two.

Grab a skillet and saute your chopped onion, paprika (I used smoked paprika), brown sugar and red pepper flakes until soft, about 5 minutes.


Tasty Kitchen Blog: Homemade Refried Beans. Guest post by Jessica Merchant of How Sweet It Is, recipe submitted by TK member Julie of Table for Two.

Add the contents of that skillet to the big pot of beans. Oh yes.


Tasty Kitchen Blog: Homemade Refried Beans. Guest post by Jessica Merchant of How Sweet It Is, recipe submitted by TK member Julie of Table for Two.

And add the reserved liquid too.


Tasty Kitchen Blog: Homemade Refried Beans. Guest post by Jessica Merchant of How Sweet It Is, recipe submitted by TK member Julie of Table for Two.

Next comes the mashing of the beans. To begin, I used a potato masher to smash everything together. You can also use a pastry blender or heck, even a few forks. That will give you a good arm workout, but it will work.


Tasty Kitchen Blog: Homemade Refried Beans. Guest post by Jessica Merchant of How Sweet It Is, recipe submitted by TK member Julie of Table for Two.

After mashing the beans, I went to town with my immersion blender. This gave the beans a really creamy texture, so if you prefer a more rustic mix, continue mashing with your tool of choice. Additionally, if you do not have an immersion blender, an electric hand mixer also work, though it didn’t smoothen the beans out quite as much. Don’t freak if you can’t get the beans super creamy. They will still be delicious.

At this time, you also want to take a few tastes of your beans. They will taste pretty bland since we haven’t added any salt, so begin with an amount you feel comfortable with. The original recipe called for 4 tablespoons, but I began with 1 teaspoon and got away with about 1 tablespoon of salt for the whole pot. I also think this had to do with my use of the smoked paprika, as well as the pinch of salt I added to my sauteing onions.


Tasty Kitchen Blog: Homemade Refried Beans. Guest post by Jessica Merchant of How Sweet It Is, recipe submitted by TK member Julie of Table for Two.

After seasoning, scoop the beans into a bowl (or your mouth) for easier consumption. Top with your favorites, like cheese, green onions and cilantro.


Tasty Kitchen Blog: Homemade Refried Beans. Guest post by Jessica Merchant of How Sweet It Is, recipe submitted by TK member Julie of Table for Two.

Throw on burritos, tacos, nachos or salads. Even use as a delicious dip for blue corn chips! Die and go to heaven. These are fabulous.

Thanks so much to Julie for the recipe! Be sure to check out her blog, Table for Two, where she posts some of the most delicious comfort food I’ve ever seen.


Printable Recipe

Homemade Refried Beans

See post on Table for Two’s site!
2.20 Mitt(s) 5 Rating(s)5 votes, average: 2.20 out of 55 votes, average: 2.20 out of 55 votes, average: 2.20 out of 55 votes, average: 2.20 out of 55 votes, average: 2.20 out of 5

Prep Time:

Cook Time:

Difficulty: Easy

Servings: 10

10
x

Print Options

Page size Letter 3x5 4x6
Text Size Small Medium Large
Content Include description
Include prep time, etc.
Show image

Description

Homemade refried beans: you won’t ever go back to the canned stuff!

Ingredients

  • 2-½ cups Dry Pinto Beans
  • 3 quarts Water
  • 1  Onion, Chopped
  • ½ Tablespoons Red Pepper Flakes, Or More To Taste
  • ½ Tablespoons Paprika
  • 2 Tablespoons Light Brown Sugar
  • 4 Tablespoons Salt, Or As Needed

Preparation Instructions

1. If possible, soak pinto beans overnight. This will cut down your cooking time a lot. If not, it’s okay. Instructions are the same as below.
2. Rinse the beans to get off any dirt.
3. Add the beans to a pot and cover with the water. Make sure there is at least 3-4 inches of water above the beans. Cook the beans for 2 1/2 hours, about 1 1/2 hours for pre-soaked beans.
4. Once the beans are cooked, reserve 1 cup of the water, then drain the rest. Set aside.
5. In a skillet, saute the onions, red pepper flakes, paprika, and brown sugar for about 5 minutes. Add this to the pot where the beans are and add the reserved cup of water.
6. Using an immersion blender, lightly blend the beans until they’re the consistency you want. If you don’t have an immersion blender, you can use a pastry blender (like I did). It gives a coarser consistency than the immersion blender since it’s harder to get every bean.
7. Season with salt as needed. Keep tasting it occasionally. This is also where you can add more red pepper flakes if desired.
8. Serve immediately.


_______________________________________

Jessica Merchant is a personal trainer turned food writer and blogger. Her blog, How Sweet Eats, is where she proclaims her love for all things sweet, all things bacon, and everything else in between. She works her magic in her Pittsburgh kitchen, which she shares with her husband of 2 years.


Profile photo of Laurie - Simply Scratch

Creamy Penne with Blue Cheese Sauce

Posted by in Step-by-Step Recipes

Tasty Kitchen Blog: Creamy Penne with Blue Cheese, Arugula and Toasted Walnuts. Guest post by Laurie McNamara of Simply Scratch, recipe submitted by TK member Bev Weidner of Bev Cooks.

 
I was on the hunt for a recipe. I was having a good friend over for lunch and it had to be a recipe that didn’t take long to whip up. Bev Weidner’s (Tasty Kitchen member Bev Cooks) recipe for Creamy Penne with Blue Cheese, Arugula and Toasted Walnuts just about stopped me in my tracks. Actually that’s exactly what it did. While perusing through the many wonderful Tasty Kitchen recipes looking for a dish that had pizzazz and that I could make super fast, my eyes instantly locked on Bev’s recipe. With ingredients like penne, blue cheese and toasted walnuts in the title, how could I go wrong?
 
I was happy to see I had pretty much all the ingredients already in my pantry and fridge. After a quick trip to the grocery store for fresh arugula, I was off to submerge myself in some blue cheese laden pasta!
 
If you’re a huge blue cheese fan (like me), you’ll just love Bev’s recipe!


Tasty Kitchen Blog: Creamy Penne with Blue Cheese, Arugula and Toasted Walnuts. Guest post by Laurie McNamara of Simply Scratch, recipe submitted by TK member Bev Weidner of Bev Cooks.

I had no idea you could make a pasta sauce out of blue cheese but after making Bev’s recipe, I’m now a believer and an obsessed fan. I about fell over with how easy this was to whip up. There is minimal prep work so that meant I had it on our plates with a glorious forkful in our mouths in 20 minutes flat.


Tasty Kitchen Blog: Creamy Penne with Blue Cheese, Arugula and Toasted Walnuts. Guest post by Laurie McNamara of Simply Scratch, recipe submitted by TK member Bev Weidner of Bev Cooks.

In a small dry pan over medium heat, slowly toast the walnuts until fragrant.


Tasty Kitchen Blog: Creamy Penne with Blue Cheese, Arugula and Toasted Walnuts. Guest post by Laurie McNamara of Simply Scratch, recipe submitted by TK member Bev Weidner of Bev Cooks.

Remove, coarsely chop and set aside. 


Tasty Kitchen Blog: Creamy Penne with Blue Cheese, Arugula and Toasted Walnuts. Guest post by Laurie McNamara of Simply Scratch, recipe submitted by TK member Bev Weidner of Bev Cooks.

Into a large pot of boiling water, add about a half pound of penne. Cook as the directed on the package. While the pasta cooks, go ahead and get going on the sauce.


Tasty Kitchen Blog: Creamy Penne with Blue Cheese, Arugula and Toasted Walnuts. Guest post by Laurie McNamara of Simply Scratch, recipe submitted by TK member Bev Weidner of Bev Cooks.

Melt the butter into a small sauce pan. Add in the milk, blue cheese and season with salt and black pepper. Whisk until all the ingredients come together and start to bubble. 


Tasty Kitchen Blog: Creamy Penne with Blue Cheese, Arugula and Toasted Walnuts. Guest post by Laurie McNamara of Simply Scratch, recipe submitted by TK member Bev Weidner of Bev Cooks.

Drain the pasta. Before draining you could reserve a little of the pasta water, just in case you need to thin the sauce out a tad in the end.


Tasty Kitchen Blog: Creamy Penne with Blue Cheese, Arugula and Toasted Walnuts. Guest post by Laurie McNamara of Simply Scratch, recipe submitted by TK member Bev Weidner of Bev Cooks.

Add the pasta into the pot that has the blue cheese sauce, and add in the arugula.


Tasty Kitchen Blog: Creamy Penne with Blue Cheese, Arugula and Toasted Walnuts. Guest post by Laurie McNamara of Simply Scratch, recipe submitted by TK member Bev Weidner of Bev Cooks.

The arugula will begin to wilt as you gently toss it around to coat every inch of the penne pasta. Here is where you could add a little of the reserved pasta water to thin it out a tad. I didn’t find that I needed to. It was absolutely perfect!


Tasty Kitchen Blog: Creamy Penne with Blue Cheese, Arugula and Toasted Walnuts. Guest post by Laurie McNamara of Simply Scratch, recipe submitted by TK member Bev Weidner of Bev Cooks.

Remove to a large platter and sprinkle with the toasted walnuts.


Tasty Kitchen Blog: Creamy Penne with Blue Cheese, Arugula and Toasted Walnuts. Guest post by Laurie McNamara of Simply Scratch, recipe submitted by TK member Bev Weidner of Bev Cooks.

The sauce wasn’t too heavy, and I especially enjoyed the flavors of the peppery arugula mixed with the creamy pungent blue cheese. I served our plates with a large spoonful of pasta, and then added just an extra little sprinkle of salt and a healthy pinch of black pepper. 


Tasty Kitchen Blog: Creamy Penne with Blue Cheese, Arugula and Toasted Walnuts. Guest post by Laurie McNamara of Simply Scratch, recipe submitted by TK member Bev Weidner of Bev Cooks.

You could also serve this pasta with a large slice of buttery toasted baguette, a side salad and you’ll have yourself an easy and elegant meal! Oh, and if—and I mean if—there are any leftovers, they’ll reheat nicely the next day.  
 
A big thank you to Bev for posting this pasta recipe. Believe me when I tell you it was inhaled and enjoyed thoroughly! Be sure to stop by her blog Bev Cooks for beautiful food, laughs and pure shenanigans. You can also visit her Tasty Kitchen recipe box for more mouthwatering recipes. 
 
Note: The only change I made was that I used whole milk instead of reduced fat. The sauce is a little thin, but can easily be thickened with corn starch if desired.


Printable Recipe

Creamy Penne with Blue Cheese, Arugula and Toasted Walnuts

See post on Bev Weidner’s site!
3.83 Mitt(s) 6 Rating(s)6 votes, average: 3.83 out of 56 votes, average: 3.83 out of 56 votes, average: 3.83 out of 56 votes, average: 3.83 out of 56 votes, average: 3.83 out of 5

Prep Time:

Cook Time:

Difficulty: Easy

Servings: 2

2
x

Print Options

Page size Letter 3x5 4x6
Text Size Small Medium Large
Content Include description
Include prep time, etc.
Show image

Description

What do you get when you fall in luuuve?

Ingredients

  • ½ cups Walnuts
  • ½ pounds Penne Pasta
  • 1 Tablespoon Butter
  • 1 cup Reduced-fat Milk
  • ½ cups Crumbled Blue Cheese
  • 1 pinch Coarse Salt And Freshly Ground Pepper
  • 4 cups Arugula

Preparation Instructions

Start by toasting your walnuts. Pour them into a small skillet and toast over medium heat for about 5 minutes, until they start to brown and you can smell ‘em. Remove them from the heat and coarsely chop. Set aside.

Cook the pasta until it reaches al dente (use package instructions for al dente). Reserve 1/4th of the pasta water and drain the rest. Set pasta and reserved water aside.

Back in the pot, reduce the heat to medium and add the butter, milk and blue cheese. Whisk together until combined and smooth. Throw in a pinch of salt and pepper.

Add the cooked pasta and the arugula into the sauce, wilting the greens and gently stirring to cover everything with the sauce. If you need to thin out the sauce a little, you can add the reserved pasta water here.

Serve with toasted walnuts and oh my dear, eat eat eat.


_______________________________________

Laurie is the force behind Simply Scratch, a blog that documents her efforts to find and create recipes that are made simply from scratch. (We think it’s sweet that her mother-in-law helped her set up her blog and get started.) We love her recipes; they’re not just tried and true, but they look gorgeous as well. Check out her blog and you’ll become a fan too.


Profile photo of georgiapellegrini

Kale and Feta Egg Bake

Posted by in Step-by-Step Recipes

Tasty Kitchen Blog: Kale and Feta Egg Bake. Guest post by Georgia Pellegrini, recipe submitted by TK member Gina of Running to the Kitchen.

 
I’m an egg person. I eat them almost every morning. But there is only so much scrambled eggs with avocado and hot sauce that a girl can eat before it begins to feel a tad redundant. What intrigued me most about this Kale and Feta Egg Bake from Tasty Kitchen member Gina was that it would work wonderfully for breakfast, lunch or dinner. And it reheats well so that you could really have it again the next day when times are busy. Plus, it is infinitely scalable, so you can make it in small individual ramekins, or you can make a nice large batch in a skillet like I did.


Tasty Kitchen Blog: Kale and Feta Egg Bake. Guest post by Georgia Pellegrini, recipe submitted by TK member Gina of Running to the Kitchen.

Here is what you will need: eggs, olive oil, red pepper flakes, minced garlic, kale (or other leafy greens like collards, Swiss chard, etc.), tomato sauce, onions, feta cheese.


Tasty Kitchen Blog: Kale and Feta Egg Bake. Guest post by Georgia Pellegrini, recipe submitted by TK member Gina of Running to the Kitchen.

Start by adding some olive oil to a sauté pan.


Tasty Kitchen Blog: Kale and Feta Egg Bake. Guest post by Georgia Pellegrini, recipe submitted by TK member Gina of Running to the Kitchen.

Add the onions and garlic and sweat until translucent.


Tasty Kitchen Blog: Kale and Feta Egg Bake. Guest post by Georgia Pellegrini, recipe submitted by TK member Gina of Running to the Kitchen.

Add in your red pepper flakes. I had a Thai red pepper sauce so I opted to use that.


Tasty Kitchen Blog: Kale and Feta Egg Bake. Guest post by Georgia Pellegrini, recipe submitted by TK member Gina of Running to the Kitchen.

Next add your leafy greens. You can be creative here. Kale is wonderful, but I was in the mood for collard greens to opted for those. You could also try spinach, Swiss chart, escarole … the possibilities are endless! Give them a stir and sprinkle with a bit of salt. You can put a lid on it for a few minutes to help them wilt.


Tasty Kitchen Blog: Kale and Feta Egg Bake. Guest post by Georgia Pellegrini, recipe submitted by TK member Gina of Running to the Kitchen.

Add the tomato sauce next. I used some Italian style stewed tomatoes for some chunkiness.


Tasty Kitchen Blog: Kale and Feta Egg Bake. Guest post by Georgia Pellegrini, recipe submitted by TK member Gina of Running to the Kitchen.

Let all of the flavors marry, stirring every so often.


Tasty Kitchen Blog: Kale and Feta Egg Bake. Guest post by Georgia Pellegrini, recipe submitted by TK member Gina of Running to the Kitchen.

Next sprinkle on the cheese. You could use cotija cheese here, too. Something crumbly is best.


Tasty Kitchen Blog: Kale and Feta Egg Bake. Guest post by Georgia Pellegrini, recipe submitted by TK member Gina of Running to the Kitchen.

Next, carefully crack your eggs and distribute them evenly on the surface.


Tasty Kitchen Blog: Kale and Feta Egg Bake. Guest post by Georgia Pellegrini, recipe submitted by TK member Gina of Running to the Kitchen.

Sprinkle the top with a bit more cheese and place the baking dish in the oven.


Tasty Kitchen Blog: Kale and Feta Egg Bake. Guest post by Georgia Pellegrini, recipe submitted by TK member Gina of Running to the Kitchen.

You’ll bake it until the eggs are cooked but still runny, or you can cook the yolks all the way through, depending on how you like them.


Tasty Kitchen Blog: Kale and Feta Egg Bake. Guest post by Georgia Pellegrini, recipe submitted by TK member Gina of Running to the Kitchen.

Scoop out portions onto plates if you’ve made it in a large skillet, or these ingredients can be placed in individual ramekins and cooked separately for some extra charm.


Tasty Kitchen Blog: Kale and Feta Egg Bake. Guest post by Georgia Pellegrini, recipe submitted by TK member Gina of Running to the Kitchen.

This is the perfect brunch dish, and so flexible. It was hearty and healthy and delicious all at once. It has now earned a place in my regular breakfast repertoire. Thanks so much to Gina for sharing it with us! Be sure to check out her website Running to the Kitchen for other delicious recipes.


Printable Recipe

Kale & Feta Egg Bake

See post on Gina (Running to the Kitchen)’s site!
5.00 Mitt(s) 3 Rating(s)3 votes, average: 5.00 out of 53 votes, average: 5.00 out of 53 votes, average: 5.00 out of 53 votes, average: 5.00 out of 53 votes, average: 5.00 out of 5

Prep Time:

Cook Time:

Difficulty: Easy

Servings: 1

1
x

Print Options

Page size Letter 3x5 4x6
Text Size Small Medium Large
Content Include description
Include prep time, etc.
Show image

Description

The perfect single lady dinner.

Ingredients

  • ½  Medium Onion, Chopped
  • 1 clove Garlic, Minced
  • 1 Tablespoon Extra Virgin Olive Oil
  • 6  Large Kale Leaves, Washed, Trimmed And Chopped
  • ¼ teaspoons Red Pepper Flakes
  • Salt And Pepper, to taste
  • 4 Tablespoons Marinara Sauce, Divided
  • ⅓ cups Crumbled Feta, Divided
  • 2  Eggs

Preparation Instructions

Preheat oven to 375ºF.

In a skillet over medium-high heat, saute onions, garlic and olive oil for 3-5 minutes, until softened.

Add kale and red pepper flakes and saute another 2-3 minutes until kale is wilted. Season with salt and pepper to taste.

Spray an oven safe ramekin with cooking spray and spoon half of the sauce into the bottom.

Next, add half the kale and onion mixture, then half the feta, remaining sauce, then the remainder of the kale.

Crack the eggs on the top and sprinkle remaining feta on top of that.

Bake for 12-15 minutes, until eggs are fully cooked but still runny.

Serve warm with crusty bread.


_______________________________________

There’s so much to say about Georgia, we don’t know where to start. Leaving Wall Street for the French Culinary Institute, followed by a stint at the Gramercy Tavern and La Chassagnette in France, her passion for food and food traditions are evident and inspiring. Visit her site at Georgia Pellegrini, where you’ll find more recipes, photos, learn all about her wonderful books Girl Hunter and Food Heroes, and enjoy her latest adventures.


Profile photo of Natalie | Perry's Plate

Layered Mediterranean Dip

Posted by in Step-by-Step Recipes

  Pretty, isn’t it? Think: Mediterranean version of the classic (and sometimes overdone) Mexican 7-layer dip. On the bottom there’s a fantastic cilantro-pecan pesto, then a generous dose of hummus, and a sprinkling of diced vegetables, feta cheese, and toasted pine nuts. We recently became homeowners and threw a little housewarming party last…

Profile photo of twopeasandtheirpod

Cookie Dough Dip

Posted by in Step-by-Step Recipes

  The Super Bowl is on Sunday and if you are still finalizing your Super Bowl party menu, make sure you add this Cookie Dough Dip to the list. If you follow my blog Two Peas and Their Pod, you know I am obsessed with cookies. So when I saw Jessica’s (How Sweet Eats) recipe […]