The Pioneer Woman Tasty Kitchen
Profile photo of Amber {Sprinkled With Flour}

Ozark Apple Pudding

Posted by in Baking, Step-by-Step Recipes

Tasty Kitchen Blog: Ozark Apple Pudding. Guest post by Amber Potter of Sprinkled with Flour, recipe submitted by TK member novakgirls.

 
Here in the Missouri Ozarks, the leaves have just passed their colorful prime, scattering across the ground leaving their tell-tale message. Winter is coming. “Boo!” I say! If I lived in a perfect world, it would be fall every day of the year, except for one snowy day on Christmas.

I do not like to be cold, and I do not like to be hot. (Is it just me or am I starting to sound like a Dr. Seuss book?) So fall is just right for me. The only thing that makes the colder weather redeemable is getting to enjoy all the cozy, warm seasonal desserts. When I came across this recipe submitted by Tasty Kitchen member novakgirls, I was immediately drawn by the name.

Naturally, a dessert named after the area I live in was something I had to try.

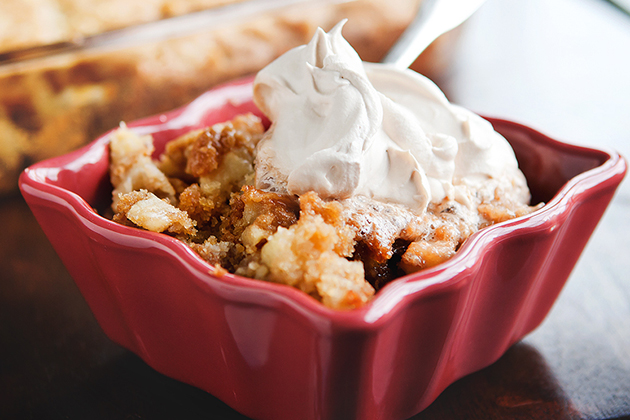
I can’t believe I’ve never tried Ozark Apple Pudding before. Rustic is a great way to describe this yummy treat. The batter is so thick and packed with fresh, chopped apples and walnuts, you just know it will be perfectly comforting on a cold day. When you add a generous helping of cinnamon-infused whipped cream, it’s sinful.

Let’s begin shall we?


Tasty Kitchen Blog: Ozark Apple Pudding. Guest post by Amber Potter of Sprinkled with Flour, recipe submitted by TK member novakgirls.

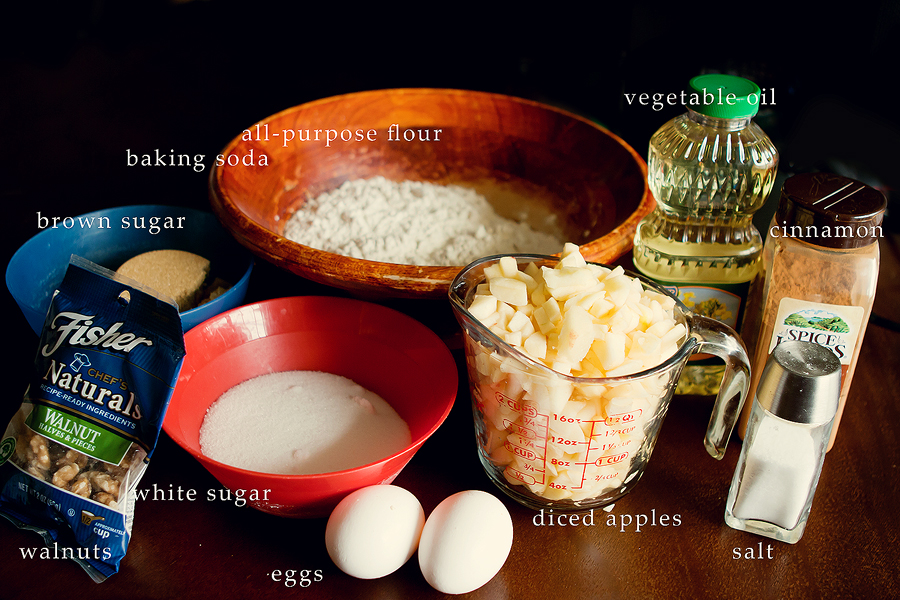
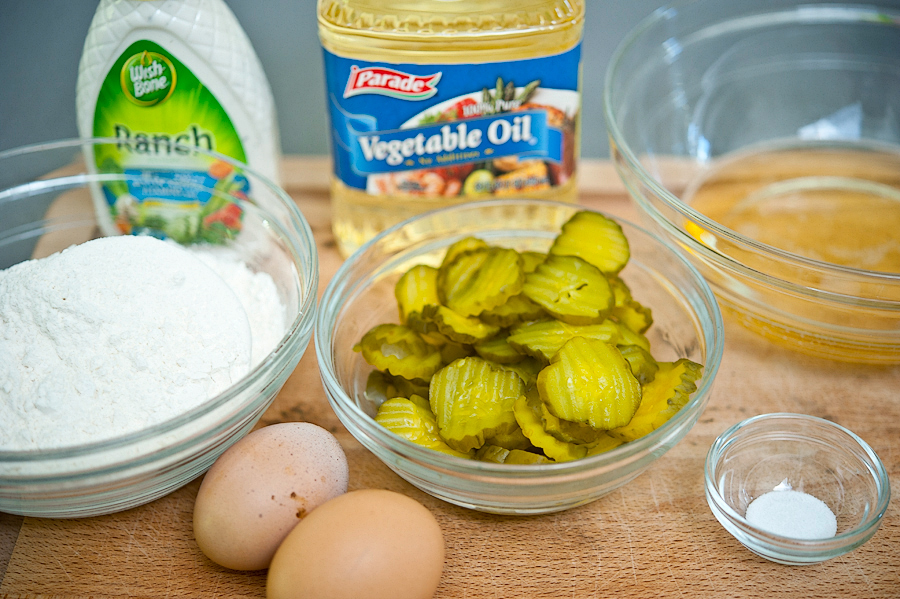
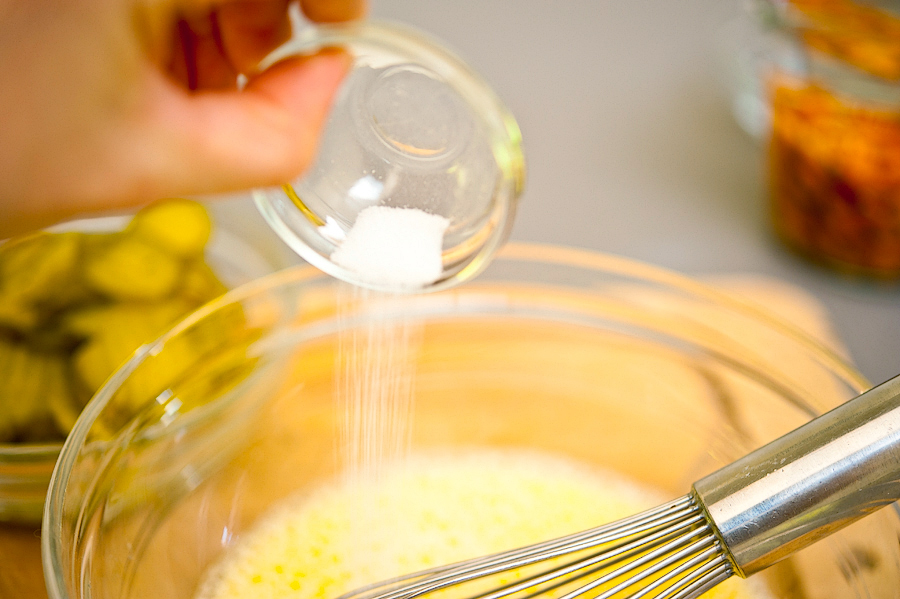
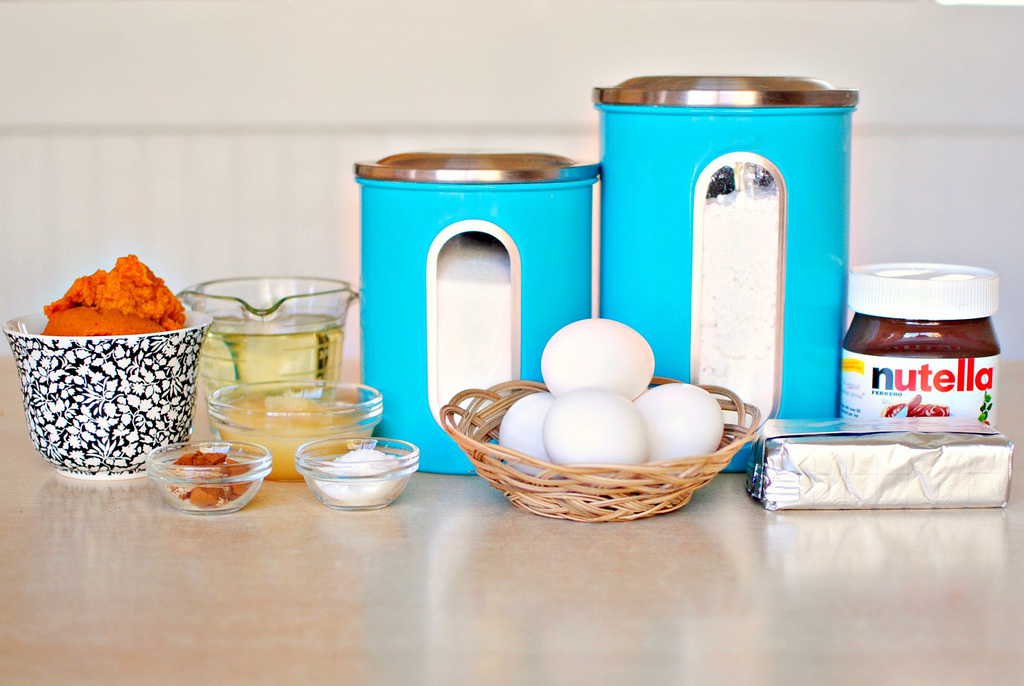
This is a simple recipe—my favorite kind. You’ll need flour, sugar, baking soda, salt, cinnamon, oil, eggs, apples, and walnuts (optional).


Tasty Kitchen Blog: Ozark Apple Pudding. Guest post by Amber Potter of Sprinkled with Flour, recipe submitted by TK member novakgirls.

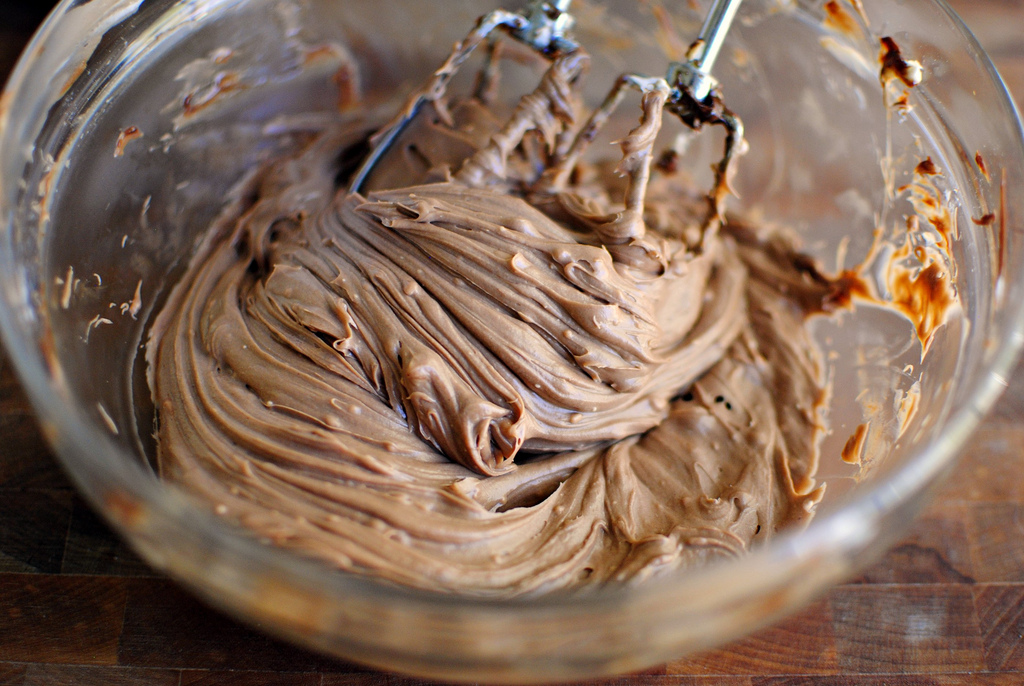
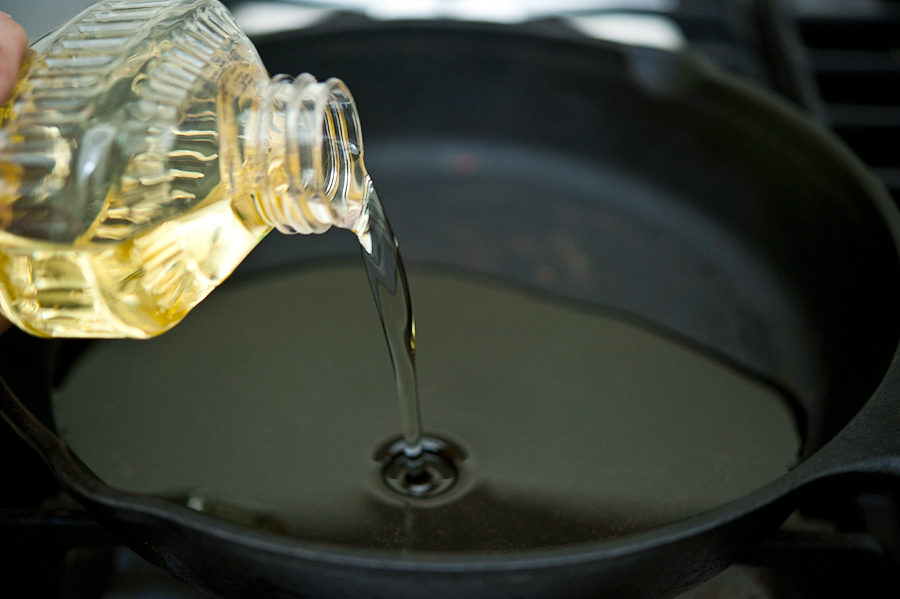
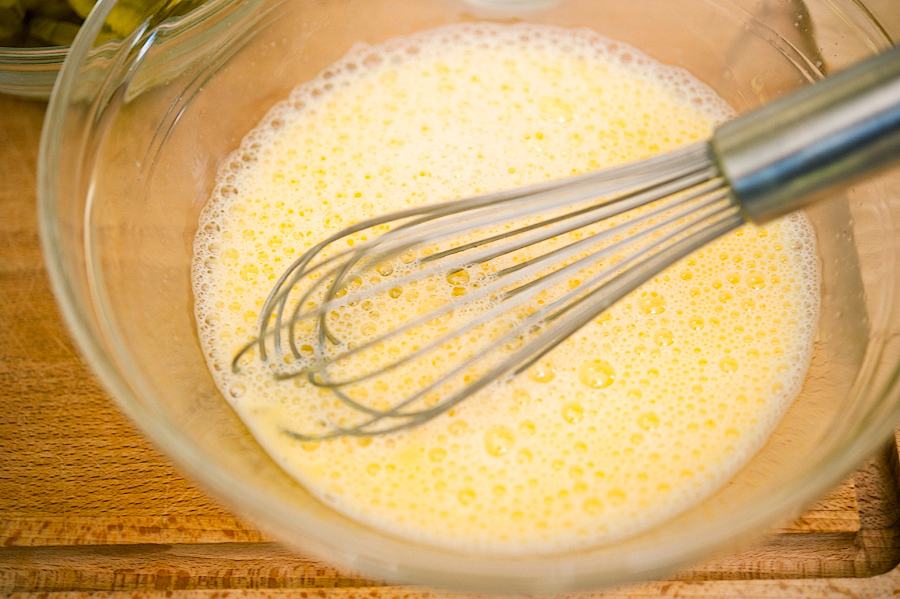
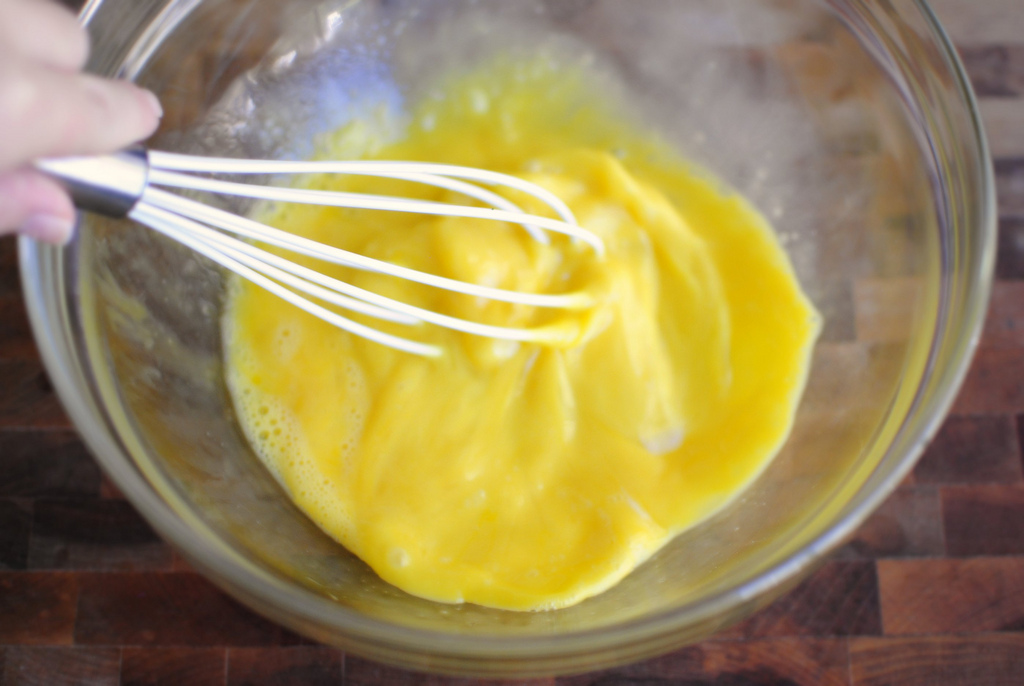
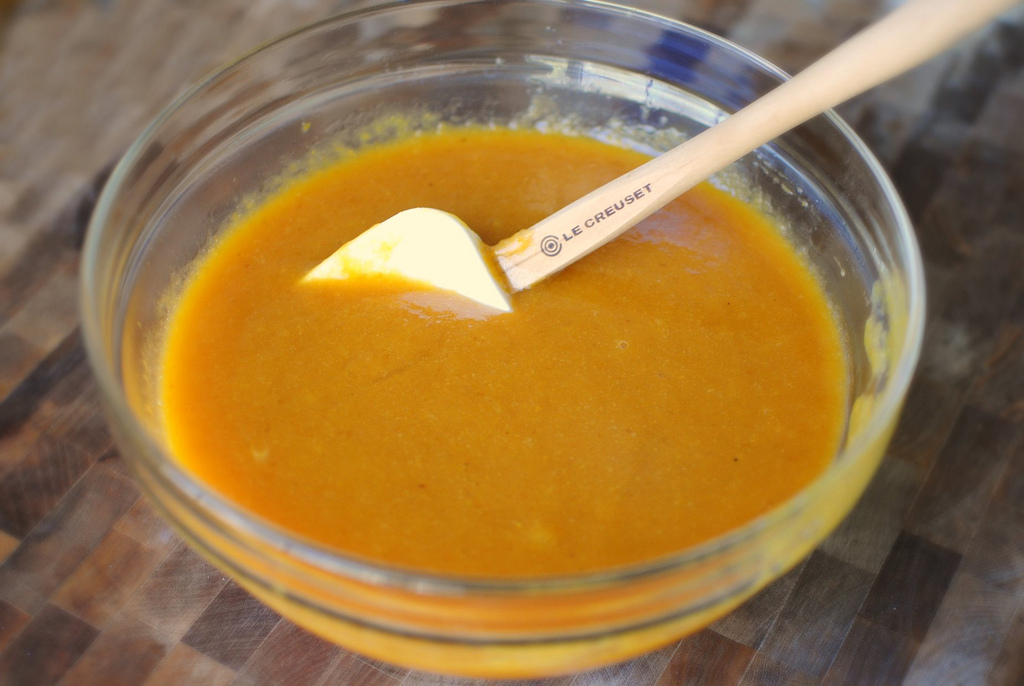
In a medium-sized bowl, mix together the sugar, oil and eggs. Set aside.


Tasty Kitchen Blog: Ozark Apple Pudding. Guest post by Amber Potter of Sprinkled with Flour, recipe submitted by TK member novakgirls.

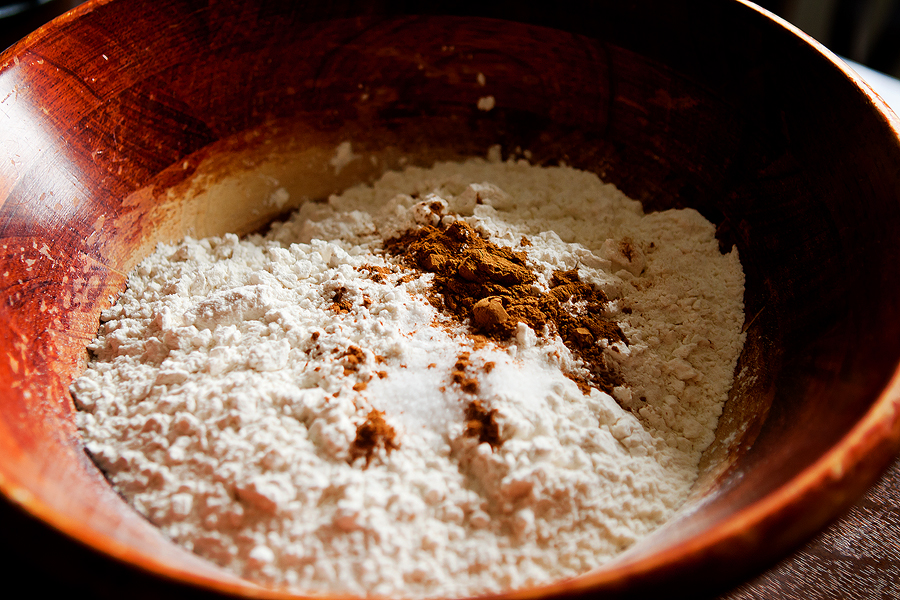
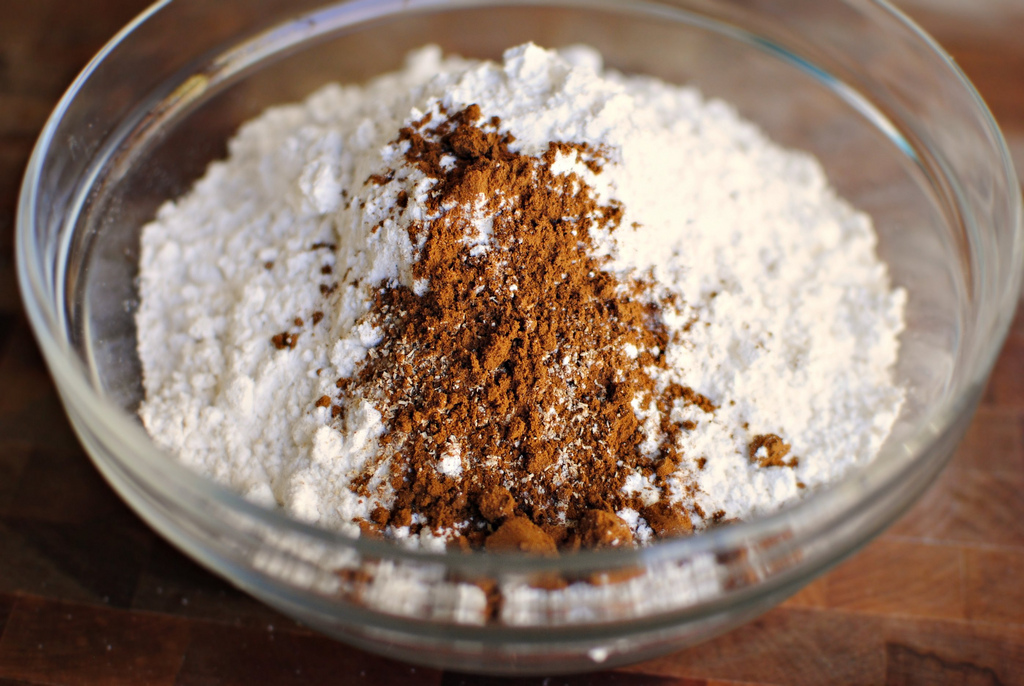
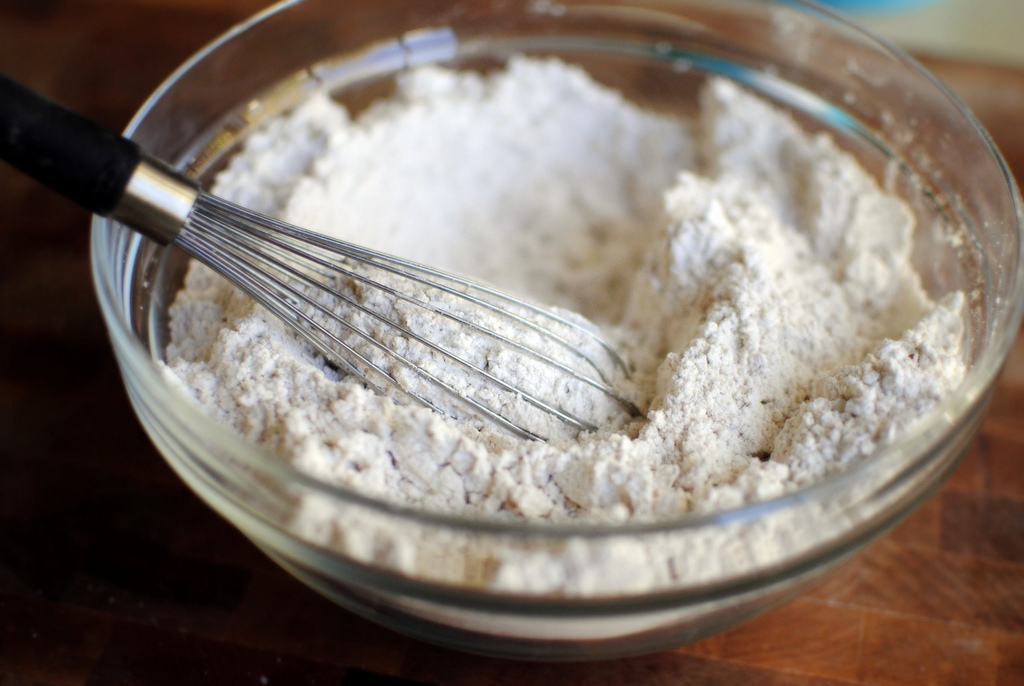
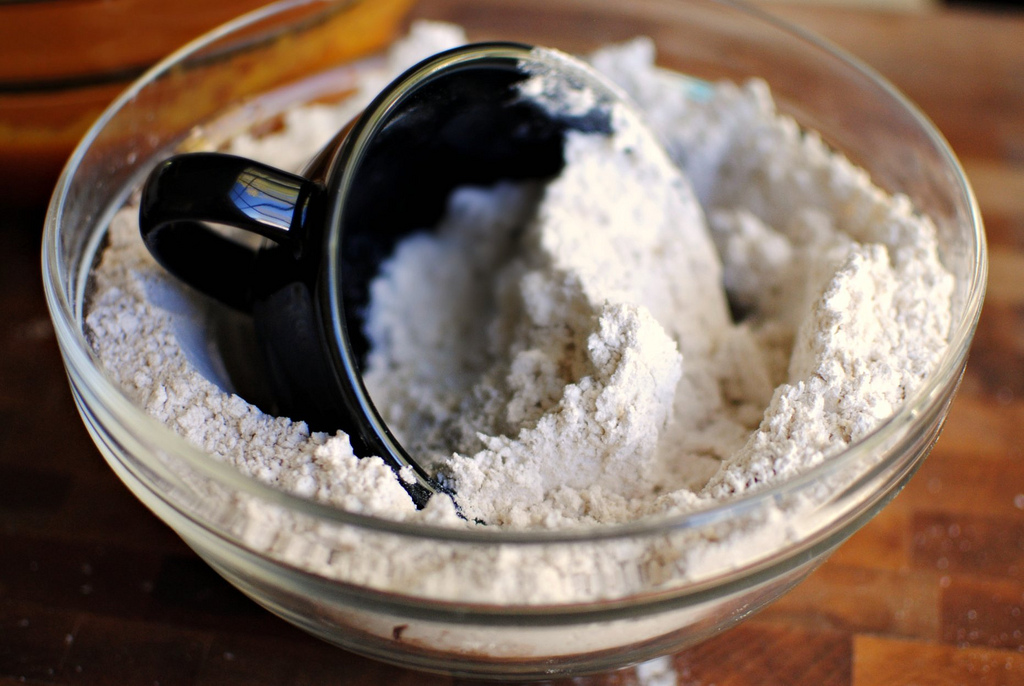
In a separate bowl, combine the dry ingredients.


Tasty Kitchen Blog: Ozark Apple Pudding. Guest post by Amber Potter of Sprinkled with Flour, recipe submitted by TK member novakgirls.

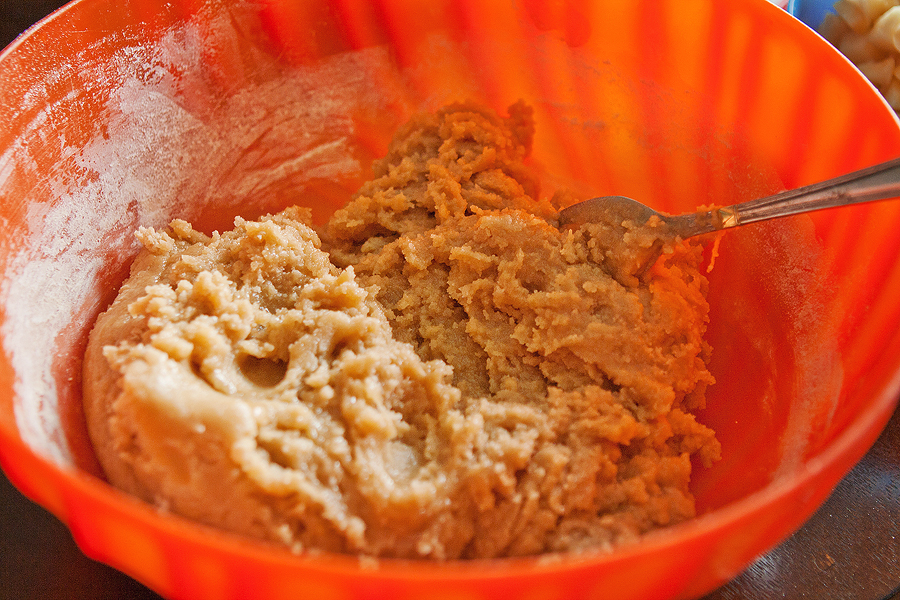
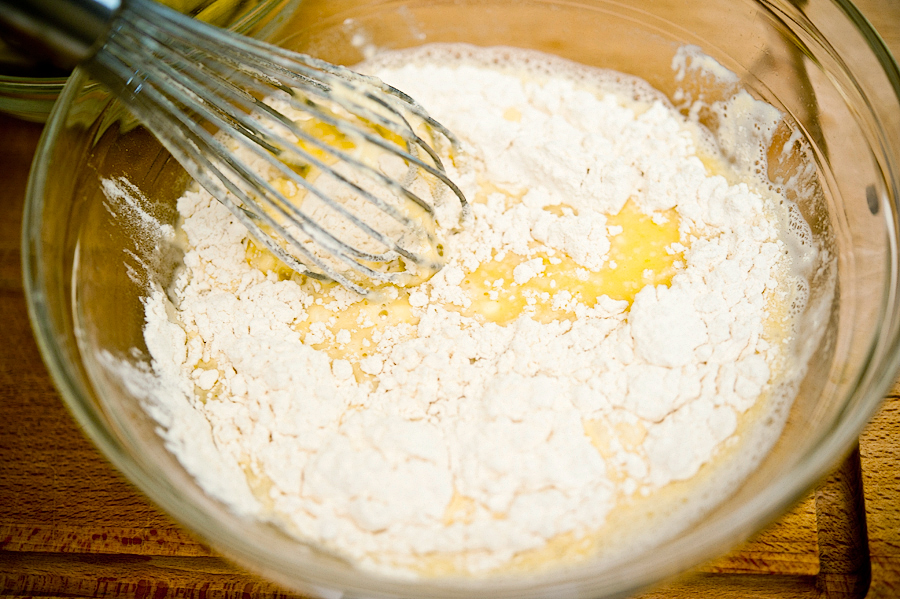
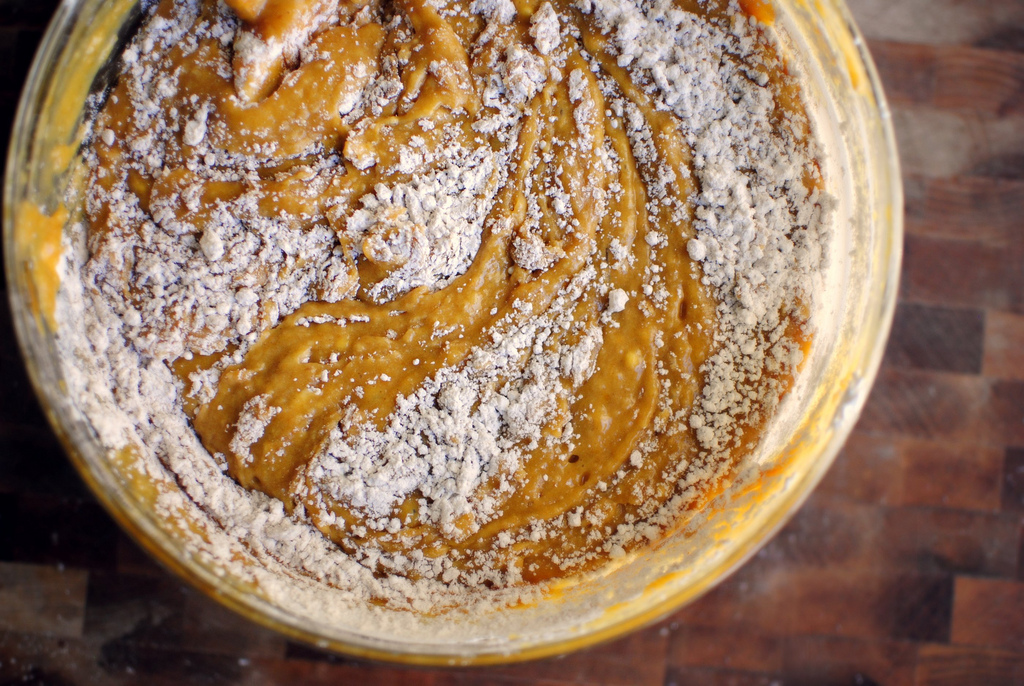
Now add your sugar mixture to the dry ingredients. Your dough will be very thick and shaggy and it will actually resemble cookie dough rather than cake batter. That’s okay.


Tasty Kitchen Blog: Ozark Apple Pudding. Guest post by Amber Potter of Sprinkled with Flour, recipe submitted by TK member novakgirls.

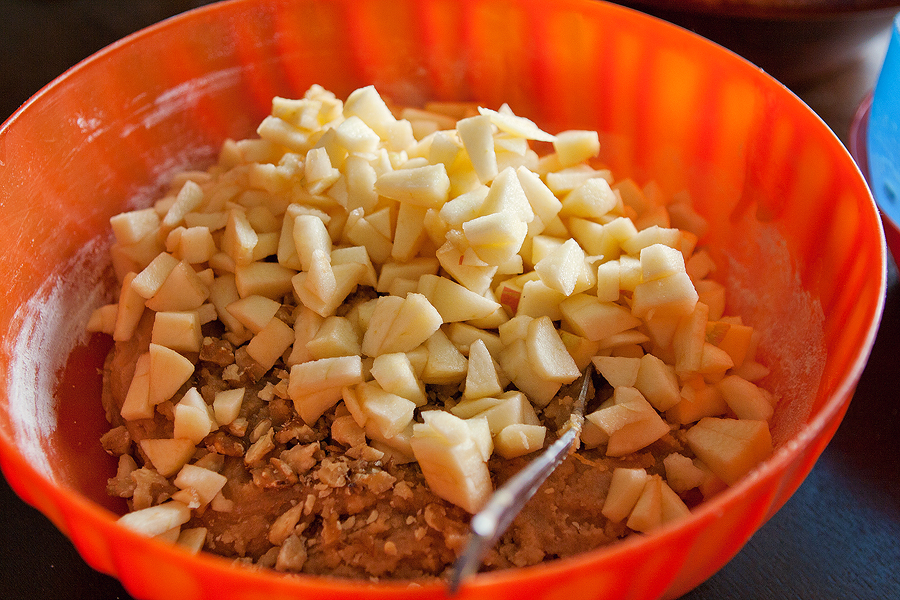
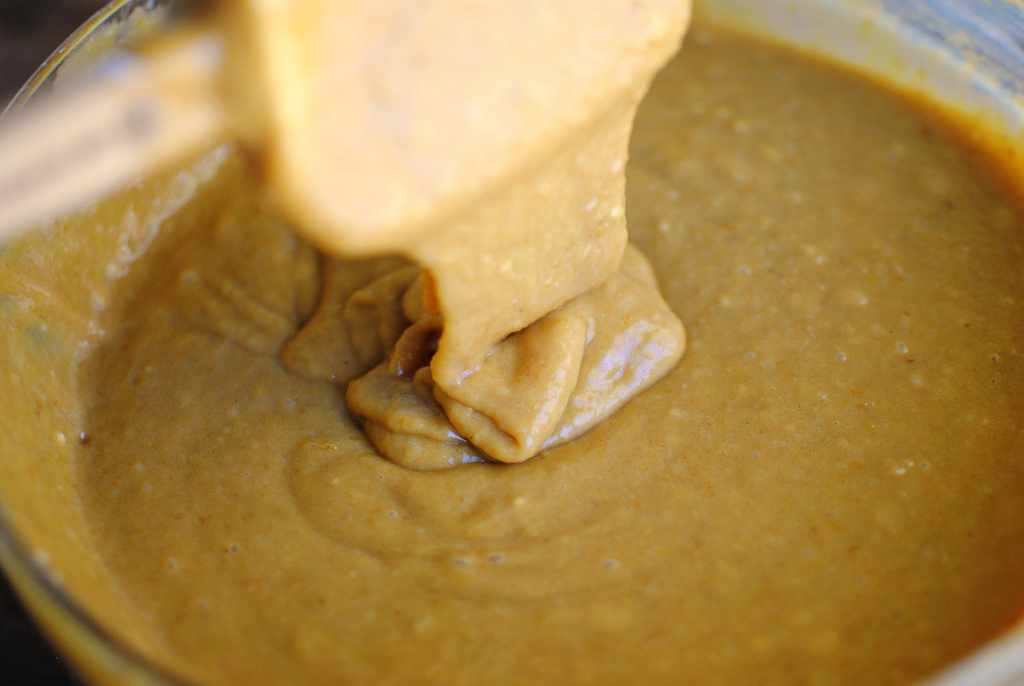
Stir in the chopped apples and nuts (if using). Use your elbow grease for this part. I used my ultra high tech manual mixing equipment, a.k.a my hands.


Tasty Kitchen Blog: Ozark Apple Pudding. Guest post by Amber Potter of Sprinkled with Flour, recipe submitted by TK member novakgirls.

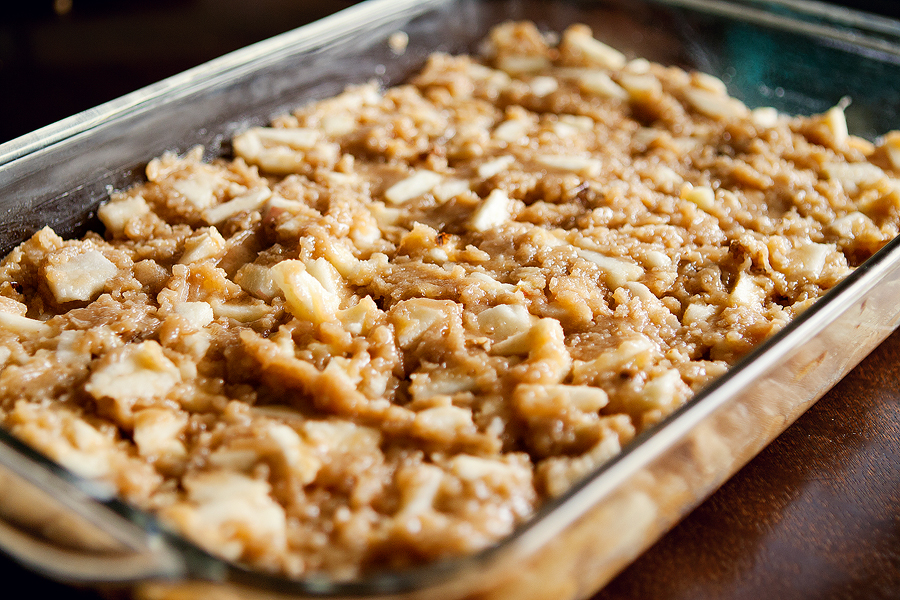
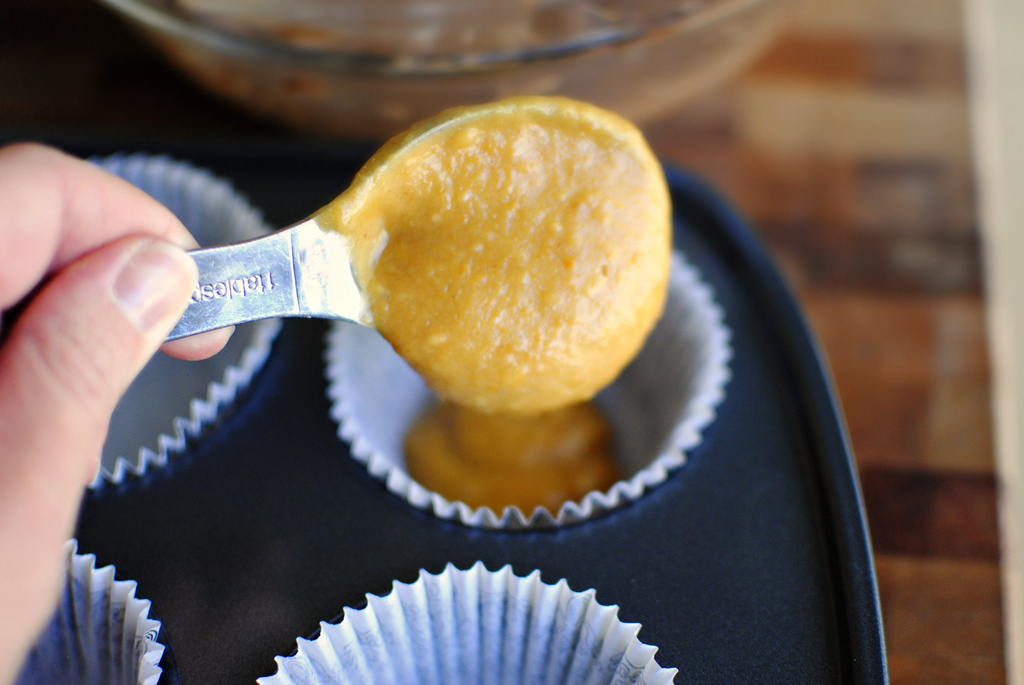
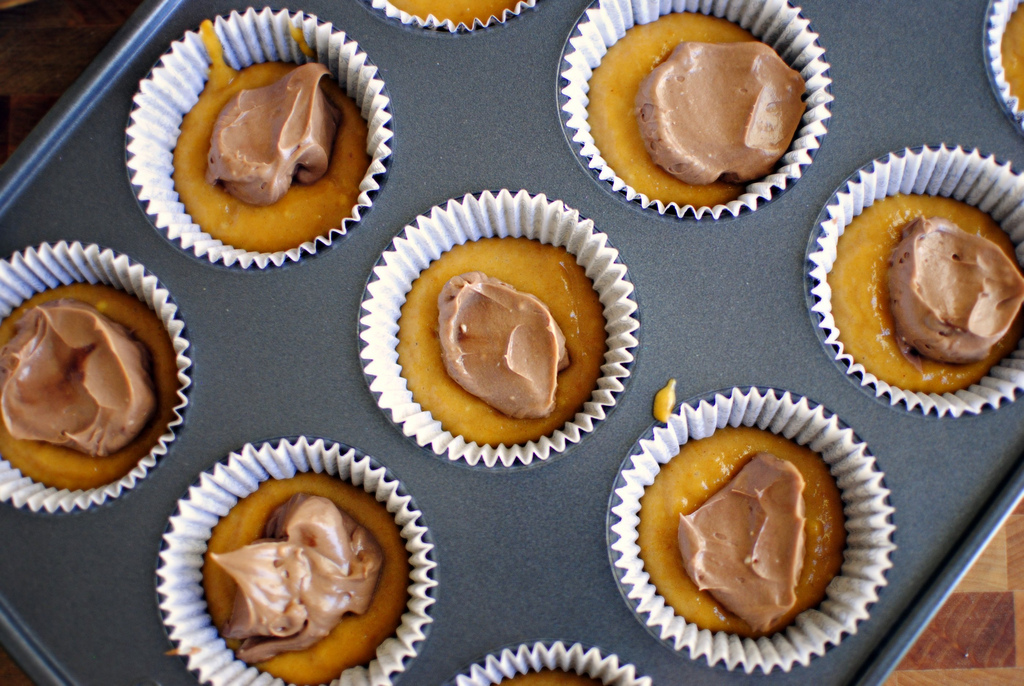
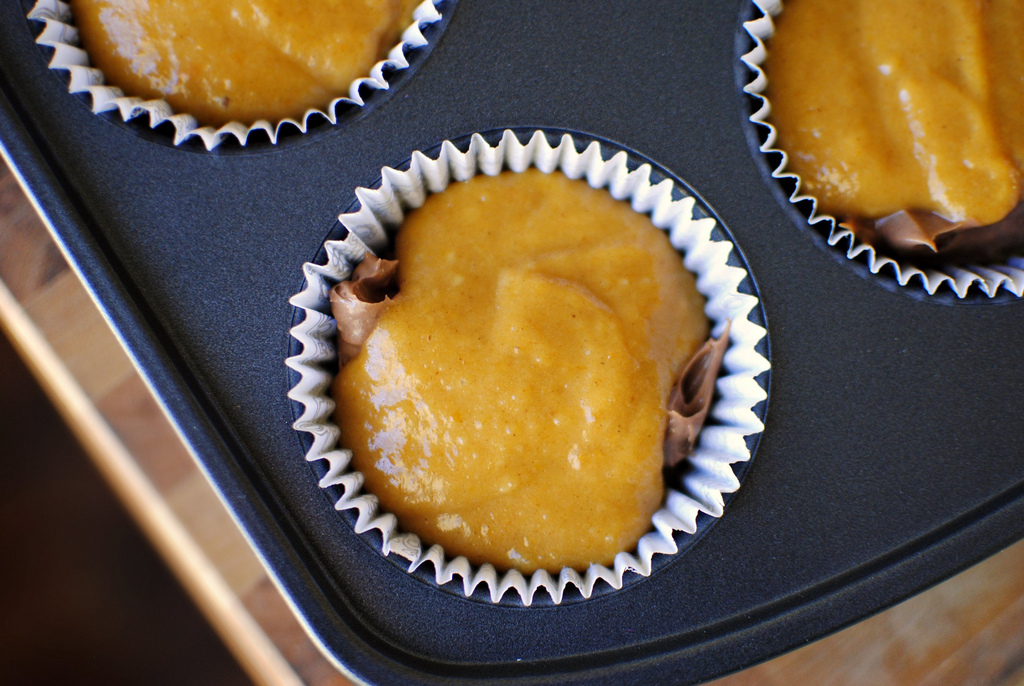
Spread the dough into a greased and floured 9 x 13 pan. Bake at 350ºF for 45 minutes.


Tasty Kitchen Blog: Ozark Apple Pudding. Guest post by Amber Potter of Sprinkled with Flour, recipe submitted by TK member novakgirls.

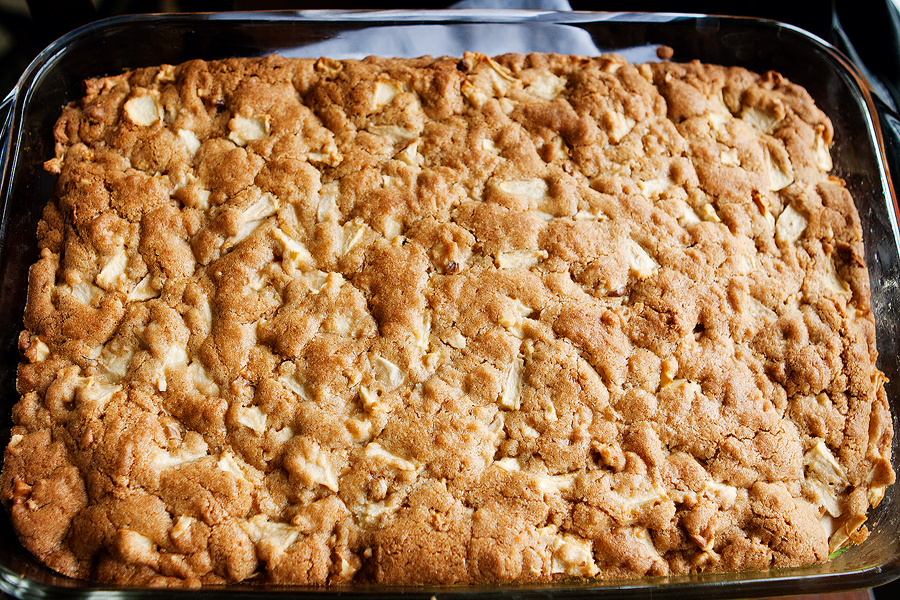
Remove cake when top is golden brown and resembles what I don’t want to look like in 20 years.


Tasty Kitchen Blog: Ozark Apple Pudding. Guest post by Amber Potter of Sprinkled with Flour, recipe submitted by TK member novakgirls.

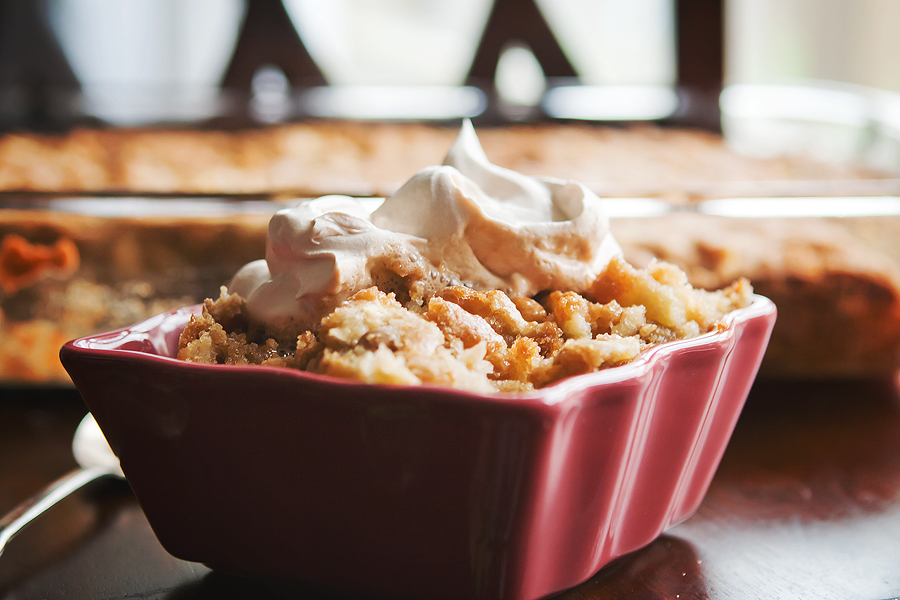
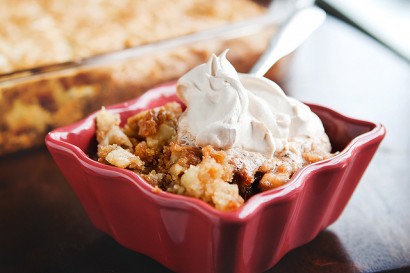
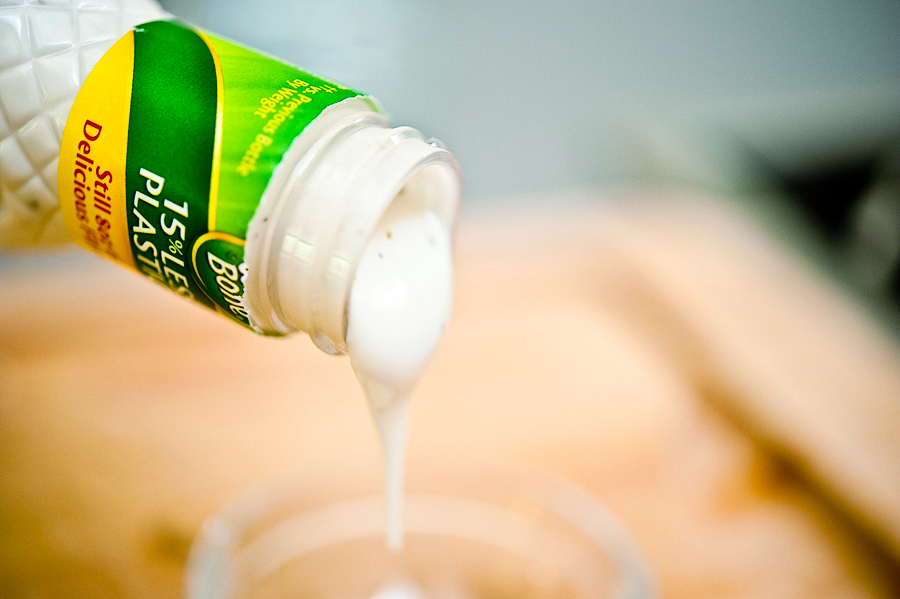
This cake is wonderful served warm with a dollop of whipped cream or vanilla ice cream. I actually had a tub of cinnamon-flavored whipped topping in the fridge. It went PERFECTLY with the warm, soft cake. I could even imagine cinnamon ice cream would be great with this too. Once the cake has cooled, it becomes even more moist and the flavors really come out.

Special thanks to novakgirls for sharing this wonderful recipe!


Printable Recipe

Ozark Apple Pudding

4.90 Mitt(s) 11 Rating(s)11 votes, average: 4.90 out of 511 votes, average: 4.90 out of 511 votes, average: 4.90 out of 511 votes, average: 4.90 out of 511 votes, average: 4.90 out of 5

Prep Time:

Cook Time:

Difficulty: Easy

Servings: 16

16
x

Print Options

Page size Letter 3x5 4x6
Text Size Small Medium Large
Content Include description
Include prep time, etc.
Show image

Description

My mother-in-law calls this a pudding, but we call it apple cake. It’s yummy and goes great after dinner, or with a cup of coffee for breakfast. Great use for apples that are close to being too ripe.

Ingredients

  • 2 cups Sugar
  • 1-¼ cup Oil
  • 2 whole Eggs
  • 3 cups Flour
  • 1 teaspoon Salt
  • 1 teaspoon Baking Soda
  • 1 teaspoon Cinnamon
  • 3 cups Diced Apple
  • ½ cups Chopped Nuts

Preparation Instructions

Mix together sugar, oil and eggs.

In a separate bowl combine dry ingredients, then add to the sugar mixture. Stir in apples and nuts.

Spread in a greased and floured 13 x 9 pan. Bake at 350ºF for 45 minutes.


_______________________________________

Amber is a stay at home mom who lives in the heart of the Missouri Ozarks. It’s a long way from where she grew up, in Wales (yes, way over in the U.K.). The recipes in her blog Sprinkled with Flour include her original creations as well as her family recipes. Go check them out!


Profile photo of cookincanuck

Zuppa di Gnocchi e Pesto

Posted by in Step-by-Step Recipes

Tasty Kitchen Blog: Zuppa di Gnocchi e Pesto. Guest post by Dara Michalski of Cookin' Canuck, recipe submitted by TK member Melanie of The Coupon Goddess.

 
If I had an Italian grandmother, I am sure this is the chicken soup she would make for my seven brothers and sisters and me. Okay, I don’t actually have seven siblings. In fact, I’m an only child. However, I always imagine Italian meals as large family affairs, so I have to conjure up some additional characters to set the scene. My pleasantly plump nonna would be standing by the stove, ladling out the steaming soup into large earthenware bowls, exclaiming “Mangia, mangia!” (Incidentally, “Nonna” is what my kids call my mum. We obviously have a deep-seated yearning for some Italian blood in our veins. And yet, nary a drop.)

When I spotted this recipe by Tasty Kitchen member Melanie, I knew it was likely to become a family favorite. The broth is rich with the taste of roasted onions and garlic, pesto and chicken broth pureed together (be sure to read about my broth mishap below and learn from my mistake so you can avoid green-colored blinds and carpet). The gnocchi is gently boiled in the broth until tender and plump and the savory mixture is ladled over simply roasted, shredded chicken. It is comfort in a bowl. I swear I can feel my fictitious nonna’s hug as I take each bite.


Tasty Kitchen Blog: Zuppa di Gnocchi e Pesto. Guest post by Dara Michalski of Cookin' Canuck, recipe submitted by TK member Melanie of The Coupon Goddess.

Here are the ingredients you’ll need to get started. Roasting chicken breasts can sound intimidating, but it’s one of the easiest things to do. Stay with me here.

Preheat oven to 350 degrees F.


Tasty Kitchen Blog: Zuppa di Gnocchi e Pesto. Guest post by Dara Michalski of Cookin' Canuck, recipe submitted by TK member Melanie of The Coupon Goddess.

Place the chicken breasts—skin, bones and all—into a roasting pan. Separate the onion quarters and scatter the pieces, along with the unpeeled garlic cloves, over and around the chicken breasts.


Tasty Kitchen Blog: Zuppa di Gnocchi e Pesto. Guest post by Dara Michalski of Cookin' Canuck, recipe submitted by TK member Melanie of The Coupon Goddess.

Drizzle over some olive oil. I promise it’s not going to get any harder than this.


Tasty Kitchen Blog: Zuppa di Gnocchi e Pesto. Guest post by Dara Michalski of Cookin' Canuck, recipe submitted by TK member Melanie of The Coupon Goddess.

Season with salt and pepper and slide those babies into the oven. You’re well on your way.

Roast the chicken for 35 to 45 minutes, or until it is cooked through.


Tasty Kitchen Blog: Zuppa di Gnocchi e Pesto. Guest post by Dara Michalski of Cookin' Canuck, recipe submitted by TK member Melanie of The Coupon Goddess.

Transfer the chicken breasts to a cutting board to cool. Remove the onion and garlic and peel the garlic. The cloves will be soft and buttery.


Tasty Kitchen Blog: Zuppa di Gnocchi e Pesto. Guest post by Dara Michalski of Cookin' Canuck, recipe submitted by TK member Melanie of The Coupon Goddess.

In the bowl of a food processor or a blender, combine the chicken broth, roasted onion pieces and peeled, roasted garlic. Add 3 tablespoons of pesto and pulse until smooth.

Now, let me give you a little tip here to save you some cleanup time. Do not—I repeat, DO NOT—try to do this all in one batch. I was feeling a little over-confident in my blender’s ability to hold mass quantities of liquid. Since I take all of my food photos in the living room (for the best light), that is where the blending took place. That is also where the combination of chicken broth, pesto, onions and garlic blew out the side of the blender lid and all over my carpet, blinds and furniture. It’s a good thing my kids weren’t home at the time or they would have learned some unsavory words to add to their vocabularies. Moral of the story: puree the mixture in two batches—in the kitchen!


Tasty Kitchen Blog: Zuppa di Gnocchi e Pesto. Guest post by Dara Michalski of Cookin' Canuck, recipe submitted by TK member Melanie of The Coupon Goddess.

Once the chicken is cool enough to handle, shred it into bite-sized pieces, removing and discarding the skin and bones. I like to use my hands to do this, but two forks would work well, too.


Tasty Kitchen Blog: Zuppa di Gnocchi e Pesto. Guest post by Dara Michalski of Cookin' Canuck, recipe submitted by TK member Melanie of The Coupon Goddess.

Transfer the chicken to a bowl and stir in the rest of the pesto until the chicken is coated.


Tasty Kitchen Blog: Zuppa di Gnocchi e Pesto. Guest post by Dara Michalski of Cookin' Canuck, recipe submitted by TK member Melanie of The Coupon Goddess.

Transfer the chicken broth mixture to a large saucepan and bring to a boil. Add the gnocchi and cook until the little guys pop up to the surface.


Tasty Kitchen Blog: Zuppa di Gnocchi e Pesto. Guest post by Dara Michalski of Cookin' Canuck, recipe submitted by TK member Melanie of The Coupon Goddess.

Place some of the chicken in each bowl and ladle over the broth and gnocchi.


Tasty Kitchen Blog: Zuppa di Gnocchi e Pesto. Guest post by Dara Michalski of Cookin' Canuck, recipe submitted by TK member Melanie of The Coupon Goddess.

Garnish with chopped Roma tomatoes and serve. “Mangia, mangia!”

Thank you, Melanie, for sharing your incredible recipe. Melanie’s site The Coupon Goddess is not only filled with tips on saving money at the grocery store, but has loads of mouthwatering recipes. Be sure to check it out.


Printable Recipe

Zuppa di Gnocchi e Pesto

See post on A Beautiful Bite’s site!
4.60 Mitt(s) 5 Rating(s)5 votes, average: 4.60 out of 55 votes, average: 4.60 out of 55 votes, average: 4.60 out of 55 votes, average: 4.60 out of 55 votes, average: 4.60 out of 5

Prep Time:

Cook Time:

Difficulty: Easy

Servings: 8

8
x

Print Options

Page size Letter 3x5 4x6
Text Size Small Medium Large
Content Include description
Include prep time, etc.
Show image

Description

A quick and delicious soup made from pantry and freezer staples that will have your guests thinking that your Nonna passed the recipe down to you!

Ingredients

  • 3  Chicken Breasts, On The Bone
  • 1 whole Yellow Onion, Quartered
  • 8 cloves Garlic, In Skins
  • 3 Tablespoons Olive Oil
  • 3 pinches Salt
  • 3 pinches Black Pepper
  • 2 cartons Chicken Broth, 32 Ounces Each
  • 1 jar Pesto 8oz
  • 1 package Gnocchi, 16 Ounce
  • 3 whole Roma Tomatoes Seeded And Chopped

Preparation Instructions

Preheat oven to 350F. Place chicken breasts in a roasting pan. Break apart quartered onion and scatter around and on top of breasts. Toss garlic, skins and all, around the chicken. The garlic will not flavor the chicken at this point. We are merely roasting them and will add them to the broth in a bit. Drizzle olive oil on chicken. Salt and pepper to taste and roast for 35-45 minutes or until the center is white and no longer pink.

Once cooked, allow the chicken to cool so that it can be shredded by hand. Scoop out roasted onion and garlic to use in broth. While the chicken is cooling, pour broth into a Cuisinart or blender along with the onions and roasted garlic (skins removed after roasting of course) and three tablespoons of the pesto. Pulse until there are no large chunks of garlic left. About 3 five second pulses should do the trick. The roasted garlic will give the soup a velvety feel in your mouth. Definitely don’t skip this step. It’s so worth it.

Back to the chicken. After shredding it, mix in the rest of the pesto. Stir well and set aside.

In a large pot, bring the broth/garlic/pesto mixture to a boil. Add gnocchi and cook until they float. In soup bowls, place a pile of chicken in the center. Ladle the hot broth over the chicken and garnish with chopped tomatoes. Mangia bene (eat well)!


_______________________________________

Dara Michalski is a doll and a sweetheart who clearly knows her way around the kitchen. She blogs at Cookin’ Canuck, where she shares her flavor-packed recipes and fun, engaging writing. The photography’s pretty incredible, too.


Profile photo of georgiapellegrini

Beer-Battered Fried Pickles

Posted by in Step-by-Step Recipes

Tasty Kitchen Blog: Beer-Battered Fried Pickles. Guest post by Georgia Pellegrini, recipe submitted by TK member Kelly of Live Love Pasta.

 
I’m fairly certain there is nothing more satisfying to eat than a fried pickle. The sad part is that it took me 29 years to discover this. Last year I tasted my first fried pickle in an Irish pub in California and I was forever transformed. I crossed the threshold into a new phase of life—pre-fried pickle to post-fried pickle. And I’m never looking back. Thank you to TK member Kelly from Live Love Pasta (who in turn sourced the recipe from Elizabeth’s Edible Experience) for reminding me of this glorious food and inspiring me to share it with you today!


Tasty Kitchen Blog: Beer-Battered Fried Pickles. Guest post by Georgia Pellegrini, recipe submitted by TK member Kelly of Live Love Pasta.

The best part? This is all you need: flour, pickle slices (you could also do pickle spears), vegetable oil, 2 eggs, salt, beer, and ranch dressing for dipping.


Tasty Kitchen Blog: Beer-Battered Fried Pickles. Guest post by Georgia Pellegrini, recipe submitted by TK member Kelly of Live Love Pasta.

Get out your trusty skillet and pour in a thick layer of oil. About an inch will do.


Tasty Kitchen Blog: Beer-Battered Fried Pickles. Guest post by Georgia Pellegrini, recipe submitted by TK member Kelly of Live Love Pasta.

Next, combine the eggs and the beer in a bowl.


Tasty Kitchen Blog: Beer-Battered Fried Pickles. Guest post by Georgia Pellegrini, recipe submitted by TK member Kelly of Live Love Pasta.

Whisk them up well and get them nice and frothy.


Tasty Kitchen Blog: Beer-Battered Fried Pickles. Guest post by Georgia Pellegrini, recipe submitted by TK member Kelly of Live Love Pasta.

Sprinkle in the salt…


Tasty Kitchen Blog: Beer-Battered Fried Pickles. Guest post by Georgia Pellegrini, recipe submitted by TK member Kelly of Live Love Pasta.

And then little by little add the flour to the liquid ingredients. You may not need all the flour, so keep whisking and see how thick it gets. You’ll want it to drip with the consistency of a nice thick syrup.


Tasty Kitchen Blog: Beer-Battered Fried Pickles. Guest post by Georgia Pellegrini, recipe submitted by TK member Kelly of Live Love Pasta.

Get your pickle slices close to you while the oil heats up.


Tasty Kitchen Blog: Beer-Battered Fried Pickles. Guest post by Georgia Pellegrini, recipe submitted by TK member Kelly of Live Love Pasta.

Use a pair of tongs or a fork and dip them in the batter one by one.


Tasty Kitchen Blog: Beer-Battered Fried Pickles. Guest post by Georgia Pellegrini, recipe submitted by TK member Kelly of Live Love Pasta.

They should be nicely coated. Shake off the excess and quickly drop them into the hot oil.


Tasty Kitchen Blog: Beer-Battered Fried Pickles. Guest post by Georgia Pellegrini, recipe submitted by TK member Kelly of Live Love Pasta.

The pickles will bubble and pop and after about 2 minutes …


Tasty Kitchen Blog: Beer-Battered Fried Pickles. Guest post by Georgia Pellegrini, recipe submitted by TK member Kelly of Live Love Pasta.

Flip them over so that they brown on the other side.


Tasty Kitchen Blog: Beer-Battered Fried Pickles. Guest post by Georgia Pellegrini, recipe submitted by TK member Kelly of Live Love Pasta.

You also might want to take the temperature of the oil along the way to make sure it doesn’t drop too much. The goal is to keep it hovering around 350 degrees F.


Tasty Kitchen Blog: Beer-Battered Fried Pickles. Guest post by Georgia Pellegrini, recipe submitted by TK member Kelly of Live Love Pasta.

Once they are golden brown, lay them on a wire rack and sprinkle them liberally with salt to help them crisp up.


Tasty Kitchen Blog: Beer-Battered Fried Pickles. Guest post by Georgia Pellegrini, recipe submitted by TK member Kelly of Live Love Pasta.

Then get out a little dipping bowl and pour in some ranch or your other favorite dipping sauce.


Tasty Kitchen Blog: Beer-Battered Fried Pickles. Guest post by Georgia Pellegrini, recipe submitted by TK member Kelly of Live Love Pasta.

Then you will have little golden discs of crispy, crunchy, salty, sour perfection.


Tasty Kitchen Blog: Beer-Battered Fried Pickles. Guest post by Georgia Pellegrini, recipe submitted by TK member Kelly of Live Love Pasta.

I hope you’ll make these as soon as humanly possible! And thanks to Kelly for passing along such a brilliant recipe. Check out her website Live Love Pasta for other brilliant recipes!


Printable Recipe

Beer Battered Fried Pickles

See post on kelly @ livelovepasta’s site!
5.00 Mitt(s) 2 Rating(s)2 votes, average: 5.00 out of 52 votes, average: 5.00 out of 52 votes, average: 5.00 out of 52 votes, average: 5.00 out of 52 votes, average: 5.00 out of 5

Prep Time:

Cook Time:

Difficulty: Easy

Servings: 6

6
x

Print Options

Page size Letter 3x5 4x6
Text Size Small Medium Large
Content Include description
Include prep time, etc.
Show image

Description

In honor of the Jersey Shore premiere, we decided to make Snooki’s favorite snack: Fried Pickles! They’re fun to snack on and they’re surprisingly tasty. This recipe is pretty basic—only 5 or 6 ingredients.

Ingredients

  • 20 ounces, fluid Canola Oil
  • 2 whole Dill Pickles, Sliced Into ½ Inch Rounds
  • 2 whole Eggs
  • ¾ cups Beer, Or More As Needed
  • 1 pinch Salt And Pepper, to taste
  • 2 cups Flour
  • Ranch Dressing, To Serve

Preparation Instructions

Pour enough oil in a large skillet so that the oil is about 1-2 inches up the side of the pan. Or use a deep fryer if you have one. Heat the oil to 350 degrees F.

Slice pickles into ½-inch slices. Set aside.

In a mixing bowl, whisk the eggs and beer. Season the mixture with salt and pepper. Whisk in enough flour to form a batter. If the batter is too thick, add up to 1/4 cup additional beer to thin the batter.

Using tongs, dip pickles one at a time into the batter and then place in the heated oil. Fry pickles for about 2 minutes, flipping the pickle after about 1 minute.

Place pickles on a plate lined with paper towels and season with salt. Serve with ranch dressing.


_______________________________________

There’s so much to say about Georgia, we don’t know where to start. Leaving Wall Street for the French Culinary Institute, followed by a stint at the Gramercy Tavern and La Chassagnette in France, her passion for food and food traditions are evident and inspiring. Visit her site at Georgia Pellegrini, where you’ll find more recipes, photos, learn all about her wonderful book Food Heroes, and enjoy her latest adventures.


Profile photo of Laurie - Simply Scratch

Nutella Cheesecake Pumpkin Muffins

Posted by in Baking, Step-by-Step Recipes

Tasty Kitchen Blog: Nutella Cheesecake Pumpkin Muffins. Guest post by Laurie McNamara of Simply Scratch, recipe submitted by TK member Amy of My Name is Snickerdoodle.

 
I distinctly remember the moment I fell in love with Nutella. I was sold by its creamy texture, distinct hazelnut flavor, and how well it tasted spread over a banana, then sprinkled with coconut. Ever since that very moment, I knew if there was one thing I needed to always have in my pantry, that would be Nutella. It quickly became a pantry staple as would peanut butter or flour for that matter. Whatever you decide to do with it, you’re sure to love it. I’m pretty sure there is simply no way to ruin any recipe that has Nutella in it.
 
So when I came upon this recipe for Nutella Cheesecake Pumpkin Muffins from TK member (Amy) mynameissnickerdoodle, I instantly knew this recipe was going to be a keeper. I could hardly wait for the cold weather to really set in so I could curl up with a cup of coffee and a plate of these muffins. I mean, the thought of Nutella cheesecake alone sounds heavenly, but Nutella cheesecake in the center of a pumpkin muffin? Only one word comes to mind: magical. And that’s exactly what they are.


Tasty Kitchen Blog: Nutella Cheesecake Pumpkin Muffins. Guest post by Laurie McNamara of Simply Scratch, recipe submitted by TK member Amy of My Name is Snickerdoodle.

To make these delicious muffins, you’ll need eggs, sugar, pumpkin puree, oil, flour, cinnamon, nutmeg, baking soda, salt, Nutella and cream cheese. I didn’t have any vegetable oil so I just substituted 1 cup extra light olive oil and a half cup of unsweetened applesauce and it worked like a charm.


Tasty Kitchen Blog: Nutella Cheesecake Pumpkin Muffins. Guest post by Laurie McNamara of Simply Scratch, recipe submitted by TK member Amy of My Name is Snickerdoodle.

Preheat your oven to 375ºF and line a muffin tin with some baking liners. These days you can find liners in all sorts of different colors or designs, which can really add personality and dress up any cupcake or muffin.


Tasty Kitchen Blog: Nutella Cheesecake Pumpkin Muffins. Guest post by Laurie McNamara of Simply Scratch, recipe submitted by TK member Amy of My Name is Snickerdoodle.

Now let’s get going with the pumpkin batter. In a bowl, add the all-purpose flour, baking soda, salt, cinnamon and nutmeg. It should start to smell good already!


Tasty Kitchen Blog: Nutella Cheesecake Pumpkin Muffins. Guest post by Laurie McNamara of Simply Scratch, recipe submitted by TK member Amy of My Name is Snickerdoodle.

Whisk the dry ingredients together and set aside for just a moment.


Tasty Kitchen Blog: Nutella Cheesecake Pumpkin Muffins. Guest post by Laurie McNamara of Simply Scratch, recipe submitted by TK member Amy of My Name is Snickerdoodle.

In a large bowl, crack four eggs.


Tasty Kitchen Blog: Nutella Cheesecake Pumpkin Muffins. Guest post by Laurie McNamara of Simply Scratch, recipe submitted by TK member Amy of My Name is Snickerdoodle.

Gently whisk the eggs until they are slightly beaten.


Tasty Kitchen Blog: Nutella Cheesecake Pumpkin Muffins. Guest post by Laurie McNamara of Simply Scratch, recipe submitted by TK member Amy of My Name is Snickerdoodle.

Next add in the sugar, applesauce and pumpkin puree.


Tasty Kitchen Blog: Nutella Cheesecake Pumpkin Muffins. Guest post by Laurie McNamara of Simply Scratch, recipe submitted by TK member Amy of My Name is Snickerdoodle.

Lastly, add in the oil.


Tasty Kitchen Blog: Nutella Cheesecake Pumpkin Muffins. Guest post by Laurie McNamara of Simply Scratch, recipe submitted by TK member Amy of My Name is Snickerdoodle.

Stir until all the wet ingredients are thoroughly combined.


Tasty Kitchen Blog: Nutella Cheesecake Pumpkin Muffins. Guest post by Laurie McNamara of Simply Scratch, recipe submitted by TK member Amy of My Name is Snickerdoodle.

Working in batches, add a little of the flour mixture into the pumpkin batter.


Tasty Kitchen Blog: Nutella Cheesecake Pumpkin Muffins. Guest post by Laurie McNamara of Simply Scratch, recipe submitted by TK member Amy of My Name is Snickerdoodle.

Stir until all ingredients are incorporated.


Tasty Kitchen Blog: Nutella Cheesecake Pumpkin Muffins. Guest post by Laurie McNamara of Simply Scratch, recipe submitted by TK member Amy of My Name is Snickerdoodle.

The batter should be smooth yet slightly thick. My rule of thumb: if the batter tastes amazing, so will the final baked product. And let me just tell you, the batter is absolutely fantastic! Now, if you can help it, set it aside and get started with the cheesecake filling.


Tasty Kitchen Blog: Nutella Cheesecake Pumpkin Muffins. Guest post by Laurie McNamara of Simply Scratch, recipe submitted by TK member Amy of My Name is Snickerdoodle.

Measure out a half cup of Nutella.


Tasty Kitchen Blog: Nutella Cheesecake Pumpkin Muffins. Guest post by Laurie McNamara of Simply Scratch, recipe submitted by TK member Amy of My Name is Snickerdoodle.>

Add the Nutella, along with the 8 ounces of softened cream cheese and one whole egg into a medium bowl.


Tasty Kitchen Blog: Nutella Cheesecake Pumpkin Muffins. Guest post by Laurie McNamara of Simply Scratch, recipe submitted by TK member Amy of My Name is Snickerdoodle.

Using a hand mixer, blend until smooth.


Tasty Kitchen Blog: Nutella Cheesecake Pumpkin Muffins. Guest post by Laurie McNamara of Simply Scratch, recipe submitted by TK member Amy of My Name is Snickerdoodle.

Now comes the fun part! To the lined muffin tin, add two level tablespoons of the pumpkin batter.


Tasty Kitchen Blog: Nutella Cheesecake Pumpkin Muffins. Guest post by Laurie McNamara of Simply Scratch, recipe submitted by TK member Amy of My Name is Snickerdoodle.

Next place a tablespoon of the Nutella cheesecake mixture on top of that.


Tasty Kitchen Blog: Nutella Cheesecake Pumpkin Muffins. Guest post by Laurie McNamara of Simply Scratch, recipe submitted by TK member Amy of My Name is Snickerdoodle.

Lastly, top the Nutella mixture with two more tablespoons of the pumpkin batter. Place in your preheated oven for 18-20 minutes. See? So easy!


Tasty Kitchen Blog: Nutella Cheesecake Pumpkin Muffins. Guest post by Laurie McNamara of Simply Scratch, recipe submitted by TK member Amy of My Name is Snickerdoodle.

My muffins baked up perfectly in 18 minutes. They were light and fluffy and my home filled up with the smell of pumpkin. Here are some words of advice: let them cool slightly before removing from the pan and attempting to eat.


Tasty Kitchen Blog: Nutella Cheesecake Pumpkin Muffins. Guest post by Laurie McNamara of Simply Scratch, recipe submitted by TK member Amy of My Name is Snickerdoodle.

What I really liked about this recipe, besides the whole entire thing, was that the measurements are spot on. I didn’t have any leftover batter or cheesecake filling. And if you keep the muffins in an airtight container, they can last for up to a week. (If that’s even possible.)


Tasty Kitchen Blog: Nutella Cheesecake Pumpkin Muffins. Guest post by Laurie McNamara of Simply Scratch, recipe submitted by TK member Amy of My Name is Snickerdoodle.

It was pure genius of Amy to match this fluffy pumpkin cake with the silkiness of Nutella cheesecake. These muffins pack easily and are great afternoon snack or as an evening dessert. And as a Season Two Dessert Host for Real Women of Philadelphia, Amy is no stranger to creating fun and delicious treats. It’s obvious she knows her way around a kitchen. Just check out Amy’s Tasty Kitchen recipe box or stop by her fun and happy website My Name is Snickerdoodle and you’ll see just why. Thank you, Amy, for sharing such a scrumptious muffin recipe with us! This recipe will firmly hold a spot in my recipe box and I can’t wait to bake these again for the holidays.

Note: The only change to this recipe I made was to use 1 cup olive oil and a half cup unsweetened apple sauce instead of 1-1/2 cups vegetable oil.


Printable Recipe

Nutella Cheesecake Pumpkin Muffins

See post on mynameissnickerdoodle’s site!
4.60 Mitt(s) 15 Rating(s)15 votes, average: 4.60 out of 515 votes, average: 4.60 out of 515 votes, average: 4.60 out of 515 votes, average: 4.60 out of 515 votes, average: 4.60 out of 5

Prep Time:

Cook Time:

Difficulty: Easy

Servings: 20

20
x

Print Options

Page size Letter 3x5 4x6
Text Size Small Medium Large
Content Include description
Include prep time, etc.
Show image

Description

Pumpkin muffins just says fall. Adding a little Nutella cheesecake filling to pumpkin muffins just YELLS fall!

Ingredients

  • FOR THE PUMPKIN MUFFINS:
  • 4 whole Large Eggs
  • 1-½ cup Sugar
  • 1 can (15 Oz. Size) Pumpkin Puree
  • 1-½ cup Vegetable Oil
  • 3 cups All-purpose Flour
  • 2 teaspoons Cinnamon
  • 1 teaspoon Nutmeg
  • 2 teaspoons Baking Soda
  • 1 teaspoon Salt
  • FOR THE NUTELLA CHEECAKE FILLING:
  • 8 ounces, weight Cream Cheese, Softened
  • ½ cups Nutella
  • 1 whole Large Egg

Preparation Instructions

Preheat oven to 375°F. In a large bowl, beat eggs slightly. Add in sugar, pumpkin and oil and beat thoroughly. Add in remaining dry ingredients and mix until smooth.

In a small bowl, beat together cream cheese, Nutella and egg until smooth.

Place paper liners in a muffin tin. Place about 2 tablespoons of pumpkin batter into each liner, then 1 tablespoon of Nutella batter, then top with 2 more tablespoons of pumpkin batter. Bake for 18-22 minutes.

These are best served completely cooled. Makes 20 muffins.


_______________________________________

Laurie is the force behind Simply Scratch, a blog that documents her efforts to find and create recipes that are made simply from scratch. (We think it’s sweet that her mother-in-law helped her set up her blog and get started.) We love her recipes; they’re not just tried and true, but they look gorgeous as well. Check out her blog and you’ll become a fan too.