The Pioneer Woman Tasty Kitchen
Profile photo of Natalie | Perry's Plate

Pepitas Shrimp Skewers

Posted by in Step-by-Step Recipes

Tasty Kitchen Blog: Pepitas Shrimp Skewers. Guest post by Natalie Perry of Perry's Plate, recipe submitted by TK member Lindsay of Eat 80/20.

 
The sun seems to be shining more lately, and after all of the freezing cold weather most of us here in the US have been experiencing (snow in San Francisco?!) I’m definitely ready for warmer weather. And flip flops. And throwing everything we eat on the grill. I was drawn to this recipe for Pepitas Shrimp Skewers because I’m antsy to start grilling. And shrimp seems like a spring-y type of food, no?

TK member Eat 80/20 Dietitian (Lindsay) who blogs at Eighty Twenty is a registered dietitian and has put together some incredible shrimp skewers. My favorite part is how she incorporates ground pepitas (one of my favorite seeds) in the shrimp marinade. These skewers would be a flavorful, healthy addition to your next get-together, but they’ll go fast. It’s a good thing this recipe makes a lot!


Tasty Kitchen Blog: Pepitas Shrimp Skewers. Guest post by Natalie Perry of Perry's Plate, recipe submitted by TK member Lindsay of Eat 80/20.

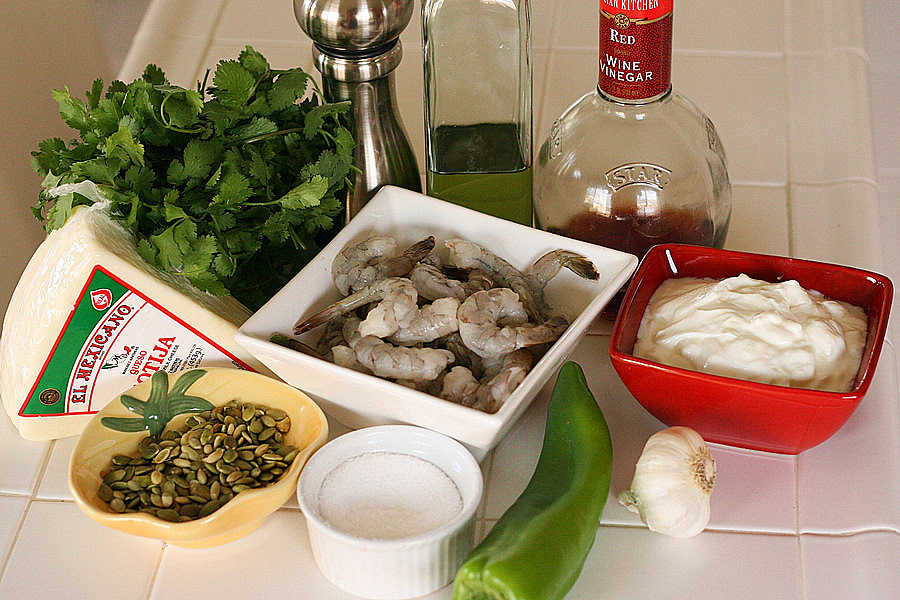
To make these skewers you’ll need 50 or up to 75 medium shrimp (peeled, tail-on), cotija or Parmesan cheese, roasted pepitas (shelled pumpkin seeds), salt, one anaheim pepper, some garlic, plain yogurt, red wine vinegar, heat-safe oil (I used grapeseed instead of canola), pepper, and bunch of fresh cilantro.


Tasty Kitchen Blog: Pepitas Shrimp Skewers. Guest post by Natalie Perry of Perry's Plate, recipe submitted by TK member Lindsay of Eat 80/20.

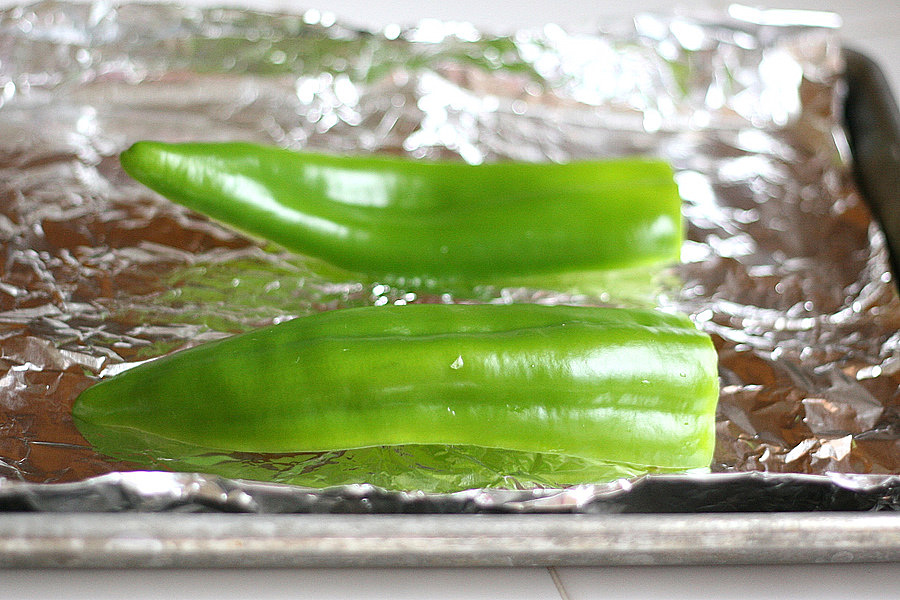
First you’ll need to roast the pepper. Anaheim peppers are longer and lighter in color than green bell peppers. They’re very mild, too. If you can’t find fresh Anaheim peppers in your grocery store, simply use a 4-ounce can of diced green chiles instead.

Slice the pepper in half, remove the seeds and white veins and place cut-side down on a foil lined baking sheet. Put it under the oven broiler for 8–10 minutes until the skins have large black spots.


Tasty Kitchen Blog: Pepitas Shrimp Skewers. Guest post by Natalie Perry of Perry's Plate, recipe submitted by TK member Lindsay of Eat 80/20.

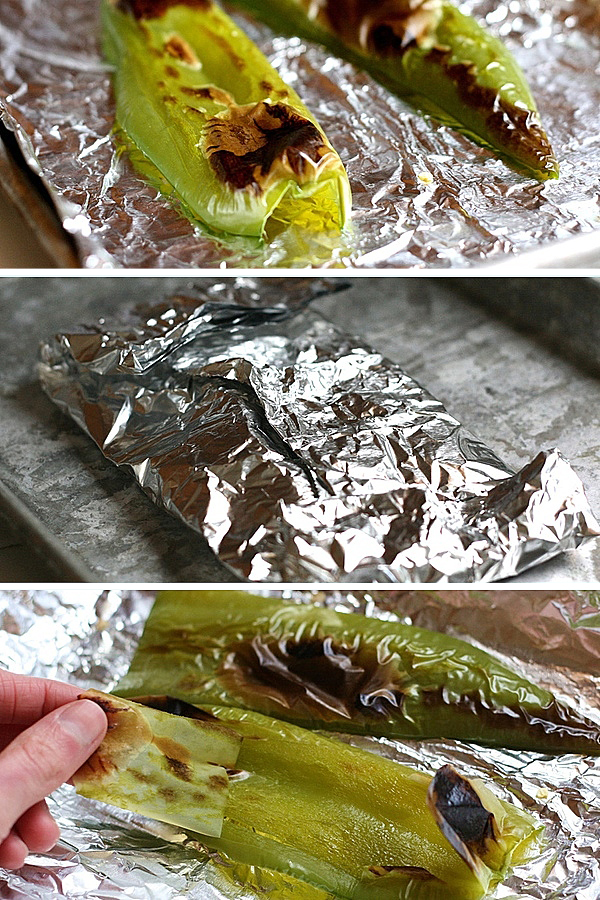
When they come out of the oven, fold the foil around the peppers and let them sit for 5–10 minutes to steam. This should make the peel come off very easily. If you don’t get all the peel off, don’t sweat it.


Tasty Kitchen Blog: Pepitas Shrimp Skewers. Guest post by Natalie Perry of Perry's Plate, recipe submitted by TK member Lindsay of Eat 80/20.

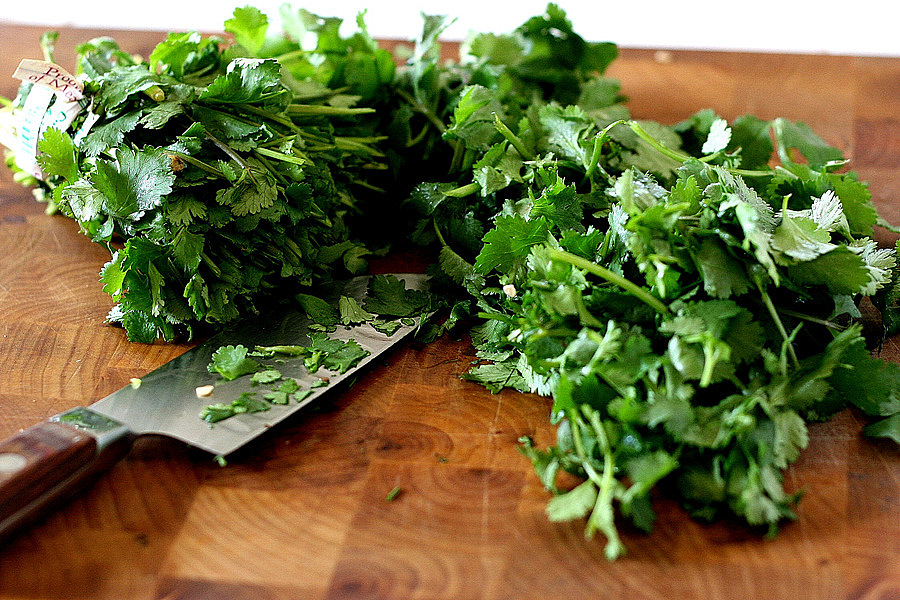
Get the cilantro ready by taking the bunch and slicing it off where the leaves start to get really dense, avoiding the thicker stems. Give the leaves a rough chop.


Tasty Kitchen Blog: Pepitas Shrimp Skewers. Guest post by Natalie Perry of Perry's Plate, recipe submitted by TK member Lindsay of Eat 80/20.

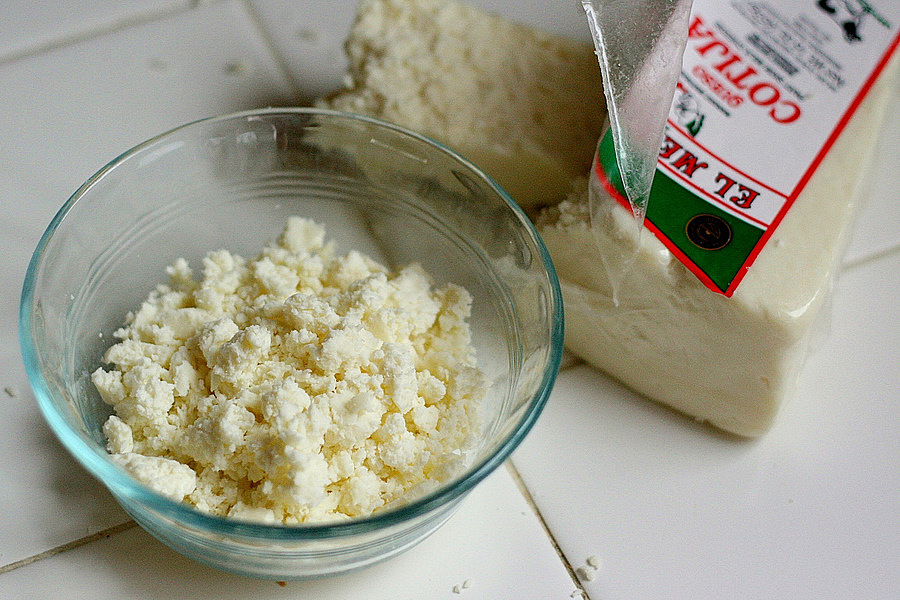
Get the cotija cheese ready by crumbling it with your fingers. Have you ever had cotija cheese? The first time I tried it I thought I’d died and gone to Mexican cheese heaven. I love this cheese. It’s salty and fairly dry like feta, but the taste isn’t quite as strong. You could use feta or even fresh Parmesan cheese if you can’t find cotija.


Tasty Kitchen Blog: Pepitas Shrimp Skewers. Guest post by Natalie Perry of Perry's Plate, recipe submitted by TK member Lindsay of Eat 80/20.

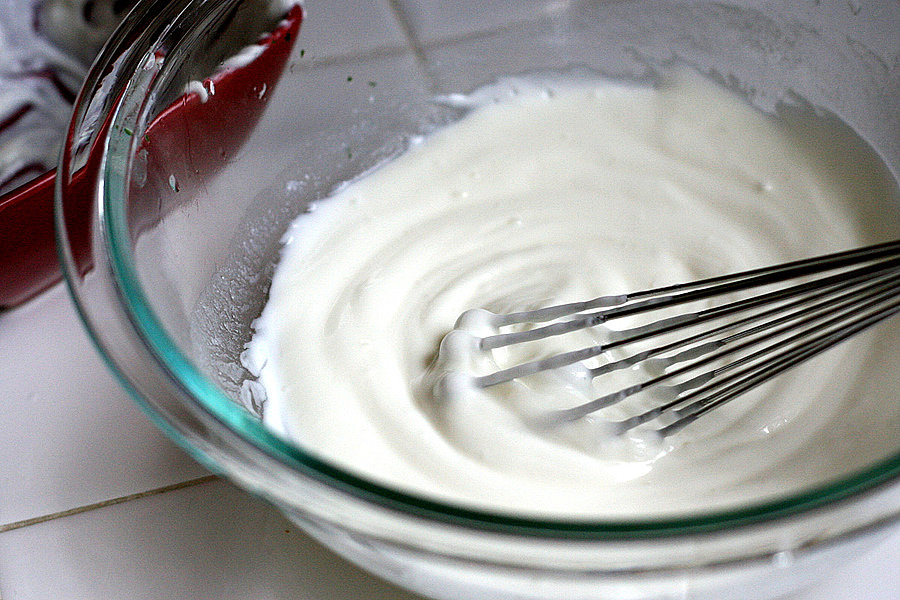
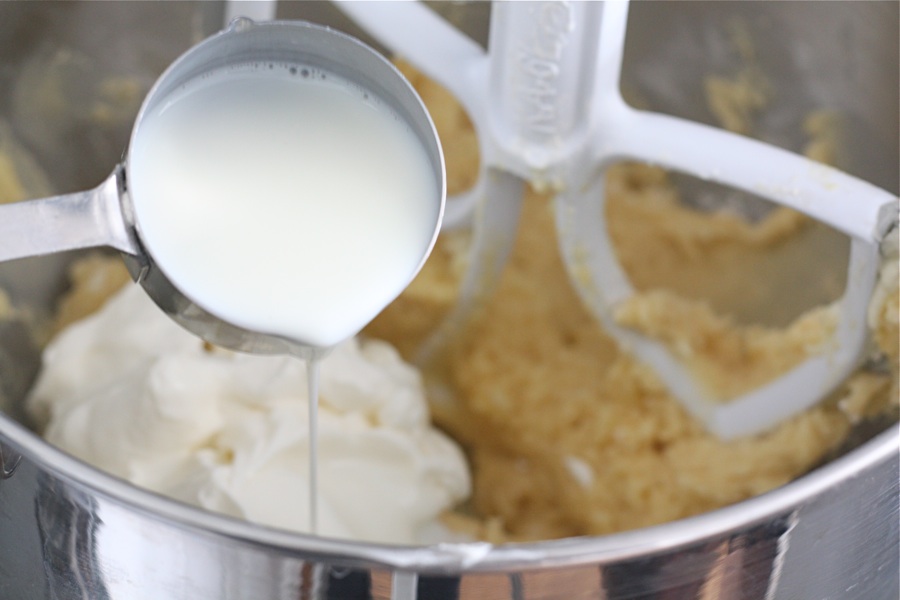
Pour the yogurt into a bowl and give it a whisk to loosen it up.


Tasty Kitchen Blog: Pepitas Shrimp Skewers. Guest post by Natalie Perry of Perry's Plate, recipe submitted by TK member Lindsay of Eat 80/20.

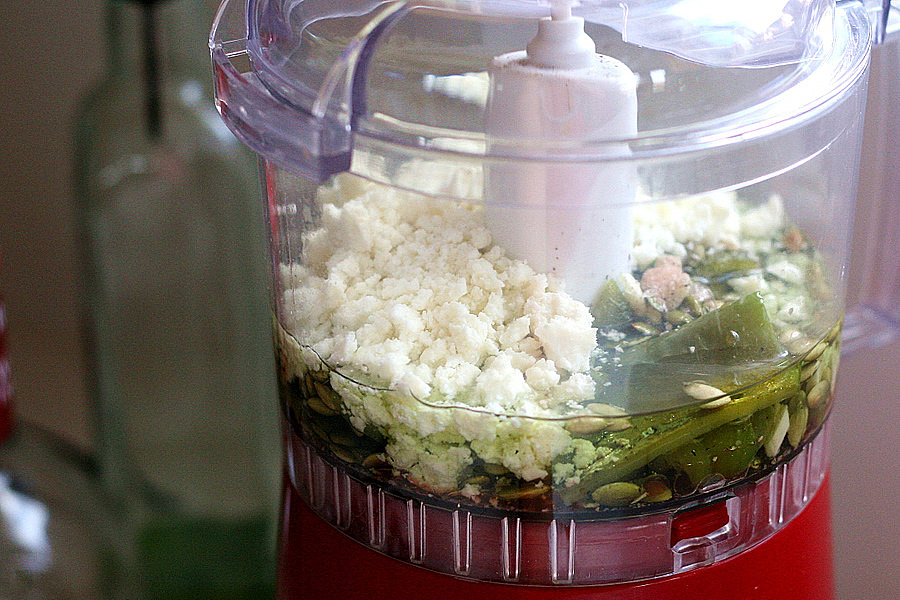
Grab your food processor or blender and add the roasted chile, pepitas, garlic, salt, pepper, oil, vinegar, and cheese.


Tasty Kitchen Blog: Pepitas Shrimp Skewers. Guest post by Natalie Perry of Perry's Plate, recipe submitted by TK member Lindsay of Eat 80/20.

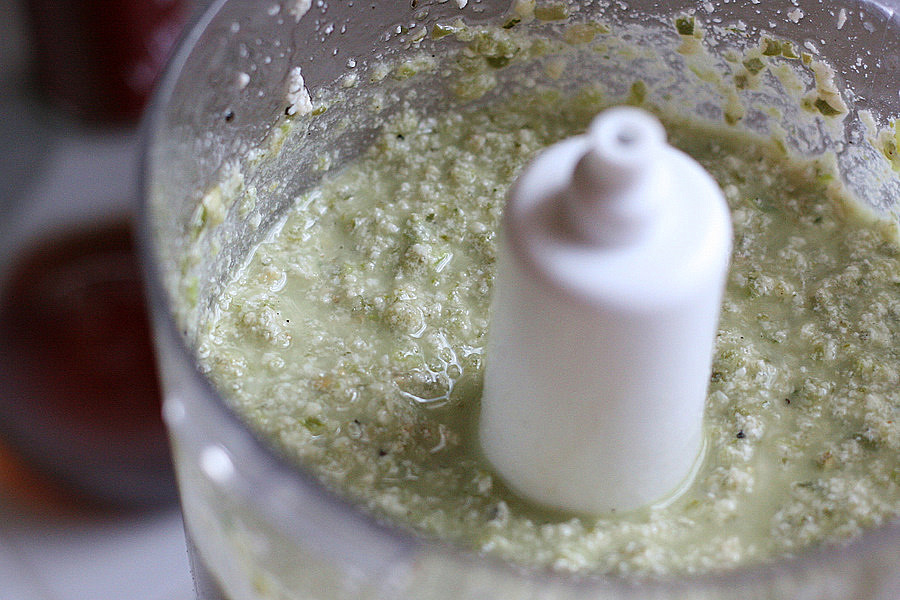
Blend or process until no large chunks remain. Doesn’t look so appetizing, but smells great already!


Tasty Kitchen Blog: Pepitas Shrimp Skewers. Guest post by Natalie Perry of Perry's Plate, recipe submitted by TK member Lindsay of Eat 80/20.

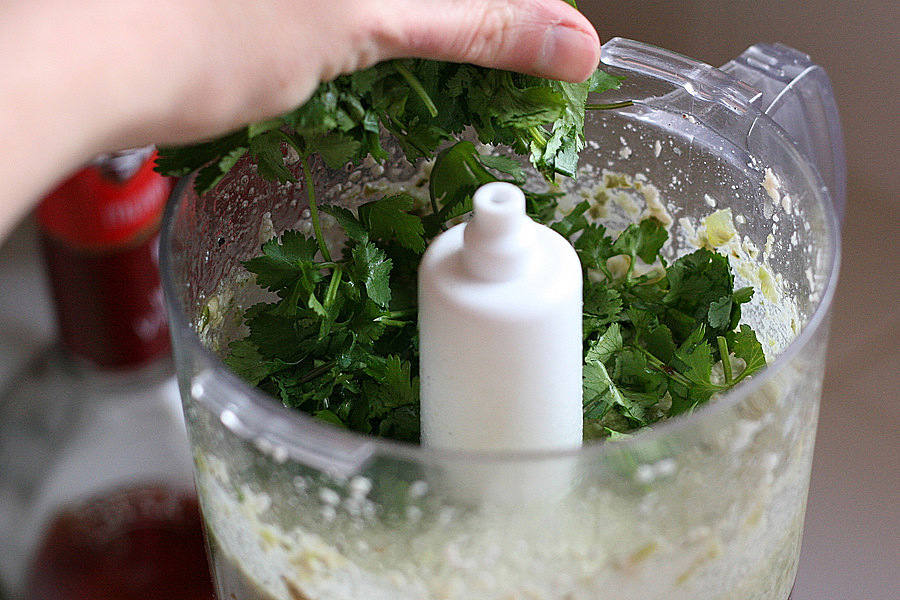
Add the cilantro and blend until smooth. At this point I really think you could use this as a salad dressing.


Tasty Kitchen Blog: Pepitas Shrimp Skewers. Guest post by Natalie Perry of Perry's Plate, recipe submitted by TK member Lindsay of Eat 80/20.

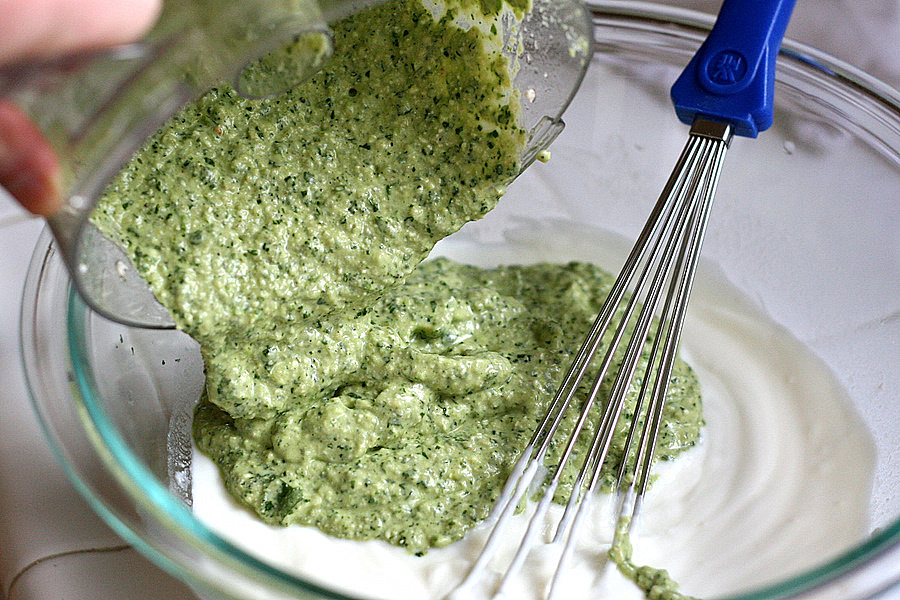
Dump the lovely green mixture into the bowl with the yogurt.
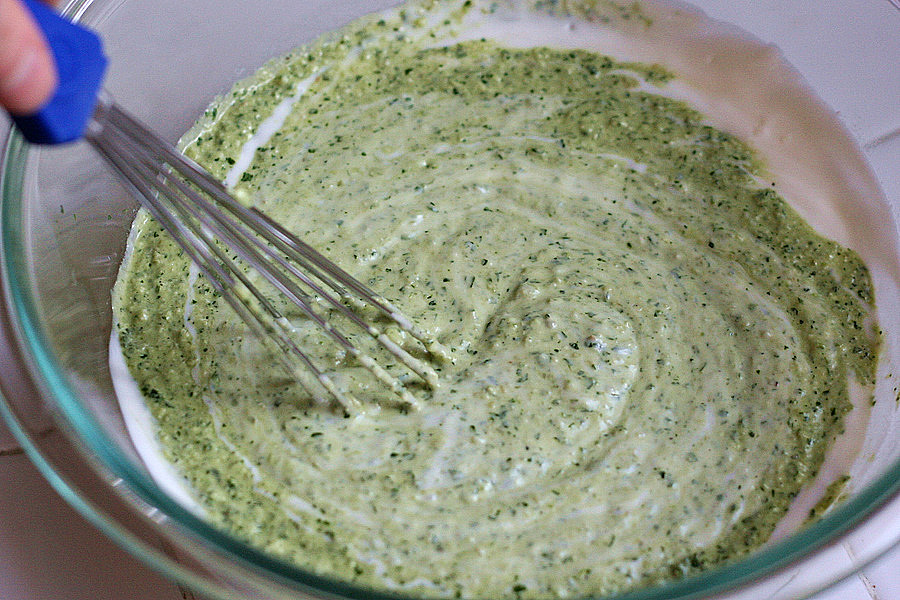


Tasty Kitchen Blog: Pepitas Shrimp Skewers. Guest post by Natalie Perry of Perry's Plate, recipe submitted by TK member Lindsay of Eat 80/20.

Whisk it together.


Tasty Kitchen Blog: Pepitas Shrimp Skewers. Guest post by Natalie Perry of Perry's Plate, recipe submitted by TK member Lindsay of Eat 80/20.

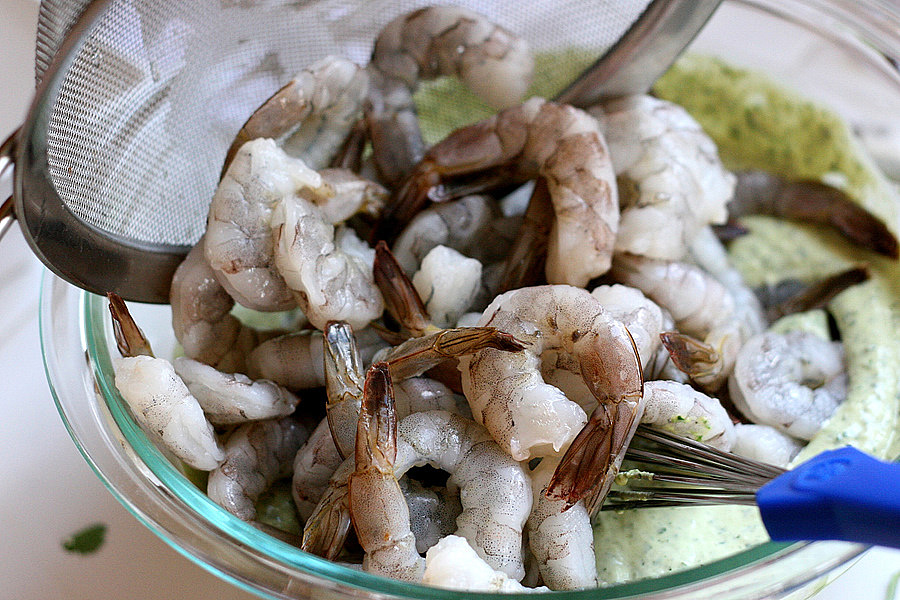
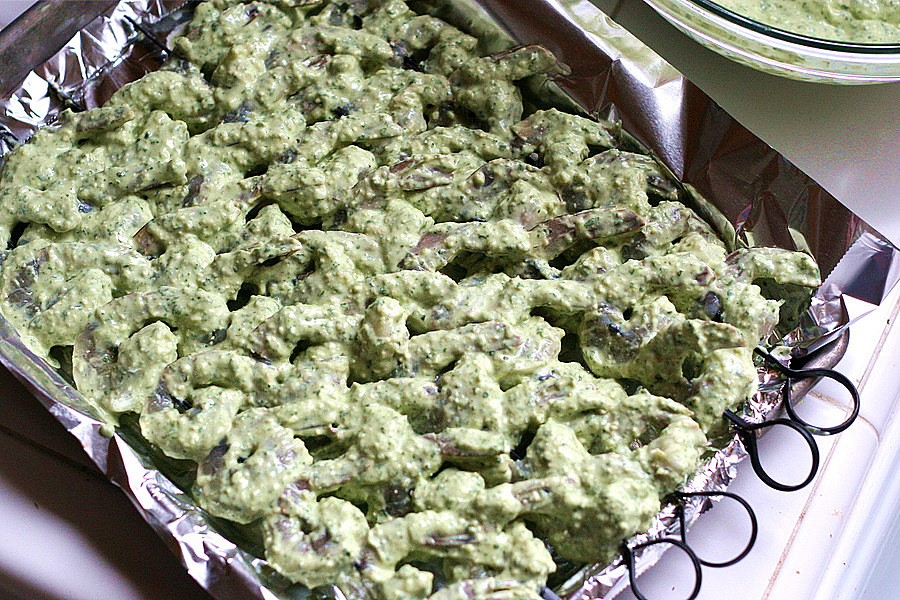
Now dump in all of the shrimp. (See how easy this is?) Stir to ensure the shrimp is coated. I used a little over 50 shrimp, but I think there is enough marinade for up to 75 shrimp.


Tasty Kitchen Blog: Pepitas Shrimp Skewers. Guest post by Natalie Perry of Perry's Plate, recipe submitted by TK member Lindsay of Eat 80/20.

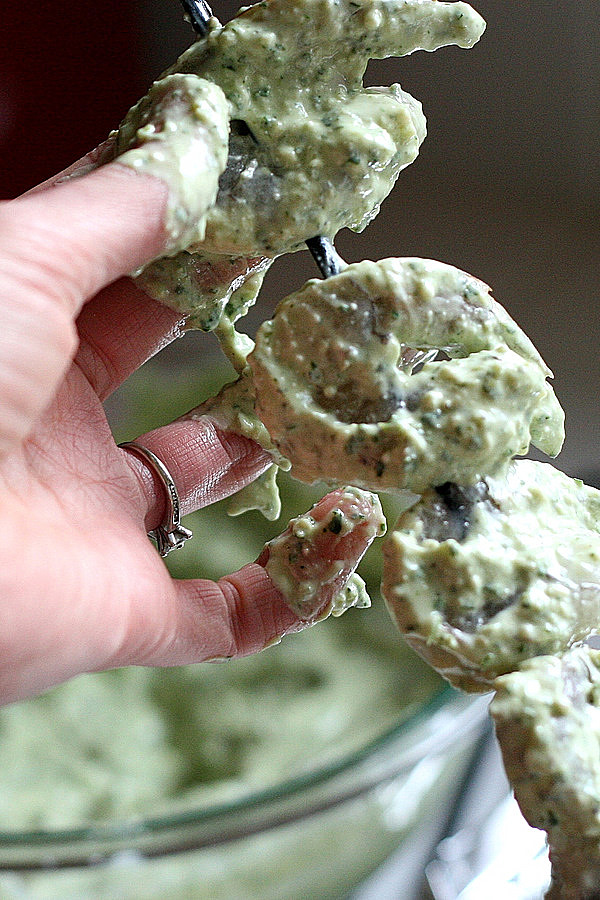
Time to get your hands dirty! Thread shrimp carefully onto skewers. I like to skewer them in two places so they’re more secure and easier to flip on the grill. If you’re using bamboo skewers, make sure to soak them in water for 30 minutes so they don’t burn.


Tasty Kitchen Blog: Pepitas Shrimp Skewers. Guest post by Natalie Perry of Perry's Plate, recipe submitted by TK member Lindsay of Eat 80/20.

I ended up with 6 skewers with 8 shrimp per skewer, plus half of another skewer.


Tasty Kitchen Blog: Pepitas Shrimp Skewers. Guest post by Natalie Perry of Perry's Plate, recipe submitted by TK member Lindsay of Eat 80/20.

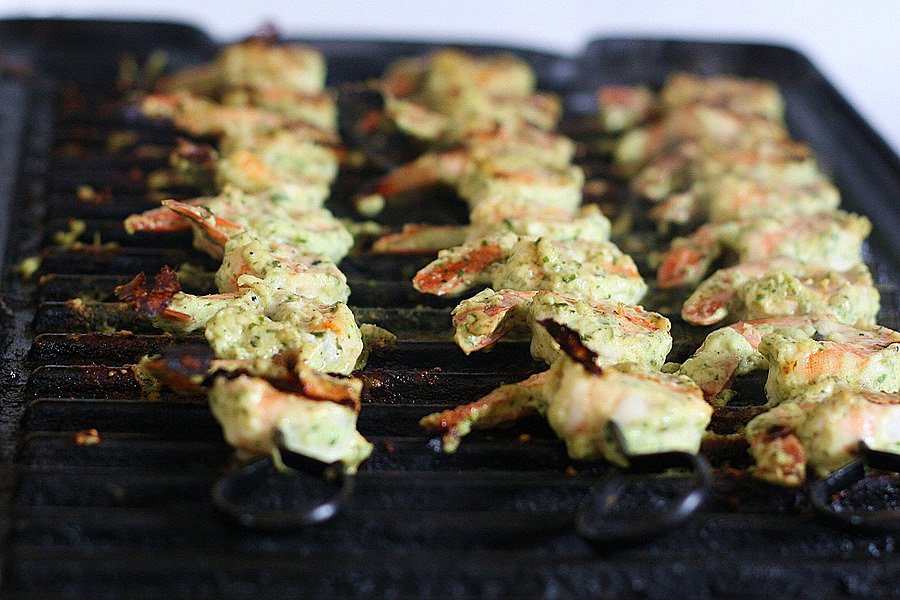
Heat your grill up to about medium heat and place skewers on the grates a few at a time. Grill for about 3-4 minutes per side or until the shrimp are no longer gray or translucent. Be careful not to overcook them or they’ll be rubbery. The recipe says 15 minutes total, but mine were done in about half that time. (My grill might have been on the hot side. So keep your eye on them.)

If you don’t have an outdoor BBQ grill, using a grill pan on the stove does a pretty good job. You don’t even have to wait for the snow to melt! I’ve got a cast-iron grill pan that I love and have been using for years. You could even broil them in the oven, turning them once during cooking.


Tasty Kitchen Blog: Pepitas Shrimp Skewers. Guest post by Natalie Perry of Perry's Plate, recipe submitted by TK member Lindsay of Eat 80/20.

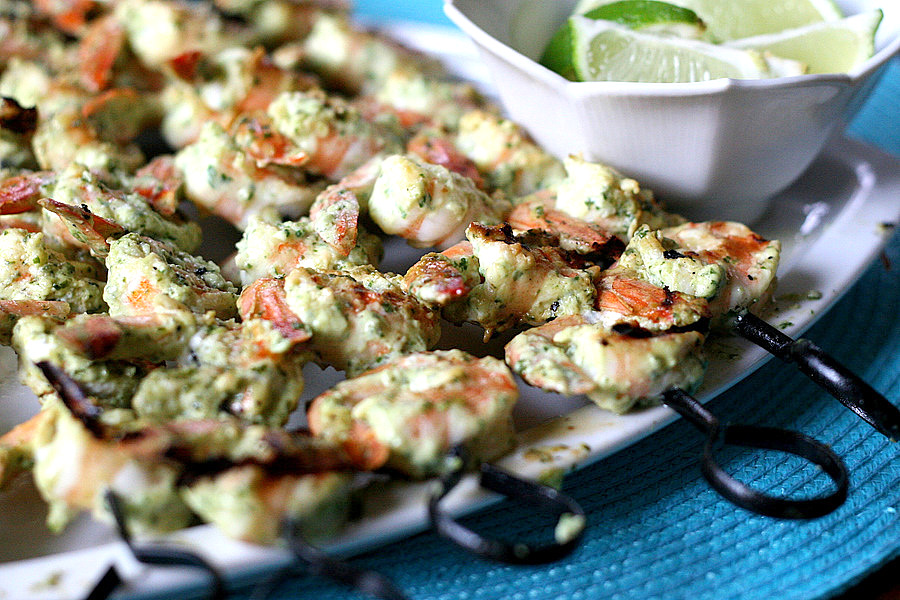
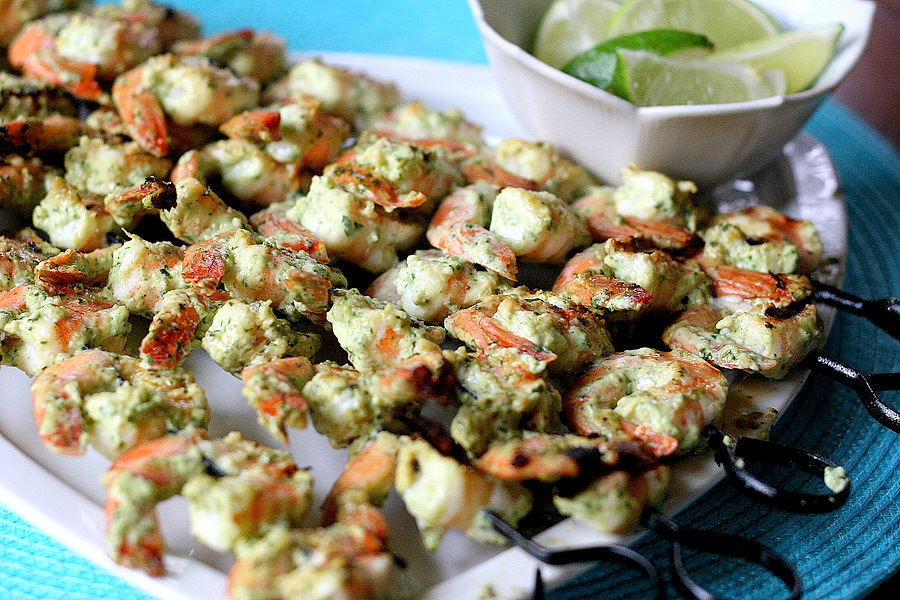
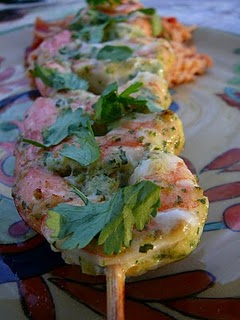
Put the skewers on a platter and serve with lime wedges. Y-U-M.

As I was thinking of something to serve these with I remembered a recipe I ran across in a book for roasted chile and goat cheese tacos. So I threw a few extra Anaheim chiles on the roasting pan, grabbed some goat cheese and homemade corn tortillas …


Tasty Kitchen Blog: Pepitas Shrimp Skewers. Guest post by Natalie Perry of Perry's Plate, recipe submitted by TK member Lindsay of Eat 80/20.

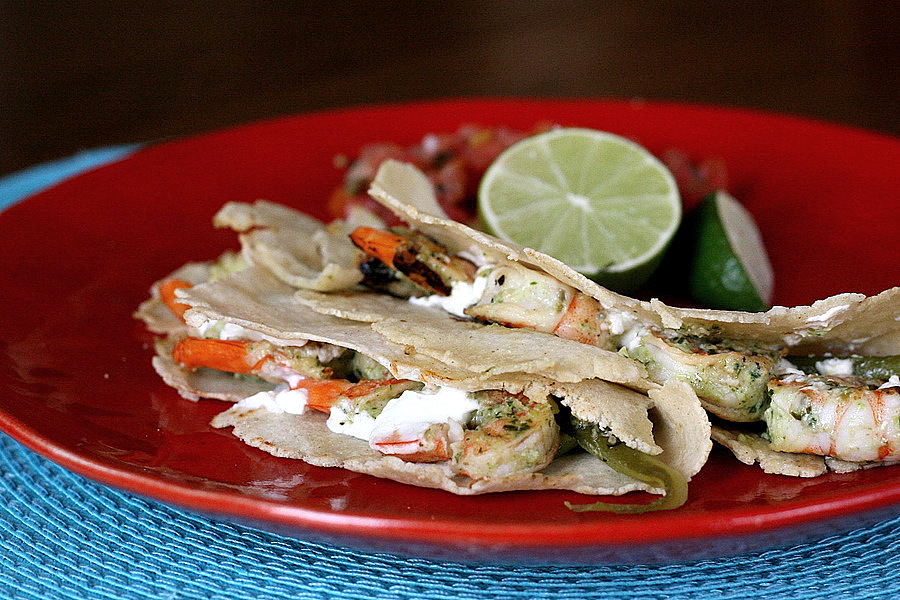
And ended up with one of the best tacos I’ve had in my life. These shrimp are fantastic by themselves, but whoa, nelly, are they great in tacos. Especially these ones.

Thanks Lindsay for a great new way to cook shrimp! Her blog, Eat 80/20, is all about balance—eating healthy 80% of the time lets you cheat a little for the remaining 20%. In there, you’ll find helpful nutrition tips in addition to a great collection of recipes.


Printable Recipe

Pepitas Shrimp Skewers

See post on Lindsay {Eighty Twenty Dietitian}’s site!
5.00 Mitt(s) 1 Rating(s)1 vote, average: 5.00 out of 51 vote, average: 5.00 out of 51 vote, average: 5.00 out of 51 vote, average: 5.00 out of 51 vote, average: 5.00 out of 5

Prep Time:

Cook Time:

Difficulty: Easy

Servings: 6

6
x

Print Options

Page size Letter 3x5 4x6
Text Size Small Medium Large
Content Include description
Include prep time, etc.
Show image

Description

Pepitas are pumpkin seeds without the shell! You can roast and shell your own (maybe after a pumpkin carving?) or purchase them pre-roasted without shells (look in the bulk section of your grocery store). As with any seed or nut, they have lots of healthy fats and fiber!

Ingredients

  • 1 whole Anaheim Chile, Roasted, Peeled And Seeded
  • ¼ cups Roasted Pepitas
  • 1 whole Garlic Clove, Pressed And Minced
  • ¼ teaspoons Ground Black Pepper
  • 1 teaspoon Salt
  • ½ cups Canola Oil
  • 2 Tablespoons Red Wine Vinegar
  • 3 Tablespoons Grated Cotija Cheese (or Shredded Parmesan)
  • 1 bunch Cilantro, Stemmed
  • 1-½ cup Lowfat Yogurt
  • 50 whole Shrimp, Peeled, Deveined, Tail-on

Preparation Instructions

Place all ingredients except cilantro, yogurt and shrimp in a blender or food processor. Blend about 10 seconds, then add cilantro little by little until blended smooth (reserve some cilantro for garnish if desired). Place yogurt in a medium stainless steel bowl and mix with a wire whip until smooth. Add the blended ingredients and mix thoroughly.

Add shrimp to the mixture. Refrigerate at least 3 hours. Twenty minutes prior to cooking, soak bamboo skewers in water (to prevent burning).

Preheat grill. Skewer 5-6 shrimp on each stick. Cook over medium heat until done (about 10-15 minutes).

Nutrition info per 2 tablespoons pepitas dressing/marinade: 101 calories, 6 g fat, 3 g protein, 3 g carbohydrates

Nutrition info per 8-9 shrimp: 55 calories, 1 g fat, 11.5 g protein, 0 g carbohydrate, 107mg cholesterol


_______________________________________

Be sure to check out Natalie’s own beautiful food blog, Perrys’ Plate, where you can see her growing collection of lovely recipes. There’s always something new to see there. Go visit now!


Profile photo of twopeasandtheirpod

Snickerdoodle Muffins

Posted by in Baking, Step-by-Step Recipes

Tasty Kitchen Blog: Snickerdoodle Muffins. Guest post by Maria Lichty of Two Peas and Their Pod, recipe submitted by TK member Heather of Heather Christo Cooks, adapted from Culinary Concoctions by Peabody.

 
Snickerdoodles have always been one of my favorite cookies. First of all, I love the name. I bet you can’t say snickerdoodle without smiling. It’s such a fun word. I also enjoy eating the sweet, buttery cookies that have a cinnamon sugar crust. When I saw this recipe submitted by Heather Christo for Snickerdoodle Muffins on Tasty Kitchen, I did a little happy dance. A cookie in muffin form? Talk about a dream come true! Heather adapted this from Culinary Concoctions by Peabody. I read over the recipe and checked my pantry and refrigerator. Luckily, I had everything I needed to make the muffins. I love recipes that don’t require a trip to the store. I rolled up my sleeves and got started. 


Tasty Kitchen Blog: Snickerdoodle Muffins. Guest post by Maria Lichty of Two Peas and Their Pod, recipe submitted by TK member Heather of Heather Christo Cooks, adapted from Culinary Concoctions by Peabody.

To make the Snickerdoodle Muffins, you will need: butter, sugar, eggs, vanilla, flour, baking powder, baking soda, salt, cream of tartar, sour cream, buttermilk, and cinnamon and sugar for the topping. 


Tasty Kitchen Blog: Snickerdoodle Muffins. Guest post by Maria Lichty of Two Peas and Their Pod, recipe submitted by TK member Heather of Heather Christo Cooks, adapted from Culinary Concoctions by Peabody. 

Preheat the oven to 350 degrees F. Prepare a muffin tin with liners and set aside. Make sure you use liners because the muffins are delicate.  


Tasty Kitchen Blog: Snickerdoodle Muffins. Guest post by Maria Lichty of Two Peas and Their Pod, recipe submitted by TK member Heather of Heather Christo Cooks, adapted from Culinary Concoctions by Peabody.

In a mixer, combine the butter and sugar and cream until fluffy. 


Tasty Kitchen Blog: Snickerdoodle Muffins. Guest post by Maria Lichty of Two Peas and Their Pod, recipe submitted by TK member Heather of Heather Christo Cooks, adapted from Culinary Concoctions by Peabody.

Add the eggs and vanilla extract and beat until smooth. 


Tasty Kitchen Blog: Snickerdoodle Muffins. Guest post by Maria Lichty of Two Peas and Their Pod, recipe submitted by TK member Heather of Heather Christo Cooks, adapted from Culinary Concoctions by Peabody.

In a separate bowl, whisk together the dry ingredients. 


Tasty Kitchen Blog: Snickerdoodle Muffins. Guest post by Maria Lichty of Two Peas and Their Pod, recipe submitted by TK member Heather of Heather Christo Cooks, adapted from Culinary Concoctions by Peabody.

Add half of the dry ingredients to the mixing bowl and stir to combine. 


Tasty Kitchen Blog: Snickerdoodle Muffins. Guest post by Maria Lichty of Two Peas and Their Pod, recipe submitted by TK member Heather of Heather Christo Cooks, adapted from Culinary Concoctions by Peabody.

Add the sour cream and buttermilk and mix until combined. 


Tasty Kitchen Blog: Snickerdoodle Muffins. Guest post by Maria Lichty of Two Peas and Their Pod, recipe submitted by TK member Heather of Heather Christo Cooks, adapted from Culinary Concoctions by Peabody.

Add the rest of the dry ingredients and mix until batter is smooth. 


Tasty Kitchen Blog: Snickerdoodle Muffins. Guest post by Maria Lichty of Two Peas and Their Pod, recipe submitted by TK member Heather of Heather Christo Cooks, adapted from Culinary Concoctions by Peabody.

In a small bowl, combine the cinnamon and sugar for the muffin topping. 


Tasty Kitchen Blog: Snickerdoodle Muffins. Guest post by Maria Lichty of Two Peas and Their Pod, recipe submitted by TK member Heather of Heather Christo Cooks, adapted from Culinary Concoctions by Peabody.

Use an ice cream or large cookie scooper to scoop out the muffin batter. 


Tasty Kitchen Blog: Snickerdoodle Muffins. Guest post by Maria Lichty of Two Peas and Their Pod, recipe submitted by TK member Heather of Heather Christo Cooks, adapted from Culinary Concoctions by Peabody.

Plop a scoop of batter into the cinnamon and sugar mixture. Gently roll the muffin batter in the cinnamon and sugar, until well coated. Place the ball into a muffin liner. 


Tasty Kitchen Blog: Snickerdoodle Muffins. Guest post by Maria Lichty of Two Peas and Their Pod, recipe submitted by TK member Heather of Heather Christo Cooks, adapted from Culinary Concoctions by Peabody.

When you have completed all of the muffins, sprinkle the leftover cinnamon sugar mixture onto the tops of the muffins. 


Tasty Kitchen Blog: Snickerdoodle Muffins. Guest post by Maria Lichty of Two Peas and Their Pod, recipe submitted by TK member Heather of Heather Christo Cooks, adapted from Culinary Concoctions by Peabody.

Bake the muffins for 15–18 minutes, or until they are golden brown and baked all the way through. 


Tasty Kitchen Blog: Snickerdoodle Muffins. Guest post by Maria Lichty of Two Peas and Their Pod, recipe submitted by TK member Heather of Heather Christo Cooks, adapted from Culinary Concoctions by Peabody.

Our house smelled amazing while the muffins were baking. The muffin tops looked exactly like snickerdoodle cookies. I have no will power when it comes to baked goods, so as soon as I removed them from the oven, I unwrapped a muffin and took a big bite. The muffin melted in my mouth. They taste exactly like snickerdoodle cookies, but in muffin form. The muffins are moist, delicate, and oh so delicious. I think the muffins are best when they are warm, so enjoy them straight out of the oven or heat them up in the microwave for a few seconds. These muffins are great for breakfast, a sweet snack, or dessert. 


Tasty Kitchen Blog: Snickerdoodle Muffins. Guest post by Maria Lichty of Two Peas and Their Pod, recipe submitted by TK member Heather of Heather Christo Cooks, adapted from Culinary Concoctions by Peabody.

 
Thanks Heather for sharing this Snickerdoodle Muffin recipe. I know I will be making these muffins on a regular basis. They didn’t last long in our house.  (Head on over to Heather’s blog, for more delicious recipes and entertaining tips.)  


Printable Recipe

Snickerdoodle Muffins

See post on Heather Christo’s site!
4.93 Mitt(s) 32 Rating(s)32 votes, average: 4.93 out of 532 votes, average: 4.93 out of 532 votes, average: 4.93 out of 532 votes, average: 4.93 out of 532 votes, average: 4.93 out of 5

Prep Time:

Cook Time:

Difficulty: Easy

Servings: 12

12
x

Print Options

Page size Letter 3x5 4x6
Text Size Small Medium Large
Content Include description
Include prep time, etc.
Show image

Description

Delicious muffins that combines the best of a snickerdoodle cookie with the comfort of a warm muffin, perfect for breakfast or dessert!

Ingredients

  • 1 cup Butter, Softened
  • 1 cup Sugar
  • 2 whole Eggs
  • 2 teaspoons Vanilla
  • 2-¼ cups Flour
  • ¾ teaspoons Baking Powder
  • ¾ teaspoons Baking Soda
  • ¾ teaspoons Cream Of Tartar
  • ½ teaspoons Salt
  • 1 cup Sour Cream
  • ¼ cups Buttermilk
  • _____
  • FOR THE TOPPING:
  • ⅔ cups Sugar
  • 2 Tablespoons Cinnamon

Preparation Instructions

Preheat the oven to 350ºF. Prepare a muffin tin with liners. (I learned the hard way that they are too fragile for just cooking spray.)

In a mixer, combine the butter and sugar and cream until fluffy. Add the eggs and vanilla and combine.

In a separate bowl, combine the dry ingredients. Add half of the dry ingredients to the mixing bowl and stir to combine. Add the sour cream and buttermilk and mix to combine. Add the rest of the dry ingredients and mix until you have a smooth batter.

In a small bowl, combine the sugar and cinnamon for the topping.

Use scooper and plop a scoop of batter into the bowl with the sugar and cinnamon. Gently roll the batter in the sugar and cinnamon. Place the ball into the muffin liner.

When you have completed all of the muffins, sprinkle the leftover cinnamon sugar onto the tops of all of the muffins.

Bake the muffins at 350ºF for about 15-18 minutes or until they are golden on top and just baked through.

Enjoy!

***Adapted from Culinary Concoctions by Peabody***


_______________________________________

Maria and her husband Josh (who she affectionately refers to as her “dough boy”) blog at Two Peas and Their Pod. They’ve been featured on Saveur, Eatocracy, Gourmet Live, Glamour, and the Los Angeles Times, to name just a few. We’re so glad to have them here!


Profile photo of In Good Taste

Chipotle-Spiced Sweet Potato Chili

Posted by in Looks Delicious!

Tasty Kitchen Blog: Chipotle Spiced Sweet Potato Chili. Guest post and recipe from Maris Callahan of In Good Taste.

 
I have a theory that the only people who don’t like sweet potatoes haven’t tried them. Or maybe they have tried them but they’ve tried them plain, cooked half-heartedly in a microwave and topped with something lackluster, like fat-free sour cream or worse: fake butter.


Sweet potatoes also take a lot of flack when it comes to French fries. Dedicated eaters have strong opinions about how they like their French fries: thick steak fries to drag through ketchup or barbecue sauce, thin crispy pommes frites to eat sprinkled with sea salt or truffle oil.

Now I’m giving myself a craving for French fries.

My point here is that sweet potatoes are easily an unsung hero in the tuber family and without having tried them in a wide variety of recipes that have different flavors and textures it’s hard to give them the credit they deserve.

Sweet potatoes offer a myriad of health benefits so when you’re making a hot, stick-to-your-ribs, spicy chili recipe they are a perfect way to inject a little nutrition into your dinner.


Printable Recipe

Chipotle-Spiced Sweet Potato Chili

4.50 Mitt(s) 12 Rating(s)12 votes, average: 4.50 out of 512 votes, average: 4.50 out of 512 votes, average: 4.50 out of 512 votes, average: 4.50 out of 512 votes, average: 4.50 out of 5

Prep Time:

Cook Time:

Difficulty: Intermediate

Servings: 6

6
x

Print Options

Page size Letter 3x5 4x6
Text Size Small Medium Large
Content Include description
Include prep time, etc.
Show image

Description

A hearty chili packed with sweet potatoes, black beans and smoky chipotle peppers with a little bit of fire.

Ingredients

  • 1 pound Sweet Potatoes, Peeled And Cubed Into 1/2 Inch Dice
  • 2 Tablespoons Extra-virgin Olive Oil, Divided
  • 1 whole Onion, Medium Dice
  • 2 cloves Garlic, Rough Chopped
  • 1 Tablespoon Ground Chili Pepper
  • 2 teaspoons Ground Cumin
  • 1 teaspoon Ground Chipotle Pepper Powder
  • 1 cup Dark Beer
  • 1 can 28 Oz Can Whole Tomatoes
  • 2 whole Chipotle Peppers In Adobo Sauce, Chopped
  • ½ cups Barbecue Sauce
  • 2 Tablespoons Worcestershire Sauce
  • 1 Tablespoon Red Hot Sauce (more If Desired)
  • 1-½ cup Frozen Corn
  • 1 can (15 Oz. Can) Black Beans, Drained And Rinsed
  • 2 cups Crushed Tortilla Chips, If Desired
  • Salt And Pepper, to taste

Preparation Instructions

Preheat oven to 350 degrees F. Place sweet potatoes on a rimmed baking sheet or jelly roll pan and toss with one tablespoon of olive oil. Season with salt and pepper as desired and bake for approximately 8–10 minutes or until sweet potatoes are just tender.

Heat a deep heavy pot over medium heat and add the remaining olive oil. Sauté the onions until lightly caramelized. Add the garlic, chili powder, chipotle powder and cumin and cook for an additional minute or until spices are fragrant. Stir them frequently so they don’t burn at the bottom of the pan.

Deglaze the pan with the beer and scrape up any browned bits (these are called fond and they’re full of flavor) from the bottom of the pan. Add the tomatoes, chipotle peppers, barbecue sauce, Worcestershire sauce and hot sauce.

Simmer the chili for about 15-20 minutes or until it begins to thicken slightly. Add the corn, beans, sweet potatoes, salt and pepper to taste.

Serve in a bowl topped with crushed tortilla chips, if desired.


_______________________________________

Maris Callahan is the author of In Good Taste, where she writes fresh, simple recipes for young professionals and busy cooks. When she isn’t working on her next recipe she is usually reading, writing, eating—or doing a combination of all three.


Profile photo of Erika (TK)

Looks Delicious! Roasted Salmon

Posted by in Looks Delicious!

Tasty Kitchen Blog: Looks Delicious! (Rosemary and Garlic Roasted Salmon, submitted by TK member Meredith of In Sock Monkey Slippers)

 
Now that Tuesday’s revelry is behind us, it’s time to slow it down a bit. Gastronomically speaking, that is. Today marks the day that many begin a period of fasting and sacrifice. Most choose to give up the one thing they enjoy the most: chocolate, cheese, alcohol, bacon (say it isn’t so), red meat …

One advantage that comes from practicing restraint is that you learn to find satisfaction in the simplest of things. I’d even venture to say that you discover great pleasure in them, but then that might negate the whole “restraint” and “sacrifice” aspect of it.

Here’s one delicious-looking recipe that’ll hopefully make it to your menu: Rosemary and Garlic Roasted Salmon. It has the simplest ingredients: salmon, garlic, rosemary, salt and pepper. Just a few basic flavors that all work together to make one incredible meal. Squeeze some fresh lemon over it, and you’ve got a satisfying dish that won’t leave you missing anything.

Thank you, Meredith (Tasty Kitchen member in sock monkey slippers), for this recipe! We’re so glad you continue to share all those incredible-looking recipes you have on your blog.


Profile photo of Erika (TK)

Mardi Gras!

Posted by in Holidays, The Theme Is...

  I’m not going to pretend I know all about Mardi Gras, because honestly, if you think you know little about it, I know even less. All I can muster from the top of my head is New Orleans. And beans. Or was that beads? See? I know nothing. Okay, maybe I know a little […]

Profile photo of cookincanuck

Easy Asian Beef and Noodle Soup

Posted by in Step-by-Step Recipes

  When I headed off for college (which may or may not have been more than 15 years ago), friends and family members regaled me with tales of inedible cafeteria food and the legendary “Freshman Fifteen”. To a certain extent, they were right about the cafeteria food choices. By the end of the first month, […]

Profile photo of EatLiveRun

Chicken Noodle Soup Casserole

Posted by in Step-by-Step Recipes

  When I stumbled upon 4littlefergusons’ comforting recipe for Chicken Noodle Soup Casserole I knew I had to make it, especially since I was nursing my boyfriend back to health after a ski accident-induced shoulder surgery. Nothing says “get well soon” like a big pot of chicken noodle soup, and this casserole piqued my interest […]

Profile photo of Erika (TK)

Pancakes!

Posted by in The Theme Is...

  When we started doing theme posts here at Tasty Kitchen, one of our first themes was pancakes. Today, almost a year later, I’m still dreaming of those Carrot Cake Pancakes from multiplydelicious. And okay, also those incredible Cinnamon Bun Pancakes from sapeylissy. Since then, you’ve been sharing so many more delicious-looking pancake recipes with…