


I’m excited to share a recipe from my own box today because it’s one that’s close to my heart. I have a southern grandmother who cooks the best desserts. (I’m guessing many of you are nodding your heads and smiling. You know what I’m talking about, right?) Grandma Inez’s Pineapple Pie is my most favorite pie in the whole world and one of my favorites in her repertoire.
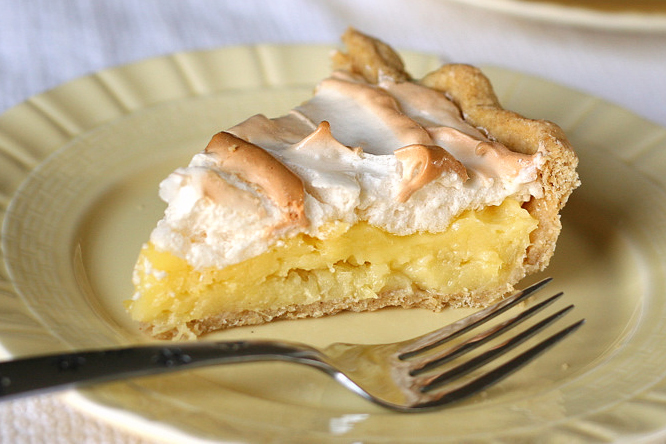
When I tell people my favorite pie is pineapple, I always wonder what kind of images their mind conjures up. A flaky pie crust filled with steaming pineapple rings? Ugh. No wonder they make faces at me. No steaming pineapple rings here. Think of this pie as a pineapple version of lemon meringue. Better now?
Let’s get started!
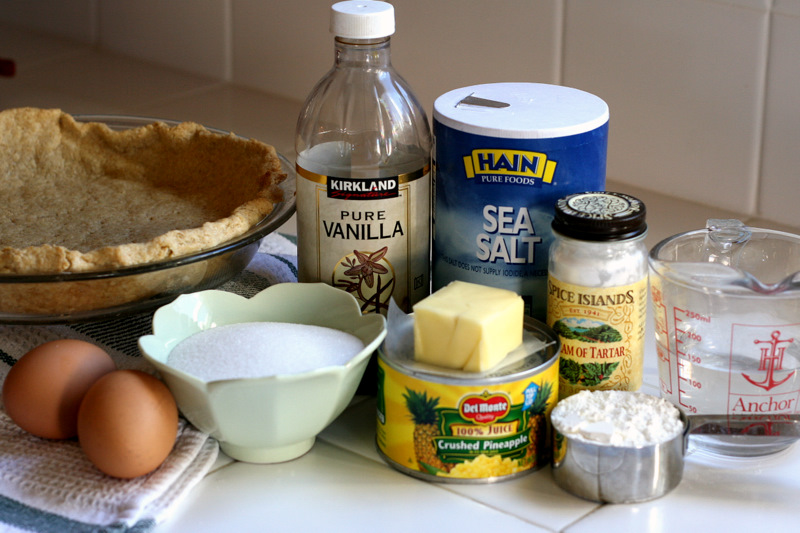
One of the things I love about this pie is that the ingredients are simple and the technique isn’t fussy. You’ll need eggs, sugar, butter, vanilla, salt, cream of tartar, corn starch, water, a can of crushed pineapple, and pre-baked pie crust. A pie crust from scratch is best, especially if it looks like it was made by a three-year-old. (Grandma, don’t look at my crust, please.)
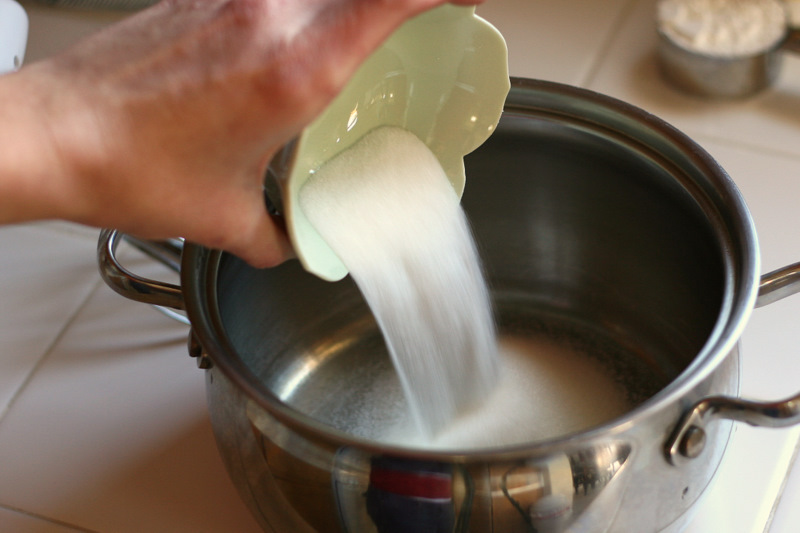
Get a medium saucepan and dump in 3/4 cup sugar …
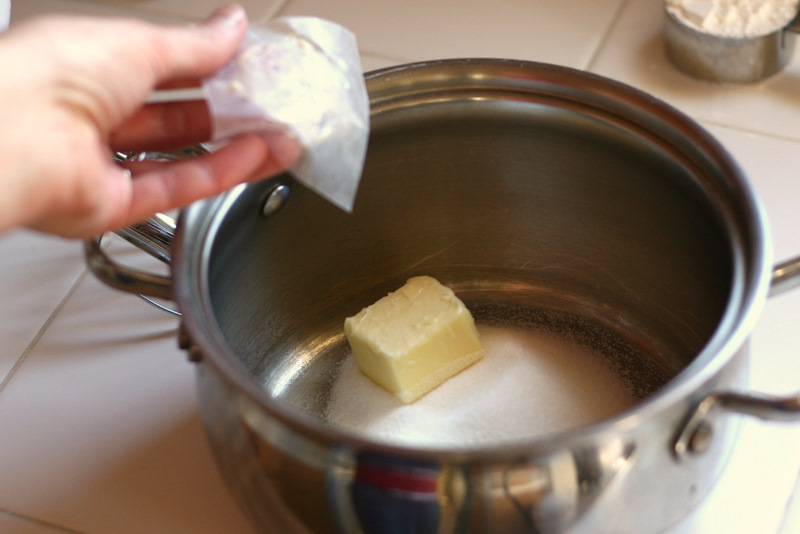
And the butter. Two tablespoons? I know. Pretty weak for a southern recipe, but I’m not going to argue with my grandma.

At this point you’ll need to separate the eggs if you haven’t already. Reserve the whites in a small bowl and set aside.
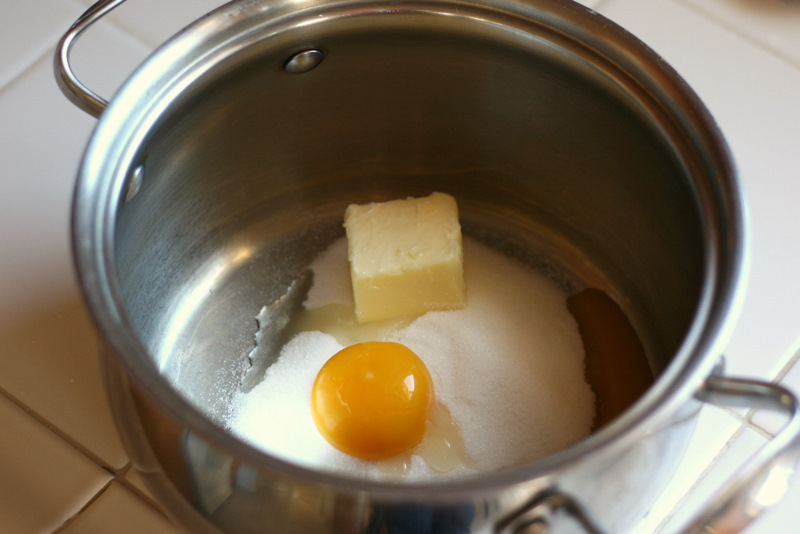
Place the yolks in the saucepan with the sugar and butter.
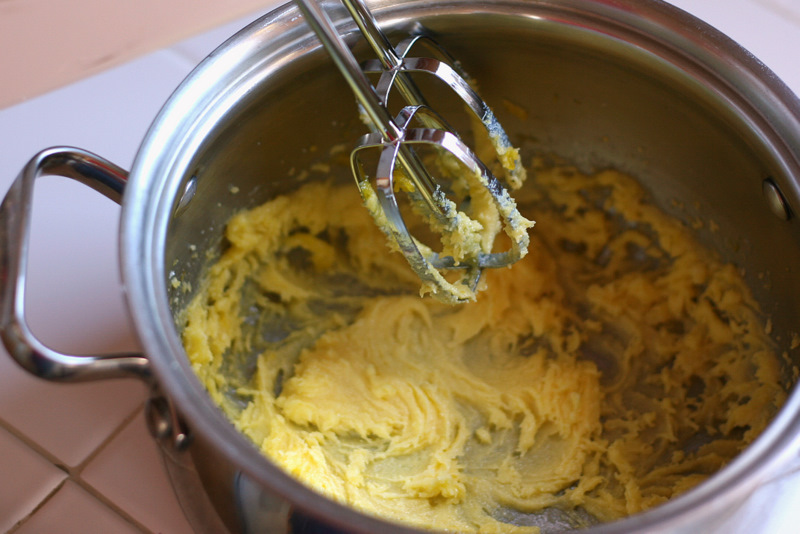
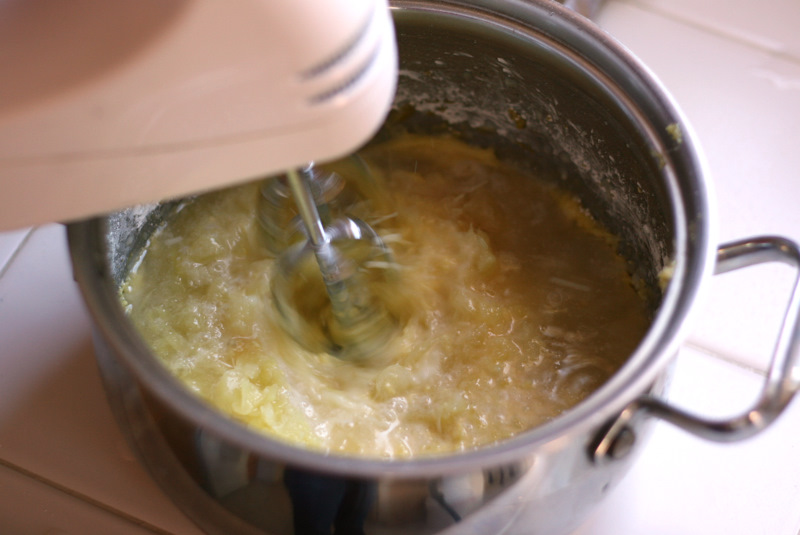
Get out your electric hand-held mixer and beat until everything’s mixed up nicely.
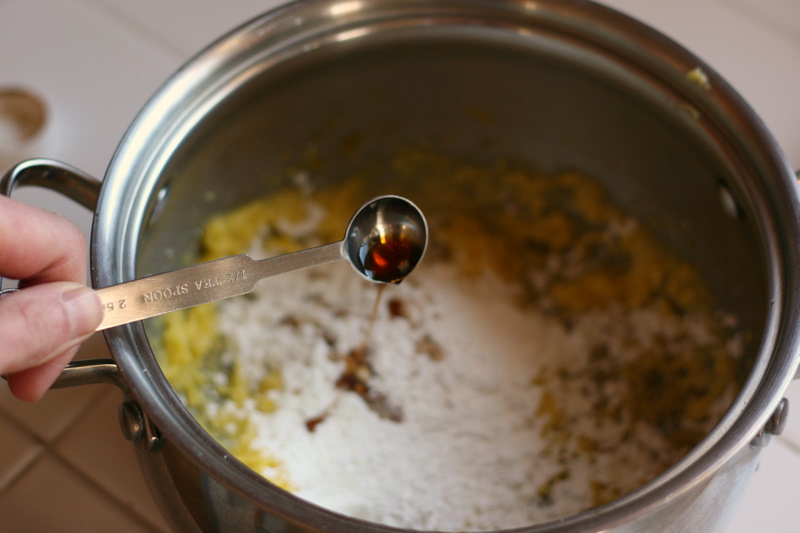
Add the cornstarch and vanilla.
Give it another mix.
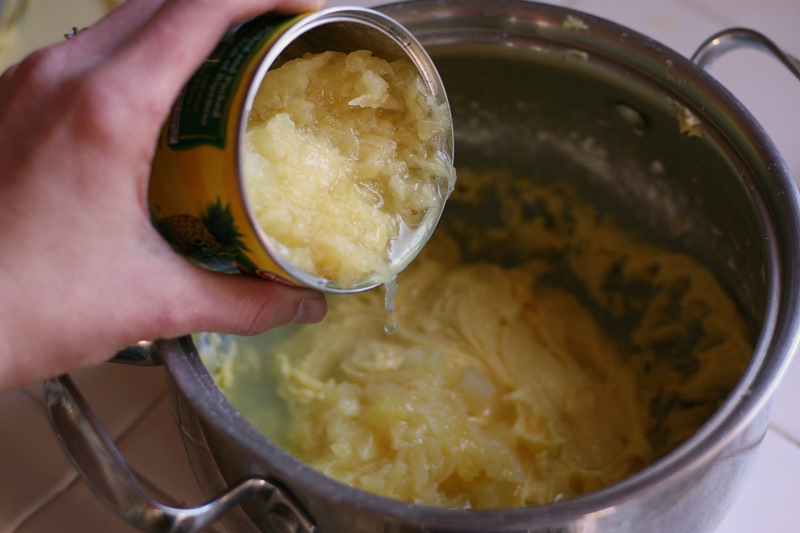
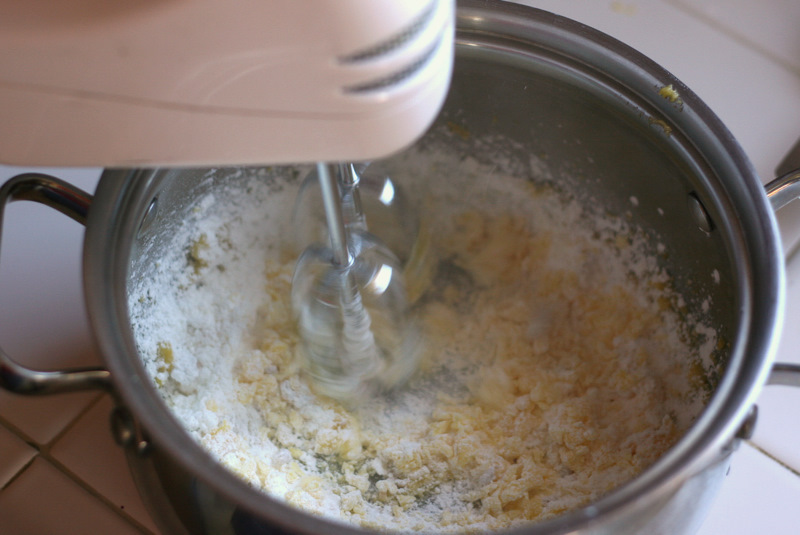
Then add the water and the crushed pineapple, juice and all.
Mix it again. (You could even use a spoon if you want.)
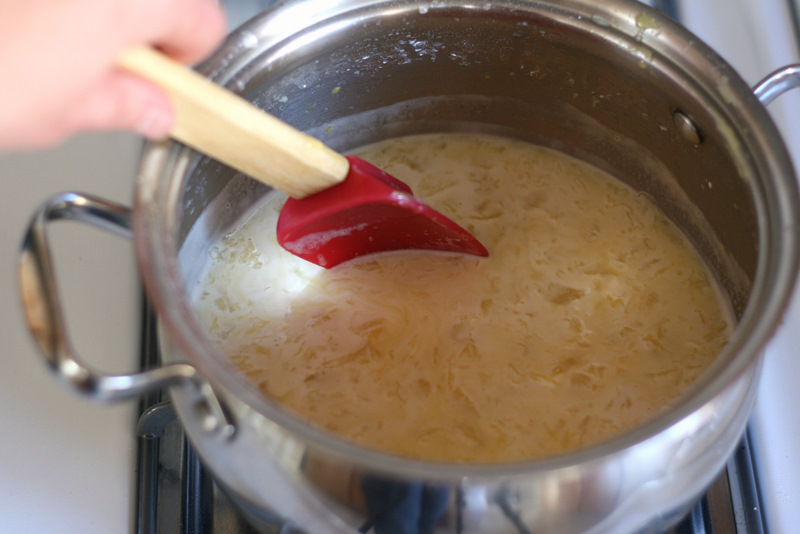
Move the saucepan over to the stove and place it over medium heat. You want it to heat up, but don’t let it boil. If it starts to bubble a lot, turn the heat down. Stir constantly for a few minutes until it starts to thicken.
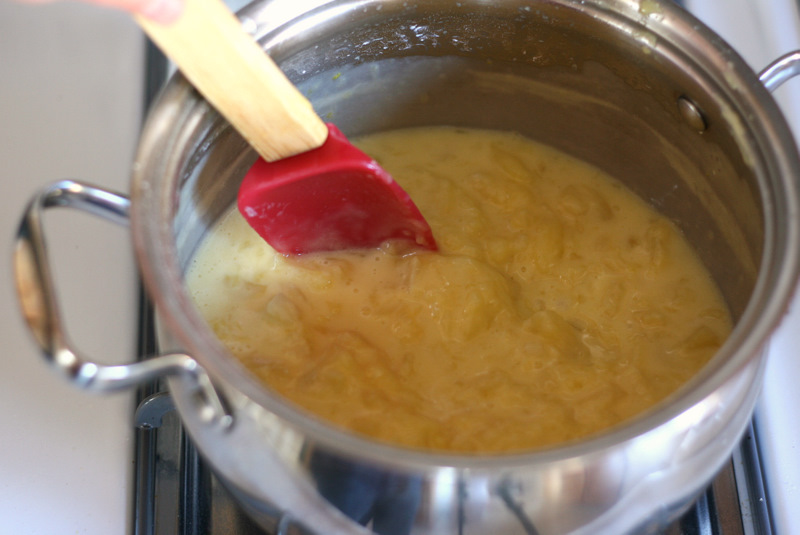
It’ll seem like nothing is happening, and then BAM it’ll thicken up really quickly. When it starts to get clumpy like this, remove it from the heat. Keep stirring.
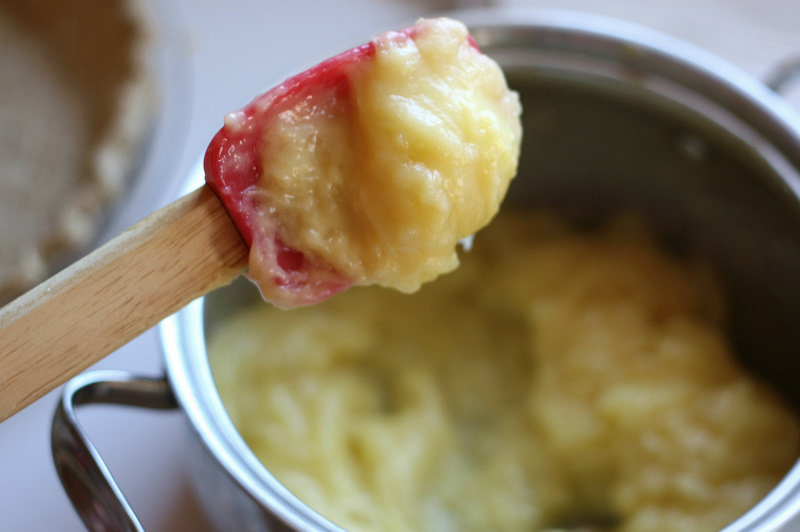
The filling should be really thick. Like this.
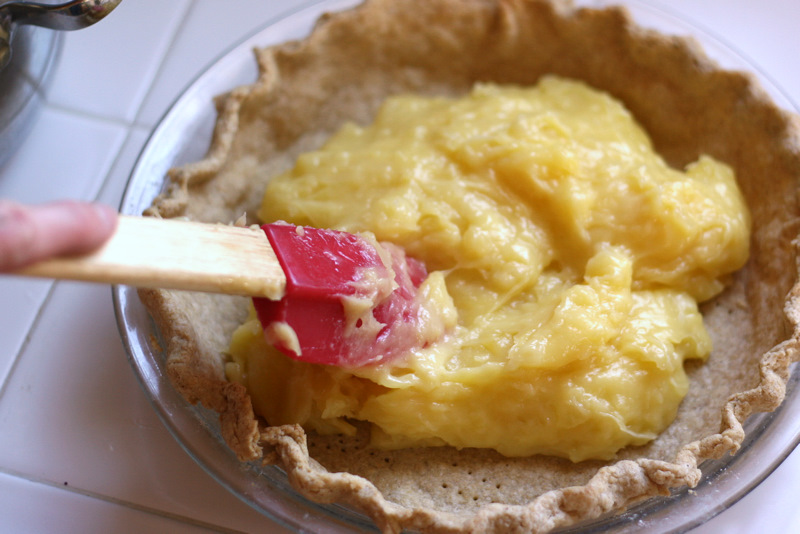
Bring out your perfectly fluted pie crust and dump all of the pineapple filling into it.
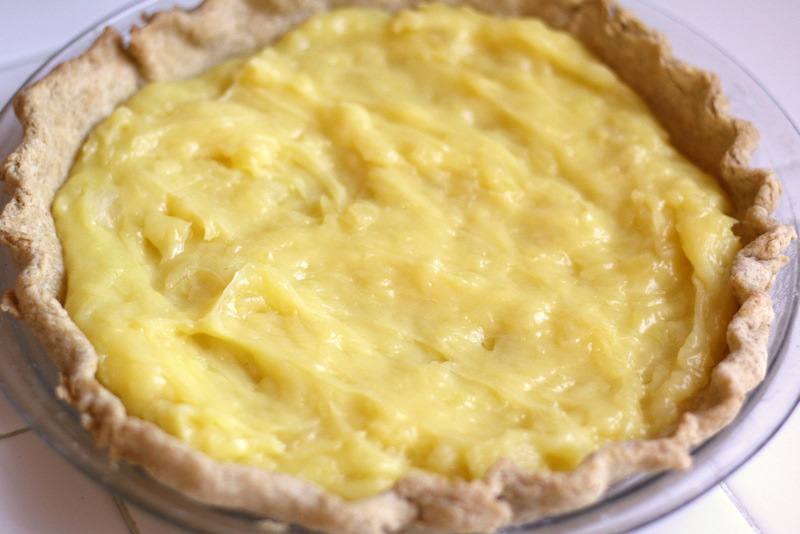
Spread it around evenly and set it aside. If you’re not going to make the meringue right away, you’ll need to cover this with some plastic wrap and put it in the refrigerator.
Preheat your oven to 400 degrees F.
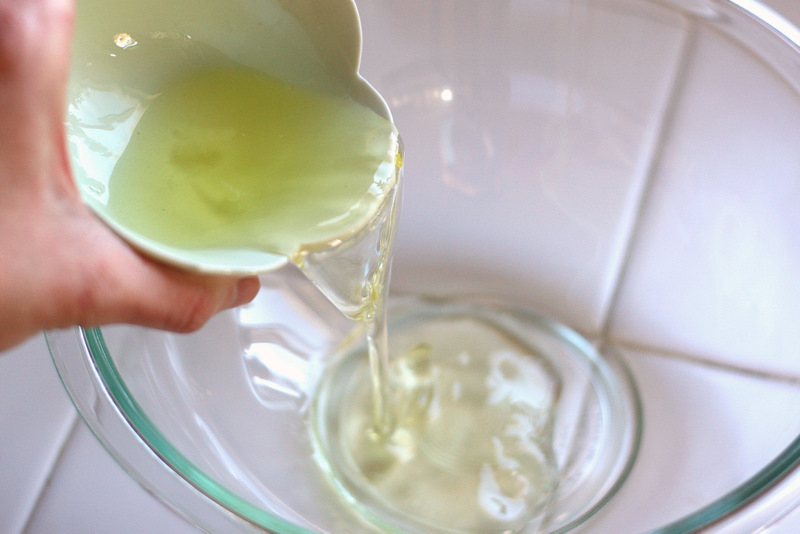
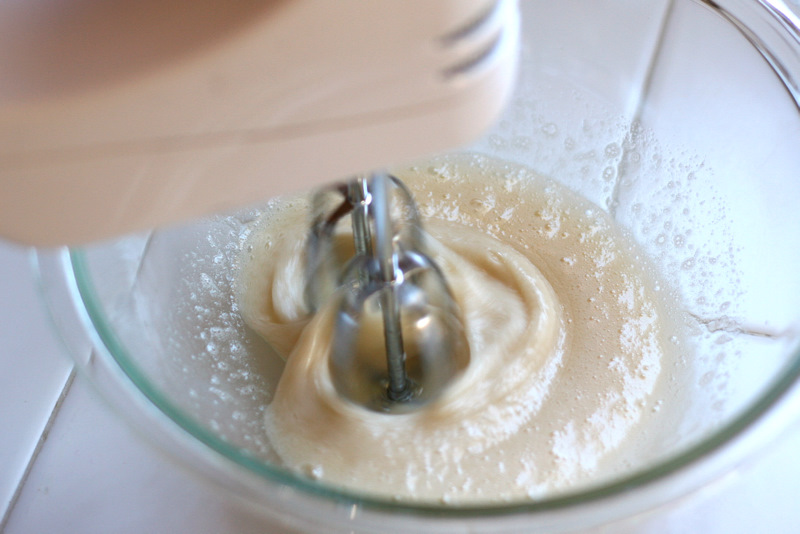
Now for the meringue. Grab a clean, medium-sized mixing bowl and add the egg whites.
Okay, y’all, I have a confession to make. (I like saying “y’all”. And I like people who say “y’all”. But that’s not my confession.)
When I made this meringue for this blog post, I was following my recipe card that I copied from my grandma. She says to put all the meringue ingredients into the bowl at once and beat them. Other meringue recipes will tell you to beat the egg whites for a minute or two before adding in anything else, which is how I wrote the directions when I submitted this recipe to Tasty Kitchen.
Is there a difference? I think so. I think it takes a lot longer for the whites to whip up if you add everything at the beginning. I swore I’d lost my meringue mojo while I was standing there whipping this. It took FOREVER (forever = about 7 minutes) and there were a few times I was tempted to toss the whole thing and start over.
But …
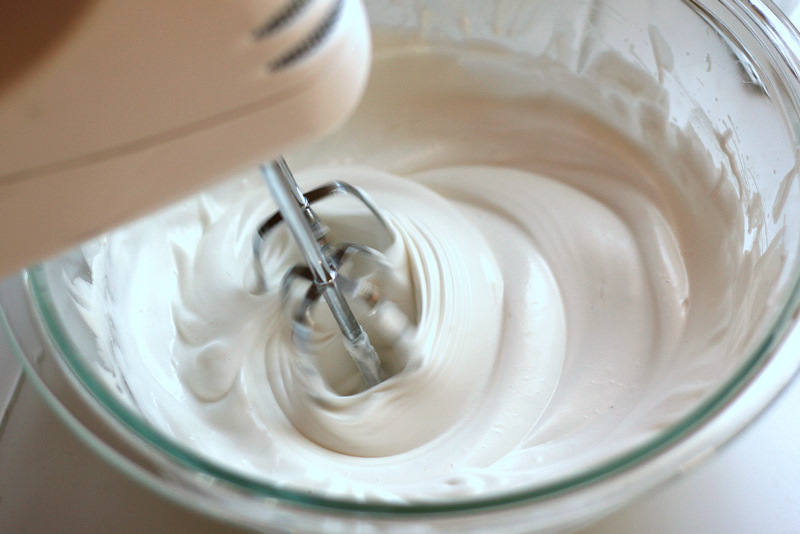
It worked anyway.
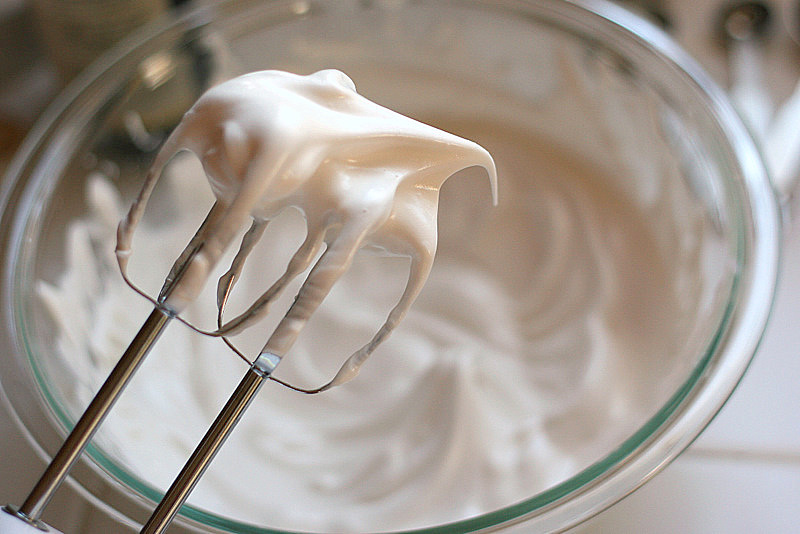
And I ended up with smooth, fluffy, glossy meringue. You can whip this until it reaches stiff peaks (peaks standing straight up), but I like it when they sort of flop over. I think it’s cute.
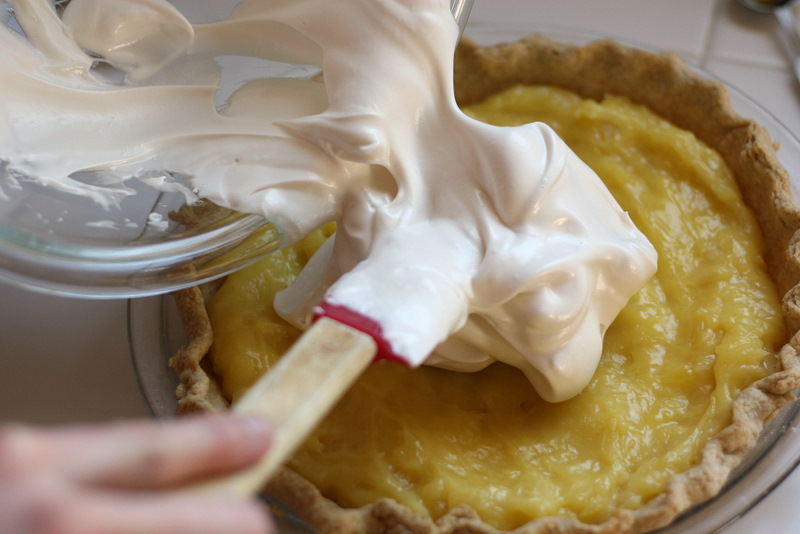
Spread all the meringue over the pineapple filling.
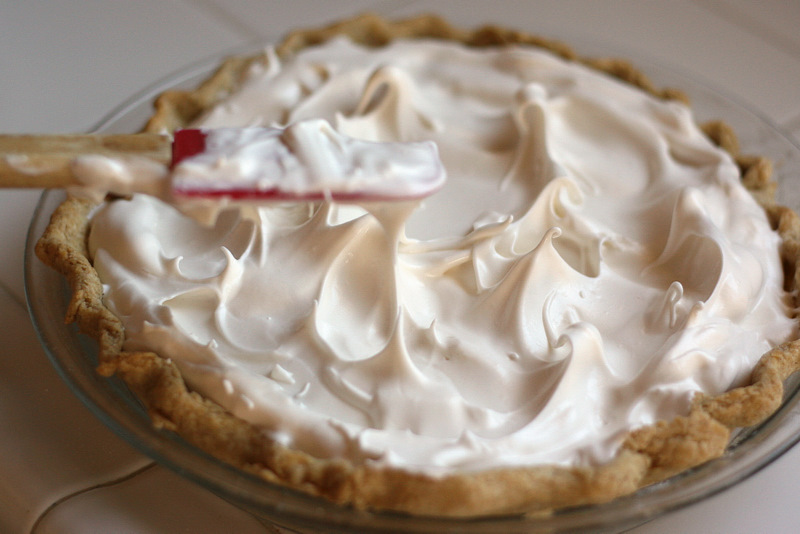
If you want to, make a few little peaks to give the pie some texture. Then put it in your preheated oven for 5-8 minutes or so until it’s golden brown. Keep an eye on it so it doesn’t burn!
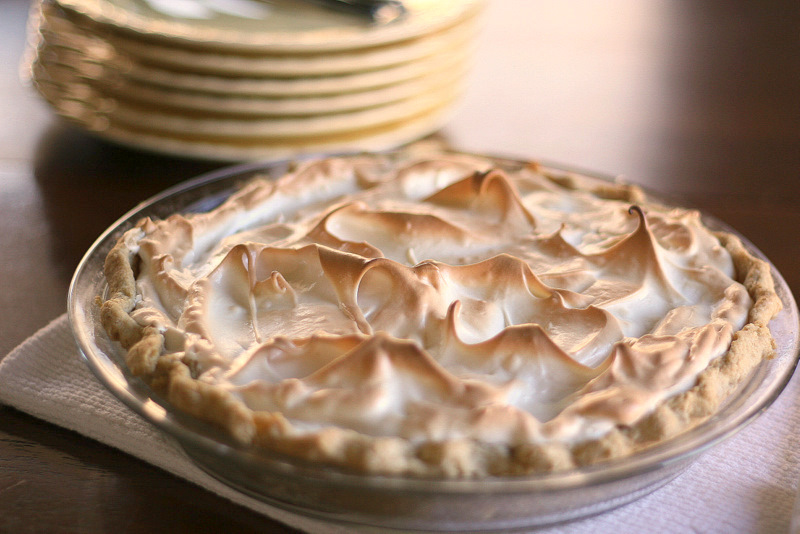
See why I like to make little swirlies on the top? How gorgeous is that?

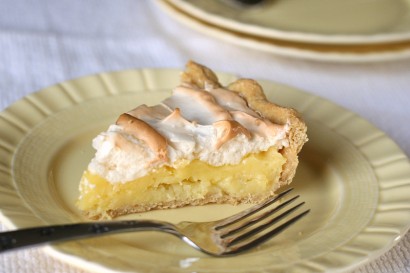
My favorite was this little guy right here. My three-year-old called dibs on him when I was slicing it up.

And that, my friends, is a pineapple pie. It’s delicious when it’s still a bit warm from the oven. Or when it’s ice cold. Or when it’s 4 AM. The recipe easily doubles, and making more than one is definitely a good idea. I hope you enjoy this as much as I do!
(And thanks, Grandma! This pie rules.)
Printable Recipe


Print Options
Description
Similar to lemon meringue, this unique pie features a creamy pineapple filling. It’s also my favorite pie in the whole world. My grandma quit asking me what dessert I want her to make when we visit. She just makes one of these. Sometimes two. One for me and my grandpa and the other one for everyone else.
Ingredients
- FOR THE PIE:
- ¾ cups Sugar
- 2 Tablespoons Butter
- 2 whole Eggs, Separated
- ⅓ cups Cornstarch
- ½ teaspoons Vanilla Extract
- ½ cups Plus 2 Tablespoons Of Water
- 8 ounces, weight Canned Crushed Pineapple
- 1 whole 9-inch Pre-baked Pie Crust
- _____
- FOR THE MERINGUE:
- 2 whole Egg Whites (From Separated Eggs Above)
- ⅛ teaspoons Salt
- ¼ teaspoons Cream Of Tartar
- 6 Tablespoons Sugar
- 1 teaspoon Vanilla
Preparation Instructions
For the pie, cream sugar, butter, and egg yolks in a saucepan. Add cornstarch and vanilla. Add water and crushed pineapple. Cook over medium heat, stirring constantly until thick. Pour into a 9″ baked pastry.
For the meringue, whip egg whites until they begin to get foamy. Add the remaining ingredients and continue to whip until the meringue has reached soft peak stage and is smooth and glossy. Place the meringue over the cooled pie. Brown at 400ºF for just a few minutes. Store in the fridge until ready to serve. Tastes great warm or cold.
_______________________________________
Be sure to check out Natalie’s own beautiful food blog, Perrys’ Plate, where you can see her growing collection of lovely recipes. There’s always something new to see there. Go visit now!

107 Comments
Comments are closed for this recipe.
Natalie | Perry's Plate on 1.28.2011
Hillary – I see what you’re saying… if it was a custard, you wouldn’t need to slice it into pieces. Haha. (Excuse my mommy brains.) Yes, I think it would be a delicious spoon dessert as well
Natalie | Perry's Plate on 1.28.2011
Hillary – Add the liquid, too! Hmm… without a crust? I really don’t think it would come out of a pie plate nicely. If you used a tart pan with a removeable bottom or a springform it might work. But still…I think I’d refrigerate it for several hours before trying that (And maybe lining the bottom with parchment or something?) If it works, let us know!
Hillary on 1.28.2011
Oh, 2nd question. Would this work without a crust? Like a pineapple custard with a meringue top?
Hillary on 1.28.2011
I printed out the recipe to give it a try but I wondered about the canned crushed pineapple. Do you drain the liquid out of the can first? Given the recipe also have a good bit of water I wondered about the pineapple juice from the can being too much liquid.
What say you?
michele on 1.28.2011
Do you remember the pineapple pie from The Patio on the classen curve in OKC?
paminsd on 1.28.2011
Oh my this looks good, printing it off right now…thank y’all.
PS …grew up in TX and that’s how I talk.
ohjalapeno on 1.28.2011
Oh my grandmother made this(from Ms. and lived in Al.)but she made it like a banana pudding. It was pineapple pudding!! delicious. Thanks for reminding me of my sweet Nany!
StarvingGradStudent on 1.28.2011
Yum! I’ve had this in my recipe box for a few days, but I think it needs to be made this weekend for sure.
Also, I have the same little white flower dish/cups. No idea where I got them, but I use them all the time.
Natalie | Perry's Plate on 1.28.2011
MegganB & pumpkinfreckles – Yes, Grandma Inez’s are awesome My first daughter has Inez as her middle name, so she’s named after her great-grandma, too!
Natalie | Perry's Plate on 1.28.2011
Bara – That little pot was a wedding gift seven years ago. The brand is Tools of the Trade (Belgique) and they still sell them in all sizes at Macy’s. Mine’s the 3 qt. and it’s my favorite little soup pot! Here’s a link: http://www1.macys.com/catalog/product/index.ognc?ID=452551&PseudoCat=se-xx-xx-xx.esn_results
pumpkinfreckles on 1.28.2011
I have a grandma Inez too. Aren’t they awesome. I’m saving your recipe, and will give it a try next month. It looks delicious. Thanks for sharing.
Erin S. on 1.28.2011
That is so funny! This is almost EXACTLY the pineapple pie recipe that was passed down to me from my Grandma (but I use flour instead of cream of tartar, and add the yolks at the end), and I just made it last week for my dad for his birthday! We like homemade whip cream on top though…not a big meringue fan. Its sooo yummy!
Bara on 1.28.2011
I agree with Kathy on the weeping tricks that work for me and — I’m in east Tennessee.
This recipe looks great and as I was scrolling down through all the great step-by-step photographs… (sucking air in!) there’s the pan I’ve been searching everywhere for! My neighbor has one like that, it was her Mother’s. Her’s says Wagner Ware Sidney Roasterette. Anyone know what is similar? I’d love a source for a heavy, stainless steel pot.
Now to add some things to my grocery list! This pie sounds scrumpdiddlyishous!
I’ll try your way with meringue, those curls are perfectly tempting!
Maggie (Vittles & Bits) on 1.28.2011
I think I would be one of those people who made a face at the mention of “pineapple pie” – but your grandma’s recipe looks absolutely delicious! Love the peaks as well, the whole thing is just gorgeous! Thank you for sharing something so with us.
Anna ♥ Sugarized on 1.28.2011
Oh my gosh! This looks good! I’ve never made any kind of meringue pie before…but the step by step photos totally had me sold! Thanks for sharing!
Maggie on 1.28.2011
I have been searching forever for a recipe for Pineapple Pie like my mother used to make and this appears to be it! Thanks so much for the recipe.
lovelybaker on 1.28.2011
Oh thank you! I have a rare evening to myself tomorrow and had no idea how to occupy my time! I have all these ingredients already so I’m making a pie!
Natasha @ Saved by the Egg Timer on 1.28.2011
Oh wow this does look fantastic. So fresh and springy too! Yum, I can’t wait to try this one!
Dayna on 1.28.2011
@urbanwife08 – Salmonella is killed at 165 degrees. No worries about the yolks because the filling will be way past that temp by the time it thickens. Putting a raw meringue directly on HOT filling and then into the oven usually cooks the meringue. But if that is not possible, the suggestion to make a cooked (Swiss) meringue in a double boiler is spot on.
Jess on 1.28.2011
I’m making this pie sometime over the weekend, because it looks SO GOOD. My 8 year-old was a little uncertain initially, but was won over by the possibility of meringue.
MegganB on 1.28.2011
It looks delicious and beautiful! I might have to try it – my great- grandma’s name is Inez and it’s my middle name!
Ange on 1.28.2011
Oh, my I can’t wait to make this. And I couldn’t quit saying ‘ya’ll’ if I wanted to.
smiles4u2have on 1.28.2011
What are the other meringue ingrediants? You only said to add the egg whites.
Went to the recipe link and now I see what they are.
holtnotes on 1.28.2011
Thanks for a great recipe and a beautiful picture to boot. That is my favorite pie – my daughter has celiac disease ( no wheat – oats – barley – rye) and has rarely made pies for her family that can have gluten. I have her boys age 4 and 2 next week and my hubby had already asked me to make them a pie. I had printed my pineapple pie recipe but think I will try yours instead. It was my mom’s favorite and always makes me smile.
Kristi on 1.28.2011
I WANTS IT! I NEEDS IT!
Emily on 1.28.2011
Love seeing the Kirkland Signature Vanilla – one of my favorite products! Your pie is beautiful!
Natalie | Perry's Plate on 1.28.2011
urbanwife08 – I think it’s cooked enough, but I wouldn’t worry so much about the yolks as much as the whites, which is where problems occur, if any. If you’re getting your eggs from a good source, then you shouldn’t be worried. If the whites make you nervous, simply whip the meringue over a double broiler (or a heat-safe bowl nestled in a pot with about an inch of simmering water).
Urban Wife on 1.28.2011
Lovely recipe! I have a question, however. Concerning the raw egg yolks…I wondered if during the few minutes that you are thickening the filling, is that enough time to make sure the raw egg yolk is cooked enough? I know it will also be in the oven for a few minutes at the end when browning the meringue but I’m just worried that it may not be enough time. Thanks anyone for helping me out here!
Natalie | Perry's Plate on 1.28.2011
Kathy & Dawnalee – thanks for those great tips!
Sally Darling on 1.28.2011
Oh my Stars! Grandma Inez I love you! You make it look so easy, how can I NOT try it! Oh boy! Wonderful wonderful.
LisaL on 1.28.2011
Thanks for those tips on the weeping meringue. I will remember that.
I’ve never heard of this pie, but it sounds and looks wonderful! I love that her pie crust wasn’t perfect and beautiful–just makes it look more rustic and homemade!
dawnalee on 1.28.2011
In our family experience the best way to prevent weeping is Kathy’s third tip – eat it all in one sitting. :o)
Kathy those are good tips to remember about “sealing” the pie. I get best results when the meringue goes immediately on the hot filling, is sealed to the edges then piled in the middle.
Also, making sure the pie has completely cooled before refrigerating.
Natalie – such a simple thing I never thought of was using a mixer/blender to combine such ingredients in the pan. What a simpler way of making sure everything is fully combined.
Christy Rose on 1.28.2011
Yum! Great pictures and that is how my “scratch” pie crusts always look too! I can not make them pretty to save my life!
Krista D. on 1.28.2011
My absolute favorite pie ever…I always thought our family was the only one that made this and yes, I get odd looks when I say my favorite pie is pineapple pie, but yum yum!!!
Kathy on 1.28.2011
Actually, I’ve been researching the whole meringue weeping problem lately. The few tips I’ve tried that seem to work (although it’s hard to tell when the pie is eaten up so quickly) is that you should make the meringue first so you have it ready to put on the HOT filling immediately. This instantly bakes the bottom of the meringue a little so this forms a barrier against the moisture in the filling (which causes the weeping). The other thing is to put the meringue on the edges of the filling first, actually sealing the crust to the meringue. Then go ahead and fill in to the center. Again, sealing the crust to the meringue prevents some moisture from getting in there, and helps prevent the meringue from shrinking away from the crust. )
)
Third tip is just eat it all in one sitting so there’s no time for weeping (at least the meringue won’t be weeping – you may be
Janice on 1.28.2011
I say y’all and I like people that say y’all, too. Cause I’m a southern girl also. Love the pie recipe and will absolutely give it a try. Can see the joy on my husband’s face now!
Alyse on 1.28.2011
Thanks for the tip. I’ll add more cream of tartar next time.
I’ve tried cornstarch. I read somewhere that would help. It doesn’t. I live in humid Eastern Kentucky. That might affect things.
I don’t mind the weepiness. Some people are like, “What are those little gooey dots?” I guess no one made them homemade pies.
Marisa Toomey on 1.28.2011
That looks delicious!! I’ve never had pineapple pie but I’m going to give this a try!
Natalie | Perry's Plate on 1.28.2011
Alyse – Actually yes. . . mine got a little weepy after sitting in the fridge overnight. I read something recently about cream of tartar helping with that. I also wonder if it depends on the climate you live in. Maybe if you bump up the cream of tartar it would help. My grandma’s pies always got weepy, so I always thought that was normal
Aubrey on 1.28.2011
This looks super yummy and my mouth is totally watering just reading how to make it. Looks like I’ll be whipping this pie up this weekend. Thanks for sharing the recipe.
Alyse on 1.28.2011
When I make meringue I have a problem with weeping.
Does the meringue weep when you mix the sugar in at first?
Natalie | Perry's Plate on 1.28.2011
SassafrasSarah – Oops… I didn’t realize there was a mistake in the recipe. My recipe card in my binder says 2T (1/4 stick), but I doubt those extra 2 T would hurt it.
Dee – I’m so glad you liked it! I’m sure it was delicious with the whipped cream, too!
Lauren from Lauren's Latest on 1.28.2011
How interesting! My Grandma has an amazing Pineapple pie recipe too, and she’s not southern in the least! Beautiful photos, Natalie!
Jean F on 1.28.2011
**thud!**
I’m picking myself up after faiting over something that looks so darn lucious but is so darn simple. I gotta make this!
Thanks for sharing this recipe! YUM!
Dee on 1.28.2011
I made this pie! It was fantastic. Surprisingly fast & easy. I chickened out & topped it w/ whipped cream, though. Still lovely – thanks for sharing.
SassafrasSarah on 1.28.2011
Think I’ll make it this weekend! However, the print recipe calls for 1/4 c. butter (half a stick), but in Natalie’s step by step she only uses 2 T. (one quarter stick).
Which is correct? Looking forward to a tasty dessert.
Susan on 1.28.2011
I just love pineapple pie. Just close your eyes on a cold winter day and feel like you’re in the tropics! The picture looks so creamy that I was surprised that you hadn’t whirled up the pineapple in the blender! Can’t wait to give this a try. Thanks for featuring it, Natalie.
Jeanne (aka NanaBread) on 1.28.2011
I’d forgotten all about this pie. My grandmother used to make it when I was much younger. Thank you so much for publishing this, and taking me back in time. I will be making it for my grandkids soon so we can pass along the tradition. You made my day!
Katrina on 1.28.2011
This looks fantastic! A must try!
Heather (Heather's Dish) on 1.28.2011
i think i just died and went to heaven…pineapple pie?! sounds absolutely amazing!