The Pioneer Woman Tasty Kitchen
Profile photo of ThreeManyCooks

Amazing Spiced Chai Concentrate

Posted by in Step-by-Step Recipes

Tasty Kitchen Blog: Amazing Spiced Chai Concentrate. Guest post by Maggy Keet of Three Many Cooks, recipe submitted by TK member thecatnipcat.

 
Warm spices, strong tea and steamed milk swirling around in my tummy make chai lattes a favorite during the winter months. It warms me from the inside out in a way that puts coffee and tea to shame. Unfortunately, the chai concentrate from certain coffee chains is too sweet. But there is something better.

It never occurred to me to make my own chai. (Certainly it must be too hard.) But when I saw this recipe from thecatnipcat for this Amazing Spiced Chai Concentrate, something about the whole thing seemed doable. If I had known how easy it was, I would have started making my own years ago. Needless to say, this version is delicious! And I love that I can up the quantities of the flavors I like more and reduce the quantities of the flavors I like less. For example, we used less sugar and doubled the cinnamon. Make the original version, then tweak the recipe based on your preferences. I wouldn’t be surprised if you find her recipe is just right for you.


Tasty Kitchen Blog: Amazing Spiced Chai Concentrate. Guest post by Maggy Keet of Three Many Cooks, recipe submitted by TK member thecatnipcat.

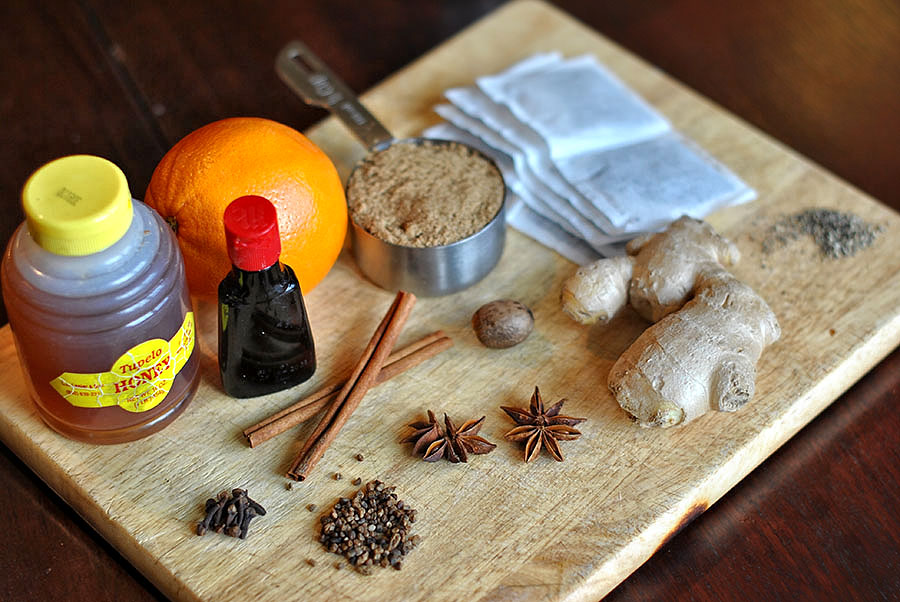
Here are the ingredients you’ll need: cinnamon, ginger, cardamom, star anise, cloves, black pepper, nutmeg, orange zest, tea bags, brown sugar, honey, and vanilla.

Start by bringing 4 1/2 cups water to the boil on the stove.



Tasty Kitchen Blog: Amazing Spiced Chai Concentrate. Guest post by Maggy Keet of Three Many Cooks, recipe submitted by TK member thecatnipcat.

Then you need some orange zest. If you don’t have a zester, you can use a vegetable peeler.


Tasty Kitchen Blog: Amazing Spiced Chai Concentrate. Guest post by Maggy Keet of Three Many Cooks, recipe submitted by TK member thecatnipcat.

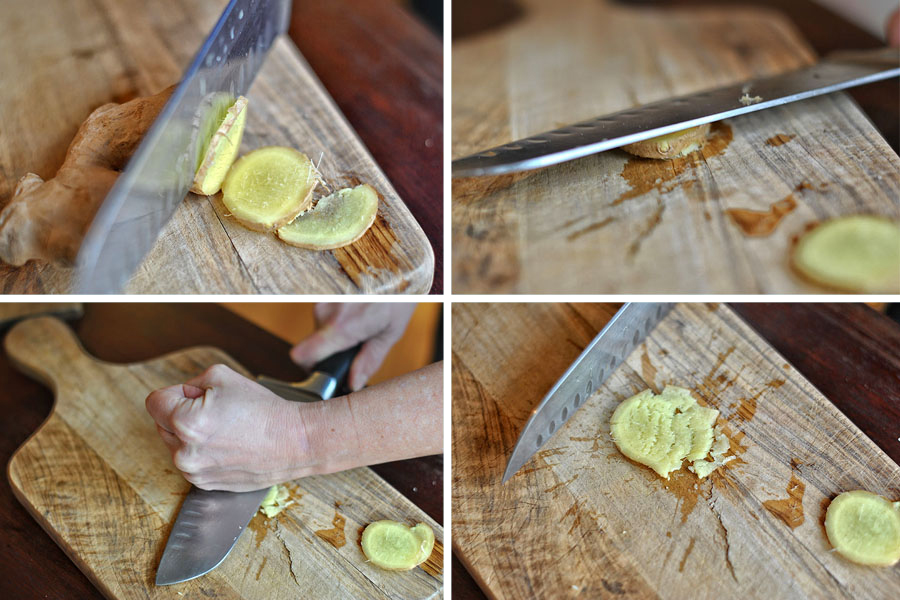
The recipe says to use a piece of ginger. For us that meant three large coins which we smashed to release more flavor.


Tasty Kitchen Blog: Amazing Spiced Chai Concentrate. Guest post by Maggy Keet of Three Many Cooks, recipe submitted by TK member thecatnipcat.

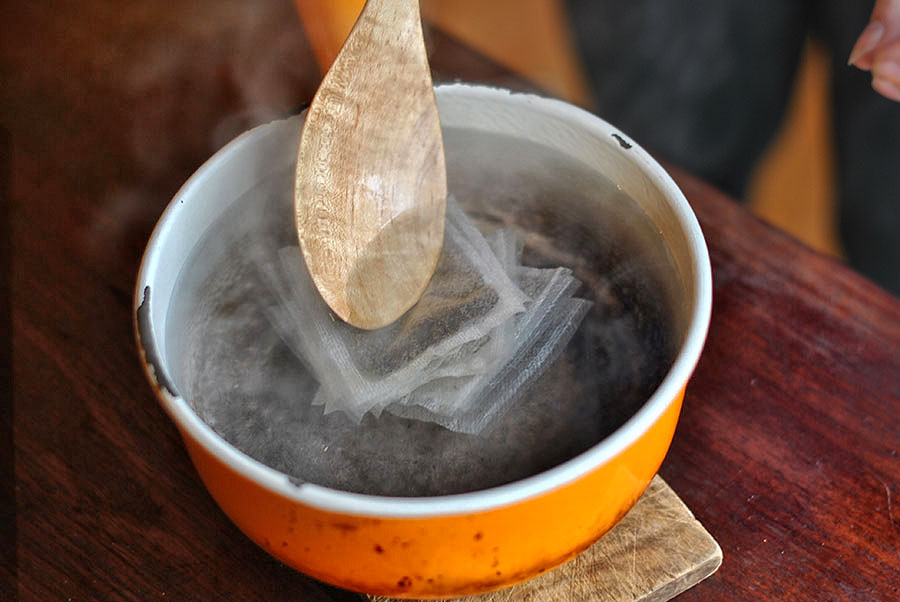
Once the water has come to a boil, remove the pot from the heat and add the tea bags.


Tasty Kitchen Blog: Amazing Spiced Chai Concentrate. Guest post by Maggy Keet of Three Many Cooks, recipe submitted by TK member thecatnipcat.

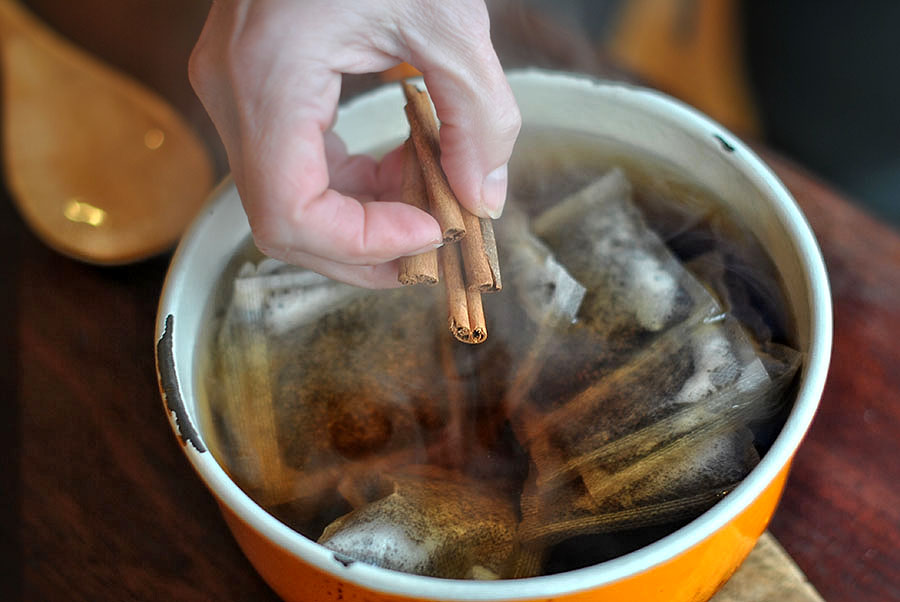
Then add your cinnamon sticks (we only add two—it just looks like we’re using four because we broke them in half).


Tasty Kitchen Blog: Amazing Spiced Chai Concentrate. Guest post by Maggy Keet of Three Many Cooks, recipe submitted by TK member thecatnipcat.

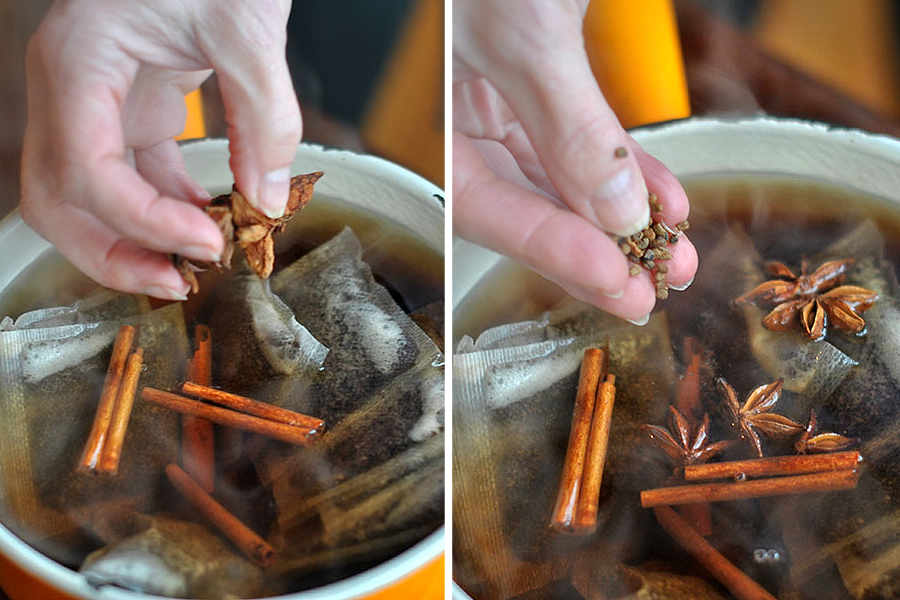
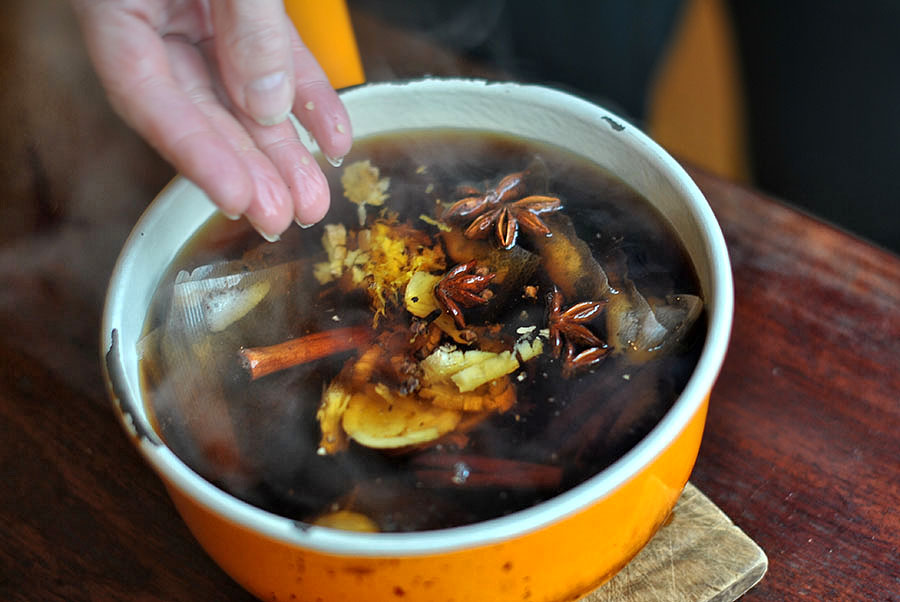
Then add your star anise and seven cardamom pods. We only had cardamom seeds so we looked up how many seeds there are in a pod. The answer is “about 12” so we added roughly 80 cardamom seeds (no we did not count them out).


Tasty Kitchen Blog: Amazing Spiced Chai Concentrate. Guest post by Maggy Keet of Three Many Cooks, recipe submitted by TK member thecatnipcat.

Then add the rest of the spices: the whole cloves, freshly ground pepper, zest (or peel), smashed ginger, and freshly grated nutmeg. Stir the pot to mix all the ingredients. This is the point at which Mom said, “This is starting to look like a witch’s brew.” I concurred.

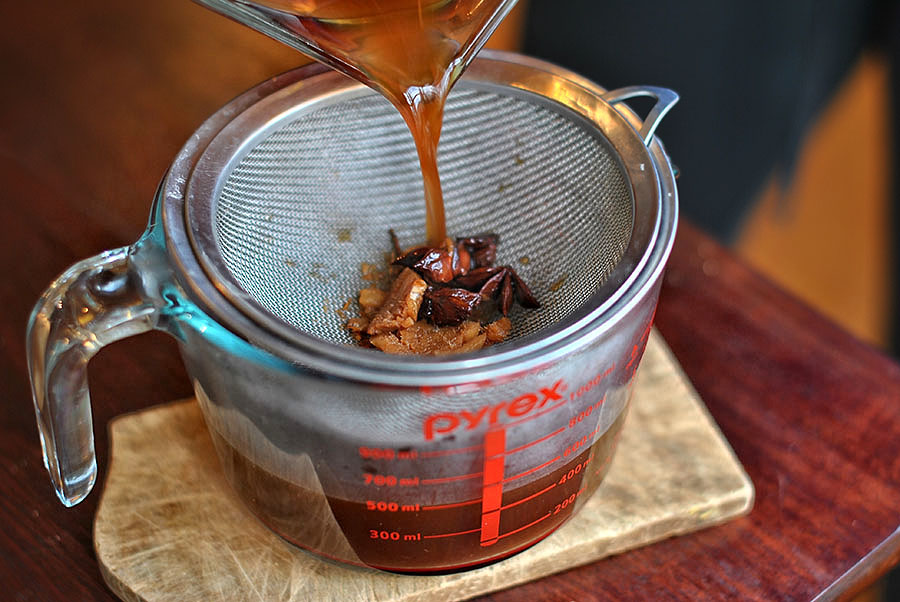
Add sugar, vanilla and honey and then let this steep for 15-20 minutes. Our family likes our chai concentrate like we like our tea and coffee, strong and dark. So we let it go the full 20 minutes.


Tasty Kitchen Blog: Amazing Spiced Chai Concentrate. Guest post by Maggy Keet of Three Many Cooks, recipe submitted by TK member thecatnipcat.

When the chai concentrate has reached desired taste and color, strain out the spices and zest.



Tasty Kitchen Blog: Amazing Spiced Chai Concentrate. Guest post by Maggy Keet of Three Many Cooks, recipe submitted by TK member thecatnipcat.

Now you are left with delicious, homemade chai concentrate.



Tasty Kitchen Blog: Amazing Spiced Chai Concentrate. Guest post by Maggy Keet of Three Many Cooks, recipe submitted by TK member thecatnipcat.

We added the chai concentrate to steamed milk, but you could mix it with ice cream or yogurt to give plain vanilla a flavor kick.


Tasty Kitchen Blog: Amazing Spiced Chai Concentrate. Guest post by Maggy Keet of Three Many Cooks, recipe submitted by TK member thecatnipcat.

All I know is that I will never pay $3.25 for an overly-sweet chai again.

Thanks again, thecatnipcat!


Printable Recipe

Amazing Spiced Chai Concentrate

4.92 Mitt(s) 26 Rating(s)26 votes, average: 4.92 out of 526 votes, average: 4.92 out of 526 votes, average: 4.92 out of 526 votes, average: 4.92 out of 526 votes, average: 4.92 out of 5

Prep Time:

Cook Time:

Difficulty: Easy

Servings: 8

8
x

Print Options

Page size Letter 3x5 4x6
Text Size Small Medium Large
Content Include description
Include prep time, etc.
Show image

Description

All the flavor of a mix, with no funky additives or preservatives! The benefits to making your own mix are obvious: you can customize it all you want, you know exactly what’s in it, and if you buy them in bulk, the spices can be dirt cheap!

Ingredients

  • 4-½ cups Water
  • 1 stick Cinnamon
  • 1 piece Fresh Ginger Chopped
  • 7 whole Cardamom Pods
  • 2 whole Star Anise Pods
  • 10 whole Cloves
  • ¼ teaspoons Freshly Ground Black Pepper
  • ½ teaspoons Freshly-ground Nutmeg
  • 1 teaspoon Orange Zest
  • 10 teaspoons Green Or Black Tea Or 10 Tea Bags
  • ⅔ cups Brown Sugar
  • 1 Tablespoon Honey
  • 1 Tablespoon Vanilla

Preparation Instructions

Bring the water to a boil. Add the spices and tea, remove from heat and let steep 15-20 minutes, depending on how strong you want it. Strain and add the brown sugar, honey, and vanilla. Stir to combine.

Mix 1 part concentrate with 1 part milk, heat and enjoy or pour over ice.

For a stronger flavor, mix 2 parts concentrate with 1 part milk or half-and-half (if you’re like me).

This concentrate will keep in the fridge for around 2 weeks. Freeze it in an icecube tray and add to smoothies!


_______________________________________

Three Many Cooks is the always-entertaining food blog of Pam Anderson and her two daughters, Maggy and Sharon. Pam is a well-known and much-respected food writer and author, Maggy is a “hippy adventurer meets 1950s housewife,” and Sharon refers to herself as a recovering food snob learning to survive on a graduate student’s budget. Theirs is a strong relationship both inside and outside the kitchen, and it shows in the food they create and the stories they tell.


Profile photo of Natalie | Perry's Plate

Roasted Cauliflower Soup

Posted by in Step-by-Step Recipes

Tasty Kitchen Blog: Roasted Cauliflower Soup. Guest post by Natalie Perry of Perry's Plate, recipe submitted by TK member Hailey of Hail's Kitchen.

 
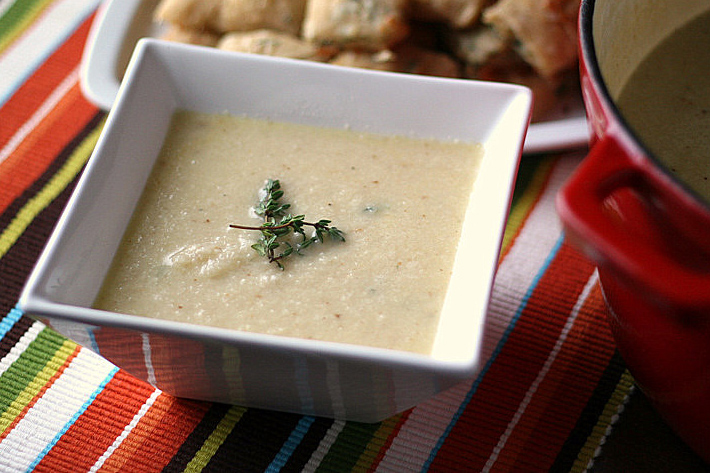
Cauliflower, to me, is a humble vegetable. It’s rarely the star of the meal, it doesn’t have a flashy color or a strong flavor, and let’s face it—its complexion could use some work. Despite its frumpy characteristics, cauliflower has a few tricks up its sleeve. Case in point: this Roasted Cauliflower Soup with White Cheddar Cheese recipe submitted by TK member hailskitchen. Pureeing the cauliflower creates the illusion of a creamy soup without the added richness from cream. Not only did this soup taste great, it was simultaneously light yet rich tasting.

Okay, it does have cheese, too. But if you use a sharp white cheddar, you might not need as much. (If you’re concerned with such things. I wasn’t one of those who swore off cheese-laden foods this year.)


Tasty Kitchen Blog: Roasted Cauliflower Soup. Guest post by Natalie Perry of Perry's Plate, recipe submitted by TK member Hailey of Hail's Kitchen.

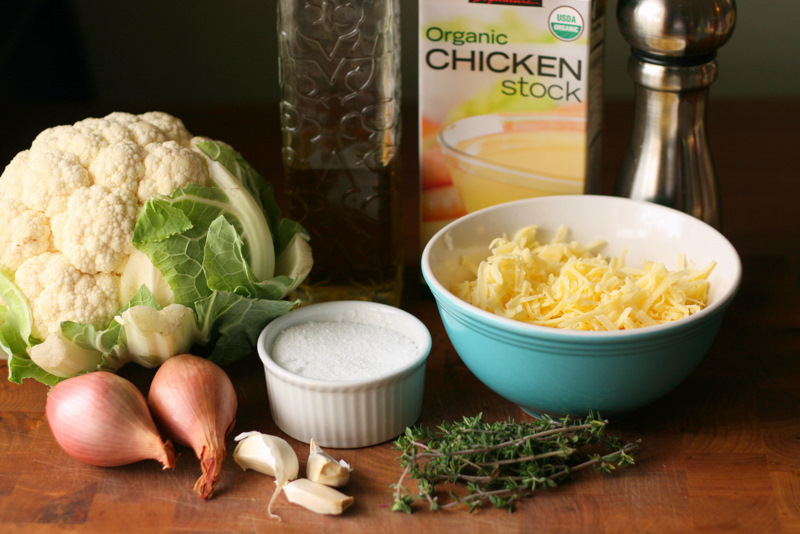
For the soup you’ll need a nice, big head of cauliflower, shallots, fresh garlic, fresh thyme, shredded white cheddar cheese, salt, pepper, olive oil, and chicken (or vegetable) broth.


Tasty Kitchen Blog: Roasted Cauliflower Soup. Guest post by Natalie Perry of Perry's Plate, recipe submitted by TK member Hailey of Hail's Kitchen.

First, preheat your oven to 400 degrees F.

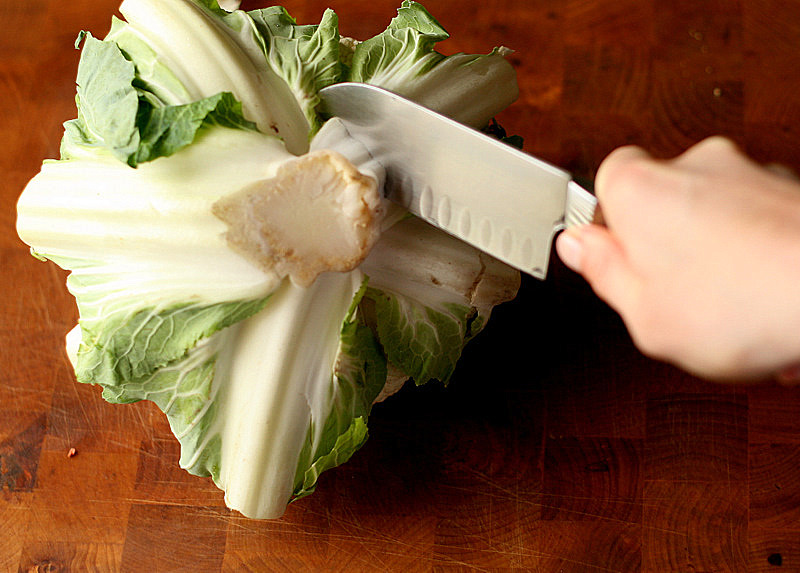
Then prep the cauliflower. I like to turn it upside down and make a few slashes in the bottom to get the tough stem out and remove the leaves.


Tasty Kitchen Blog: Roasted Cauliflower Soup. Guest post by Natalie Perry of Perry's Plate, recipe submitted by TK member Hailey of Hail's Kitchen.

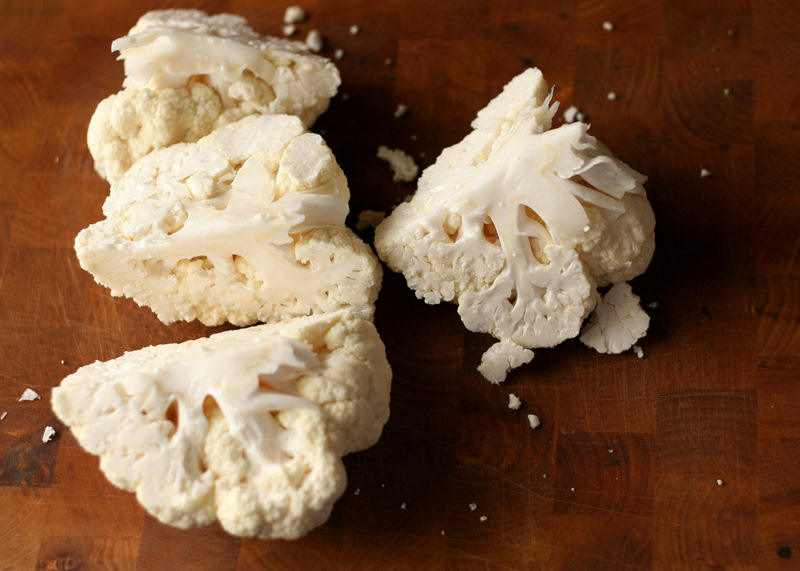
I also like to quarter the head before breaking it down into florets. It’s easier to manage than a giant head.


Tasty Kitchen Blog: Roasted Cauliflower Soup. Guest post by Natalie Perry of Perry's Plate, recipe submitted by TK member Hailey of Hail's Kitchen.

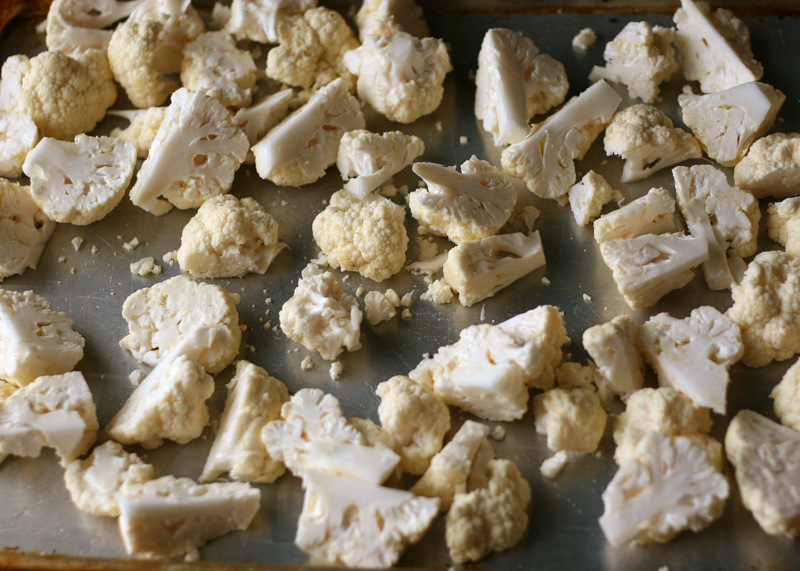
Once you have it broken down, toss it onto a large rimmed baking sheet.


Tasty Kitchen Blog: Roasted Cauliflower Soup. Guest post by Natalie Perry of Perry's Plate, recipe submitted by TK member Hailey of Hail's Kitchen.

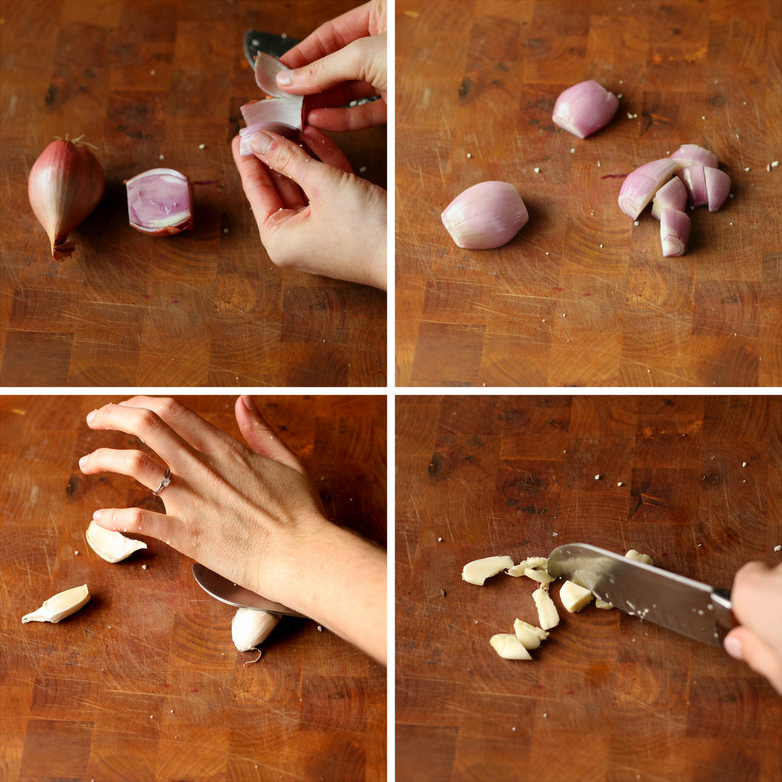
Next, peel the shallots and garlic. If you lay your knife on the garlic and give it a whack with the palm of your hand, the peel comes right off. Don’t chop them too small. Quartering the shallots and cutting the garlic in half ought to do it.


Tasty Kitchen Blog: Roasted Cauliflower Soup. Guest post by Natalie Perry of Perry's Plate, recipe submitted by TK member Hailey of Hail's Kitchen.

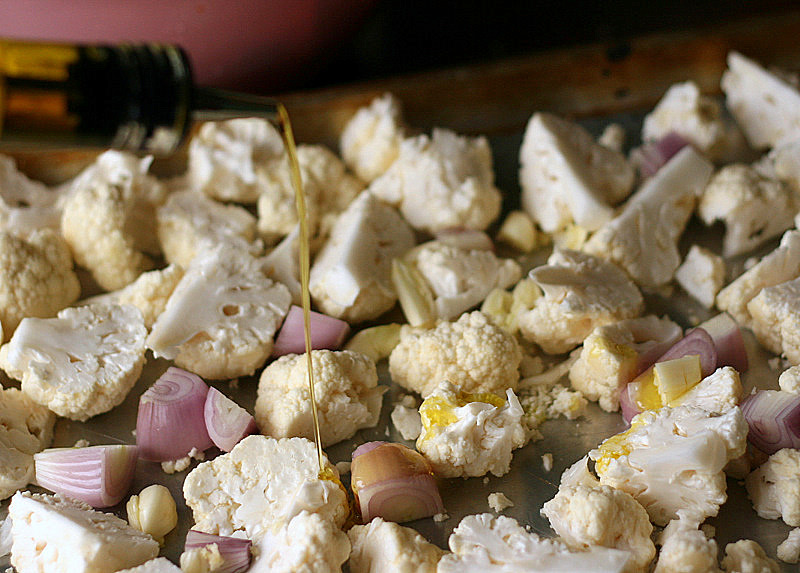
Add the prepped shallots and garlic to the cauliflower on the baking sheet. Drizzle liberally with olive oil, sprinkle with salt, and stick it in that screaming hot oven.


Tasty Kitchen Blog: Roasted Cauliflower Soup. Guest post by Natalie Perry of Perry's Plate, recipe submitted by TK member Hailey of Hail's Kitchen.

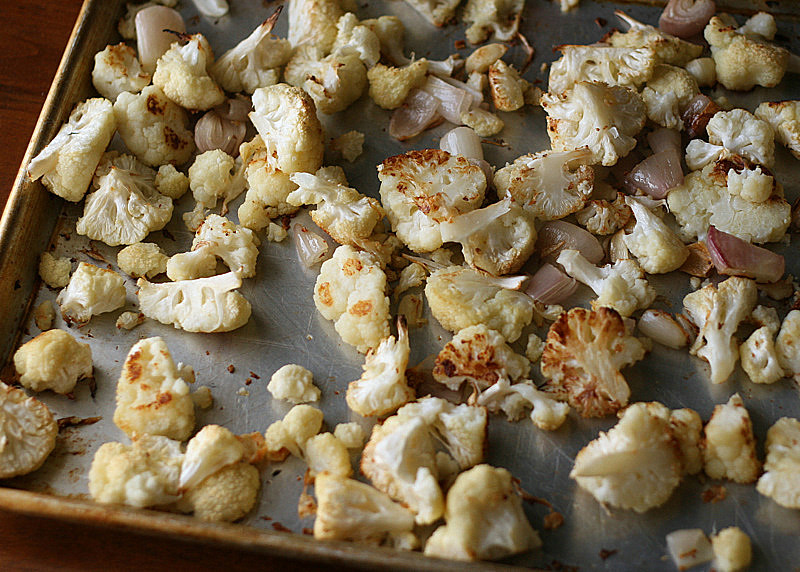
After 40-50 minutes it should look like this. See those dark, caramelized pieces? Roasting should be a part of all vegetable preparation, in my opinion. That’s how I got myself to like Brussels sprouts. Try it.


Tasty Kitchen Blog: Roasted Cauliflower Soup. Guest post by Natalie Perry of Perry's Plate, recipe submitted by TK member Hailey of Hail's Kitchen.

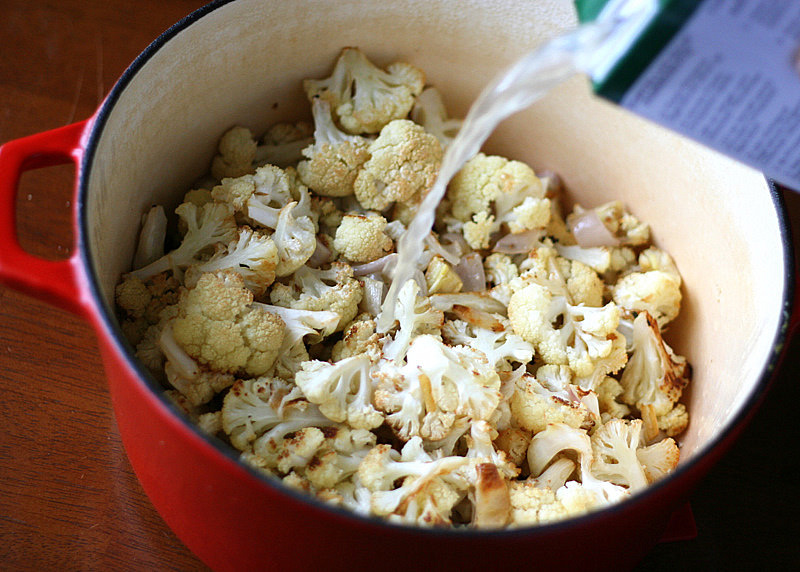
Transfer all of that roasted goodness to a big pot. (I doubled the batch, which is why it looks like my cauliflower suddenly reproduced.) Pour in half of the chicken broth—it makes pureeing much easier.


Tasty Kitchen Blog: Roasted Cauliflower Soup. Guest post by Natalie Perry of Perry's Plate, recipe submitted by TK member Hailey of Hail's Kitchen.

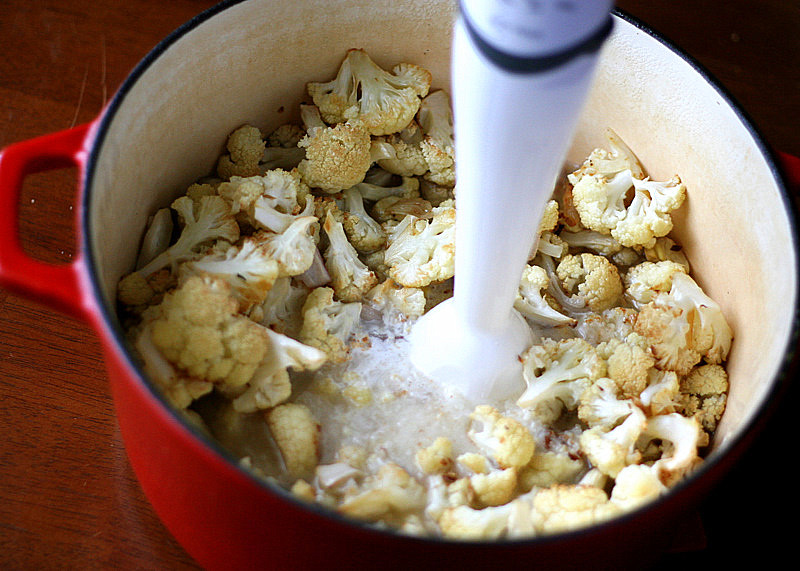
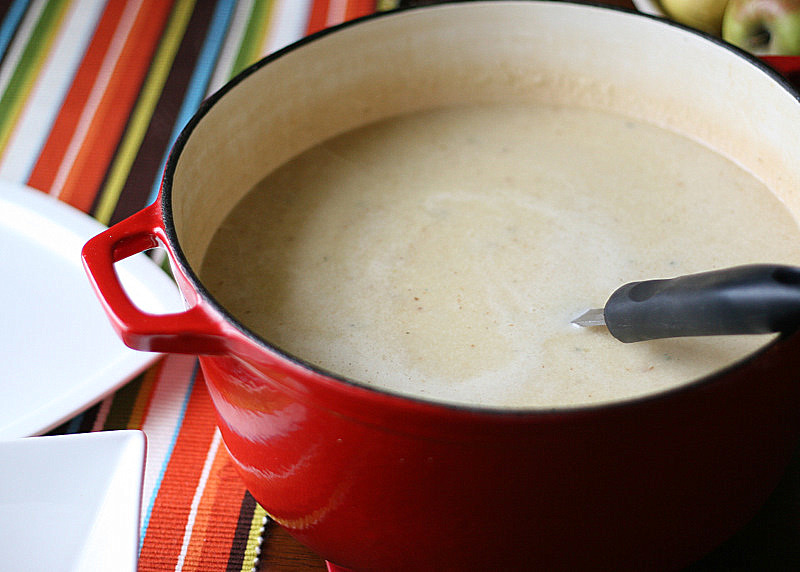
If you have an immersion or stick blender, this will be a snap. Just stick it in and start buzzing it around. If you don’t have one, go buy one. If you can’t go buy one, you can ladle the mixture into a blender and process in batches, returning it back into the pot when you’re finished.


Tasty Kitchen Blog: Roasted Cauliflower Soup. Guest post by Natalie Perry of Perry's Plate, recipe submitted by TK member Hailey of Hail's Kitchen.

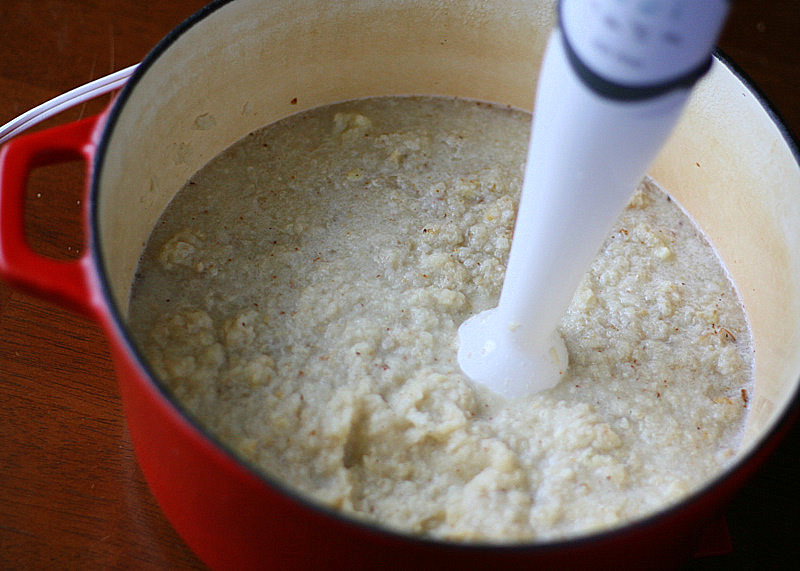
Back to blending. You can leave it a bit chunky if you like. I made it this way the first time and I liked a few chunks. But I found that the texture was really odd.


Tasty Kitchen Blog: Roasted Cauliflower Soup. Guest post by Natalie Perry of Perry's Plate, recipe submitted by TK member Hailey of Hail's Kitchen.

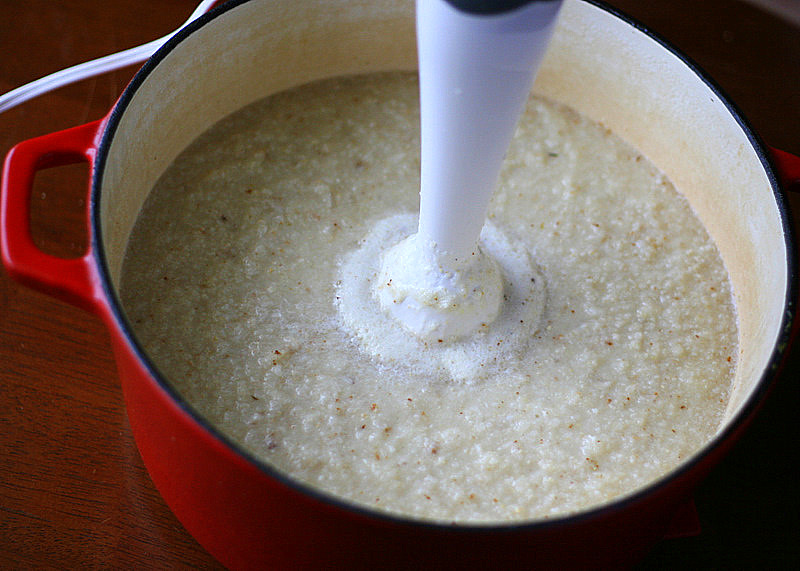
So this time I blended it even more until it was smoother. I liked it better that way.

Place the pot on the stove and bring it to a boil. Reduce the heat and let it simmer for 10 minutes.


Tasty Kitchen Blog: Roasted Cauliflower Soup. Guest post by Natalie Perry of Perry's Plate, recipe submitted by TK member Hailey of Hail's Kitchen.

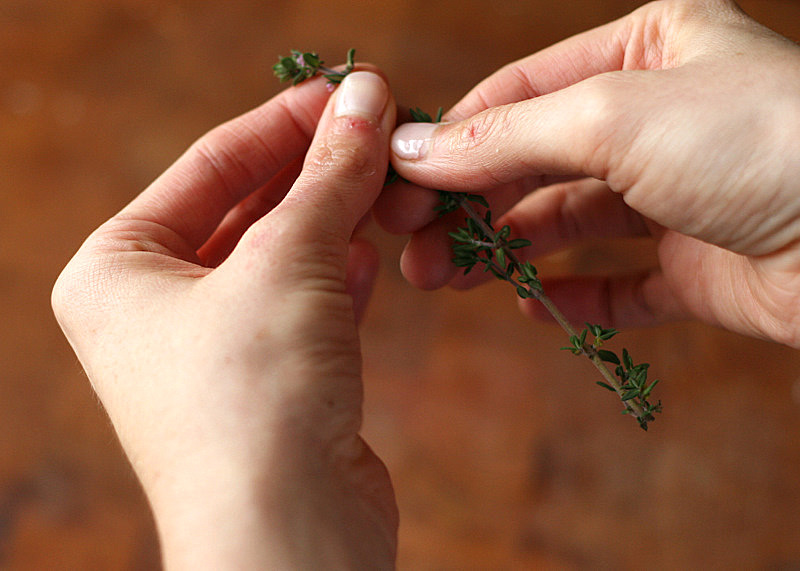
While the soup simmers away, get your thyme ready. Grab it at the top with one hand, and with the other hand, pinch toward the top and pull down the stem to remove leaves.


Tasty Kitchen Blog: Roasted Cauliflower Soup. Guest post by Natalie Perry of Perry's Plate, recipe submitted by TK member Hailey of Hail's Kitchen.

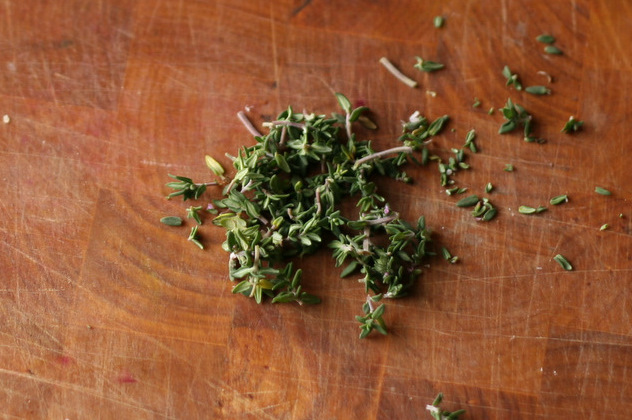
Give them a quick chop if you like. This is just my personal preference, but I found the soup to be really “thyme-y”, so I reduced the measurement by half the second time I made it. The thyme really sings in this soup.


Tasty Kitchen Blog: Roasted Cauliflower Soup. Guest post by Natalie Perry of Perry's Plate, recipe submitted by TK member Hailey of Hail's Kitchen.

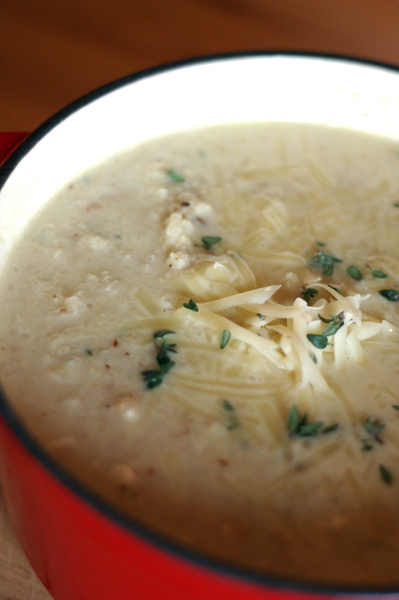
When the soup is done simmering, cut the heat and add the thyme and shredded cheese. Season to taste with a generous dose of salt and black pepper.


Tasty Kitchen Blog: Roasted Cauliflower Soup. Guest post by Natalie Perry of Perry's Plate, recipe submitted by TK member Hailey of Hail's Kitchen.

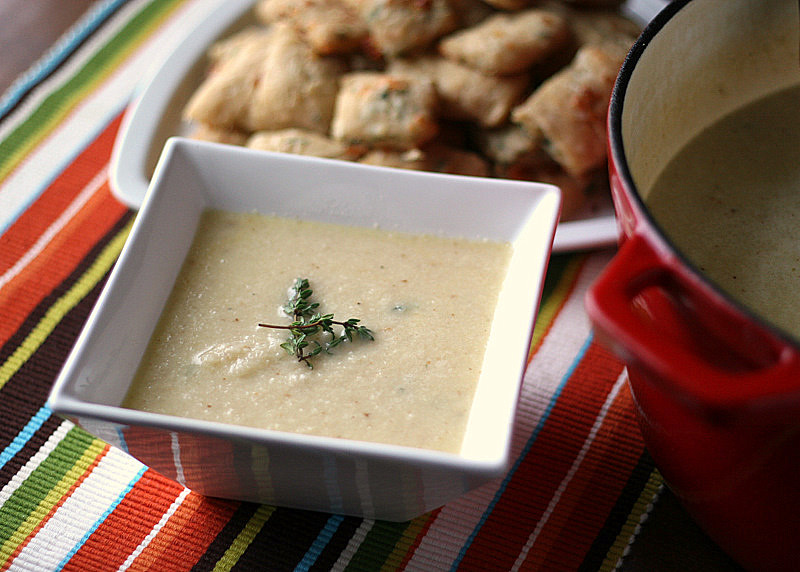
Time to serve it up with crusty bread or biscuits and a fresh salad! One of my favorite things about this recipe is that the steps can be broken up to accommodate your schedule. Roast the vegetables a day or two ahead and when you’re ready to prepare the soup, it’ll be ready in under 30 minutes.

 
Thanks Hailey for a unique and delicious soup! Visit her beautiful blog, Hail’s Kitchen, for more of her great recipes.


Printable Recipe

Roasted Cauliflower Soup with White Cheddar Cheese

See post on hailskitchen’s site!
4.40 Mitt(s) 5 Rating(s)5 votes, average: 4.40 out of 55 votes, average: 4.40 out of 55 votes, average: 4.40 out of 55 votes, average: 4.40 out of 55 votes, average: 4.40 out of 5

Prep Time:

Cook Time:

Difficulty: Easy

Servings: 4

4
x

Print Options

Page size Letter 3x5 4x6
Text Size Small Medium Large
Content Include description
Include prep time, etc.
Show image

Description

This light soup is surprisingly rich and hearty. Perfect for the change in the weather!

Ingredients

  • 1 head Cauliflower, Roughly Chopped
  • 2 whole Shallots, Roughly Chopped
  • 3 cloves Garlic, Roughly Chopped
  • 1 Tablespoon Olive Oil
  • 4 cups Chicken Broth
  • 1-½ cup White Cheddar Cheese, Shredded
  • 1 Tablespoon Fresh Thyme, Chopped
  • 1 Tablespoon Coarse Salt

Preparation Instructions

Preheat your oven to 400 degrees. On a cookie sheet, drizzle the cauliflower, shallots and garlic with the olive oil and season with coarse salt. Roast for about 40 minutes or until the cauliflower is fork-tender.

Carefully place the vegetables in a food processor or blender and roughly puree. Texture is good, large chunks are not so good. Place the vegetables in a pot along with the chicken broth. Bring to a boil. Reduce heat and simmer for about ten minutes. Add the cheese, thyme and a good dose of black pepper. Season to taste with salt. Serve with warm, crusty bread and enjoy!


_______________________________________

Be sure to check out Natalie’s own beautiful food blog, Perrys’ Plate, where you can see her growing collection of lovely recipes. There’s always something new to see there. Go visit now!


Profile photo of patiodaddio

How to Make Pressure Cooker Stock

Posted by in Kitchen Talk

Tasty Kitchen Blog: Pressure Cooker Turkey Stock. Guest post and recipe from John Dawson of Patio Daddio BBQ.

 
Stock is an essential ingredient and a secret to great cooking. A good stock is necessary to make soups, sauces, gravies (among many other things) that really shine. Sure, you can grab a box or can of “stock” or broth from your local grocer, but it seriously pales in comparison to the real thing. Not to mention that they are almost always loaded with sodium.

It used to be that when I heard or read the word “stock” I would think, “Oh, come on! Who has that kind of free time? I can’t stand around all day tending a stockpot. I have a life, people!” It’s true that making stock the traditional old-school way takes many hours. Yes, the results are worth it, but that doesn’t change the fact that most normal folk don’t have that kind of time.

I recently stumbled upon a method of making stock that reduces the stock cooking time to a mere hour. At first I thought that this would be akin to making a great prime rib in a microwave. Then, once I researched and pondered it further I realized that it actually produces a better product. How’s that? I’m glad you asked.

Stock is literally all about creating a flavorful liquid by wringing flavor and nutrients from the ingredients. This usually entails simmering bones, veggies, herbs, and seasonings in water for several hours. You have to simmer it long and slow in order to allow all of the good stuff to be released. You should avoid boiling a stock because the violent bubbling breaks down the ingredients and produces an overly cloudy product.

Enter the pressure cooker. The magic of a pressure cooker is that the sealed environs allow the boiling point of water to be raised significantly above the usual 212 degrees. This causes foods to cook much quicker while retaining more of their nutrients. Additionally, because the water never boils, there is no violent bubbling. Think of it as turbo-boiling in still water. It’s a beautiful thing.

Here, let me show you how this works.

Caution: Pressure cookers can be dangerous, so please make sure you read and heed the manufacturer’s instructions and warnings. (If you don’t have a pressure cooker, I have a great tip at the end of the post that involves a stockpot, the oven, and no stirring.)

First, we need to roast the turkey parts. Sure, you can use a carcass of a previously-roasted bird, but I find this to be far easier, better, and more consistent. I use one package of wings (about three pounds).

Preheat your oven to 350ºF.

Using a cleaver or large knife, carefully cut each wing at each joint. I discard the tips.

Season the wing pieces with kosher salt and pepper.


Tasty Kitchen Blog: Pressure Cooker Turkey Stock. Guest post and recipe from John Dawson of Patio Daddio BBQ.

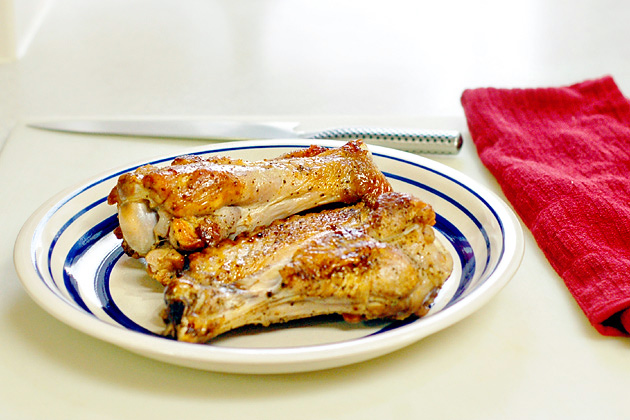
Roast the turkey parts on a sheet pan for 90 minutes, then remove them from the oven and let cool to room temperature or refrigerate for up to three days.


Tasty Kitchen Blog: Pressure Cooker Turkey Stock. Guest post and recipe from John Dawson of Patio Daddio BBQ.

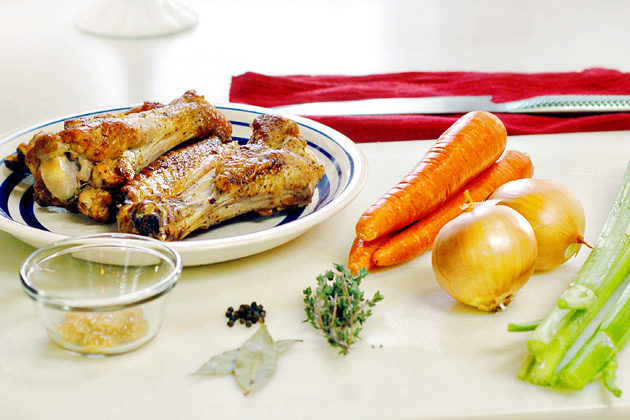
In addition to the roasted turkey parts, you’ll need three large carrots, three stalks of celery, one medium (or two small) yellow onion, ten sprigs of thyme, two bay leaves, a tablespoon of minced garlic, half a teaspoon of black peppercorns, and three quarts of cold water.


Tasty Kitchen Blog: Pressure Cooker Turkey Stock. Guest post and recipe from John Dawson of Patio Daddio BBQ.

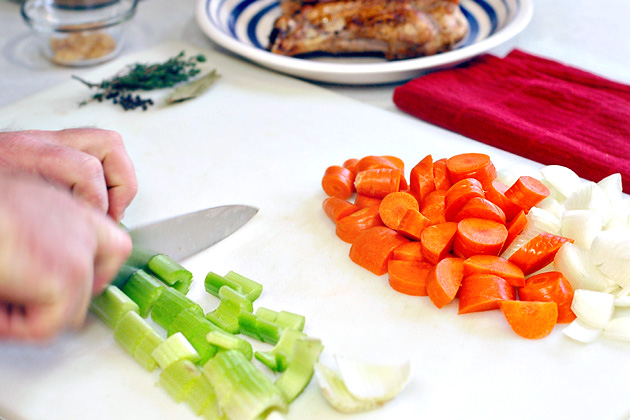
Clean the carrots (there’s no need to peel them), celery, and peel the onions.

Rough chop all of the vegetables. The size doesn’t really matter, just chop them up.


Tasty Kitchen Blog: Pressure Cooker Turkey Stock. Guest post and recipe from John Dawson of Patio Daddio BBQ.

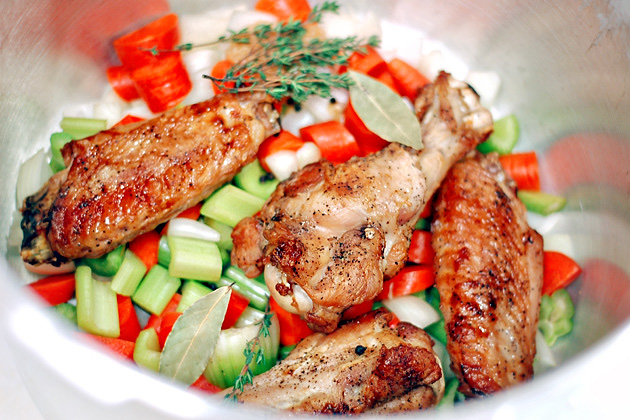
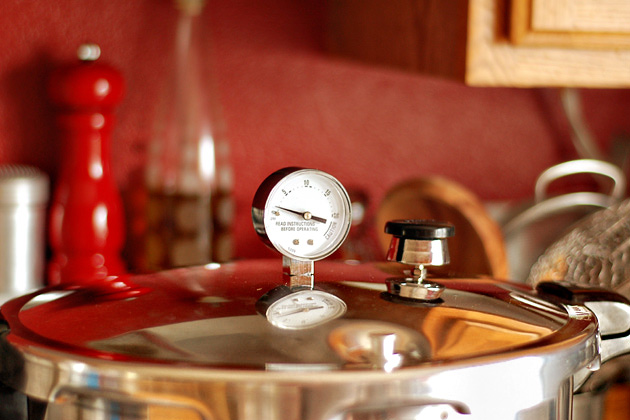
Dump everything in your pressure cooker.


Tasty Kitchen Blog: Pressure Cooker Turkey Stock. Guest post and recipe from John Dawson of Patio Daddio BBQ.

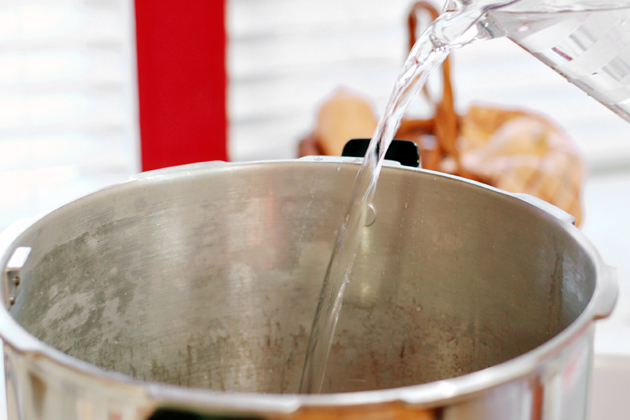
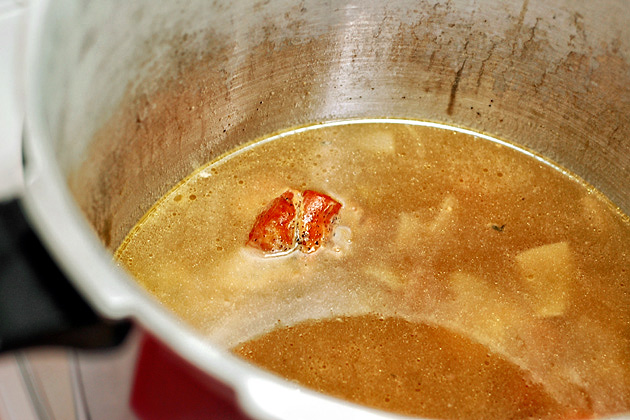
Add the water.


Tasty Kitchen Blog: Pressure Cooker Turkey Stock. Guest post and recipe from John Dawson of Patio Daddio BBQ.

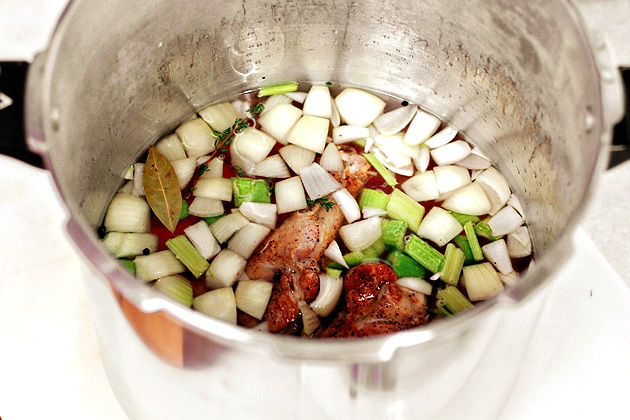
You want to just barely cover the ingredients, so add more or less water as needed.


Tasty Kitchen Blog: Pressure Cooker Turkey Stock. Guest post and recipe from John Dawson of Patio Daddio BBQ.

Seal your pressure cooker per the directions and bring to 15 pounds of pressure.

Reduce the heat as needed to maintain a pressure of 15 pounds and cook for 45 minutes.

Remove the cooker from the heat and let it cool until the pressure is completely relieved.


Tasty Kitchen Blog: Pressure Cooker Turkey Stock. Guest post and recipe from John Dawson of Patio Daddio BBQ.

Open the cooker and remove the large pieces of meat, bone and vegetables with a large slotted spoon.


Tasty Kitchen Blog: Pressure Cooker Turkey Stock. Guest post and recipe from John Dawson of Patio Daddio BBQ.

You can see what a great job the pressure cooker does. The meat completely falls off the bone with almost no effort. Our dog really appreciates this part (the leftover meat, not the bones).


Tasty Kitchen Blog: Pressure Cooker Turkey Stock. Guest post and recipe from John Dawson of Patio Daddio BBQ.

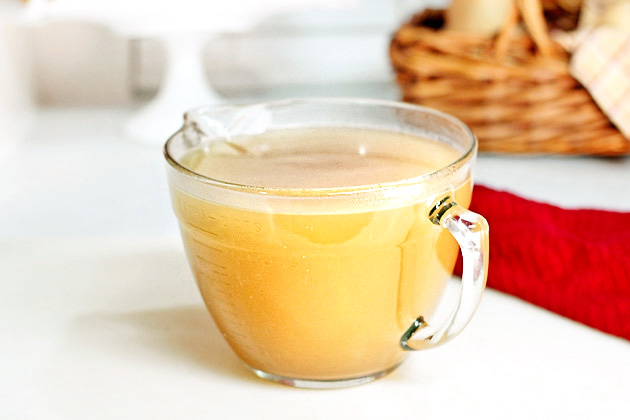
Filter the stock through a very fine strainer and cool immediately. If you want a clearer stock, filter it through a colander that is lined with a clean kitchen towel. I used this batch to make gravy, so I didn’t care about it being a little cloudy. Now that I think about it, I rarely care.

Once the stock is cold, you can easily remove the solidified fat from the top.

Store in the refrigerator for up to four days, or freeze for long-term storage.

Use as needed.

Enjoy!

 
Notes:
1. You can use this recipe to make other types of stock, like chicken or beef. Just use those meats and bones in lieu of the turkey. For example, you can use a cut-up roasted deli chicken to make chicken stock, or use cut-up beef back ribs (roasted just like the turkey) to make beef stock. When making beef stock, I would add 2 tablespoons of tomato paste for added richness.
2. If you don’t have a pressure cooker, just use a large covered stock pot. Bring it just barely to a boil, then move the covered pot to a 180-degree oven for six hours. There is no need to stir or tend it at all.


Printable Recipe

Pressure Cooker Turkey Stock

See post on patiodaddio’s site!
0.00 Mitt(s) 0 Rating(s)0 votes, average: 0.00 out of 50 votes, average: 0.00 out of 50 votes, average: 0.00 out of 50 votes, average: 0.00 out of 50 votes, average: 0.00 out of 5

Prep Time:

Cook Time:

Difficulty: Easy

Servings: 36

36
x

Print Options

Page size Letter 3x5 4x6
Text Size Small Medium Large
Content Include description
Include prep time, etc.
Show image

Description

Here’s a much easier way to make a great quality stock in a fraction of the time that it typically requires. This recipe will also work well with other kinds of stock.

Ingredients

  • 1 package Turkey Wings (about Three Pounds)
  • 3 whole Large Carrots
  • 3 stalks Celery
  • 1 whole Medium Yellow Onion (or Two Small)
  • 10 sprigs Thyme
  • 2 whole Bay Leaves
  • 1 Tablespoon Garlic, Minced
  • ½ teaspoons Black Peppercorns, Whole
  • 3 quarts Water, Cold

Preparation Instructions

Preheat your oven to 350 degrees.

Using a cleaver or large knife, carefully cut each wing at each joint. I discard the tips.

Season the wing pieces with kosher salt and pepper.

Roast the turkey parts on a sheet pan for 90 minutes, then remove them from the oven and let cool to room temperature, or refrigerate for up to three days.

In addition to the roasted turkey parts, you’ll need three large carrots, three stalks of celery, one medium (or two small) yellow onion, ten sprigs of thyme, two bay leaves, a tablespoon of minced garlic, half a teaspoon of black peppercorns, and three quarts of cold water.

Clean the carrots (there’s no need to peel them), celery, and peel the onions.

Rough chop all of the vegetables. The size doesn’t really matter, just chop them up.

Dump everything in your pressure cooker.

Add the water.

You want to just barely cover the ingredients, so add more or less water as needed.

Seal your pressure cooker per the directions, and bring to 15 pounds of pressure.

Reduce the heat as needed to maintain a pressure of 15 pounds and cook for 45 minutes.

Remove the cooker from the heat and let it cool until the pressure is completely relieved.

Open the cooker and remove the large pieces of meat, bone and vegetables with a large slotted spoon.

Filter the stock through a very fine strainer and cool immediately. If you want a clearer stock, filter it through a colander that is lined with a clean kitchen towel. I used this batch to make gravy, so I didn’t care about it being a little cloudy. Now that I think about it, I rarely care.

Once the stock is cold, you can easily remove the solidified fat from the top.

Store in the refrigerator for up to four days, or freeze for long-term storage.

Use as needed.

Enjoy!

Notes:

* You can use this recipe to make other types of stock, like chicken or beef. Just use those meats and bones in lieu of the turkey. For example, you can use a cut-up roasted deli chicken to make chicken stock, or use cut-up beef back ribs (roasted just like the turkey) to make beef stock. When making beef stock I would add 2 tablespoons of tomato paste for added richness.

* If you don’t have a pressure cooker, just use a large covered stock pot. Bring it just barely to a boil, then move the covered pot to a 180-degree oven for six hours. There is no need to stir or tend it at all.


_______________________________________

John Dawson has always been one of our favorite men here at Tasty Kitchen. His blog, Patio Daddio BBQ is a great resource for great recipes of every kind. Go visit his site for good food, equipment reviews, cooking competitions, video clips, and occasional photos of his lovely family.


Profile photo of twopeasandtheirpod

Last Minute Sesame Noodles

Posted by in Step-by-Step Recipes

Tasty Kitchen Blog: Last Minute Sesame Noodles. Guest post by Maria Lichty of Two Peas and Their Pod, recipe submitted by TK member Aggie of Aggie's Kitchen.

 
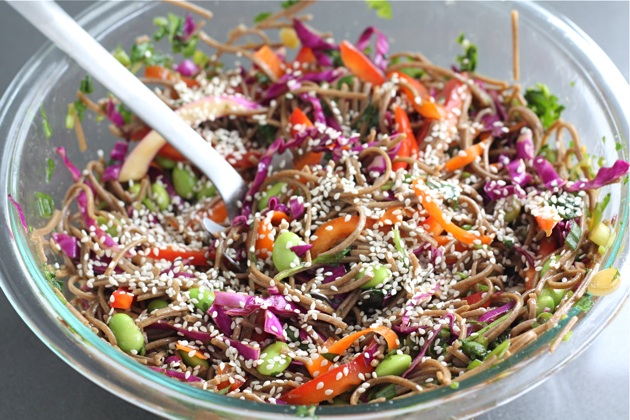
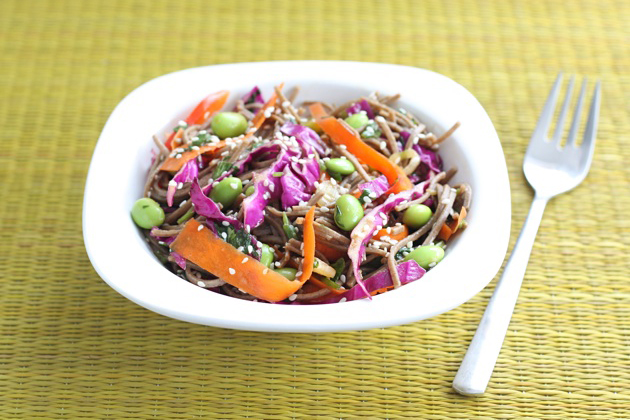
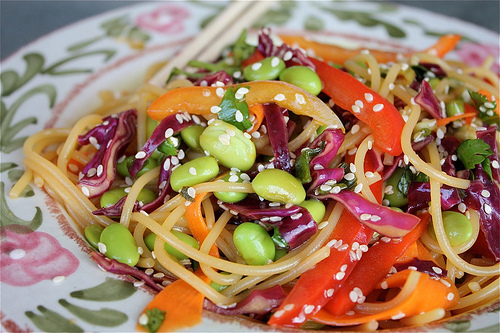
The holidays were filled with good food and fun, but I think I overdosed on sugar this year. Ree’s cookie week, turned into cookie month for me. I couldn’t stop baking and eating cookies. I think I am finally sugared out and ready to cook up some healthy recipes. First up, Last Minute Sesame Noodles from Tasty Kitchen member Aggie, who blogs at Aggie’s Kitchen. This whole grain noodle dish is filled with fresh vegetables and is super easy to make. If you are looking for a healthy recipe to jump start the new year, it is your lucky day! Let’s get started.


Tasty Kitchen Blog: Last Minute Sesame Noodles. Guest post by Maria Lichty of Two Peas and Their Pod, recipe submitted by TK member Aggie of Aggie's Kitchen.

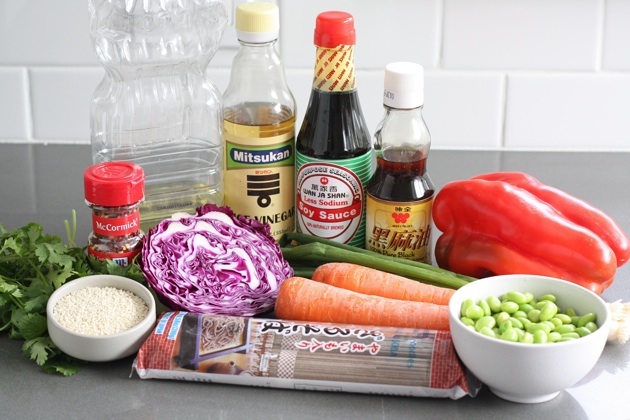
To make this noodle dish, you will need: soba noodles (or whole wheat spaghetti), soy sauce, sesame oil, canola oil, rice vinegar, red pepper flakes, green onions, cilantro, red pepper, red cabbage, carrots, edamame, and sesame seeds. 


Tasty Kitchen Blog: Last Minute Sesame Noodles. Guest post by Maria Lichty of Two Peas and Their Pod, recipe submitted by TK member Aggie of Aggie's Kitchen.

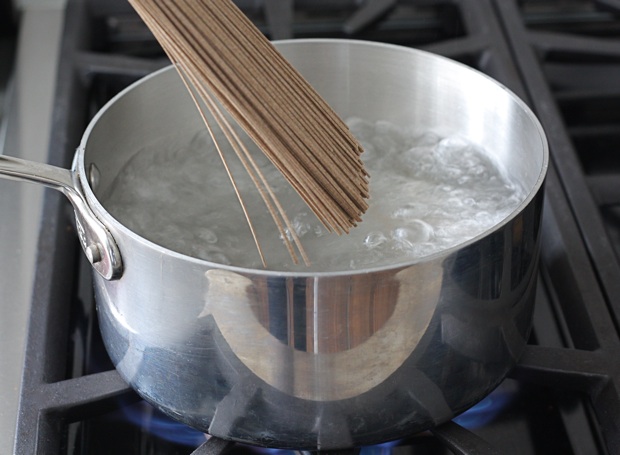
Begin by cooking the noodles, according to package instructions. 


Tasty Kitchen Blog: Last Minute Sesame Noodles. Guest post by Maria Lichty of Two Peas and Their Pod, recipe submitted by TK member Aggie of Aggie's Kitchen.

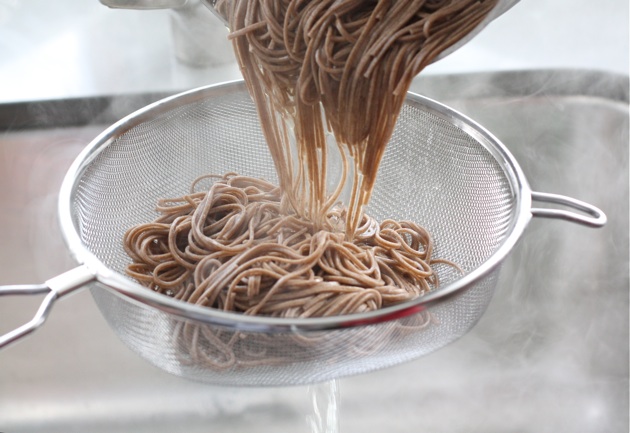
Carefully drain the pasta noodles. 


Tasty Kitchen Blog: Last Minute Sesame Noodles. Guest post by Maria Lichty of Two Peas and Their Pod, recipe submitted by TK member Aggie of Aggie's Kitchen.

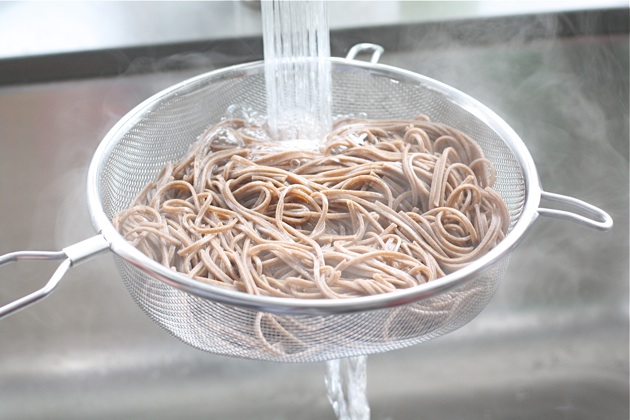
Rinse noodles under cold water and set aside. 


Tasty Kitchen Blog: Last Minute Sesame Noodles. Guest post by Maria Lichty of Two Peas and Their Pod, recipe submitted by TK member Aggie of Aggie's Kitchen.

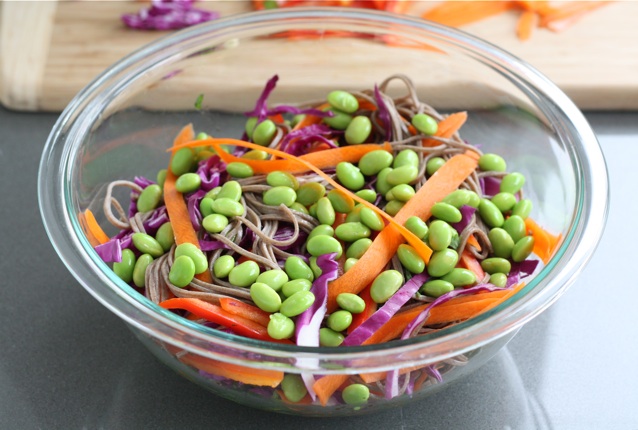
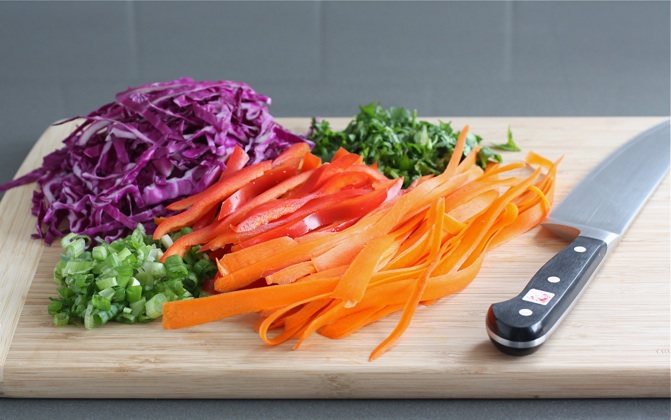
Chop up the colorful vegetables. 


Tasty Kitchen Blog: Last Minute Sesame Noodles. Guest post by Maria Lichty of Two Peas and Their Pod, recipe submitted by TK member Aggie of Aggie's Kitchen.

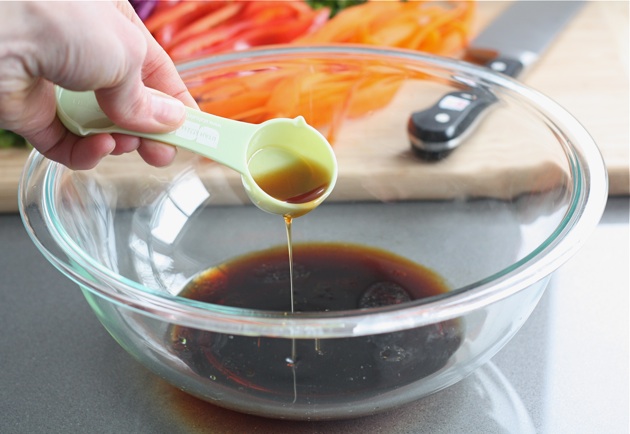
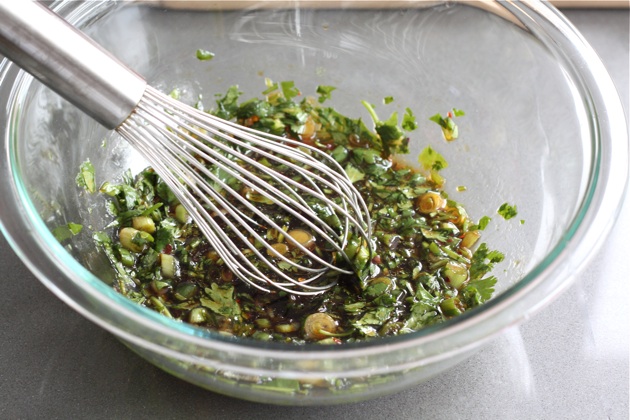
To make the dressing, combine soy sauce, oils, rice vinegar, crushed red pepper, green onions, and cilantro in a large bowl. 


Tasty Kitchen Blog: Last Minute Sesame Noodles. Guest post by Maria Lichty of Two Peas and Their Pod, recipe submitted by TK member Aggie of Aggie's Kitchen.

Whisk dressing ingredients together, until well combined. 


Tasty Kitchen Blog: Last Minute Sesame Noodles. Guest post by Maria Lichty of Two Peas and Their Pod, recipe submitted by TK member Aggie of Aggie's Kitchen.

Add noodles and vegetables to the dressing. 


Tasty Kitchen Blog: Last Minute Sesame Noodles. Guest post by Maria Lichty of Two Peas and Their Pod, recipe submitted by TK member Aggie of Aggie's Kitchen.

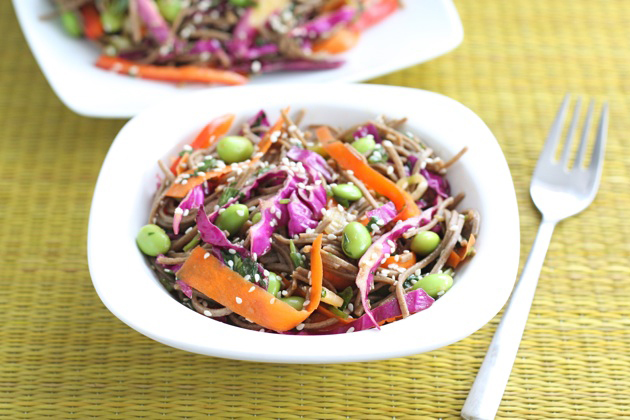
Gently toss until noodles and vegetables are well coated. Add sesame seeds. 


Tasty Kitchen Blog: Last Minute Sesame Noodles. Guest post by Maria Lichty of Two Peas and Their Pod, recipe submitted by TK member Aggie of Aggie's Kitchen.

Serve cold and enjoy! 

If healthy eating is on your New Year’s resolution list, you have to try this recipe. It is nutritious and delicious. Feel free to add in whatever veggies you have in the fridge. I love that this recipe is so versatile. This noodle dish makes a great weeknight meal and the leftovers are perfect for a light lunch. Start the new year off right with Last Minute Sesame Noodles. I know I will be making this healthy recipe all year long.

Thanks, Aggie, for this wonderful dish. Visit her blog, Aggie’s Kitchen, for more of her recipes!


Printable Recipe

Last Minute Sesame Noodles

See post on Aggie's Kitchen’s site!
5.00 Mitt(s) 4 Rating(s)4 votes, average: 5.00 out of 54 votes, average: 5.00 out of 54 votes, average: 5.00 out of 54 votes, average: 5.00 out of 54 votes, average: 5.00 out of 5

Prep Time:

Cook Time:

Difficulty: Easy

Servings: 6

6
x

Print Options

Page size Letter 3x5 4x6
Text Size Small Medium Large
Content Include description
Include prep time, etc.
Show image

Description

Just boil water, and then use it all up! Raid your fridge and throw it in! These noodles are very versatile.

Ingredients

  • 1 pound Spaghetti, Whole Wheat Spaghetti, Soba Noodles, Quinoa Pasta
  • ½ cups Reduced Sodium Soy Sauce
  • 2 Tablespoons Sesame Oil
  • 2 Tablespoons Canola Oil
  • 2 Tablespoons Rice Wine Vinegar
  • 1-½ teaspoon Red Pepper Flakes
  • 1 bunch Green Onions, Sliced, Divided
  • ¼ cups Cilantro, Chopped
  • 1 whole Red Pepper, Sliced Thin
  • ¼ heads Red Cabbage, Sliced Thin
  • 2 whole Carrots, Shredded With Vegetable Peeler
  • 1-½ cup Shelled Edamame, Cooked
  • ½ cups Toasted Sesame Seeds

Preparation Instructions

Cook pasta according to directions. Drain, rinse under cold water.

To make dressing, whisk soy sauce, sesame oil, canola oil, vinegar, crushed red pepper, scallions, and cilantro in a large bowl. Add noodles and vegetables, toss to coat. Top with sesame seeds.


_______________________________________

Maria and her husband Josh (who she affectionately refers to as her “dough boy”) blog at Two Peas and Their Pod. They’ve been featured on Saveur, Eatocracy, Gourmet Live, Glamour, and the Los Angeles Times, to name just a few. We’re so glad to have them here!